Hey there, fellow creators and customization enthusiasts! If you’ve ever found yourself staring at a blank surface, brimming with ideas for personalization, but unsure how to bring them to life with durability and flair, then you’re in the absolute right place. I know that feeling all too well. I remember countless hours spent trying to perfectly paint intricate designs, only for them to chip or fade within weeks. Or the frustration of searching for a specific decal online, only to find it didn't quite match my vision, or worse, cost a small fortune for a simple design. Trust me, it was a journey of trial and error, a quest for that magical material that could translate my digital dreams into tangible reality. And then, like a beacon in the crafting wilderness, I discovered the incredible world of printable vinyl wrap.
This isn't just about sticking a sticker somewhere; it's about transforming ordinary objects into extraordinary statements, turning personal passions into tangible art, and even kickstarting a small business from your kitchen table. Printable vinyl wrap is a game-changer, offering unparalleled versatility, vibrant color reproduction, and a durability that traditional methods often can’t match. It’s the secret sauce for everything from custom laptop skins and personalized water bottles to unique wall decals and even professional-looking product labels. Whether you’re a seasoned crafter looking to expand your toolkit, a small business owner aiming for bespoke branding, or a complete beginner eager to dive into the world of DIY, this guide is crafted specifically for you. We’re going to peel back every layer, explore every possibility, and equip you with the knowledge and confidence to truly master printable vinyl wrap. So grab your favorite beverage, get comfy, and let’s embark on this exciting creative journey together – your next masterpiece is just a print away!
---
Table of Contents
- [The World of Printable Vinyl Wrap: An Introduction for Beginners](#the-world-of-printable-vinyl-wrap-an-introduction-for-beginners)
- [Types of Printable Vinyl: Finding Your Perfect Match](#types-of-printable-vinyl-finding-your-perfect-match)
- [Applications Unleashed: Where Can You Use Printable Vinyl Wrap?](#applications-unleashed-where-can-you-use-printable-vinyl-wrap)
- [The Art of Printing: Getting Your Designs Just Right](#the-art-of-printing-getting-your-designs-just-right)
- [Application Techniques: Smooth Sailing from Start to Finish](#application-techniques-smooth-sailing-from-start-to-finish)
- [Beyond the Basics: Advanced Customization & Professional Finishes](#beyond-the-basics-advanced-customization--professional-finishes)
- [Troubleshooting & Maintenance: Keeping Your Wraps Pristine](#troubleshooting--maintenance-keeping-your-wraps-pristine)
- [DIY Projects & Business Ventures: Turning Ideas into Reality](#diy-projects--business-ventures-turning-ideas-into-reality)
- [The Future of Printable Vinyl: Trends and Innovations](#the-future-of-printable-vinyl-trends-and-innovations)
- [How to Choose the Best Printable Vinyl Wrap for Your Needs](#how-to-choose-the-best-printable-vinyl-wrap-for-your-needs)
- [Common Pitfalls to Avoid with Printable Vinyl Wrap](#common-pitfalls-to-avoid-with-printable-vinyl-wrap)
- [Advanced Tips for Mastering Printable Vinyl Wrap](#advanced-tips-for-mastering-printable-vinyl-wrap)
- [Conclusion: Your Creative Journey Starts Now!](#conclusion-your-creative-journey-starts-now)
---
The World of Printable Vinyl Wrap: An Introduction for Beginners
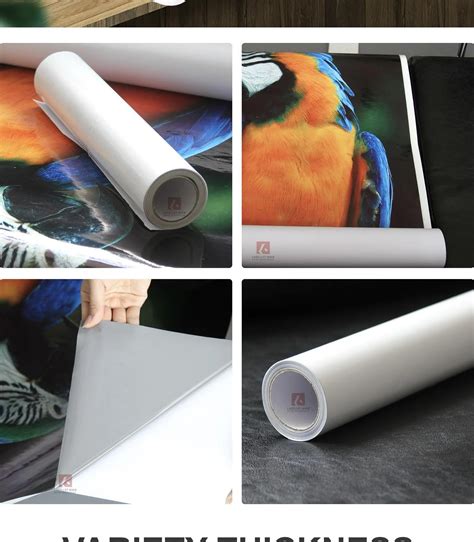
Welcome to the exciting frontier of personalized design! If you're just dipping your toes into the waters of customization, printable vinyl wrap might sound a bit intimidating. But trust me, it's far more accessible and rewarding than you might imagine. At its core, printable vinyl wrap is a special type of adhesive-backed vinyl that you can feed through a standard inkjet or laser printer to print any design, photo, or text you desire. Once printed, you can cut it out and apply it to a myriad of surfaces, transforming them instantly.
Think of it as a super-powered sticker material that gives you complete creative control. No more generic designs; your imagination is the only limit!
Here’s a deeper dive into what makes this material so special:
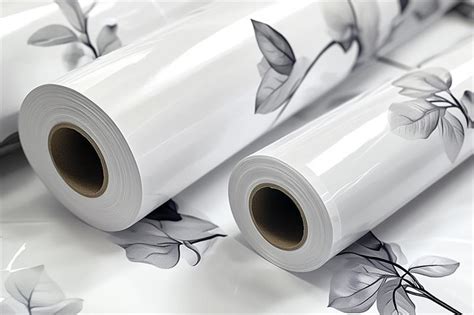
1. What Exactly Is It? Printable vinyl is essentially a thin, flexible sheet of plastic (often PVC or a similar polymer) with a printable coating on one side and an adhesive layer on the other, protected by a release liner. It's designed to accept ink from your home or office printer, allowing for full-color, high-resolution prints.
2. The Magic of Customization: Unlike traditional vinyl that comes in pre-colored sheets and requires a cutting machine to create designs, printable vinyl allows you to print *any* graphic. This means photographs, intricate patterns, gradients, and full-color illustrations are all fair game.
3. Adhesive Strength: Most printable vinyls feature a strong, permanent adhesive, making them suitable for long-term applications. However, there are also removable options available for temporary projects or surfaces where you might want to change designs frequently.
4. Durability Boost: While the vinyl itself is durable, the printed ink can sometimes be susceptible to fading, scratching, or water damage, especially with inkjet prints. This is why many users opt to "laminate" their printed vinyl with a clear protective layer, significantly boosting its lifespan and resistance.
5. Inkjet vs. Laser Compatibility: It's crucial to choose the right type of printable vinyl for your printer. Inkjet printable vinyl has a porous surface designed to absorb liquid ink, while laser printable vinyl has a smoother, heat-resistant coating suitable for toner. Using the wrong type can lead to smudging, printer damage, or poor print quality.
6. Water-Resistant Options: Many printable vinyl brands now offer water-resistant or even waterproof options, which are fantastic for items like water bottles, outdoor decals, or anything that might get wet. This usually involves a special top coating that seals the ink.
7. Finishes Galore: Just like regular vinyl, printable vinyl comes in various finishes. You can find glossy, matte, clear, and even holographic options, allowing you to add another layer of aesthetic appeal to your projects.
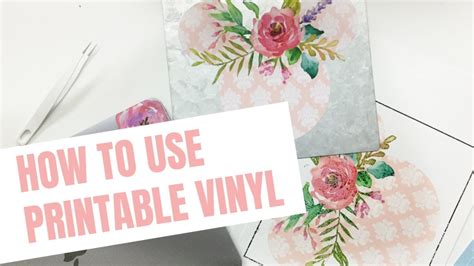
8. Ease of Use (Once You Know How): While there's a slight learning curve, the process is generally straightforward: design, print, cut, and apply. We'll cover each step in detail!
9. A Personal Revelation: I once wanted to create custom labels for my homemade hot sauces, but every label printer was either too expensive or too limited in design. Discovering printable vinyl wrap was a revelation – I could design exactly what I wanted, print it on my home inkjet, and cut it precisely. My sauces suddenly looked professional, and sales (among friends, mostly!) went up!
10. Unlocking Creative Freedom: Imagine being able to print your child's favorite drawing onto a durable sticker for their lunchbox, or creating a unique laptop skin featuring your travel photos. Printable vinyl wrap makes these dreams a reality, giving you the power to personalize almost anything.
11. Cost-Effective Customization: For small batches or one-off custom items, printing your own designs on vinyl is often far more economical than ordering custom prints from a third party. This is especially true if you already own a printer.
12. The "Wow" Factor: There's something inherently satisfying about telling someone, "Oh, I made that!" when they compliment a custom item. Printable vinyl wrap gives you that power, and believe me, the "wow" factor is real!
Types of Printable Vinyl: Finding Your Perfect Match
Navigating the different types of printable vinyl wrap can feel a bit like choosing a wand at Ollivanders – each has its unique properties and best applications. But don't fret! Understanding the nuances will empower you to pick the perfect vinyl for your specific project, ensuring vibrant prints and lasting results. Let's break down the key players:
1. Inkjet Printable Vinyl:
- Description: This is the most common type, specifically designed to absorb liquid ink from inkjet printers. It often has a slightly porous surface.
- Best For: Home crafters, small businesses, general indoor and outdoor projects, vibrant full-color images.
- Key Consideration: Requires drying time (often 10-30 minutes) and benefits greatly from lamination to protect the ink from smudging, fading, and water.
- My Experience: This is my go-to for almost all my personal projects. I once printed a custom sticker for my son's skateboard using inkjet vinyl and, after laminating it, it survived countless scrapes and even a few rainy days without losing its vibrancy. It's a game-changer for durability!
2. Laser Printable Vinyl:
- Description: Designed for laser printers, this vinyl has a smoother, non-porous surface that can withstand the heat of the laser printing process and bind with toner.
- Best For: Office environments, professional labels, projects requiring high heat resistance during application (though less common), very sharp text and graphics.
- Key Consideration: Not as widely available as inkjet vinyl for crafters, and less ideal for photographic quality images compared to inkjet. No drying time needed.
3. Matte Printable Vinyl:
- Description: Offers a non-reflective, flat finish. It reduces glare and can give designs a more sophisticated, understated look.
- Best For: Art prints, labels where glare is an issue, projects aiming for a subtle, elegant aesthetic, or designs with a vintage feel.
- Personal Preference: I personally find matte finishes more forgiving for beginners, as minor imperfections or air bubbles tend to be less noticeable than on glossy surfaces.
4. Glossy Printable Vinyl:
- Description: Provides a shiny, reflective surface that makes colors pop and adds a vibrant, professional sheen to designs.
- Best For: Photos, colorful illustrations, product labels, projects where you want maximum visual impact and color saturation.
- Consideration: Can show fingerprints and glare more easily.
5. Clear Printable Vinyl:
- Description: A transparent vinyl that allows the background surface to show through, creating a "no-label" or layered effect.
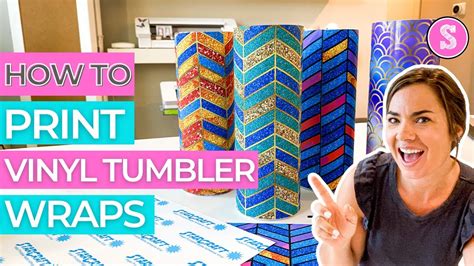
- Best For: Window decals, layering designs, creating custom stickers for clear surfaces like glass bottles or tumblers, or achieving a minimalist aesthetic.
- Important Note: White ink doesn't print from standard home printers, so any white areas in your design will be transparent. Be mindful of your background color!
6. Waterproof/Water-Resistant Printable Vinyl:
- Description: Often inkjet-compatible, these vinyls have a special coating that prevents ink from running or smudging when exposed to water. They are usually paired with a strong adhesive.
- Best For: Outdoor decals, water bottles, mugs, car decals, bathroom accessories, or anything that will be washed or exposed to moisture.
- Pro Tip: Even with waterproof vinyl, lamination is still highly recommended for maximum durability and scratch resistance, especially for items that will see heavy use.
7. Removable Printable Vinyl:
- Description: Features a less aggressive adhesive that allows for clean removal without leaving residue or damaging the surface.
- Best For: Wall decals, temporary signage, seasonal decorations, laptop skins (if you like to change them often), or projects where you want flexibility.
- Scenario: My colleague, Sarah, used removable printable vinyl to create custom, temporary signage for her pop-up bakery stall. It allowed her to brand her space beautifully without any permanent commitment, changing designs with each new seasonal offering.
8. Permanent Printable Vinyl:
- Description: Equipped with a strong, long-lasting adhesive designed for applications where you want the wrap to stay put indefinitely.
- Best For: Car decals, outdoor signs, product packaging, items that need to withstand wear and tear.
- Warning: Applying permanent vinyl requires commitment! Ensure your placement is perfect before pressing down firmly, as removal can be tricky and may damage the surface.
9. Specialty Printable Vinyls (Holographic, Glitter, Metallic):
- Description: These unique vinyls add an extra layer of visual interest with their shimmering, sparkling, or metallic effects.
- Best For: Eye-catching decals, decorative elements, unique gifts, labels that need to stand out, or adding a touch of magic to any project.
- Consideration: The specialty finish might slightly alter how printed colors appear, so always do a test print.
10. Cast vs. Calendared Vinyl (Advanced):
- Cast Vinyl: Thinner, more conformable, excellent for curved surfaces, long-lasting (5-12 years outdoor), higher cost. Think vehicle wraps.
- Calendared Vinyl: Thicker, less conformable, more prone to shrinking over time, shorter lifespan (1-6 years outdoor), lower cost. Common for flat surfaces.
- Subjective Insight: For outdoor projects like car decals or long-term signage, I always lean towards cast vinyl for its durability and conformability. It just holds up so much better to the elements and complex curves.
11. Shrinkage Factor: Different vinyl types have varying degrees of shrinkage over time due to temperature fluctuations. High-quality calendared or cast vinyls will exhibit minimal shrinkage, preventing unsightly gaps or peeling edges.
12. Thickness (Mil): Vinyl thickness is measured in "mil" (thousandths of an inch). Thicker vinyls (e.g., 3-4 mil) can be easier to handle for beginners and are more durable. Thinner vinyls (e.g., 2 mil) conform better to complex curves but can be trickier to work with.
Applications Unleashed: Where Can You Use Printable Vinyl Wrap?
The true magic of printable vinyl wrap lies in its incredible versatility. Once you unlock the ability to print your own designs, a whole universe of customization possibilities opens up. From everyday items to special occasion gifts, here are some of the most popular and creative applications for this amazing material. Get ready to unleash your inner designer!
1. Personalized Laptop & Phone Skins:
- Idea: Design a unique skin for your laptop, tablet, or phone featuring your favorite artwork, photos, or a custom pattern.
- Scenario: I once created a custom laptop skin for my niece for her birthday, featuring her favorite anime characters and her name in a cool font. She absolutely adored it and said it made her laptop feel truly hers!
- Why it's great: Protects surfaces, expresses individuality, and is often more affordable than buying pre-made skins.
2. Custom Water Bottles & Mugs:
- Idea: Decorate reusable water bottles, coffee mugs, tumblers, and travel cups with vibrant, waterproof designs.
- Key Tip: For items that will be washed, always use waterproof printable vinyl and laminate it for maximum durability. Hand-washing is usually recommended.
3. Unique Wall Decals & Murals:
- Idea: Create bespoke wall art, inspirational quotes, growth charts for kids' rooms, or even temporary accent walls.
- Consideration: Use removable printable vinyl for easy changes without damaging paint. Large designs can be printed in sections and carefully aligned.
4. DIY Product Labels & Packaging:
- Idea: For small business owners, printable vinyl is a godsend for creating professional-looking labels for homemade goods (candles, soaps, food items, cosmetics).
- Scenario: My friend, who makes artisanal jams, struggled with generic labels. I helped her design and print custom printable vinyl wrap labels with her brand logo and product info, instantly elevating her product's perceived value and making them fly off the shelves at local markets.
5. Revamping Furniture & Home Decor:
- Idea: Give old furniture pieces a new lease on life by wrapping them with custom patterns. Decorate vases, picture frames, or storage bins.
- Caution: Ensure the surface is clean, smooth, and non-porous for the best adhesion.
6. Personalized Gifts:
- Idea: The possibilities are endless! Customize skateboards, bike helmets, guitar picks, game controllers, toolboxes, or even create unique puzzles.
- My Anecdote: One Christmas, I printed out a series of inside jokes and family photos onto small vinyl stickers and used them to decorate plain gift boxes. It was a huge hit, making the packaging as personal as the gifts inside!
7. Vehicle & Outdoor Decals:
- Idea: Create custom bumper stickers, window decals, or even partial wraps for bikes, golf carts, or ATVs.
- Important: Use high-quality, outdoor-grade waterproof printable vinyl, ideally cast vinyl, and always laminate for UV and weather protection.
8. Educational & Organizational Tools:
- Idea: Make custom labels for binders, folders, storage containers, school supplies, or create learning aids for children.
- Benefit: Keeps things tidy and adds a fun, personalized touch to organization.
9. Craft Projects & Scrapbooking:
- Idea: Use vinyl cutouts as embellishments for scrapbooks, cards, journals, or other craft projects.
- Versatility: The ability to print any design means you can match any theme or color scheme perfectly.
10. Retail & Event Signage:
- Idea: Create temporary signs for sales, special events, directional markers, or window displays for small businesses.
- Benefit: Cost-effective way to produce professional-looking signs quickly.
11. Custom Apparel (Indirectly):
- Idea: While printable vinyl isn't for direct fabric application (that's heat transfer vinyl), you can use it to create custom stencils for fabric painting or to decorate accessories like belt buckles or shoe accents.
12. Model Making & Miniatures:
- Idea: For hobbyists, printable vinyl can be used to create incredibly detailed decals for model cars, planes, or dioramas, bringing a new level of realism to your builds.
The Art of Printing: Getting Your Designs Just Right
Printing on printable vinyl wrap isn't just about hitting "print" and hoping for the best. It's an art that combines design savvy with technical know-how to ensure your creations come out vibrant, sharp, and ready for application. Here’s how to master the printing phase:
1. High-Resolution Designs are Key:
- Explanation: Your design file needs to be of good quality. Low-resolution images will look pixelated or blurry when printed, especially on a glossy finish.
- Tip: Aim for at least 300 DPI (dots per inch) for crisp, professional-looking prints. Vector graphics are ideal as they scale without losing quality.
2. Color Calibration & Profiles:
- Explanation: What you see on your screen might not be what you get on paper. Monitor calibration and using ICC color profiles can help ensure color accuracy.
- Action: If color accuracy is critical, consider investing in a monitor calibrator. Otherwise, printing a test swatch is a must.
3. Choose the Right Printer & Ink:
- Inkjet vs. Laser: As discussed, match your vinyl type to your printer.
- Ink Quality: Use genuine manufacturer inks or high-quality compatible inks. Cheap inks can lead to fading, clogged nozzles, and poor color vibrancy.
- My Experience: I learned the hard way that off-brand inks can ruin a print. I once used a generic ink that caused the colors to look dull and faded on my printable vinyl, completely ruining a batch of custom labels for a client. Never again!
4. Printer Settings Are Crucial:
- Media Type: Select the correct paper type in your printer settings. Options like "Photo Paper Glossy" or "Premium Matte Photo Paper" often yield the best results for vinyl, even if it's not technically paper. This tells your printer how much ink to lay down.
- Print Quality: Always choose the highest quality setting (e.g., "Best" or "Photo Quality") for optimal detail and color saturation.
- Borderless Printing: If your design extends to the edge, enable borderless printing if your printer supports it.
5. Allow for Proper Drying Time:
- Inkjet Specific: After printing on inkjet vinyl, it's vital to let the ink dry completely before handling, cutting, or laminating. This can take anywhere from 10 minutes to several hours, depending on the ink, vinyl, and humidity.
- Warning: Rushing this step will lead to smudging and ruined prints. Patience is a virtue here!
6. Consider Lamination for Protection:
- Why: Lamination adds a clear, protective layer over your printed design, guarding it against UV rays, scratches, water, and smudging.
- Types: You can use self-adhesive laminating sheets or a laminating machine with heat-activated pouches, depending on your vinyl and project.
- Recommendation: For anything that will be handled frequently, exposed to the elements, or needs to last, lamination is non-negotiable.
7. Test Prints Are Your Best Friend:
- Advice: Before printing your final design on expensive vinyl, always do a small test print on regular paper or a scrap piece of vinyl. Check colors, resolution, and overall appearance.
- Scenario: My friend was preparing a large batch of custom decals for an event. We did a test print on a small section, and it revealed a subtle color shift we hadn't noticed on screen. A quick adjustment saved us from reprinting dozens of sheets of expensive vinyl!
8. Loading Vinyl Correctly:
- Orientation: Ensure you're loading the vinyl with the printable side facing the correct direction for your printer (usually face up in a top-loading tray, or face down in a bottom-loading tray).
- Flatness: Make sure the vinyl is flat and free of creases to prevent jams or uneven printing.
9. Cutting After Printing:
- Manual Cut: For simple shapes, scissors or a craft knife work fine.
- Cutting Machine (e.g., Cricut, Silhouette): For intricate designs, use a cutting machine. Most machines have a "print then cut" feature that uses registration marks to precisely cut around your printed design.
- Calibration: Always calibrate your cutting machine regularly, especially for print-then-cut, to ensure accuracy.
10. Environmental Factors:
- Humidity: High humidity can affect ink drying times and vinyl flatness. Store your vinyl in a cool, dry place.
- Temperature: Extreme temperatures can also impact print quality and vinyl performance.
11. Bleed and Margins:
- Bleed: For designs that go to the edge, design with a "bleed" – extend your background colors or images slightly beyond the cut line. This ensures no unprinted edges if the cut is slightly off.
- Margins: If you're using a cutting machine, be aware of its print-then-cut margin limitations.
12. Regular Printer Maintenance:
- Cleaning: Perform print head cleaning cycles regularly, especially if you notice banding or missing colors, to ensure consistent print quality.
Application Techniques: Smooth Sailing from Start to Finish
You've printed your masterpiece, and it's looking fantastic! Now comes the moment of truth: applying your printable vinyl wrap. This step can make or break your project, but with the right techniques, you can achieve a professional, bubble-free finish every time. Let's get sticky!
1. Preparation is Paramount:
- Clean the Surface: This is non-negotiable. The surface must be impeccably clean, dry, and free of dust, grease, or debris. Use rubbing alcohol (isopropyl alcohol) or a mild soap and water solution, then dry thoroughly with a lint-free cloth.
- Smooth Surface: Vinyl adheres best to smooth, non-porous surfaces. Rough or textured surfaces will lead to poor adhesion and visible imperfections.
- Temperature: Apply vinyl in a moderate room temperature environment. Extreme cold can make the vinyl brittle, and extreme heat can make it too stretchy or the adhesive too aggressive.
2. Gather Your Tools:
- Squeegee: Essential for smoothing out bubbles and ensuring good adhesion.
- Application Fluid (Optional): For larger wraps, a mist of soapy water can allow you to reposition the vinyl before it fully adheres.
- Lint-Free Cloth: For cleaning and drying.
- Craft Knife/X-Acto Knife: For trimming excess vinyl.
- Heat Gun/Hair Dryer (Optional): For conforming vinyl to curves or removing stubborn bubbles.
3. The "Hinge" Method for Larger Decals:
- Process:
1. Place your printed vinyl wrap on the surface, ensuring perfect alignment.
2. Apply a piece of painter's tape across the middle of the vinyl, creating a "hinge."
3. Peel the backing paper from one side of the hinge, cutting it away carefully.
4. Starting from the hinge, slowly lower the vinyl onto the surface, using your squeegee to smooth it out from the center outwards, pushing out air bubbles.
5. Once one side is applied, remove the tape hinge.
6. Peel the remaining backing paper from the other side.
7. Repeat the squeegee process, working from the hinge outwards.
- Benefit: This method gives you more control and prevents the entire sticky surface from touching the object at once, reducing the risk of misplacement or large bubbles.
4. The "Wet" Method for Repositioning:
- Process: For larger, flat applications (like a tabletop or window), lightly mist the adhesive side of the vinyl and the application surface with a solution of water and a tiny drop of dish soap.
- Benefit: This allows you to slide and reposition the vinyl for perfect alignment. Once in place, squeegee out the water and bubbles from the center outwards.
- Drying: The water needs to evaporate for full adhesion, which can take several hours to a day.
- Caution: Ensure your vinyl is truly waterproof before using this method, especially with inkjet prints that haven't been laminated.
5. Dealing with Curves and Contours:
- Stretch and Heat: For gently curved surfaces, you can slightly stretch the vinyl as you apply it. A heat gun or hair dryer on a low setting can make the vinyl more pliable and conform better.
- Small Sections: For complex curves, consider cutting your design into smaller, manageable sections.
- My Experience: I was once wrapping a car interior panel with a custom design. Without a heat gun, it was a bubbly mess. Using gentle heat, the vinyl became pliable, allowing me to stretch and mold it perfectly around the contours, creating a seamless finish. It saved the project!
6. Removing Air Bubbles:
- Squeegee: For most bubbles, a firm pass with your squeegee, working towards the nearest edge, will push the air out.
- Pin Prick: For stubborn, trapped bubbles, use a fine pin or needle to prick a tiny hole at the edge of the bubble. Then, squeegee the air out towards the hole.
- Heat: A little heat can also help make the vinyl more flexible to work out bubbles.
7. Trimming Excess Vinyl:
- Precision: Use a sharp craft knife or X-Acto knife to carefully trim any overhang. For perfect edges, use a ruler or the edge of the object as a guide.
- Blade Changes: Change your blade frequently, especially when working with larger projects, to ensure clean, crisp cuts and prevent tearing.
8. Post-Application Care:
- Curing Time: Allow the adhesive to "cure" for 24-48 hours before exposing the item to harsh conditions, washing, or extreme temperatures. This allows the adhesive to fully bond.
- Gentle Handling: Especially during the curing period, handle the wrapped item gently.
9. Weeding (If Applicable):
- Explanation: If your design has intricate cutouts or text, you'll need to "weed" away the excess vinyl around your design *after* cutting but *before* applying, unless you're using transfer tape.
10. Using Transfer Tape (For Intricate Designs):
- Process: For designs with multiple separate elements or intricate details, apply transfer tape over your printed and cut vinyl. Burnish it well. Then, peel the vinyl from its backing, with the design sticking to the transfer tape. Apply the transfer tape (with the design) to your surface, squeegee, and then slowly peel back the transfer tape, leaving your design perfectly aligned.
- Benefit: Keeps all design elements in their correct relative positions during application.
11. Layering Vinyl:
- Technique: If you want to create multi-layered designs, apply the first layer, then carefully apply subsequent layers on top. Ensure each layer is properly adhered before moving to the next.
12. Practice Makes Perfect:
- Advice: Don't expect perfection on your first try! Start with smaller, less critical projects to build your confidence and refine your technique. Every application is a learning experience. Don't be like me and try to wrap an entire cooler on your first go – learned that the hard way with a bubbly mess and a lot of wasted vinyl!
Beyond the Basics: Advanced Customization & Professional Finishes

Once you've mastered the fundamentals of printing and applying printable vinyl wrap, it's time to elevate your game. Moving beyond basic decals opens up a world of advanced customization techniques that can give your projects a truly professional and unique finish. This is where your inner artisan truly shines!
1. Contour Cutting & Layering:
- Concept: Instead of just printing a rectangular sticker, use a cutting machine (like Cricut or Silhouette) to precisely cut around the contours of your printed design.
- Advanced Layering: Combine different types of printable vinyl (e.g., a matte background with glossy accents) or even layer printed vinyl with colored adhesive vinyl for multi-dimensional effects.
- Benefit: Creates seamless, integrated designs that look far more sophisticated than simple square labels.
2. Full-Surface Wraps (Seamless Integration):
- Technique: Tackle larger projects like wrapping laptops, small appliances, or tabletops with a single, large piece of printable vinyl. This requires careful measurement, precise printing, and the "hinge" or "wet" application method for flawless results.
- Key: Patience and meticulous planning are crucial to avoid wrinkles and bubbles on expansive surfaces.
3. Utilizing White Ink Printing (Professional Service):
- Concept: While home printers don't print white, professional print shops often have specialized printers that can. This allows you to print white designs on clear or colored printable vinyl, which opens up incredible design possibilities.