Ever wished you could turn your wildest design ideas into real-life, durable stickers, labels, or even personalized decor? The secret, my friend, is often found in the magic of inkjet printable vinyl. It’s more than just a craft supply; it's a gateway to endless customization, making everything from water bottles to pantry jars uniquely yours. I remember my first dive into this world – trying to label my homemade spice blends. Let's just say my initial attempts were a bit… smudgy. But through trial and error (and a lot of research!), I discovered the true potential of this versatile material, and trust me, you don't want to mess this up!
This isn't just about printing; it's about transforming. Whether you’re a seasoned crafter looking for advanced tips or a complete beginner just starting your DIY journey, this guide will walk you through everything you need to know. We'll demystify the process, share expert tips, reveal common pitfalls to avoid, and inspire you with incredible projects you can tackle. Get ready to bring your digital art into the physical world with stunning results!
---
The World of Inkjet Printable Vinyl Projects: What Can You Create?
Inkjet printable vinyl opens up a universe of possibilities. From practical organization to whimsical decoration, here are some of the most popular and creative ways to put this fantastic material to use.
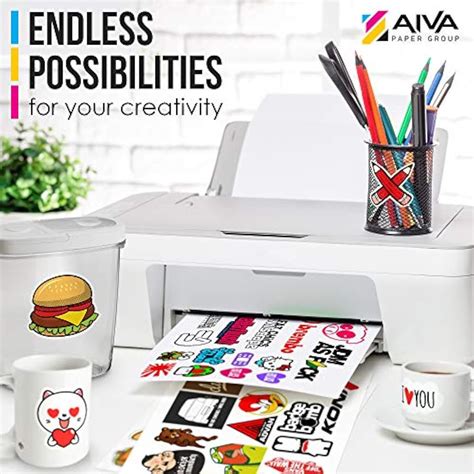
### 1. Crafting Custom Stickers & Decals for Personal Expression
This is perhaps the most popular use for inkjet printable vinyl, and for good reason! You can design anything your heart desires – from intricate illustrations to funny memes – and turn them into durable stickers. Perfect for personalizing laptops, notebooks, water bottles, skateboards, or even creating your own custom planner stickers.
- Laptop & Phone Decals: Design a unique skin or a collection of small stickers to express your personality.
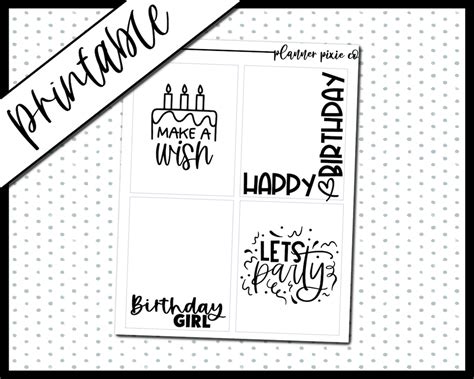
- Journal & Planner Stickers: Create functional or decorative stickers for your bullet journal, planner, or scrapbooks.
- Bumper Stickers & Car Decals: With the right lamination, you can make weather-resistant decals for your vehicle.
- Skateboard/Helmet Graphics: Personalize your gear with custom designs that stand out.
- Water Bottle & Tumbler Labels: Make your hydration buddy truly unique and identifiable.
- Themed Party Stickers: Design matching stickers for party favors, goodie bags, or invitations.
- Window Clings: Some types of vinyl are great for removable window decorations.
- Kid's Reward Charts/Stickers: Print fun, colorful stickers for chores or accomplishments.
- Band/Artist Merch: Create custom stickers for your band or artistic venture.
- I once used this category to create custom "World's Best Dog Mom" stickers for my friends' birthdays, complete with their dog's cartoon face. They were a huge hit and genuinely appreciated!
### 2. Elevating Home Decor & Organization with Printable Labels
Beyond just aesthetic appeal, inkjet printable vinyl is a powerhouse for home organization. Imagine perfectly matched labels for every jar in your pantry or chic decals for your storage bins. It's about bringing order and style together.
- Pantry & Spice Jar Labels: Create cohesive, stylish labels for all your kitchen essentials.
- Bathroom Product Labels: Organize shampoo, conditioner, and lotions with elegant custom labels.
- Laundry Room Organization: Label detergent dispensers, storage bins, and supply jars.
- Toy Bin & Storage Box Labels: Make cleanup easier for kids and adults alike with clear labels.
- Wall Decals & Art Prints: Print larger designs to create temporary or permanent wall decor.
- Switch Plate Covers: Customize boring light switch covers with fun designs.
- Small Appliance Decals: Give your mixer or coffee machine a personal touch.
- DIY Address Labels for Mailboxes: Make your mailbox stand out (ensure it's weatherproofed).
- Plant Pot Labels: Mark your herbs or seedlings with cute, custom labels.
- When I finally tackled my chaotic linen closet, I printed clear, minimalist labels for everything from "Guest Towels" to "First Aid." It made such a difference, and it truly felt like a pro organizer had visited!
### 3. Personalizing Gifts & Party Favors with a Unique Touch
Want to make a gift truly unforgettable? Customization is key! Inkjet printable vinyl allows you to add that personal flair that store-bought items just can't replicate.
- Custom Gift Tags: Design unique tags that match your wrapping paper or gift theme.
- Wine Bottle Labels: Create personalized labels for homemade wine, spirits, or special occasion bottles.
- Birthday Party Favors: Design custom labels for bubbles, candy bags, or small toys.
- Wedding Welcome Bag Labels: Add a personal touch to guest welcome kits.
- Bridal Shower/Baby Shower Game Prizes: Label small gifts or awards.
- Teacher Appreciation Gifts: Personalize mugs, notebooks, or appreciation baskets.
- Sports Team Water Bottles: Print team logos or player names for team gifts.
- Candle Jar Labels: For homemade candles, print your own scent and branding labels.
- Event Merchandise: Create custom stickers for charity runs, school events, or local fairs.
- One Christmas, I created custom "Hot Cocoa Bomb" labels with cute holiday designs for all my neighbors. It was a simple touch that made a homemade gift feel extra special and professional.
### 4. DIY Product Branding & Small Business Solutions
For the budding entrepreneur or small business owner, inkjet printable vinyl can be a game-changer. It offers an affordable way to create professional-looking branding for your products without large minimum orders from commercial printers.
- Product Labels (Candles, Soaps, Jams): Design and print professional labels for your handmade goods.
- Branded Packaging Seals: Create custom seals for tissue paper, boxes, or bags.
- Business Card Stickers: Print unique stickers to attach to plain business cards or handouts.
- Marketing Giveaways: Create branded stickers as promotional items for your customers.
- Sample Product Labels: For new product lines, print small batches of labels for samples.
- Event Booth Signage: Design small, eye-catching signs for your craft fair or market stall.
- Return Address Labels: Create custom return address labels for your business mail.
- Custom Tags for Clothing/Crafts: Print "Handmade by..." or care instruction labels.
- Barcodes/QR Code Labels: Integrate functional codes onto your products.
- I started my small Etsy shop with custom packaging seals made from printable vinyl. It instantly elevated the perceived value of my handmade items and looked far more professional than I could have afforded otherwise.
### 5. Educational & Kids' Projects for Fun & Learning
Engage kids with hands-on activities that combine creativity and learning. Inkjet printable vinyl is durable enough for little hands and can stand up to frequent handling.
- Learning Charts/Flashcards: Print colorful, durable learning aids for homeschooling.
- Kids' Room Decor: Let children design their own wall decals or door signs.
- Toy Customization: Personalize toy cars, action figures, or dollhouses.
- Scrapbook Embellishments: Print custom shapes, letters, or characters for scrapbooking.
- DIY Puzzles: Print a favorite image onto vinyl, stick it to cardboard, and cut into puzzle pieces.
- Labeling School Supplies: Help kids keep track of their notebooks, binders, and pencil cases.
- Science Project Displays: Create professional-looking labels and graphics for school projects.
- Sticker Books: Print sheets of themed stickers for kids to use in their sticker books.
- Custom Magnets: Print designs, stick to magnetic sheeting, and cut out for fridge magnets.
- My son absolutely loved making his own "superhero badges" using printable vinyl. We designed them together, printed them, and he wore them proudly. It was a fantastic way to blend art with imaginative play!
---
Tips for Mastering Your Inkjet Printable Vinyl Projects

Now that your creative juices are flowing, let's talk about the practical side. Getting great results with inkjet printable vinyl isn't hard, but a few key tips can save you a lot of frustration (and wasted vinyl!).
### Choose the Right Vinyl for Your Project
- Matte vs. Glossy: Matte vinyl offers a more subdued, non-reflective finish, while glossy vinyl makes colors pop and gives a more professional, "photo-like" look.
- Clear vs. White: Clear vinyl is great for a "no-label" look, letting the background show through. White vinyl provides a solid, opaque base for vibrant colors.
- Waterproof/Weatherproof: If your project will be exposed to moisture or outdoor elements, make sure to buy waterproof inkjet printable vinyl. Often, this means a vinyl with a special coating or one designed to be laminated.
- Adhesive Type: Most printable vinyl is permanent adhesive. If you need something removable (like wall decals), look for specialty "removable vinyl."
### Master Your Printer Settings
- Paper Type: Always select "Photo Paper Glossy" or "Photo Paper Matte" in your printer settings, even if your vinyl isn't technically photo paper. This tells your printer to lay down more ink and often slows down the printing speed, allowing for better ink absorption and reducing streaks.
- Print Quality: Choose the highest print quality setting (e.g., "Best" or "Fine"). This is crucial for crisp, vibrant images.
- Actual Size: Make sure your design is printing at "Actual Size" or "100%" to avoid scaling issues, especially if you're using a cutting machine.
- Clean Print Heads: Before a big project, run a nozzle check and head cleaning on your printer to prevent streaky prints. Trust me, you don't want to mess this up with a half-printed sticker!
### Design & Preparation Essentials
- High-Resolution Images: Start with high-quality images and designs. What looks good on screen might look pixelated when printed, especially if enlarged.
- Color Profile: If possible, use CMYK color mode for your designs, as printers use CMYK ink. RGB (common for screens) can sometimes lead to slight color shifts.
- Test Prints: Before printing on your precious vinyl, do a test print on a regular piece of paper. This allows you to check sizing, color accuracy, and design placement without waste. I find this approach works best for small batches; it saved me countless sheets of vinyl.
- Clean Your Surface: Before applying your vinyl, ensure the surface is clean, dry, and free of dust or oils. Alcohol wipes work great for non-porous surfaces.
### Protecting Your Prints for Durability
- Lamination: For ultimate durability, especially for outdoor use, high-traffic items, or anything that will be handled frequently, apply a clear self-adhesive laminating sheet over your printed vinyl after the ink has fully dried. This protects against UV fading, scratches, and water.
- Acrylic Sealer: Alternatively, you can spray your printed vinyl with a clear acrylic sealer (like Mod Podge Acrylic Sealer). This also adds a layer of protection, though typically less durable than lamination for outdoor use.
---
Common Pitfalls: What to AVOID When Working with Inkjet Printable Vinyl
Even with the best intentions, it's easy to stumble into common traps. Here’s what I learned the hard way – so you don't have to!
- Don't Rush the Drying Time: This is a big one! Inkjet ink needs time to fully dry and set on the vinyl's surface. Rushing it will lead to smudging, especially if you plan to laminate or cut the vinyl. Give it at least 15-30 minutes, or even a few hours for heavily inked designs. Don't be like me and immediately touch a freshly printed sheet only to end up with a blurry mess!
- Avoid Wet Hands/Surfaces: Water and wet hands are the enemy of freshly printed inkjet vinyl (unless it's already laminated or specifically designed for wet applications *after* drying). Ensure both your hands and the application surface are completely dry.
- Using the Wrong Printer: Inkjet printable vinyl is, as the name suggests, specifically for inkjet printers. Do NOT use it in a laser printer! Laser printers use heat, which will melt the vinyl and could damage your machine.
- Forgetting to Laminate for Durability: If your project needs to withstand water, scratching, or sunlight (like car decals or water bottle stickers), skipping the lamination step will lead to disappointment. Your beautiful designs will fade, scratch, or peel quickly.
- Ignoring Printer Settings: Printing on plain paper settings will likely result in faded colors, poor ink saturation, or even smudging because the printer isn't laying down enough ink or allowing enough dry time for a non-porous surface.
- Applying to Dirty/Textured Surfaces: Dust, lint, or greasy residues will prevent the vinyl from adhering properly, leading to bubbles, peeling, or a generally unprofessional look. Always clean your surface!
- Over-Saturating Ink: While you want vibrant colors, sometimes overly saturated designs (too much dark color in one spot) can cause the ink to pool and smudge. If you notice this, try reducing the color intensity slightly in your design software or adjusting printer settings.
---
Ready to Print, Stick, and Create?
There you have it! Your comprehensive guide to unlocking the incredible potential of inkjet printable vinyl. It might seem a little daunting at first, but with the right knowledge and a bit of practice, you'll be creating stunning, professional-looking custom projects in no time.
Remember, the key is patience, testing, and choosing the right materials for your specific project. From personalized gifts to professional product labels, the power of customization is now literally at your fingertips. So go on, fire up that inkjet printer, pick out your favorite vinyl, and turn those creative visions into tangible, durable realities. Now go make something awesome – and don't forget to share your creations!