
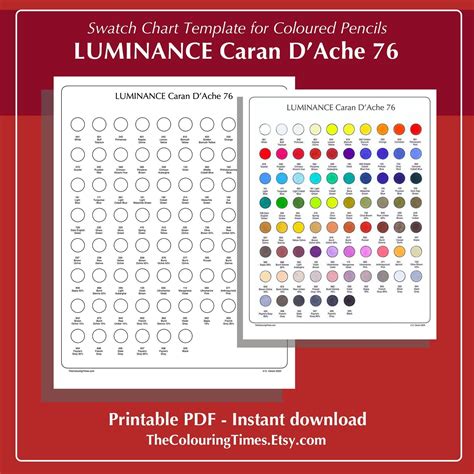
Have you ever spent hours perfecting a digital artwork, only to print it and find the colors look dull, washed out, or just… *wrong*? Or perhaps you’re an artist mixing paints, struggling to achieve the perfect shade that truly pops, only for it to fall flat on the canvas? Maybe you’re a photographer agonizing over a print that doesn't capture the subtle light and shadow you saw on your screen. Trust me, I’ve been there. I remember one particularly frustrating evening, huddled over my monitor, trying to match a client's brand blue for a print ad. The digital version looked vibrant, but every test print came out murky. It felt like I was battling my own tools, constantly questioning my eyes and my artistic judgment. What I didn't fully grasp then was the profound impact of luminance – the perceived brightness of a color – and how a simple tool, a luminance swatch chart printable, could have saved me hours of frustration and stacks of wasted paper.
This isn't just about getting "pretty" colors; it's about achieving accuracy, consistency, and ultimately, artistic integrity across all your mediums. Luminance is the backbone of how we perceive depth, form, and contrast. Without a solid understanding and a reliable way to reference it, your colors might sing individually, but they won't harmonize together. This comprehensive guide is designed to empower you, whether you’re a budding enthusiast or a seasoned professional, to master luminance. We’ll dive deep into what it is, why it matters, how to create and use your own printable luminance swatch chart, and how this seemingly simple tool can revolutionize your creative workflow. Get ready to truly see and control your colors like never before.
---
Table of Contents
- [Unveiling Luminance: Why It's the Unsung Hero of Color](#unveiling-luminance-why-its-the-unsung-hero-of-color)
- [Crafting Your Perfect Printable Luminance Swatch Chart: A Step-by-Step Guide](#crafting-your-perfect-printable-luminance-swatch-chart-a-step-by-step-guide)
- [The Art of Accurate Printing: Maximizing Your Swatch Chart's Reliability](#the-art-of-accurate-printing-maximizing-your-swatch-charts-reliability)
- [Beyond the Screen: Integrating Your Chart into Digital Workflows](#beyond-the-screen-integrating-your-chart-into-digital-workflows)
- [From Pigment to Pixel: How Artists Use Luminance Charts in Traditional Media](#from-pigment-to-pixel-how-artists-use-luminance-charts-in-traditional-media)
- [Navigating the Nuances: Common Pitfalls and Troubleshooting Your Luminance Chart](#navigating-the-nuances-common-pitfalls-and-troubleshooting-your-luminance-chart)
- [Advanced Calibration & Pro Insights: Taking Your Color Management to the Next Level](#advanced-calibration-pro-insights-taking-your-color-management-to-the-next-level)
- [Essential Tools and Resources for Your Luminance Journey](#essential-tools-and-resources-for-your-luminance-journey)
- [The Human Element: How Luminance Shapes Our Perception and Experience](#the-human-element-how-luminance-shapes-our-perception-and-experience)
- [How to Choose the Best Luminance Swatch Chart for Your Needs](#how-to-choose-the-best-luminance-swatch-chart-for-your-needs)
- [Common Pitfalls to Avoid When Using Luminance Swatch Charts](#common-pitfalls-to-avoid-when-using-luminance-swatch-charts)
- [Advanced Tips for Experts: Pushing the Boundaries of Luminance Control](#advanced-tips-for-experts-pushing-the-boundaries-of-luminance-control)
- [Conclusion: Embrace the Power of Luminance](#conclusion-embrace-the-power-of-luminance)
---
Unveiling Luminance: Why It's the Unsung Hero of Color

Before we dive into creating your very own luminance swatch chart printable, let’s get on the same page about what luminance actually is and why it holds such power. Think of it as the "brightness" or "lightness" component of a color, independent of its hue (the actual color, like red or blue) or saturation (how intense or vibrant it is). While hue and saturation often steal the spotlight, luminance dictates how well a color stands out, recedes, or creates contrast. It's the silent workhorse that defines depth, form, and readability.
Here’s why understanding and controlling luminance is absolutely crucial for anyone working with visuals:
1. Defining Form and Depth: Luminance variations are how our eyes perceive three-dimensionality. Lighter areas appear to advance, darker areas recede. Without sufficient luminance contrast, objects can look flat and lifeless.
2. Readability and Accessibility: For text, graphics, or user interfaces, sufficient luminance contrast between foreground and background is paramount for readability, especially for those with visual impairments. This is a core principle in accessible design.
3. Emotional Impact: Lightness and darkness carry emotional weight. High-luminance scenes can feel airy and optimistic, while low-luminance scenes can evoke mystery or solemnity. Mastering this allows you to guide the viewer's emotional journey.
4. Print Accuracy and Consistency: This is where a luminance swatch chart printable becomes your best friend. What looks bright on your screen might print dark, or vice-versa, due to differences in monitor calibration, printer profiles, and paper characteristics. A reference chart helps you bridge this gap.
5. Achieving Harmony and Balance: Even if colors clash in hue or saturation, their luminance values can create a pleasing balance. Conversely, colors that look harmonious in hue can feel jarring if their luminance values are too similar or too disparate.
6. Guiding the Viewer's Eye: The areas of highest luminance contrast in an image naturally draw the eye. You can strategically use luminance to direct attention to your focal point.
7. Foundation for Color Grading (Photography/Video): Professional colorists often start by adjusting luminance values before tweaking hue or saturation, as it forms the structural backbone of the image.
8. Understanding Light in Art: For traditional artists, understanding how light falls on objects and how it affects their perceived brightness (luminance) is fundamental to realistic rendering.
9. Problem-Solving Color Shifts: Many perceived color shifts or "muddy" colors, especially in print, are actually luminance issues rather than hue or saturation problems. Identifying this saves a lot of wasted effort.
10. Pre-Press Checks: Before sending a design to print, a quick check against your printable luminance swatch chart can reveal potential issues with contrast and detail loss in shadows or highlights, allowing you to make adjustments proactively.
11. Cross-Media Consistency: Ensuring that your brand colors, artwork, or photographic prints maintain a consistent look across different displays and printed materials is a significant challenge. Luminance control is a key component of this consistency.
12. The "Gray Scale" of Color: Many artists and designers work with grayscale versions of their work first, precisely because it forces them to focus purely on luminance and contrast before adding the complexities of color. A luminance swatch chart printable is essentially a refined grayscale reference.
- *Personal Scenario:* I once designed a logo with a beautiful gradient that looked stunning on my calibrated monitor. When printed by a local vendor, the gradient disappeared into a murky blob. The problem wasn't the colors themselves, but that the luminance values within the gradient were too close together for the printer to differentiate, especially on that specific paper. A quick check against a luminance swatch chart printable would have immediately flagged this, allowing me to adjust the gradient's contrast for print.
Crafting Your Perfect Printable Luminance Swatch Chart: A Step-by-Step Guide
The beauty of a luminance swatch chart printable is its simplicity and effectiveness. You don't need expensive equipment to get started, just a printer, some good paper, and a bit of focus. This section will guide you through the process of creating a chart that becomes an indispensable tool in your creative arsenal.
Here's how to craft your own:
1. Understand the Goal: Your chart should display a range of neutral gray values, from pure black (0% luminance) to pure white (100% luminance), with even steps in between. This forms your reference scale for brightness.
2. Choose Your Software: You can use virtually any image editing or vector graphics software (e.g., Adobe Photoshop, GIMP, Affinity Photo, Illustrator, Inkscape). Even a simple word processor with shape tools can work in a pinch, though less ideal for precision.
3. Set Up Your Document:
- Size: Standard letter (8.5x11 inches) or A4 is practical. You want enough space for decent-sized swatches.
- Color Mode: Crucially, set your document to grayscale or work with neutral gray values in an RGB/CMYK document. If using RGB/CMYK, ensure all R, G, and B values are identical (e.g., R128 G128 B128 for a mid-gray) or that CMYK values are only in K (Black) (e.g., C0 M0 Y0 K50). This guarantees neutrality.
- Resolution: For printing, 300 DPI (dots per inch) is standard for high quality.
4. Determine Your Steps:
- A common approach is 10-step or 20-step grayscale.
- For a 10-step chart, you’d have 0% (black), 10%, 20%... up to 90%, and 100% (white).
- For a 20-step chart, you'd go from 0%, 5%, 10%... up to 95%, and 100%. More steps offer finer granularity.
- *Expert Tip:* Include a "gradient" strip as well as individual swatches. This helps you see smooth transitions.
5. Create Your Swatches:
- Method 1 (Rectangles): Draw a series of equally sized rectangles. Fill each rectangle with a precise gray value. For example, in Photoshop, use the color picker to set brightness (B) in HSB mode, or input identical RGB values.
- Method 2 (Gradient & Sample): Create a linear gradient from pure black to pure white. Then, use the eyedropper tool to sample specific points along the gradient (e.g., 10% in, 20% in, etc.) and apply those sampled colors to your individual swatches. This can help ensure even distribution.
6. Label Your Swatches: Clearly label each swatch with its corresponding percentage (e.g., "10% Black," "50% Gray," "90% White"). This is vital for accurate reference. You might also want to label the values in RGB (e.g., "RGB 25,25,25") or Hex ("#191919").
7. Add Test Patterns (Optional but Recommended):
- Fine Lines: Include very thin black lines on a white background, and white lines on a black background, to test your printer's ability to reproduce fine detail at extremes.
- Small Text: Include small text in black on white, and white on black, to check readability and edge definition.
- Gradient Strip: As mentioned, a continuous smooth gradient from 0% to 100% helps identify banding issues.
8. Save Your Chart: Save it as a high-quality PDF or a TIFF file. These formats retain print quality best. This ensures you have a reliable luminance swatch chart printable ready whenever you need it.
9. Consider Different Versions: If you work with different paper types (matte, gloss, watercolor), consider creating and printing a separate chart for each, as paper significantly impacts perceived luminance.
- *Hypothetical Scenario:* After struggling with my watercolor paintings looking dull compared to my digital sketches, I decided to print a specific luminance swatch chart printable onto watercolor paper. The difference was astounding! I immediately saw how the paper absorbed colors differently and adjusted my digital painting process to account for the true luminance values I could achieve on that medium. This saved me from countless "muddy" paintings.
The Art of Accurate Printing: Maximizing Your Swatch Chart's Reliability
You've designed your perfect luminance swatch chart printable. Now comes the critical step: printing it accurately. This isn't just about hitting "print"; it's about understanding how your printer, paper, and settings interact to produce the most reliable reference tool possible. A poorly printed chart can be worse than no chart at all, leading you down the wrong path.
Here’s how to ensure your printable luminance swatch chart is a true benchmark:
1. Calibrate Your Monitor FIRST: This is non-negotiable. If your screen isn't showing accurate colors and brightness, your printed chart will only reflect those inaccuracies. Use a hardware calibrator (like a Spyder or i1 Display) for the best results. Software calibration is a distant second.
2. Choose the Right Paper:
- Type: Use the same type of paper you typically print your final work on. If you print on both matte and gloss, print a separate chart for each.
- Quality: Don’t skimp on cheap paper. High-quality, professional-grade paper (e.g., archival matte, photo paper) will give you the most consistent and reliable results. Cheap paper often has optical brighteners that can skew perceived white points.
3. Printer Settings are Key:
- "Best Quality" or "Photo Quality": Select the highest print quality setting your printer offers.
- Media Type: Crucially, match the media type setting in your printer driver to the paper you’re using (e.g., "Premium Photo Paper Glossy," "Archival Matte"). This tells the printer which ICC profile to use and how much ink to lay down.
- Color Management: In your print dialogue, ensure "Printer Manages Colors" or "No Color Management" is selected, and then choose the correct ICC profile for *your printer and paper combination*. If you've calibrated your monitor, make sure the input profile matches your monitor's profile.
- No Auto-Adjustments: Turn off any "photo enhancement," "auto-correct," "brightness/contrast adjustment," or "color vividness" settings in the printer driver. You want a raw, unadulterated print of your chart.
4. Disable "Black Ink Only" Mode: Even though your chart is grayscale, forcing the printer to use only black ink can lead to less smooth transitions and poorer overall quality, especially with photographic printers that use multiple black/gray inks. Let the printer use its full color palette to achieve neutral grays if it's designed to do so.
5. Print Under Controlled Lighting: Once printed, view your chart under consistent, neutral lighting conditions (e.g., 5000K daylight-balanced light source). Viewing it under warm incandescent light or cool fluorescent light will alter your perception of its luminance values.
6. Allow for Drying Time: Inkjet prints, especially on thicker photo papers, can take time to fully dry and for their colors to stabilize. Don't evaluate your chart immediately after printing. Give it at least 30 minutes, ideally a few hours or even overnight.
7. Print Multiple Copies: Print a few copies of your luminance swatch chart printable. One for your desk, one near your light box, one to keep pristine. This allows for comparison if one gets worn.
8. Reference Against a Known Good Source: If you have a professionally calibrated print or a high-quality commercial gray scale chart, compare your printed chart to it to get a sense of its accuracy. This helps you identify if your setup is consistently off.
9. Regular Maintenance: Keep your printer heads clean and perform nozzle checks regularly. Clogged nozzles can lead to banding or inaccurate color/luminance reproduction.
10. Document Your Settings: Make a note of the paper type, printer settings, and specific ICC profile you used to print each luminance swatch chart printable. This helps you replicate accurate results in the future.
11. Store Properly: Keep your printed charts flat and away from direct sunlight or humidity to prevent fading or warping.
12. Don't Over-Analyze Wet Prints: It's tempting to look at a print as it comes out of the printer, but inks often look different when wet. Patience is key.
- *Personal Scenario:* Early in my photography journey, I printed a luminance swatch chart printable on what I thought was good paper, but didn't match the printer settings. The resulting chart had a subtle green tint in the mid-tones and crushed blacks. I kept trying to "correct" my photos based on this faulty chart, leading to even worse prints! It was only when I learned about ICC profiles and media settings that I realized my reference was flawed. Learning to print the chart *correctly* was as important as designing it.
Beyond the Screen: Integrating Your Chart into Digital Workflows
While a luminance swatch chart printable is a physical tool, its true power lies in how you integrate it into your digital creative process. It acts as a bridge, helping you translate what you see on your screen to what you expect in print, and vice-versa. This integration is where the magic of consistency happens.
Here’s how to effectively use your chart in digital workflows:
1. Monitor Calibration Verification:
- After calibrating your monitor, display a digital version of your grayscale chart on screen.
- Hold your printed luminance swatch chart printable next to it, under neutral viewing conditions.
- Compare the steps: Do they look similar? Are the blacks truly black, and whites truly white on both? Are the transitions smooth and even? This immediately highlights discrepancies in your monitor's calibration.
2. Evaluating Shadow and Highlight Detail:
- In your image editing software (e.g., Photoshop), open an image you're working on.
- Look at areas in your image that should have subtle detail in the shadows (e.g., dark fabric, deep foliage) or highlights (e.g., clouds, reflections).
- Refer to your printable luminance swatch chart. Can you distinguish between, say, a 5% black and a 10% black on your chart? Now, compare that to your image. Are those subtle dark tones clearly separated, or do they "melt" into pure black (crushed shadows)? Do your highlights retain detail above, say, 90% white, or are they blown out?
3. Pre-Press Proofing:
- Before sending a file to print, do a soft proof in your software (e.g., Photoshop's "Proof Colors" with your printer's ICC profile).
- Now, compare your on-screen soft proof to your luminance swatch chart printable. Pay close attention to how tones might shift or compress in print, especially in the extreme darks and lights. This allows you to make adjustments *before* printing, saving ink and paper.
4. Color Grading and Tonal Adjustments:
- When adjusting curves, levels, or brightness/contrast, use your chart as a visual guide.
- If you want to pull up the mid-tones, you can visually target the 50% gray swatch on your chart and try to match the image's mid-tones to that reference.
- *Hypothetical Scenario:* I was color grading a series of night photos, and the blacks kept looking washed out on my screen. I referenced my printable luminance swatch chart and realized my monitor's black point was set too high, making 5% black look like 20% black. Adjusting my monitor calibration (and then re-checking with the chart) immediately resolved the issue, allowing me to achieve truly deep, rich blacks in my images.
5. Web Design and UI/UX:
- While web colors are RGB, luminance is crucial for visual hierarchy and accessibility.
- Use your chart to understand how different gray values translate to screen brightness.
- When choosing text and background colors, ensure sufficient luminance contrast. Tools like contrast checkers use luminance calculations to ensure WCAG compliance.
6. Consistency Across Devices:
- If you view your digital work on multiple screens (laptop, tablet, phone), having a printed chart helps you identify which screen is most accurate.
- You can open your digital chart on different devices and compare them to the physical chart. This helps you understand how different displays interpret luminance.
7. Artistic Value Assessment:
- Sometimes, simply converting your digital artwork to grayscale helps you assess its luminance structure.
- Compare this grayscale version to your luminance swatch chart printable. Are the major elements of your composition hitting the right luminance values to create the desired depth and focal points?
8. Setting Black and White Points: The printed chart gives you a tangible reference for what "pure black" and "pure white" look like on your specific paper and printer. This helps you set the absolute black and white points in your digital images for maximum dynamic range without clipping.
9. Identifying Color Casts: A truly neutral gray scale on your printable luminance swatch chart should appear completely neutral. If you see any color tint (e.g., green, magenta, blue) in any of the gray steps, it indicates a color cast in your monitor calibration or printer profile.
10. Training Your Eye: Regularly comparing your digital work to your physical chart trains your eye to recognize correct luminance values, making you a more intuitive and accurate designer/artist.
11. Working with Scanned Artwork: If you scan traditional artwork, use the luminance swatch chart printable to ensure the scan accurately captures the tonal range of the original. Placing a small grayscale strip next to your artwork during scanning can provide an immediate reference.
12. Video Editing and Color Correction: For video, luminance is paramount for exposure and contrast. Use a digital representation of your chart on your reference monitor and compare it to your physical chart. This helps ensure your video's blacks aren't crushed and whites aren't blown out when viewed on various displays.
From Pigment to Pixel: How Artists Use Luminance Charts in Traditional Media
While the term "luminance swatch chart printable" often conjures images of digital screens and precise printing, its underlying principles are incredibly powerful for traditional artists. Understanding luminance is fundamental to creating compelling work with paint, charcoal, pastels, or any physical medium. A printable chart can bridge the gap between digital planning and physical execution, or simply serve as a pure reference for tonal values.
Here's how traditional artists can leverage the concept and a physical chart:
1. Understanding Value (Tone) in Painting:
- In traditional art, "value" is the equivalent of luminance – how light or dark a color is. It's the most important element for creating realism and depth.
- Use your printable luminance swatch chart as a direct reference for mixing paint values. If you need a mid-tone gray, you can mix black and white until it matches the 50% swatch on your chart.
2. Pre-Mixing Palettes:
- Before starting a painting, you can pre-mix a range of values for your main colors based on your chart. For example, a light, mid, and dark version of your red, blue, green, etc., all accurately matched to your chart's luminance steps.
- *Personal Scenario:* I used to struggle tremendously with landscapes, always making my distant mountains too dark, making them feel close rather than far. Then, I started using a physical luminance swatch chart printable as a guide. I’d digitally design my landscape, then match the key luminance values for foreground, midground, and background to my chart, and then mix my paints to those specific values. Suddenly, my landscapes had incredible depth and atmospheric perspective!
3. Assessing Light and Shadow:
- When sketching from life or reference photos, mentally (or physically) compare the light and shadow areas to your luminance swatch chart. What percentage black is that deepest shadow? What percentage white is that brightest highlight? This helps you accurately capture the scene's tonal range.
4. Creating Notan Studies:
- Notan is a Japanese design concept focusing on the arrangement of light and dark shapes. It's pure luminance.
- Use your chart to simplify complex scenes into 2-5 distinct luminance values, helping you identify strong compositions based on light and shadow alone.
5. Charcoal and Graphite Drawing:
- These monochromatic mediums are all about luminance.
- A luminance swatch chart printable becomes your direct reference for the range of values you can achieve with different pencils or charcoal sticks, and how to blend them smoothly.
6. Color vs. Value Dilemma:
- It's easy to be distracted by vibrant hues. Your chart reminds you to always consider the underlying luminance. A bright yellow and a pale blue might have the same luminance, making them visually blend if not separated by other means.
- *Humorous Insight:* Don't be like me and think "more color, more impact!" Sometimes, it's just more... muddy. Check your luminance, folks!
7. Fabric and Textile Design:
- When choosing thread colors or fabric swatches, consider their inherent luminance. Two different colored threads might appear similar from a distance if their luminance values are too close, leading to a flat design.
8. Sculpture and 3D Art:
- Even in three dimensions, how light interacts with surfaces defines form. Understanding how different materials reflect or absorb light (and thus appear lighter or darker) is crucial. A physical chart helps you assess the perceived luminance of your materials.
9. Baking and Culinary Arts (Creative Stretch!):
- Think of the contrast in a perfectly layered cake, or the subtle variations in a roasted vegetable medley. Luminance (lightness/darkness) plays a role in visual appeal, even here! A chart could inspire you to think about tonal variety in your food presentation.
10. Calligraphy and Hand Lettering:
- The contrast between ink and paper is a luminance relationship. Using different shades of ink or paper, or varying line thickness (which affects perceived darkness), is directly tied to luminance.
11. Understanding Atmospheric Perspective:
- Objects further away appear lighter (less contrast, higher overall luminance) due to atmospheric haze. Your chart helps you accurately gauge these subtle shifts in value for depth.
12. Mastering Tonal Studies: Dedicate time to creating studies purely focused on luminance, using your printable luminance swatch chart as your guide. This builds a powerful foundation for all your artistic endeavors.
Navigating the Nuances: Common Pitfalls and Troubleshooting Your Luminance Chart

Even with the best intentions, working with a luminance swatch chart printable can present challenges. It's not just about having the chart; it's about using it effectively and knowing how to troubleshoot when things don't quite look right. Identifying and correcting common pitfalls will cement your mastery of color accuracy.
Here are frequent issues and how to navigate them:
1. Pitfall: Inconsistent Viewing Conditions.
- Problem: You compare your screen to your chart under different lighting (e.g., monitor light vs. window light). This changes how you perceive colors and brightness.
- Troubleshooting: Always view both your screen and your luminance swatch chart printable under consistent, neutral lighting, ideally a 5000K daylight-balanced light source. Avoid direct sunlight or mixed light sources.
2. Pitfall: Uncalibrated Monitor.
- Problem: Your screen isn't displaying accurate brightness or color, making your comparisons with the printed chart meaningless.
- Troubleshooting: Invest in a hardware monitor calibrator (e.g., X-Rite i1 Display, Datacolor Spyder). This is the single most important step for digital color accuracy. Calibrate regularly (monthly).
3. Pitfall: Using the Wrong Paper or Printer Settings.
- Problem: Your printed chart looks off (too dark, too light, color cast) because the paper type or printer driver settings don't match.
- Troubleshooting: Always select the correct paper type in your printer driver. Use the specific ICC profile for your printer and paper combination. Turn off any "auto-enhance" features in the printer settings.
4. Pitfall: Misinterpreting "Pure Black" and "Pure White".
- Problem: You