
Alright, fellow Swifties and party planners, let’s talk about making magic happen – specifically, the kind of magic that involves a stunning cake and a show-stopping "Taylor Swift cake topper printable." If you’re here, chances are you’re either planning an epic birthday bash, a cozy fan gathering, or simply want to infuse a little extra sparkle into your next celebration with a nod to the one and only Taylor Swift. And trust me, you’ve come to the right place.
I’ve been down this road myself. I remember trying to pull off a surprise "Lover" themed party for my best friend, and the cake felt incomplete without that perfect, custom touch. I scoured the internet for inspiration, wrestled with design software, and even had a minor printing mishap (don't ask about the slightly pixelated "You Belong With Me" era topper – we've all been there!). What I learned after hours of research, trial, and error is that while the journey can seem daunting, the reward of seeing that perfectly themed cake light up someone's face is absolutely priceless. This guide is born from those experiences, designed to save you the headaches and fast-track you to crafting a cake topper that’s not just a decoration, but a true tribute.
Whether you're a seasoned crafter with a Cricut machine ready to roll, or a complete beginner who just wants to download and print, this article is your comprehensive playbook. We’re going to dive deep into everything from choosing the right theme to the nitty-gritty of printing and assembly. We’ll explore designs inspired by every iconic era, uncover the best places to find high-quality printables, and share insider tips to make your "Taylor Swift cake topper printable" truly shine. Get ready to shake it off (the stress, that is!) and create a cake topper that will have everyone saying, "It's a love story, baby, just say yes!"
---
Table of Contents

- [The Eras Tour Extravaganza: Toppers That Take the Stage](#the-eras-tour-extravaganza-toppers-that-take-the-stage)
- [Album-Inspired Aesthetics: Crafting Toppers for Every Era](#album-inspired-aesthetics-crafting-toppers-for-every-era)
- [DIY Magic: Crafting Your Own Printable Topper from Scratch](#diy-magic-crafting-your-own-printable-topper-from-scratch)
- [Where to Find the Perfect Taylor Swift Cake Topper Printable](#where-to-find-the-perfect-taylor-swift-cake-topper-printable)
- [Beyond the Cake: Creative Uses for Your Printable Topper](#beyond-the-cake-creative-uses-for-your-printable-topper)
- [Personalizing Your Swiftie Statement: Customization Tips & Tricks](#personalizing-your-swiftie-statement-customization-tips--tricks)
- [Printing Perfection: Tips for a Flawless Finish Every Time](#printing-perfection-tips-for-a-flawless-finish-every-time)
- [Budget-Friendly Brilliance: Free & Affordable Taylor Swift Topper Options](#budget-friendly-brilliance-free--affordable-taylor-swift-topper-options)
- [The Ultimate Swiftie Party Ensemble: Integrating Your Cake Topper](#the-ultimate-swiftie-party-ensemble-integrating-your-cake-topper)
- [How to Choose the Best Taylor Swift Cake Topper Printable for Your Needs](#how-to-choose-the-best-taylor-swift-cake-topper-printable-for-your-needs)
- [Common Pitfalls to Avoid When Creating/Using Printables](#common-pitfalls-to-avoid-when-creatingusing-printables)
- [Advanced Tips for Expert Swiftie Crafters](#advanced-tips-for-expert-swiftie-crafters)
- [Conclusion: A Sweet Ending to Your Swiftie Celebration](#conclusion-a-sweet-ending-to-your-swiftie-celebration)
---
The Eras Tour Extravaganza: Toppers That Take the Stage
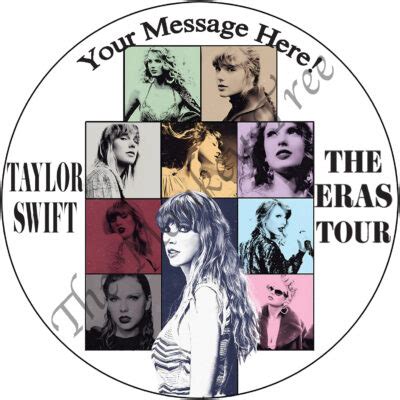
Let's be honest, the Eras Tour has taken the world by storm, and it's the ultimate inspiration for any current Swiftie celebration. If you're looking for a "Taylor Swift cake topper printable" that screams "I was there" (or "I wish I was there!"), this section is your VIP pass. An Eras Tour theme allows for incredible creativity, weaving together elements from all of Taylor's iconic albums.
Here are some dazzling ideas for Eras Tour cake toppers:
1. The Iconic Eras Silhouette: A layered design featuring Taylor's silhouette from different eras (e.g., *Fearless* curly hair, *Red* hat, *1989* sunglasses, *Lover* heart eye makeup). You can print each silhouette on a different color cardstock and layer them for a dynamic 3D effect.
2. Friendship Bracelet Garland Topper: Imagine mini friendship bracelet printables, each spelling out an album title or a significant lyric, strung across the top of your cake like a tiny garland. This is a super cute and interactive idea that resonates deeply with the fandom.
3. Concert Ticket Stub Design: A printable designed to look like a vintage concert ticket, customized with the birthday person's name, age, and "Eras Tour" details. This feels incredibly authentic and celebratory.
4. "Taylor Swift The Eras Tour" Logo Replica: A direct replica of the official tour logo, perhaps with glitter accents or a holographic print effect, makes for a sleek and instantly recognizable topper.
5. Microphone & Guitar Duo: Simple, elegant silhouettes of a microphone and an acoustic guitar, perhaps with a number (for an age) or a name nestled between them. This pays homage to her musical journey across all eras.
6. "In My [Age] Era" Topper: A popular phrase that fits perfectly! Design a topper that says "In My [Age] Era" in the official Eras Tour font, perhaps with a subtle background shimmer or a gradient reflecting album colors. I used this for my niece's 13th birthday, and it was a massive hit – she felt so seen!
7. Confetti Explosion: A vibrant printable with a burst of "confetti" in colors representing the different eras, with a central "Happy Birthday" or "Swiftie" message. Think purples for *Speak Now*, reds for *Red*, pinks for *Lover*, etc.
8. The Eras Tour Stage: A printable backdrop for your cake, featuring a simplified version of the Eras Tour stage design, with a small "Taylor Swift" banner in front. This turns your cake into its own mini concert venue.
9. Setlist Inspired Lyrics: Choose a few iconic short lyrics from different eras and arrange them artfully on a printable topper. Think "Long Live," "All Too Well," "You Belong With Me," "Cruel Summer."
10. The Clock Face from *Midnights*: Incorporate the clock face design from the *Midnights* album, but instead of "Midnights," have it say "Eras Tour" or the birthday person's name. This offers a subtle yet powerful Eras nod.
11. Star-studded "Swiftie" Banner: A banner-style "Taylor Swift cake topper printable" featuring glittery stars, reflecting the dazzling nature of the tour, with "Swiftie" or "Happy Birthday" prominently displayed.
12. The "Surprise Song" Reference: A playful topper featuring a question mark and a guitar silhouette, hinting at the beloved surprise song segment of the tour. This is a deep cut for true fans!
When I was helping my friend plan her daughter's Eras Tour party, we combined the "In My [Age] Era" concept with the friendship bracelet garland. The result was a dynamic, multi-layered "Taylor Swift cake topper printable" that truly captured the spirit of the tour and made her daughter feel like the star of her own show. It was a little more effort but seeing her face light up made it all worthwhile!
Album-Inspired Aesthetics: Crafting Toppers for Every Era
Beyond the grand spectacle of the Eras Tour, each of Taylor Swift's albums offers a distinct aesthetic, a unique mood, and a treasure trove of visual inspiration for your "Taylor Swift cake topper printable." Tapping into a specific album allows for a more focused, thematic celebration that dedicated fans will absolutely adore. Let's delve into the rich tapestry of Taylor's discography for some truly iconic topper ideas.
Here are 12 album-specific inspirations to get your creative juices flowing:
1. *Taylor Swift* (Debut): Think country charm. A printable featuring a simple acoustic guitar, cowboy boots, or a whimsical "Teardrops on My Guitar" lyric in a rustic font. Green and gold color palettes are key here.
2. *Fearless*: All things gold and glittering! A printable featuring a castle silhouette, a crown, or bold "Fearless" lettering in a shimmering gold. Perhaps a subtle "You Belong With Me" reference. My personal favorite for a hopeful, romantic vibe.
3. *Speak Now*: Enchanted forest vibes, purple, and fairy tales. A printable with a whimsical castle, a key, or a "Long Live" banner in a magical, elegant font. The drama and romance of this era are perfect for a sophisticated cake topper.
4. *Red*: Autumnal colors, bold statements, and heartbroken-yet-iconic imagery. A printable featuring a red scarf, a bold "22" (if it's a 22nd birthday!), or "All Too Well" lyrics in a typewriter font. Think plaid patterns and deep reds.
5. *1989*: Pop art, cityscapes, seagulls, and a vibrant, retro aesthetic. A printable with "1989" in a bold, blocky font, a silhouette of Taylor with her iconic bob, or "Welcome to New York" script. Teal, pink, and black are your go-to colors.
6. *Reputation*: Dark, edgy, snake motifs, and bold black and white. A printable featuring a sleek black snake, "Reputation" in a stark, newspaper-style font, or subtle "Look What You Made Me Do" imagery. This is for the Swiftie who loves a powerful statement.
7. *Lover*: Pastel dreams, hearts, rainbows, and pure romance. A printable with a heart-shaped silhouette, a "Lover" banner in a delicate script, or a kaleidoscope of soft pinks, blues, and yellows. This is arguably the prettiest era for a cake topper!
8. *folklore*: Cottagecore, enchanted forests, muted tones, and intricate details. A printable featuring a whimsical cabin, delicate trees, or "Cardigan" lyrics in a rustic, elegant script. Think sepia tones and earthy colors.
9. *evermore*: Sister album to *folklore*, with darker, wintry, witchy vibes. A printable featuring a cozy campfire, a braided hairstyle silhouette, or "Willow" imagery. Browns, deep greens, and creams work beautifully.
10. *Midnights*: Celestial, moody, sparkling, and mysterious. A printable with a clock face, stars, a crescent moon, or "Midnights" in a glittering, ethereal font. Deep blues, purples, and silver are essential here.
11. "The Tortured Poets Department": The latest masterpiece! A monochrome palette, typewriter fonts, poetic references. A printable featuring a quill, an open book, or a line like "All's fair in love and poetry" in a classic, stark font. This era leans into intellectual elegance.
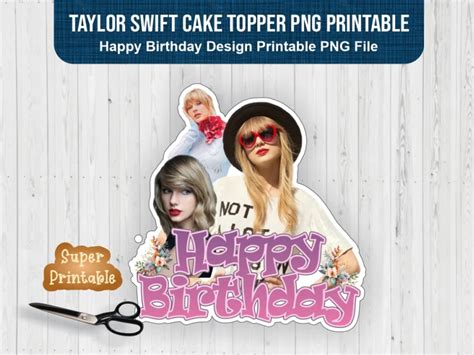
12. Album Cover Art: Sometimes, the simplest and most effective "Taylor Swift cake topper printable" is a direct reproduction of an album cover, stylized or simplified to fit the cake. Just ensure you have high-resolution images for the best print quality.
When I designed a topper for a friend's *folklore*-themed virtual birthday, I leaned into the minimalist cabin aesthetic. I created a layered printable with a subtle woodgrain background, a silhouette of a tiny cabin, and the word "folklore" in an elegant script. It wasn't flashy, but it perfectly captured the album's introspective charm, and she absolutely adored it.
DIY Magic: Crafting Your Own Printable Topper from Scratch
Feeling creatively inspired? Want to truly make your "Taylor Swift cake topper printable" one-of-a-kind? Then diving into the DIY world is for you! Creating your own printable allows for ultimate customization and a deeply personal touch. Don't worry if you're not a graphic design guru; there are plenty of user-friendly tools that make this process a breeze.
Here’s a step-by-step guide to crafting your own DIY printable topper:
1. Conceive Your Concept: Before you even open software, sketch out your idea. What era, lyric, or image are you focusing on? What colors? Will it be layered? This initial brainstorming saves so much time.
2. Choose Your Design Tool:
- Canva (Beginner-Friendly): Free and incredibly intuitive. Offers tons of templates, fonts, and graphics. Perfect for drag-and-drop design.
- PicMonkey / Adobe Express (Intermediate): More features than Canva, great for slightly more complex edits and access to stock photos.
- Procreate / Adobe Illustrator (Advanced): For experienced designers who want full control over vector graphics and custom illustrations.
- Cricut Design Space / Silhouette Studio (For cutting machines): If you have a cutting machine, these are essential for designing cut files.
3. Gather Your Assets:
- Fonts: Find Swiftie-esque fonts! "Dancing Script" for *Lover*, "Times New Roman" for *folklore*, "Georgia" or "Goudy Old Style" for *Debut*, "Trajan Pro" for *Speak Now*, "Engravers MT" for *Reputation*. Dafont.com is a great free resource.
- Graphics: Look for silhouettes, album artwork elements (e.g., *1989* seagulls, *Red* scarf, *Midnights* stars). Ensure they are high-resolution. Pinterest and free stock photo sites (Pexels, Unsplash) can be good starting points.
4. Design Your Topper:
- Set Dimensions: Typically, a cake topper is 5-8 inches wide. Set your canvas to these dimensions to ensure proper sizing.
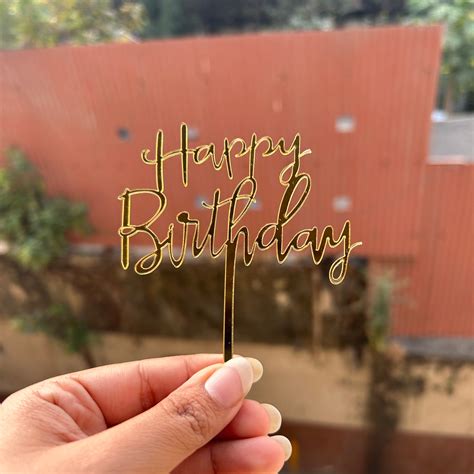
- Text First: Start with the main text (e.g., "Happy Birthday," "In My Swiftie Era"). Choose your font, size, and color.
- Add Graphics: Integrate your chosen images or silhouettes. Position them aesthetically around your text.
- Layering (Optional): If you want a multi-layered look, design each layer separately (e.g., a background shape, then text on top). You'll print these on different pieces of cardstock.
- Outline/Offset: For cutting machines, use the "offset" or "contour" feature to create a border around your design. This makes cutting easier and gives the topper more stability.
5. Color Palette: Stick to the chosen era's color scheme. Use hex codes if you want precision (e.g., #FF0000 for *Red*, #E6E6FA for *Lover* lavender).
6. Add Personal Touches: Incorporate the birthday person's name, age, or a specific inside joke (if appropriate). This makes the "Taylor Swift cake topper printable" truly unique.
7. Proofread and Review: Double-check all spellings, especially names and ages! Ensure everything is aligned and looks balanced.
8. Save in the Correct Format:
- PDF: Best for printing, maintains quality.
- PNG: Good for designs with transparent backgrounds (if you're layering or using a cutting machine).
- SVG: Essential for cutting machines like Cricut or Silhouette, as it's a vector file that scales without losing quality.
When I first started dabbling in DIY printables, I thought I needed expensive software. But honestly, Canva was a game-changer. I designed a simple "You Belong With Me" topper for a friend's wedding anniversary (they met at a karaoke night singing that song!), using a vintage microphone graphic and a sweet script font. It was easy, free, and incredibly heartfelt. Don't be afraid to experiment – that's where the real magic happens!
Where to Find the Perfect Taylor Swift Cake Topper Printable
Not everyone has the time or inclination to design from scratch, and that's perfectly okay! The good news is the internet is absolutely brimming with incredible resources where you can find a "Taylor Swift cake topper printable" that perfectly fits your vision. From dedicated fan artists to commercial marketplaces, you have a wealth of options at your fingertips.
Here’s a guide to navigating the digital landscape for your perfect printable:
1. Etsy (The Swiftie Goldmine): This is arguably the number one destination. Search "Taylor Swift cake topper printable," "Eras Tour cake topper SVG," or "custom Taylor Swift birthday topper." You'll find:
- Individual Designers: Many talented artists create unique, high-quality designs. You can often request customizations.
- Instant Downloads: Purchase, download, print, cut – easy peasy!
- Personalized Options: Many sellers offer to personalize the topper with a name and age before sending you the file.
- Bundles: Look for bundles that include matching cupcake toppers, banners, or favor tags for a cohesive party theme.
2. Pinterest (Inspiration & Freebies): A visual treasure trove. Search for "Taylor Swift cake topper free printable" or "DIY Taylor Swift party decorations." You'll find:
- Inspiration Boards: Endless ideas for designs and themes.
- Links to Blogs: Many craft bloggers offer free printables as part of their party guides.
- Direct Download Links: Some pins will link directly to free PDF downloads. Always check the source for copyright and quality.
3. Dedicated Fan Blogs & Websites: Many Swiftie fan sites or craft blogs specifically catering to pop culture themes will occasionally offer free or low-cost printables. A quick Google search for "[Album Name] free printable party decorations" might yield some gems.
4. Canva's Template Library (With a Twist): While Canva is great for DIY, you can also search its template library. While you might not find an *official* Taylor Swift template, you can find general music, birthday, or pop-themed templates that you can easily adapt and customize with Swiftie elements, fonts, and colors.
5. Design Bundles / Creative Market: These platforms offer professional-grade graphics, fonts, and SVG files. While not exclusively Swiftie, you can find elements (e.g., glitter textures, specific fonts, musical instrument graphics) that you can combine to create your own unique "Taylor Swift cake topper printable." This is more for the intermediate DIYer.
6. Facebook Groups & Forums: Join Swiftie crafting or party planning groups on Facebook. Members often share free printables they've made, offer advice, or point you to great resources. Just be mindful of sharing copyrighted material.
7. YouTube Tutorials: Many YouTubers offer free printable links in their video descriptions when they demonstrate how to make a "Taylor Swift cake topper printable." These often come with step-by-step assembly instructions.
8. Instagram Designers: Search hashtags like #swiftieprintables, #taylorswiftcaketopper, or #erastourparty. Many small business owners and designers showcase their work here and link directly to their shops (often Etsy).
9. Online Print Shops with Design Services: Some online printing services (e.g., VistaPrint, Zazzle) allow you to upload your own design *or* use their design tools to create something from scratch. This can be a good option if you want to order physical toppers directly.
10. Custom Design Services: If you have a very specific vision and can't find it anywhere, consider hiring a graphic designer on platforms like Fiverr or Upwork to create a bespoke "Taylor Swift cake topper printable" for you. This is a higher investment but guarantees a unique product.
11. Local Craft Stores (for inspiration): While not for printables, stores like Michaels or Hobby Lobby often have pre-made cardstock cutouts (stars, numbers, letters) that you can combine with a printed element to create a layered effect.
12. AI Image Generators (Carefully!): Newer tools like Midjourney or DALL-E can generate unique images based on text prompts. You could try prompting "Taylor Swift Eras Tour cake topper design" to get a starting point, but always be mindful of copyright and likeness issues. This is an emerging area.
I once found the most perfect *Lover*-themed "Taylor Swift cake topper printable" on Etsy – it was a beautiful pastel rainbow arch with delicate gold lettering. The designer even customized the age for me. It saved me hours of design time, and the quality was impeccable. Don’t hesitate to support independent artists who pour their creativity into these designs!
Beyond the Cake: Creative Uses for Your Printable Topper

While a "Taylor Swift cake topper printable" is designed for, well, cakes, its versatility doesn't have to end there! These beautiful printables can be repurposed and utilized in countless creative ways to elevate your entire Swiftie celebration. Thinking outside the cake box (pun intended!) allows you to maximize your effort and create a cohesive, immersive party experience.
Here are 12 ingenious ways to use your printable beyond the cake:
1. Cupcake Toppers: Scale down your main cake topper design (or individual elements from it) to create matching cupcake toppers. This is a classic move for a cohesive dessert table.
2. Centerpiece Accents: Attach your printable to a dowel rod and place it in floral arrangements, a jar filled with friendship bracelets, or a themed vase as a mini centerpiece.
3. Party Favor Tags: Print smaller versions of your topper design and punch a hole to attach them to party favor bags or boxes. A "Thanks for celebrating in my Swiftie Era!" tag would be adorable.
4. Photo Booth Props: Enlarge your design (e.g., a massive "1989" or a *Reputation* snake) and attach it to a sturdy stick for a fun photo booth prop. Get ready for some epic selfies!
5. Gift Bag Decorations: Use your printable as an embellishment on plain gift bags. It adds a custom, high-end touch without much effort.
6. Scrapbook or Journal Embellishment: If the celebration is for a dedicated Swiftie, they can carefully remove the topper and use it to decorate a scrapbook page or their personal journal as a keepsake.
7. Wall Decorations/Banners: Print several elements of your design, string them together, and hang them as a mini banner above the dessert table or as part of a larger party backdrop.
8. Drink Stirrers: Downsize tiny elements (like stars, hearts, or album icons) and glue them to the top of cocktail stirrers for a themed beverage bar.
9. Food Labels: If you're having a buffet or snack table, print small versions of your topper design and use them to label dishes (e.g., "Lavender Haze Popcorn," "Bad Blood Orange Juice").
10. Card Embellishment: Use a smaller version of your "Taylor Swift cake topper printable" to decorate a handmade birthday card for the guest of honor.
11. Table Scatter: Print tiny, intricate elements (stars, music notes, tiny album covers) and scatter them across the party table for a whimsical, detailed look.
12. Framed Keepsake: If the topper is particularly beautiful and personalized, consider printing a second copy and framing it as a small piece of art for the birthday person's room. I did this for my sister after her *Midnights* release party, and it's now proudly displayed on her bookshelf!
One time, I had a beautiful *Lover* cake topper that featured a delicate butterfly. After the party, I carefully cut out the butterfly element and used it to decorate a plain white gift box for another occasion. It added a touch of unexpected elegance and kept the Swiftie spirit alive! Don't let your beautiful designs be single-use wonders; let them flutter into other parts of your celebration.
Personalizing Your Swiftie Statement: Customization Tips & Tricks
A "Taylor Swift cake topper printable" is already special, but a *personalized* one? That's next level. Customization allows you to infuse the recipient's unique personality, age, or even inside jokes into the design, making it a truly memorable keepsake. This is where your Swiftie knowledge and a little bit of creativity truly shine.
Here are 12 ways to personalize your printable topper:
1. Name & Age Integration: The most common and impactful personalization. Integrate the birthday person's name and age directly into the design (e.g., "Happy 30th Birthday, Sarah!", "In My 16th Era").
2. Favorite Era Focus: If the recipient has a *definitive* favorite era, make that the central theme. For example, if they're a *folklore* stan, lean heavily into that aesthetic with specific fonts and imagery.
3. Signature Lyric: Choose a short, meaningful lyric that resonates with the recipient or the occasion. "Long Live," "This Is Our Place, We Make The Rules," "It's A Love Story" – the options are endless.
4. "In My [Age] Era" Adaptation: This trending phrase is perfect for personalization. Simply replace "[Age]" with the actual age, and consider adding their name for an extra touch.
5. Inside Jokes/References: If you share a specific Swiftie inside joke (e.g., "A bottle of wine," "Not a lot going on at the moment"), subtly incorporate it if appropriate for the celebratory tone. This is my go-to for really making someone feel special!
6. Color Palette Shift: While album colors are iconic, you can subtly shift them to the recipient's favorite colors while maintaining the overall aesthetic. For example, a *Lover* theme but with their favorite shade of teal mixed in.
7. Add a Personal Photo (Carefully!): For a truly unique touch, you could incorporate a small, well-cropped photo of the birthday person, perhaps in a frame that matches the chosen Swiftie era. Just ensure the resolution is high.
8. Birthstone Colors/Accents: If the recipient loves their birthstone, you could incorporate subtle glitter accents or background colors that match it, blending it with the Swiftie theme.
9. Hobby Integration: If the Swiftie also loves cats, books, gaming, or a specific sport, you could find a way to subtly include a small graphic representing that hobby alongside the Taylor Swift elements.
10. Custom Silhouette: Instead of Taylor's silhouette, if you're feeling adventurous and have design skills, you could try creating a simplified silhouette of the birthday person!
11. Spotify Code Integration (Advanced): Generate a Spotify code for their favorite Taylor Swift song or album. Print it as a small, discreet element on the topper. When scanned, it plays the music! This is a truly modern and interactive personalization.
12. Handwritten Element (Post-Print): Print the main design, but leave a small blank space. After printing, use a beautiful metallic or glitter pen to hand-write a special message, date, or signature. This adds a tangible, personal touch.
I once personalized a "Taylor Swift cake topper printable" for my sister who's obsessed with *folklore* and also loves to read. I designed a topper that featured a minimalist cabin, her age, and a tiny stack of books next to it. It was subtle but incredibly thoughtful, and she still talks about how much she loved that detail. It’s these small, tailored touches that turn a good topper into a great one.
Printing Perfection: Tips for a Flawless Finish Every Time
You've spent hours choosing or designing the perfect "Taylor Swift cake topper printable," and now it's time for the grand finale: printing! This step is crucial for ensuring your topper looks as amazing in real life as it does on your screen. Don't let a bad print job ruin all your hard work. With a few key tips, you can achieve professional-looking results right from home.
Here are 12 essential tips for printing your cake topper flawlessly:
1. High-Quality Printer: If possible, use a good quality inkjet printer. Laser printers work too, but inkjet often provides richer colors, especially for photos and vibrant graphics.
2. Best Paper Choice - Cardstock is King:
- White Cardstock (65lb-110lb): This is your go-to. It's sturdy enough to stand up on a cake and provides a crisp base for colors. 80lb is a good all-rounder.
- Glossy Photo Paper (Heavyweight): For a really vibrant, professional look, especially if your design has photos or deep colors. Make sure it's thick enough to stand up.
- Glitter Cardstock (for backing/layers): You can print your design on white cardstock and then glue it onto glitter cardstock for an extra sparkly effect without printing directly on glitter.
3. Printer Settings are Paramount:
- "Best" or "High Quality" Setting: *Always* select the highest print quality option in your printer's settings. This uses more ink but yields much better results.
- Correct Paper Type: Select "Cardstock," "Photo Paper," or "Matte Paper" in your printer settings to ensure the ink is applied correctly and doesn't bleed.
- Scale to 100%: Do not let your printer "fit to page" or scale down the image. Print at 100% to maintain the intended size.
4. Check Ink Levels: There's nothing worse than running out of ink halfway through a crucial print. Ensure all cartridges have sufficient ink.
5. Use Fresh Ink: Older ink cartridges can sometimes produce dull or streaky prints. If your ink has been sitting for a long time, consider replacing it.
6. Test Print (If Possible): If you have multiple designs or are unsure about colors, do a small test print on regular paper first to check layout and color accuracy before using your expensive cardstock.
7. Allow Ink to Dry Completely: Especially with glossy paper, ink needs time to set. Don't touch or cut your print immediately after