Oh, the humble tissue paper! For years, it’s been the unsung hero of gift wrapping, the silent supporter of delicate items, and the quiet backdrop for countless creative projects. But what if I told you that this delicate, translucent wonder holds the key to unlocking a whole new realm of personalization, branding, and artistic expression? What if you could take your own designs, your own patterns, your own heartfelt messages, and *print them directly onto tissue paper*? Trust me, the world of "printable tissue paper" is not just a niche craft; it's a game-changer for anyone looking to add that extra sprinkle of magic to their creations, products, or gifts.
I remember the first time I stumbled upon the idea. I was trying to create some truly unique packaging for a handmade gift, something that felt as personal and special as the item inside. Regular gift wrap felt too rigid, and plain tissue paper, while lovely, just didn't scream "me." That's when I had my "aha!" moment. Could I *print* on it? My initial attempts were, shall we say, a delicate disaster. Wrinkles, ink smears, paper jams – you name it, I probably experienced it. But through persistence, research, and a fair bit of trial and error (and a few ruined sheets of tissue paper!), I discovered the incredible potential of this medium. This guide is born from those learning curves, from the desire to save you hours of frustration, and from a genuine passion for seeing your creative visions come to life.
Whether you're a small business owner looking to elevate your brand's unboxing experience, a passionate crafter seeking new artistic avenues, or someone who simply loves giving gifts with a personal touch, this comprehensive guide is for you. We're going to dive deep into every facet of printable tissue paper, from understanding the different types and choosing the right equipment, to mastering printing techniques, exploring innovative uses, and even turning your creativity into profit. We’ll cover beginner basics and advanced tips, ensuring that no matter your experience level, you'll walk away feeling empowered and inspired. So, grab a cup of your favorite beverage, get comfortable, and let's embark on this exciting journey into the vibrant world of custom printed tissue paper!
---
Table of Contents

- [Understanding Printable Tissue Paper: The Basics & Beyond](#understanding-printable-tissue-paper-the-basics--beyond)
- [Choosing Your Canvas: Types of Tissue Paper for Printing](#choosing-your-canvas-types-of-tissue-paper-for-printing)
- [The Printer's Playground: Equipment & Inks for Success](#the-printers-playground-equipment--inks-for-success)
- [Designing Your Dreams: Software & Creative Inspiration](#designing-your-dreams-software--creative-inspiration)
- [The Art of Printing: Step-by-Step Guides for Flawless Results](#the-art-of-printing-step-by-step-guides-for-flawless-results)
- [Beyond Gift Wrap: Innovative Uses for Printable Tissue Paper](#beyond-gift-wrap-innovative-uses-for-printable-tissue-paper)
- [Troubleshooting & Tips: Avoiding Common Pitfalls](#troubleshooting--tips-avoiding-common-pitfalls)
- [Ethical & Sustainable Printing: Making Conscious Choices](#ethical--sustainable-printing-making-conscious-choices)
- [Monetizing Your Creativity: Selling Custom Tissue Paper](#monetizing-your-creativity-selling-custom-tissue-paper)
- [Advanced Techniques & Next-Level Personalization](#advanced-techniques--next-level-personalization)
- [How to Choose the Best Printable Tissue Paper Approach for Your Needs](#how-to-choose-the-best-printable-tissue-paper-approach-for-your-needs)
- [Common Pitfalls to Avoid When Working with Printable Tissue Paper](#common-pitfalls-to-avoid-when-working-with-printable-tissue-paper)
- [Advanced Tips for Experts: Pushing the Boundaries of Printable Tissue Paper](#advanced-tips-for-experts-pushing-the-boundaries-of-printable-tissue-paper)
- [Conclusion: Your Journey into Custom Tissue Paper Begins Now](#conclusion-your-journey-into-custom-tissue-paper-begins-now)
---
Understanding Printable Tissue Paper: The Basics & Beyond
At its heart, "printable tissue paper" refers to the process of applying custom designs, logos, patterns, or text onto standard or specially prepared tissue paper using a home printer or professional services. It's about transforming a simple, often overlooked material into a powerful tool for branding, personal expression, and adding a luxurious touch. But it's more than just slapping ink onto paper; it's about understanding the nuances of the material and the printing process to achieve truly stunning results.
Here's what makes this medium so fascinating and versatile:
- The Delicate Nature of the Material: Tissue paper is incredibly thin, lightweight, and often somewhat translucent. This inherent delicacy is both its charm and its challenge. It requires a gentle touch and specific handling techniques to prevent tearing, wrinkling, or jamming in a printer. The thinness also means ink can bleed or show through if not managed correctly, which can be an artistic effect or a frustrating flaw depending on your intent.
- The Power of Personalization: This is where printable tissue paper truly shines. Imagine wrapping a handmade soap with tissue paper adorned with your brand's intricate logo, or presenting a birthday gift wrapped in tissue paper featuring photos of the recipient. The ability to customize opens up endless possibilities, turning ordinary packaging into a memorable experience.
- A Cost-Effective Branding Solution: For small businesses, custom-printed packaging can often be prohibitively expensive, especially for smaller runs. Printing your own tissue paper, or using a service for smaller batches, offers a significantly more affordable way to elevate your brand's presentation, making even simple products feel premium. I once helped a friend start her Etsy shop, and custom tissue paper was the *first* branding element we tackled. It made a world of difference in her unboxing videos!
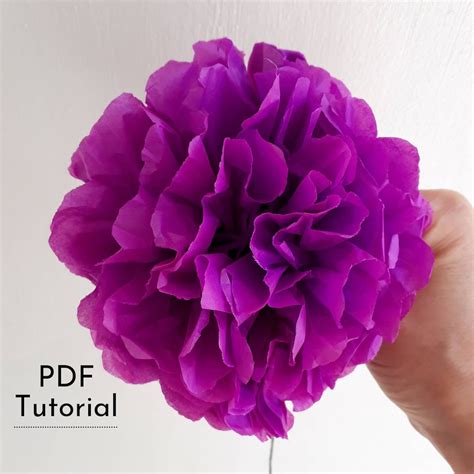
- Versatility in Application: While often associated with gift wrapping, printable tissue paper has a much broader scope. Think about using it for decoupage, creating unique luminaries, adding texture to scrapbooking projects, or even making custom party decorations. Its adaptability across various crafts and applications is a key reason for its growing popularity.
- Environmental Considerations: With a growing global awareness of sustainability, many are looking for eco-friendly alternatives. Some printable tissue papers are made from recycled content and are biodegradable, offering a more environmentally conscious choice for packaging and crafting. This allows you to personalize without guilt.
- Achieving a Luxurious Feel: There's something inherently luxurious about custom-printed items. When a customer receives a product wrapped in tissue paper featuring a carefully chosen design or logo, it communicates attention to detail and a higher perceived value. It elevates the entire product experience from merely transactional to truly special.
- Expressing Your Unique Style: Beyond branding, printable tissue paper is a fantastic canvas for pure self-expression. Want to create unique patterns for your art journal? Design a bespoke backdrop for your next craft fair display? Or simply wrap a special book for a friend in a design that speaks directly to their soul? This medium allows you to imbue every project with your personal aesthetic.
- The "Unboxing" Experience: In the age of social media, the unboxing experience is paramount. Beautifully printed tissue paper can transform a simple package into a shareable moment, encouraging customers to post about their purchase and organically promote your brand. It's not just packaging; it's part of the marketing story.
- A Gateway to Advanced Crafting: For those new to crafting with paper, printing on tissue paper can be an accessible entry point. The techniques learned, such as careful handling, understanding printer settings, and basic design principles, are transferable to many other paper crafts. It builds confidence while creating beautiful results.
- Problem-Solving with Customization: Imagine needing a specific pattern or color of tissue paper that simply doesn't exist commercially. Instead of compromising, you can create it yourself. This problem-solving aspect makes printable tissue paper an invaluable tool for designers, crafters, and small business owners who refuse to settle for "almost right."
- Learning Curve and Rewards: Yes, there's a learning curve, especially if you're tackling it at home. But the satisfaction of holding a perfectly printed sheet of your own design, knowing you created something truly unique, is incredibly rewarding. It’s a craft that truly pays off with stunning results.
Choosing Your Canvas: Types of Tissue Paper for Printing
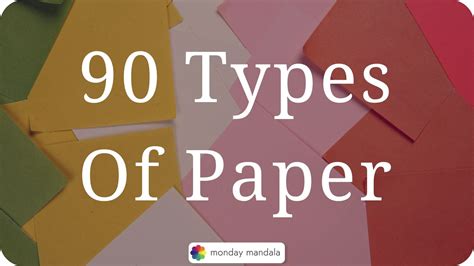
Not all tissue paper is created equal, especially when it comes to printing. The subtle differences in weight, finish, and composition can significantly impact your printing results. Selecting the right "printable tissue paper" is the first critical step towards success, influencing everything from ink absorption to how well it feeds through your printer.
Here are the key types and considerations:
- Standard Craft Tissue Paper: This is the most common type you'll find in craft stores. It's usually very lightweight (around 10-17gsm) and comes in a wide array of colors. While it *can* be printed on, its extreme thinness makes it prone to wrinkling, tearing, and jamming. It also tends to absorb ink quickly, which can lead to bleeding or less vibrant colors. This is often the cheapest option, so it’s great for practice runs where you don’t mind a few mishaps.
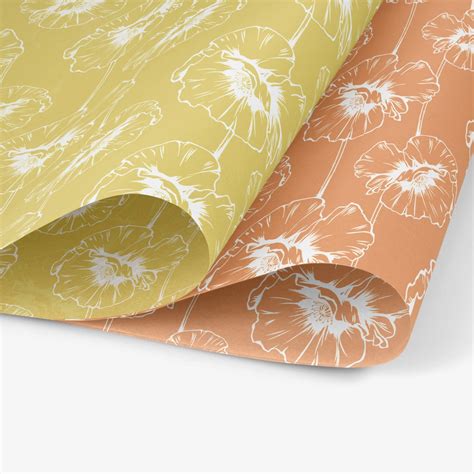
- Gift-Grade Tissue Paper: Slightly thicker and often smoother than craft tissue, gift-grade tissue (around 17-20gsm) offers a better surface for printing. It’s still delicate but often has a bit more integrity, making it easier to handle. You might find this in rolls or larger sheets, often with a subtle sheen or a slightly more refined finish. This is my personal go-to for most home printing projects because it strikes a good balance between cost and print quality.
- Acid-Free Tissue Paper: Essential for archival projects or protecting sensitive items, acid-free tissue paper prevents yellowing and degradation over time. It's often white or natural colored and can vary in thickness. If you're printing photos or designs that need to last, or if the tissue will be in direct contact with precious items like photographs, art prints, or delicate fabrics, this is the type to choose.
- Specialty/Coated Tissue Paper: Some manufacturers produce tissue paper specifically designed for printing. These might have a very light coating that helps with ink adhesion and prevents bleeding, resulting in sharper images and more vibrant colors. They are typically slightly heavier than standard tissue, making them more robust for printer feeding. While more expensive, the print quality is often superior.
- Recycled Tissue Paper: For the environmentally conscious, recycled tissue paper is a fantastic option. Its texture might be slightly different – sometimes a little coarser or with visible flecks – but it prints well. It’s an excellent choice for eco-friendly branding or crafts, ensuring your beautiful creations also align with your values. My brand uses recycled tissue exclusively, and customers always appreciate the commitment.
- Waxed Tissue Paper: While not commonly printed on directly, waxed tissue paper offers a degree of moisture resistance. Printing on it can be challenging due to the non-absorbent surface, often requiring specialized inks or heat-setting. It's usually not recommended for standard home printing, but for specific applications where moisture protection is key, it might be worth exploring with professional services.
- Translucent vs. Opaque: Consider the translucency of the tissue paper. Highly translucent tissue will allow background colors or items to show through, which can be a desired effect (e.g., for luminaries) or a drawback (e.g., if you need your design to pop against a dark item). More opaque tissue will give your prints a bolder appearance.
- GSM (Grams per Square Meter): This is a measure of paper thickness. For tissue paper, it typically ranges from 10gsm to 30gsm. Lower GSM means thinner, more delicate paper; higher GSM means thicker, more robust paper. For home printing, aiming for 17-25gsm often yields the best balance of printability and "tissue paper feel."
- Color of the Tissue Paper: While white tissue paper is the most common canvas for vibrant prints, don't shy away from colored tissue paper! Printing a dark design on light-colored tissue can create beautiful, subtle effects. Just remember that the tissue paper color will interact with your ink colors, so white inks won't show up on white tissue, and colors will be muted or altered on dark tissue.
- Rolls vs. Sheets: Tissue paper comes in both rolls and pre-cut sheets. For home printing, pre-cut sheets (e.g., 8.5" x 11" or A4) are almost always necessary for feeding into a standard printer. Rolls are great for larger projects but require careful cutting to size.
- Surface Finish (Matte vs. Gloss): Most tissue paper is matte, which is ideal for absorbing ink from inkjet printers. Some specialty tissue might have a very subtle gloss, which could impact ink drying times and adhesion, particularly with laser printers. Always check the manufacturer's recommendations.
- Bleed Resistance: Some tissue papers are treated to be more bleed-resistant, meaning the ink won't spread out excessively. This is crucial for crisp lines and detailed designs. Look for descriptions that mention "low bleed" or "good for printing."
The Printer's Playground: Equipment & Inks for Success

Choosing the right printer and understanding ink types are as crucial as selecting the right "printable tissue paper." Your equipment will dictate the quality of your prints, the ease of the process, and ultimately, your satisfaction with the results. This isn't just about having *a* printer; it's about having the *right* printer for the job.
Here’s a deep dive into the equipment and ink considerations:
- Inkjet Printers: The Home Crafter's Best Friend:
- Why they work: Inkjet printers spray microscopic droplets of liquid ink onto the paper. This method is generally more forgiving with tissue paper because the ink sits on the surface and absorbs rather than fusing with heat. They are excellent for vibrant colors and photographic quality.
- Key features to look for: A straight-through paper path (often found in printers with a rear manual feed slot) is *gold*. This minimizes bending the delicate tissue, drastically reducing jams and wrinkles. Also, look for printers that allow you to adjust paper thickness settings.
- My experience: I've had the most success with an older Epson Workforce model that has a fantastic rear-feed tray. It bypasses all the rollers that typically mangle tissue paper, allowing for a much smoother journey. If your printer only has a bottom tray that curves the paper, you'll need to use a carrier sheet (more on that later).
- Laser Printers: A More Challenging Option:
- Why they are tricky: Laser printers use toner (powdered ink) and fuser heat to bond the toner to the paper. The heat can cause thin tissue paper to wrinkle, warp, or even melt if it's too delicate. The static charge used to attract toner can also cause issues.
- When they might work: If you have a laser printer, you might still achieve results, especially with slightly thicker, more robust tissue paper (20gsm+). Stick to simple, text-based designs or patterns with minimal toner coverage to reduce heat impact.
- Warning: Always test on scrap pieces first! You don't want to melt tissue paper inside your printer – that's a mess you truly want to avoid.
- Professional Printing Services:
- When to use them: For large runs, extremely high-quality prints, specific color matching, or specialty tissue papers (like metallic inks or very large sheets), professional services are the way to go. They have industrial-grade equipment designed to handle delicate materials and produce consistent results.
- Benefits: No fuss, no jams, superior quality, and often more cost-effective for bulk orders. They also often offer a wider range of tissue paper colors and finishes than you might find for home use.
- Consideration: Minimum order quantities and lead times.
- Ink Types for Inkjet Printers:
- Dye-based inks: These are common in consumer inkjet printers and produce vibrant, true-to-color prints. They absorb well into tissue paper but can be prone to smudging if exposed to moisture before drying, and they can fade over time with UV exposure.
- Pigment-based inks: Often found in higher-end or "photo" inkjet printers, pigment inks are more resistant to water and fading, offering archival quality. They sit more on the surface of the paper, which can be an advantage for preventing bleed-through on thin tissue. If your printer uses pigment ink, you're likely to get crisper results.
- Toner for Laser Printers:
- Toner is a dry powder. The main concern here is not the toner itself, but the heat of the fuser unit that bonds it to the paper. Ensure your tissue paper can withstand the heat without warping or wrinkling excessively.
- Printer Settings are Key:
- Paper Type: Always select the thinnest paper setting your printer offers (e.g., "Plain Paper Thin," "Transparency," or "Specialty Matte Paper"). This tells the printer to use less ink and often to feed the paper more slowly.
- Print Quality: For best results, choose "Best" or "High" quality. This often means more ink droplets, but also finer detail. Experiment to find the balance between quality and potential bleed.
- Color Management: Ensure your design software and printer settings are aligned for color profiles (e.g., sRGB or Adobe RGB) to get the most accurate color reproduction.
- Maintenance: A clean printer is a happy printer. Dust and debris can cause jams, especially with delicate tissue paper. Regularly clean your printer's rollers and print heads according to the manufacturer's instructions. This is crucial for preventing those annoying ink streaks and paper jams.
- Testing, Testing, Testing: Before committing to a large print run, always perform test prints on scrap pieces of the *exact same tissue paper* you plan to use. Adjust settings, check for ink bleed, and ensure the paper feeds smoothly. This will save you countless headaches and wasted materials. This is one of those times where patience truly is a virtue.
Designing Your Dreams: Software & Creative Inspiration
The magic of "printable tissue paper" truly comes alive in the design phase. This is where your imagination takes flight, transforming a blank canvas into a personalized masterpiece. Whether you're a seasoned graphic designer or a complete beginner, there are tools and techniques to help you create stunning visuals.
Here’s how to design your dreams and find endless inspiration:
- User-Friendly Design Software for Beginners:
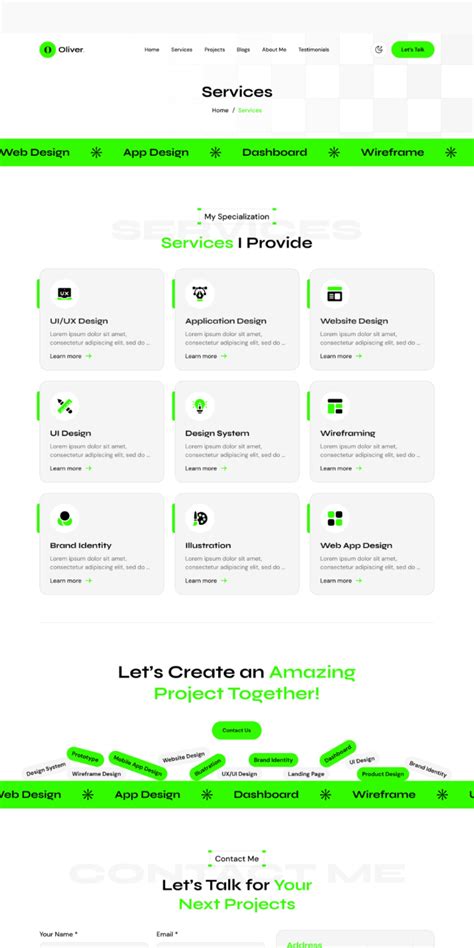
- Canva: This is my absolute favorite for quick, beautiful designs. Canva offers a vast library of templates, fonts, and graphics, making it incredibly easy to create professional-looking patterns, logos, or text-based designs. You can easily upload your own images and resize them. It’s browser-based and has a fantastic free tier.
- PicMonkey/FotoJet: Similar to Canva, these tools offer drag-and-drop interfaces with many templates for various projects. Great for adding text overlays, simple graphics, or creating collages.
- Microsoft Word/Google Docs: Don't underestimate these! For simple text, repeating patterns, or basic image placement, Word or Docs can work perfectly. Set up your page size, insert images, and arrange them as needed. It might be basic, but it's accessible.
- Advanced Design Software for Experts:
- Adobe Illustrator: The industry standard for vector graphics. Ideal for creating scalable logos, intricate patterns, and sharp typography that will look crisp no matter the size. If you're designing for a brand or need complex, editable designs, this is your tool.
- Adobe Photoshop: Excellent for raster images (photos, detailed illustrations). Use it for manipulating images, creating artistic effects, or designing photo-realistic patterns. Be mindful of resolution to ensure your prints aren't pixelated.
- Affinity Designer/Photo: Great, more affordable alternatives to Adobe products, offering similar robust features for both vector and raster design.
- Key Design Considerations for Tissue Paper:
- Less is More: Because tissue paper is thin and somewhat translucent, overly complex or dark, heavy designs can lead to ink bleed-through or a muddy appearance. Often, simple patterns, minimalist logos, or elegant text work best.
- Color Palette: Consider how colors will appear on the chosen tissue paper. If printing on colored tissue, remember that the base color will affect your printed colors (e.g., yellow ink on blue tissue will look green). Lighter ink colors might be subtle on white tissue but disappear on darker colored tissue.
- Pattern Repetition: For gift wrap or continuous designs, create seamless repeating patterns. Many design software options have tools for this. Test how your pattern repeats to avoid awkward breaks.
- Font Choice: Legible fonts are crucial. Avoid overly thin or intricate fonts that might bleed and become unreadable. Bold, clear fonts often work best.
- Image Resolution: For images, always use high-resolution files (at least 300 DPI) to prevent pixelation, especially if they are a central part of your design.
- Bleed Area: If your design extends to the very edge of the tissue paper and you want no white borders, add a "bleed" area (an extra margin of design that will be trimmed off). This ensures your design goes edge-to-edge.
- Creative Inspiration Hubs:
- Pinterest: An absolute goldmine for visual inspiration! Search "custom tissue paper," "pattern design," "packaging ideas," or "decoupage ideas." Create mood boards to save your favorite looks.
- Etsy: Look at small businesses selling handmade goods. Pay attention to their packaging. Many use custom tissue paper to enhance their brand.
- Instagram: Follow crafters, designers, and small businesses. Hashtags like #custompackaging, #printedtissuepaper, #DIYcrafts, #brandpackaging will lead you to a treasure trove of ideas.
- Design Blogs & Websites: Websites like Creative Market, Behance, or design blogs often showcase innovative uses of print and paper, which can spark new ideas for your tissue paper projects.
- Nature & Everyday Life: Sometimes the best inspiration is right in front of you. A leaf pattern, a geometric design on a building, a quote that resonates with you – keep your eyes open for patterns, textures, and ideas everywhere.
- Harnessing Your Brand's Story: For businesses, your printable tissue paper isn't just decoration; it's an extension of your brand story. Is your brand playful? Elegant? Eco-conscious? Let your design reflect that. Use your logo, brand colors, or even a subtle watermark of your brand values. I love seeing how brands use tissue paper to reinforce their mission statement or add a fun, quirky element.
- Personal Touches for Gifts: When designing for gifts, think about the recipient. Do they have a favorite hobby, animal, or inside joke? Incorporating these elements makes the gift feel truly personal. For my niece's birthday, I printed tissue paper with tiny illustrations of her favorite book characters – the look on her face was priceless!
- Experiment with Textures and Overlays: Don't limit yourself to flat graphics. Consider incorporating subtle textures into your design (e.g., a linen texture overlay) or using transparency effects to create a layered look. These can add depth and sophistication to your "printable tissue paper."
- Mock-ups are Your Friend: Before printing, create digital mock-ups of your design on a tissue paper background. This will give you a realistic preview of how your design will look when printed and allow you to make adjustments before wasting precious materials.
The Art of Printing: Step-by-Step Guides for Flawless Results
Now for the exciting part: bringing your designs to life on "printable tissue paper"! This is where technique truly matters. A little preparation and patience will go a long way in transforming delicate tissue into beautifully printed art.
Here’s how to master the art of printing, whether you're a beginner or looking to refine your process:
- Method 1: The Carrier Sheet Technique (Most Common for Home Printers)
1. Prepare Your Tissue Paper: Carefully cut your tissue paper to the exact size of your carrier sheet (e.g., 8.5" x 11" or A4). Handle it gently to avoid wrinkles.
2. Choose Your Carrier Sheet: Select a sturdy, plain sheet of printer paper (60-80lb cardstock works best) or even an old, used piece of copy paper. The key is that it's stiff enough to guide the tissue through the printer but not so thick that it causes jams.
3. Attach the Tissue Paper: Using a temporary adhesive (like repositionable spray adhesive, a glue stick on the edges, or painter's tape on the very edges), adhere the tissue paper smoothly onto the carrier sheet. Ensure there are no wrinkles or bubbles. The tissue should be flat and taut. Make sure the adhesive is only on the edges, as too much will cause wrinkles or even stick to your printer rollers.
4. Load the Printer: Place the carrier sheet (with the tissue paper side facing *up* for most top-loading printers, or *down* for bottom-loading trays) into your printer's manual feed slot or main paper tray. If using a rear-feed slot, ensure it’s loaded straight.
5. Adjust Printer Settings: In your computer's print dialog box, select the "Paper Type" as the thinnest option available (e.g., "Plain Paper Thin," "Transparency," or "Specialty Matte"). Set the print quality to "High" or "Best."
6. Print! Send your design to the printer. Monitor the process closely to ensure the paper feeds smoothly. If it jams, gently remove it without tearing.
7. Remove Tissue Paper: Once printed, carefully peel or un-tape the tissue paper from the carrier sheet. Allow the ink to dry completely before handling extensively to prevent smudging. This method is incredibly reliable, and it's how I managed to print custom designs for my sister's wedding favors without a single jam.
- Method 2: Straight-Through Feed (If Your Printer Supports It)
1. Prepare Tissue Paper: If your printer has a dedicated straight-through paper path (often a manual feed slot at the back), you might be able to feed the tissue paper directly without a carrier sheet. This requires perfectly cut, wrinkle-free tissue.
2. Load Carefully: Gently load a single sheet of tissue paper into the manual feed slot, ensuring it's straight and doesn't buckle.
3. Adjust Printer Settings: As with the carrier sheet method, select the thinnest paper type and high print quality.
4. Print & Dry: Print your design. This method is faster and less fuss if your printer is cooperative. Let it dry completely.
- Method 3: Professional Printing Services (For Large Quantities or Complex Needs)
1. Prepare Your Files: Ensure your design files are in the correct format (usually PDF, AI, or EPS for vector; high-res JPG or TIFF for raster), with proper resolution, color profiles, and bleed settings as specified by the printing service.
2. Choose Tissue Paper & Ink: Discuss options with the printer. They often have a wider selection of tissue paper weights, colors, and even specialty inks (like metallic or spot colors).
3. Proofing: Always request a digital proof, and ideally, a physical sample (if budget/time allows) before committing to the full print run. This ensures colors and designs are accurate.
4. Order & Delivery: Once approved, place your order and await your beautifully printed "printable tissue paper" to be delivered. The peace of mind of professional quality and not having to deal with tricky printing yourself is often worth the investment for larger quantities.
- Essential Printing Tips for All Methods:
- Work in a Clean Environment: Dust, pet hair, or crumbs can easily stick to tissue paper and cause print imperfections or jams.
- Handle with Care: Always pick up tissue paper by the edges to avoid transferring oils from your fingers or creating creases.
- Print One Sheet at a Time: Never load a stack of tissue paper, even with carrier sheets. Print one, remove, then load the next. This prevents misfeeds.
- Allow for Drying Time: Inkjet inks, especially on thin, absorbent tissue paper, need time to dry. Don't stack printed sheets immediately. Lay them flat on a clean surface or hang them to dry completely to prevent smudging.
- Test Ink Coverage: If your design has large areas of solid color, test a small section first. Heavy ink coverage can lead to more bleeding or wrinkling. You might need to adjust your design or printer settings.
- Consider Mirroring (for Decoupage/Transfer): If you plan to use the printed tissue paper for decoupage where the printed side will be glued down, or if you're attempting a transfer technique, remember to mirror your image in your design software before printing.
- Troubleshooting Jams: If a jam occurs, *gently* pull the paper out in the direction it was feeding. Avoid tearing it inside the printer. Check for any small pieces left behind before attempting to print again. I learned this the hard way after a particularly stubborn jam almost took out my favorite printer!
- Use Quality Ink: Cheap, generic inks can lead to poorer print quality, quicker fading, and even damage to your printer. Stick to reputable brands or manufacturer-recommended inks.
Beyond Gift Wrap: Innovative Uses for Printable Tissue Paper
While "printable tissue paper" is a star in the realm of gift wrapping and packaging, its versatility extends far beyond. Once you master the printing process, a whole new world of creative possibilities opens up. Think of it as a delicate, customizable canvas for a myriad of artistic and practical applications.
Here are 10-12 innovative ways to use your custom printed tissue paper:
1. Custom Decoupage Projects:
- What it is: Decoupage involves