Are you dreaming of personalizing everything from tumblers to wall decals, but feeling a little overwhelmed by the sheer volume of vinyl options out there? I get it. When I first started my crafting journey, I spent hours poring over forum posts, trying to figure out if I needed adhesive, heat transfer, or something else entirely. Trust me, the confusion is real, especially when you encounter a game-changer like printable permanent vinyl. It's the secret sauce for vibrant, durable custom projects, but getting it right means understanding its nuances.
This isn't just about sticking a design on something; it's about bringing your unique visions to life with professional-level results that last. I remember the frustration of my first few attempts with regular vinyl, trying to layer colors perfectly or wishing I could print intricate patterns directly. Then, I discovered printable permanent vinyl, and it felt like finding a cheat code for creativity. It literally opened up a whole new world of possibilities for my DIY projects. So, if you're ready to ditch the layering struggle and embrace full-color customization, you're in the right place. Let's dive deep and make sure your next project is a masterpiece!
What Exactly *Is* Printable Permanent Vinyl? Your Crafting Game Changer

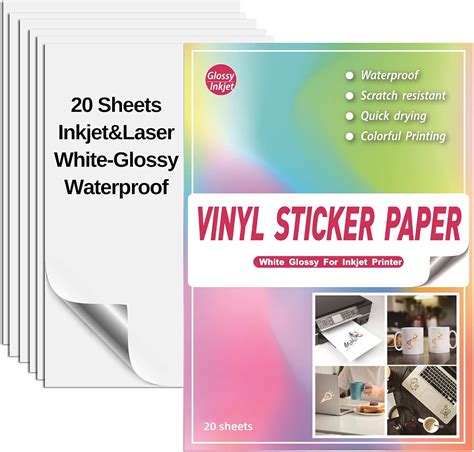
Think of printable permanent vinyl as the superhero of the vinyl world. Unlike regular adhesive vinyl that comes in pre-colored sheets, this incredible material is designed to be fed through your home inkjet or laser printer. Yes, you read that right – you can print any full-color design, photo, or intricate pattern directly onto it! Once printed, it maintains a strong, durable adhesive backing, making it perfect for long-term outdoor or indoor applications. It's truly a game-changer for custom labels, detailed decals, and vibrant stickers that need to stand the test of time and elements. It’s what allows you to bypass the need for layering multiple colors of vinyl, saving you time and giving you limitless color options.
Why Choose Printable Permanent Vinyl? Beyond Just Sticking It On
So, why would you pick this over other vinyl types? The benefits are pretty compelling, especially if you're looking for that "wow" factor with lasting power.
- Limitless Color & Detail: This is the big one. Imagine being able to print a photo of your pet, a complex watercolor design, or even fine text in a gradient directly onto your vinyl. This opens up possibilities that regular cut vinyl simply can't match.
- Durability You Can Trust: As the "permanent" in its name suggests, this vinyl is built to last. It features a strong adhesive that stands up to washing (hello, custom tumblers!), outdoor exposure (think mailbox decals!), and everyday wear and tear.
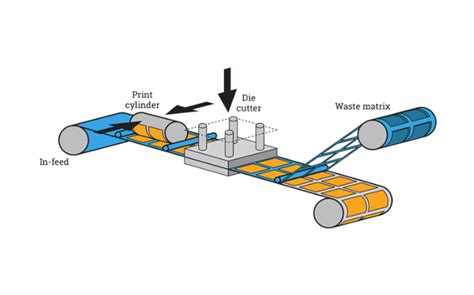
- Streamlined Process: For intricate, multi-color designs, traditional vinyl would require meticulous layering. With printable vinyl, you print, cut, and apply – significantly reducing your project time and frustration. It's like skipping several boss battles in one go!
- Waterproof Capabilities: Many types of printable permanent vinyl are designed to be waterproof, especially when sealed or laminated. This makes them ideal for items that will get wet, like water bottles, car decals, or even outdoor signage.
Getting Started: Essential Tools & Prep for Printable Permanent Vinyl Success

Before you hit print, a little preparation goes a long way. This is where you can save yourself some headache, trust me, I learned this the hard way with a ruined sheet or two!
- The Right Printer: Most printable vinyl works with inkjet printers. Double-check your vinyl's specifications. Some specialized versions exist for laser printers, but inkjet is more common for crafters.
- Cutting Machine: While you can cut designs by hand, a cutting machine (like Cricut or Silhouette) is highly recommended for precision. It allows for intricate cuts around your printed designs.
- Laminating Sheets (Optional but Recommended): For maximum durability and waterproofing, especially for outdoor items or those that will be washed frequently, clear self-adhesive laminating sheets are your best friend. They act as a protective barrier over your printed design. I always laminate my mug designs; it's my personal preference for guaranteeing longevity.
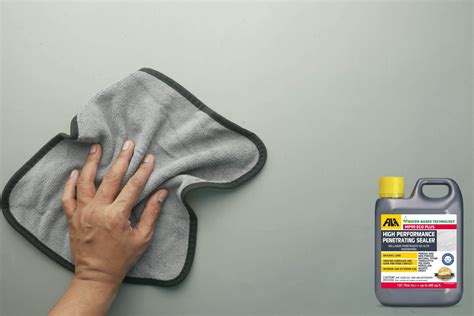
- Clean Surface: Always apply vinyl to a clean, dry, non-porous surface. Alcohol wipes are excellent for this.
- Design Software: Use your cutting machine's software (Cricut Design Space, Silhouette Studio) or graphic design software (Canva, Adobe Illustrator) to create your stunning designs.
Printing & Cutting Your Designs: The Heart of the Process
This is where your vision truly starts to take shape! Don't rush this part.
- Print Settings are Key: Always do a test print on plain paper first. Match your printer settings to the vinyl type. Often, selecting "Photo Paper Glossy" or "Premium Matte" can yield the best results for color saturation and crispness. Make sure your printer isn't set to "fit to page" if you need precise sizing.
- Allow Drying Time: After printing, let your vinyl dry completely. This can take anywhere from 10 minutes to a few hours, depending on your printer and ink. Skipping this step can lead to smudges and ruined projects. I once got impatient and smudged an entire sheet, costing me valuable time and material – don't be like me!
- Laminate (If Using): If laminating, carefully apply the clear sheet over your dried print. Work slowly from one end to the other to avoid bubbles. A squeegee or even a credit card can help smooth it out.
- Calibrate Your Cutter: If using a cutting machine, ensure your "Print Then Cut" or "Registration Mark" calibration is spot on. This is crucial for the machine to cut accurately around your printed image.
- Test Cut: Always perform a test cut on a small, inconspicuous area of your vinyl (or a scrap piece) before cutting your main design. Different brands and even different batches of vinyl can require slightly different pressure settings. Adjust your blade depth and pressure until you get a clean cut that doesn't go through the backing paper.
Application Techniques for Lasting Results: Stick It Right!
You've printed, you've cut, now for the grand finale! Proper application ensures your printable permanent vinyl sticks well and lasts for ages.
- Cleanliness is Godliness: Reiterate: a clean, dry, smooth surface is non-negotiable. Oils, dust, or moisture will compromise adhesion.
- The Hinge Method: For larger decals, apply the vinyl using the hinge method. Place your design on the surface, tape down one side to create a "hinge," peel back the backing from the untaped side, cut off the exposed backing, and apply. Then remove the tape, peel the remaining backing, and smooth down the rest of the vinyl. This prevents bubbles and misalignment.
- Squeegee It Out: Use a squeegee to firmly press down the vinyl, working from the center outwards. This expels any air bubbles and ensures strong contact with the surface.
- Slow Peel: When peeling off the transfer tape (if used), do so slowly and at a sharp angle. If any part of the vinyl lifts, press it back down with your squeegee and try again.
- Curing Time: While the vinyl is "permanent" upon application, the adhesive often benefits from a curing period. For items that will be washed (like tumblers), I recommend waiting 24-72 hours before the first wash to allow the adhesive to fully set. This is my favorite strategy because it saved me countless times from decals peeling prematurely!
Troubleshooting Common Printable Permanent Vinyl Issues
Even seasoned crafters run into hiccups. Here’s how to tackle some common issues with printable permanent vinyl:
- Smudged Prints: This usually means your ink isn't dry, or your printer settings aren't right. Use "High Quality" or "Photo" print settings, ensure adequate drying time, and consider a matte or semi-gloss vinyl if you're having persistent issues.
- Poor Ink Adhesion: If the ink isn't soaking into the vinyl, your vinyl might be designed for a different printer type (e.g., trying inkjet vinyl in a laser printer, or vice versa) or it's a very glossy surface that needs specific "quick-dry" inks.
- Cutting Machine Won't Read Registration Marks: Ensure you have enough light, your marks are dark and clear (no smudges!), and your vinyl isn't reflective, which can confuse the sensor. Sometimes, putting matte Scotch tape over the marks can help reduce glare without obscuring them.
- Vinyl Not Sticking: Did you clean the surface thoroughly? Is the surface porous (like unfinished wood, which needs sealing first)? Is it too cold? Vinyl likes to be applied in moderate temperatures.
- Bubbles After Application: You applied too quickly, or didn't use enough pressure with your squeegee. For small bubbles, you can try pricking them with a pin and pressing the air out.
Creative Project Ideas with Printable Permanent Vinyl
Now for the fun part – what can you make with this awesome material?
- Custom Labels: For jars, bottles, storage containers, or product packaging.
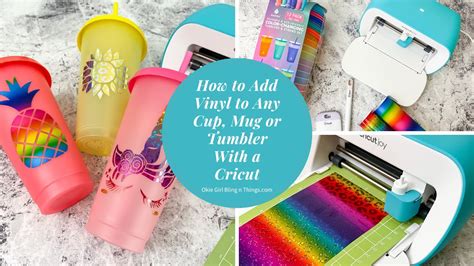
- Personalized Drinkware: Tumblers, mugs, water bottles (don't forget that laminating layer!).
- Laptop & Phone Decals: Express your personality with unique designs.
- DIY Wall Decals & Murals: Create stunning, removable (but long-lasting) art for your home.
- Custom Stickers & Magnets: Print your own sticker sheets or magnet designs for gifts or sales.
- Outdoor Signage: Mailbox numbers, garden markers, or small business signs.
- Kids' Room Decor: Personalized growth charts, name decals, or themed wall art.
Tips for Personalizing Your Projects with Printable Permanent Vinyl
Making your projects truly unique is what crafting is all about. Here’s how to infuse even more personality:
- Incorporate Photos: Don't shy away from using actual photographs! High-resolution images will give you the best results.
- Layer with Regular Vinyl: While printable vinyl reduces layering, you can still combine it with regular adhesive vinyl for added texture or metallic accents. For instance, a printed logo on a metallic vinyl background.
- Add Textures & Patterns: Experiment with digital papers or repeating patterns in your designs. From marble to watercolor, the possibilities are endless.
- Think Beyond the Flat: Don't just stick to flat surfaces. With practice, you can apply printable vinyl to curved surfaces like mugs and tumblers. Patience is key here!
- Consider the End Use: If it's going outdoors or will be washed, always laminate. If it's for an indoor wall decal, maybe less durability is fine. This is one of those subjective tips where I find matching the durability to the *purpose* truly elevates a project.
Common Pitfalls: What to AVOID When Working with Printable Permanent Vinyl
Steer clear of these common blunders to ensure your crafting journey is smooth sailing:
- Rushing the Drying Time: This is the number one cause of smudges and blurry prints. Patience, young padawan!
- Ignoring Test Cuts: Thinking you know your machine settings perfectly without a test cut is a recipe for disaster. Different vinyl brands, different days, different temperatures – they all affect cut settings. Don't be like me and waste half a roll thinking you can skip this step!
- Forgetting to Clean the Surface: Any dust, lint, or oil on your application surface will prevent proper adhesion, leading to bubbles and peeling.
- Using the Wrong Printer Type: Inkjet vinyl in a laser printer will melt (or at best, not print). Laser vinyl in an inkjet won't absorb ink. Always match your vinyl to your printer!
- Over-Saturating with Ink: If your prints look wet or blotchy even after drying, your print settings might be putting down too much ink. Adjust to a lighter setting or a "draft" quality for test runs.
- Applying in Extreme Temperatures: Very cold or very hot environments can affect the vinyl's adhesion. Aim for room temperature for best results.
Conclusion
There you have it – your comprehensive guide to mastering printable permanent vinyl. This material truly empowers you to bring intricate, full-color designs to life with a durability that regular vinyl can't always match. From understanding its unique properties to troubleshooting common issues, you're now equipped with the knowledge to tackle your next project with confidence.
Remember, every crafting journey involves a few trial-and-error moments, but with these tips and a little practice, you'll be creating stunning, personalized items that look store-bought in no time. So grab your vinyl, load up your printer, and get ready to unleash a whole new level of creativity. Now go make something awesome – your imagination is the only limit!