Hey there, fellow creators and DIY enthusiasts! Have you ever scrolled through Pinterest or Instagram, utterly captivated by those stunning custom decals – personalized mugs, unique laptop skins, or even bespoke wall art – and thought, "I wish I could make that?" Or maybe you're a small business owner dreaming of adding a professional, custom touch to your products without breaking the bank on outsourcing? Trust me, I've been there. The world of custom decals can seem daunting at first, a maze of materials, printers, and endless possibilities. I remember my first foray into printable decal vinyl, armed with a cheap printer and more enthusiasm than actual knowledge. Let's just say my initial attempts were… educational. Smudged ink, peeling edges, and a general sense of "what am I doing wrong?!" quickly became my companions. But through countless hours of research, trial, and error (and a few ruined sheets of vinyl), I discovered the magic and the methods behind creating truly beautiful, durable, and professional-looking decals right from home.
This isn't just another article about "printable decal vinyl"; it's your comprehensive, no-nonsense roadmap to mastering this incredibly versatile craft. We're going to dive deep, exploring everything from the fundamental types of vinyl to advanced application techniques, troubleshooting common headaches, and even turning your passion into profit. Whether you're a complete beginner eager to make your first custom sticker or a seasoned crafter looking to refine your techniques and expand your repertoire, you've come to the right place. We'll cover the essential gear, the best practices, and all the insider tips and tricks I've picked up along the way. Get ready to transform your creative visions into tangible, vibrant decals that truly stand out. Because with the right knowledge, the only limit is your imagination.
---
Table of Contents

- [What Exactly is Printable Decal Vinyl? A Beginner's Deep Dive](#what-exactly-is-printable-decal-vinyl-a-beginners-deep-dive)
- [Decoding the Types: Which Printable Decal Vinyl is Right for Your Project?](#decoding-the-types-which-printable-decal-vinyl-is-right-for-your-project)
- [The Heart of the Operation: Printers, Inks, and Compatibility](#the-heart-of-the-operation-printers-inks-and-compatibility)
- [Designing Your Decal Masterpiece: Software, Settings, and Sizing](#designing-your-decal-masterpiece-software-settings-and-sizing)
- [Bringing Your Designs to Life: Printing and Cutting Techniques](#bringing-your-designs-to-life-printing-and-cutting-techniques)
- [Flawless Application: Surface Prep, Transfer, and Lamination](#flawless-application-surface-prep-transfer-and-lamination)
- [Creative Decal Projects: Inspiration for Every Skill Level](#creative-decal-projects-inspiration-for-every-skill-level)
- [Making Your Decals Last: Care, Durability, and Longevity](#making-your-decals-last-care-durability-and-longevity)
- [Troubleshooting Common Printable Decal Vinyl Problems](#troubleshooting-common-printable-decal-vinyl-problems)
- [Beyond Hobby: Turning Printable Decal Vinyl into a Business](#beyond-hobby-turning-printable-decal-vinyl-into-a-business)
- [How to Choose the Best Printable Decal Vinyl for Your Needs](#how-to-choose-the-best-printable-decal-vinyl-for-your-needs)
- [Common Pitfalls to Avoid When Working with Printable Decal Vinyl](#common-pitfalls-to-avoid-when-working-with-printable-decal-vinyl)
- [Advanced Tips for Experts: Pushing the Boundaries of Printable Decal Vinyl](#advanced-tips-for-experts-pushing-the-boundaries-of-printable-decal-vinyl)
- [Conclusion: Your Decal Journey Begins Now!](#conclusion-your-decal-journey-begins-now)
---
What Exactly is Printable Decal Vinyl? A Beginner's Deep Dive
If you're new to the wonderful world of custom crafting, the term "printable decal vinyl" might sound a bit technical, but it’s actually quite straightforward and incredibly exciting. At its core, printable decal vinyl is a specialized, adhesive-backed material designed to be fed through a standard inkjet or laser printer, allowing you to print *any* design, photo, or graphic directly onto its surface. Once printed, you can cut out your design (either by hand or with a cutting machine), peel off the backing, and apply it like a sticker to almost any smooth surface. It's how you turn a digital image into a physical, durable decal.
Think of it as the ultimate DIY tool for personalization. Instead of being limited to pre-cut shapes or single-color designs like traditional craft vinyl, printable decal vinyl opens up a spectrum of full-color possibilities. It's the secret ingredient behind those vibrant, intricate stickers that look professionally made. My first "aha!" moment with printable decal vinyl came when I realized I could print a complex watercolor design I'd created digitally onto a sheet and then cut it into a perfect sticker for my water bottle. It felt like magic, transforming a digital file into a tangible, beautiful item I could proudly display.
Here’s a closer look at what makes this material so special:
1. It's a "Sticker" with Superpowers: Unlike regular paper stickers, printable decal vinyl is typically more durable, often water-resistant or even waterproof, and designed for a longer lifespan. It adheres strongly and can withstand more wear and tear.
2. Adhesive Backing: Every sheet comes with a protective backing that you peel away to reveal a sticky adhesive layer. This adhesive is formulated to bond securely to various surfaces like glass, plastic, metal, wood, and even painted walls.
3. Printable Surface: The top layer is specially coated to absorb and hold ink from your printer, ensuring vibrant colors and crisp details. This coating is crucial for preventing smudges and ensuring print quality.
4. Versatility is Key: From tiny laptop stickers to large wall decals, custom product labels, car decals, or even decorative elements for home decor, the applications are truly limitless.
5. Inkjet vs. Laser Specific: It's vital to know that printable decal vinyl is specifically engineered for either inkjet or laser printers. Using the wrong type can lead to disastrous results (believe me, I once tried inkjet vinyl in a laser printer – it didn't end well for the vinyl or my printer!). We'll dive deeper into this soon.
6. Durability Enhancements: Many types of printable decal vinyl can be laminated after printing. This extra layer provides UV protection, scratch resistance, and often makes the decal fully waterproof, extending its life significantly.
7. Peel-and-Stick Simplicity: Once printed and cut, the process is as simple as peeling the backing and applying. No messy glues or complicated tools are required for basic application.
8. Digital to Physical: It bridges the gap between your digital design skills and the physical world, allowing you to bring illustrations, photographs, and text to life in a tangible way.
9. Cost-Effective Customization: For small batches or one-off custom items, printing your own decals is often far more economical than ordering from a professional printing service. This is a game-changer for crafters and small businesses alike.
10. A Crafter's Canvas: It truly is a blank canvas, waiting for your unique artistic touch. If you can design it on a computer, you can print it as a decal.
11. Empowering Creativity: It empowers you to personalize almost anything, making gifts more thoughtful, products more branded, and personal spaces more reflective of your style.
12. The "Decal" Difference: While often used interchangeably with "sticker," a decal usually implies a more permanent, durable application often used for decoration or labeling on objects, vehicles, or walls, designed to withstand elements or frequent handling.
So, whether you’re looking to brand your homemade candles, personalize a gift for a friend, or just cover your laptop in awesome art, printable decal vinyl is your go-to material. It’s an accessible entry point into high-quality customization, and once you start, you’ll find yourself looking at every blank surface as a potential canvas.
---
Decoding the Types: Which Printable Decal Vinyl is Right for Your Project?
Navigating the world of printable decal vinyl can feel a bit like choosing a wand at Ollivanders – there are so many options, and each has its own unique properties and ideal uses. Understanding the different types is crucial for ensuring your project not only looks great but also lasts. Picking the wrong type for your application is a common beginner mistake, and trust me, you don't want to spend hours perfecting a design only for it to peel or fade because you used the wrong material! I learned this the hard way when a "removable" vinyl I thought would be perfect for outdoor signage lasted about a week in the sun. Lesson learned: always match the vinyl to the environment and desired longevity.
Here's a breakdown of the most common and versatile types of printable decal vinyl, along with their best uses:
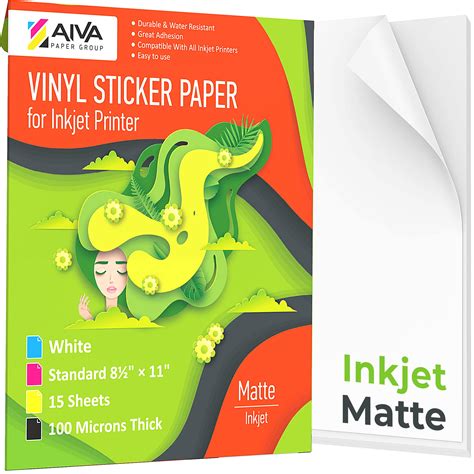
1. White Glossy Printable Vinyl:
- Description: This is probably the most popular choice. It has a bright white, shiny surface that makes colors pop and details crisp.
- Best For: Vibrant, eye-catching decals for laptops, water bottles, car windows, product labels, and any application where you want a professional, high-gloss finish. My team uses this type for all our internal branding stickers, and they always look fantastic.
- Durability: Good, especially when laminated. Often water-resistant, but typically needs lamination for full waterproofing and UV protection.
2. White Matte Printable Vinyl:
- Description: Similar to glossy, but with a non-reflective, smooth finish. It gives a more subtle, sophisticated look.
- Best For: Labels, stationery, artistic prints, wall decals, or any design where you want to avoid glare and prefer a softer aesthetic. I personally love matte for its elegant feel on planner stickers.
- Durability: Similar to glossy, benefits greatly from lamination for extended life and protection.
3. Clear Printable Vinyl:
- Description: A transparent film that allows the surface underneath to show through. Your printed design will be the only opaque part.
- Best For: Window decals, glass applications, creating a "stickerless" look, or layering over colored surfaces. It’s fantastic for creating a floating effect with your designs. For a custom mug, this allows the mug color to become part of the design.
- Considerations: Your printer doesn't print white ink, so any white in your design will be transparent. This means clear vinyl works best for designs with solid colors and no white elements if applied to a non-white surface.
- Durability: Can be very durable, especially when laminated. Great for weather-resistant applications.
4. Holographic Printable Vinyl:
- Description: Features a shimmering, iridescent effect that catches the light and shifts colors. It's often clear with the holographic effect.
- Best For: Unique, eye-catching stickers, special edition product labels, or adding a magical touch to any decal. Imagine your logo with a rainbow shimmer!
- Considerations: The holographic effect can sometimes subtly alter printed colors, so test prints are recommended.
- Durability: Varies by brand, but generally good. Lamination is recommended to protect the holographic layer.
5. Glitter Printable Vinyl:
- Description: Infused with fine glitter particles, giving your decals a sparkling, textured look.
- Best For: Festive decorations, party favors, children's crafts, or any project needing a touch of sparkle and fun.
- Considerations: The texture can sometimes affect print quality slightly, so choose designs that aren't overly intricate.
- Durability: Can be less durable than standard vinyl if the glitter is on the surface and not embedded. Lamination is a must for protection.
6. Removable Printable Vinyl:
- Description: Designed with a less aggressive adhesive that allows for easy removal without leaving residue or damaging the surface.
- Best For: Wall decals, temporary signage, seasonal decorations, rental properties, or any application where you might want to change your mind later.
- My Experience: I used this type for temporary directional signage at a large event, and it was a lifesaver. Easy to apply, easy to remove, and no sticky mess!
- Durability: Generally lower adhesion and durability than permanent options, not ideal for high-wear areas or outdoor use.
7. Permanent Printable Vinyl:
- Description: Features a strong, long-lasting adhesive meant for applications where you want the decal to stay put indefinitely.
- Best For: Car decals, outdoor signage, mugs, tumblers, or anything that needs to withstand washing, weather, or frequent handling.
- Considerations: Removal can be difficult and may leave residue or damage delicate surfaces.
- Durability: The champion of durability, especially when paired with appropriate lamination.
8. Waterproof/Weatherproof Printable Vinyl:
- Description: Often a subset of permanent vinyl, specifically formulated to resist water, moisture, and UV rays, even without lamination (though lamination always helps).
- Best For: Outdoor applications, car decals, boat decals, water bottles, or items that will be exposed to the elements. This is my go-to for anything that might get wet.
- Durability: Excellent, built to withstand harsh conditions.
9. Fabric Printable Vinyl:
- Description: A specialty vinyl designed to be printed on and then applied to textiles using heat (like an iron or heat press).
- Best For: Custom t-shirts, tote bags, aprons, hats, or other fabric-based projects where you want full-color designs.
- Considerations: Requires heat application. Not all printable vinyls are suitable for fabric.
- Durability: Good washability when applied correctly.
10. Magnetic Printable Vinyl:
- Description: Vinyl with a magnetic backing, allowing it to adhere to metallic surfaces without adhesive.
- Best For: Car magnets, refrigerator magnets, removable signage for whiteboards, or flexible labels.
- Considerations: Typically thicker and heavier than adhesive vinyl.
- Durability: Good for repeated use on magnetic surfaces.
11. Reflective Printable Vinyl:
- Description: Designed to reflect light, making your decals visible in low-light conditions.
- Best For: Safety decals, vehicle markings, or unique promotional items that need to stand out at night.
- Considerations: Can sometimes have a slightly textured surface which might affect fine details.
- Durability: Good, especially for outdoor use.
12. Glow-in-the-Dark Printable Vinyl:
- Description: Absorbs light and then emits a soft glow in the dark.
- Best For: Kids' room decorations, novelty items, emergency signage, or unique party favors.
- Considerations: The glow effect is best on designs with contrasting colors.
- Durability: Generally good for indoor use.
Choosing the right type of printable decal vinyl is the first critical step toward a successful project. Always consider the intended surface, environmental conditions, and desired longevity before making your selection. When in doubt, start with a versatile white glossy or matte permanent vinyl, and then experiment as you gain confidence!
---
The Heart of the Operation: Printers, Inks, and Compatibility
Alright, let's talk about the unsung heroes of your decal crafting journey: your printer and its ink. These two elements are absolutely fundamental to the quality and durability of your printable decal vinyl. Think of them as the engine of your creative machine; if they're not working in harmony with your materials, you're going to hit some serious roadblocks. I remember vividly trying to print on a new batch of "waterproof" printable decal vinyl only to have the ink smudge with the slightest touch because my printer settings were wrong. It was frustrating, to say the least, and a stark reminder that even the best vinyl needs the right print environment.
### Printers: Inkjet vs. Laser
This is the first and most crucial distinction you need to understand. Printable decal vinyl is specifically manufactured for *either* inkjet *or* laser printers. Using the wrong type can damage your printer, ruin your vinyl, and generally lead to a very bad day.
1. Inkjet Printers:
- How they work: Inkjet printers spray microscopic droplets of liquid ink onto the paper (or vinyl).
- Pros: Generally more affordable to purchase, excellent for vibrant color reproduction, especially photos and gradients.
- Cons: Ink can smudge or run if not properly cured or if the vinyl isn't designed for water-based inks. Ink cartridges can be expensive.
- Vinyl Compatibility: Requires "Inkjet Printable Vinyl." This vinyl has a special coating that absorbs water-based inkjet inks and allows them to dry quickly and adhere properly.
- My Personal Take: Most home crafters will start with an inkjet. I primarily use an inkjet for my decal projects because of its color fidelity, which is paramount for my intricate designs.
2. Laser Printers:
- How they work: Laser printers use toner (a dry powder) and heat to fuse the image onto the paper (or vinyl).
- Pros: Prints are inherently waterproof and smudge-proof immediately after printing because the toner is fused to the surface. Faster print speeds, generally lower cost per page in the long run.
- Cons: Higher initial purchase cost for color laser printers. Color reproduction can sometimes be less vibrant or nuanced than inkjet for photographic images.
- Vinyl Compatibility: Requires "Laser Printable Vinyl." This vinyl is formulated to withstand the heat of a laser printer without melting or deforming.
- Important Warning: *Never* put inkjet vinyl into a laser printer, or vice versa. Inkjet vinyl can melt in a laser printer, causing severe damage.
### Inks: The Lifeblood of Your Design
The type of ink your printer uses also plays a significant role in the durability and quality of your printed decals.
1. Dye-Based Inks (Common in Inkjets):
- Description: These inks are made of colorants dissolved in a liquid. They produce bright, vibrant colors and are excellent for photographic prints.
- Pros: Superior color gamut, smoother gradients, generally lower cost.
- Cons: Highly susceptible to water and UV fading. Decals printed with dye-based inks *absolutely require lamination* to protect them from moisture and sunlight if you want them to last.
- My Advice: If your inkjet uses dye-based inks (most consumer models do), consider lamination your best friend for any project that will be handled frequently, exposed to moisture, or placed outdoors.
2. Pigment-Based Inks (Some Inkjets, especially photo printers and professional models):
- Description: These inks use solid pigment particles suspended in a liquid. They sit on top of the paper rather than soaking in.
- Pros: Much better water resistance and UV fade resistance than dye-based inks. Decals printed with pigment inks are inherently more durable, even without lamination (though lamination still enhances longevity).
- Cons: Can sometimes appear slightly less vibrant than dye inks, and printers using them tend to be more expensive.
- My Experience: When I upgraded to an inkjet printer that uses pigment-based inks, the difference in outdoor decal longevity was remarkable. It significantly reduced smudging issues even before lamination.
3. Toner (Laser Printers):
- Description: A fine powder that is heat-fused to the vinyl.
- Pros: Extremely durable, waterproof, and highly resistant to smudging and fading right off the printer.
- Cons: Color range can be more limited than inkjet, and the finish can sometimes be less "soft" than inkjet prints.
### Compatibility Checklist & Best Practices
- Always Check the Vinyl Packaging: The packaging will clearly state whether it's for inkjet or laser printers. Do not deviate!
- Printer Settings are Key: Don't just hit print!
- Media Type: Select the correct media type in your printer settings. Options like "Photo Paper Glossy," "Matte Photo Paper," or "Premium Presentation Paper" often work well. Experiment to find what gives you the best results for your specific vinyl.
- Print Quality: Always choose the highest print quality setting. This uses more ink but provides the crispest, most vibrant results, which is exactly what you want for decals.
- Borderless Printing: If your design goes to the edge of the sheet, enable borderless printing in your settings (if your printer supports it) to avoid white margins.
- Allow for Drying/Curing:
- Inkjet: Even if the vinyl is designed for quick-drying, give inkjet prints a good 10-30 minutes (or even longer for heavy ink saturation) to fully dry before handling, cutting, or laminating. This prevents smudging and ensures better adhesion of lamination.
- Laser: Laser prints are generally dry immediately, but it's still good practice to let them cool for a minute or two before handling extensively.
- Test Prints: Before committing to a full sheet of expensive vinyl, print a small test swatch on a piece of regular paper (or even a small scrap of vinyl) to check colors and settings. This is a simple step that saves a lot of heartache and wasted material.
- Keep Your Printer Clean: Dust and debris can cause streaks or imperfections. Regularly clean your printer heads (inkjet) or wipe down the interior (laser) according to manufacturer instructions. A clean printer equals clean decals!
- Store Vinyl Properly: Keep your printable decal vinyl sheets flat and in their original packaging or a sealed bag to protect them from moisture, dust, and curling.
Understanding your printer and the type of ink it uses is paramount to achieving professional-looking results with printable decal vinyl. Invest a little time in learning these basics, and you'll save yourself a lot of frustration and wasted material, setting yourself up for crafting success!
---
Designing Your Decal Masterpiece: Software, Settings, and Sizing
Now that you understand the materials and the machine, it's time for the fun part: designing! This is where your creativity truly shines, transforming an idea into a digital blueprint for your physical decal. A well-designed decal starts with thoughtful planning in your chosen software. Don't underestimate the power of good design; even the most premium printable decal vinyl won't rescue a pixelated or poorly laid-out image. I've seen countless crafters get frustrated because their printed decals didn't match their screen vision, only to find out it was a simple resolution or color profile issue in their design software. I remember one project where I spent hours on an intricate design, only to print it and discover it was pixelated because I had started with a low-resolution image. It was a facepalm moment that taught me the importance of starting with quality assets!
Here's a comprehensive guide to designing your decal masterpiece:
### Software Choices: Your Digital Canvas
The right software can make all the difference in achieving professional results.
1. Vector Graphics Editors (e.g., Adobe Illustrator, Inkscape, Affinity Designer):
- Best For: Logos, text, sharp illustrations, intricate line art.
- Why: Vector graphics are mathematically defined, meaning they can be scaled to *any* size without losing quality or becoming pixelated. This is crucial for decals that might be resized for different applications.
- Expert Tip: If you're designing something that needs crisp edges or will be cut with a machine, always try to use vector graphics.
2. Raster Graphics Editors (e.g., Adobe Photoshop, GIMP, Affinity Photo):
- Best For: Photographs, complex artwork with gradients, painted effects, detailed textures.
- Why: Raster graphics (like JPEGs or PNGs) are made of pixels. They excel at capturing photographic detail and subtle color variations.
- Considerations: Resolution is paramount! Always start with high-resolution images (300 DPI or higher for printing) to avoid pixelation.
3. Cutting Machine Software (e.g., Cricut Design Space, Silhouette Studio):
- Best For: Combining text, basic shapes, and imported images, especially for "print then cut" functionality.
- Why: These programs are specifically designed to prepare your designs for precise cutting after printing. They handle registration marks, which are essential for the machine to know where to cut.
- My Scenario: For quick, personalized gift decals, I often jump straight into Cricut Design Space. It's user-friendly and streamlines the print-then-cut process beautifully.
4. Online Design Tools (e.g., Canva, PicMonkey):
- Best For: Beginners, quick designs, social media graphics that can be repurposed for decals.
- Why: User-friendly interfaces, pre-made templates, and access to stock elements.
- Considerations: May have limitations on resolution or advanced editing capabilities compared to professional software. Always check your output resolution.
### Essential Design Settings for Decals
These settings are critical for ensuring your printed decal looks exactly as you envision it.
1. Resolution (DPI - Dots Per Inch):
- Rule of Thumb: For print, aim for 300 DPI at the final print size. Lower resolutions (like 72 DPI, common for web images) will look pixelated when printed.
- How to Check: In most design software, you can see and adjust the image resolution. When importing images, ensure they are high-res.
2. Color Mode (CMYK vs. RGB):
- RGB (Red, Green, Blue): Used for screens (monitors, phones). It has a wider color gamut.
- CMYK (Cyan, Magenta, Yellow, Black): Used for printing. Printers combine these four colors to create all other colors.
- Recommendation: Design in CMYK if your software allows it. If you design in RGB and convert to CMYK for printing, some colors might shift slightly (especially very bright greens or blues), as CMYK has a smaller color range.
- Personal Insight: I've had designs look absolutely stunning on screen (RGB) but come out a little duller when printed (CMYK). Now, I always start in CMYK if the final output is print.
3. Bleed and Margins:
- Bleed: If your design goes all the way to the edge of your decal, extend the background color or image slightly beyond the cut line. This "bleed" ensures that if the cut is slightly off, you don't end up with an unsightly white edge. A standard bleed is usually 0.125 inches (3mm).
- Margins: Leave a safe margin around your design, especially if you're not cutting precisely to the edge. This prevents accidental cropping of important elements.
4. Cut Lines (for Cutting Machines):
- Vector Paths: For precise cuts, your cutting machine needs vector paths. If you're using raster images, you'll need to "trace" them in your cutting machine software to create cut lines.
- Offset: Creating an "offset" or a small border around your design before cutting is a popular technique. It gives a clean, professional look and makes application easier, especially for intricate designs.
### Sizing and Layout Considerations
- Measure Twice, Print Once: Always measure the surface where your decal will go *before* you start designing. This seems obvious, but it's easy to get carried away.
- Scale Accurately: In your design software, ensure your design is scaled to its final print size. Don't rely on "eye-balling" it.
- Batch Printing/Nesting: To maximize your printable decal vinyl sheets, arrange multiple smaller designs on a single sheet. This is called "nesting" and is often done automatically by cutting machine software or manually in your design program.
- Test on Paper: Before printing on your precious vinyl, always do a test print on plain paper. This allows you to check sizing, colors, and overall layout without wasting expensive material.
- Consider the Background: Think about the color of the surface your decal will be applied to. If you're using clear vinyl, remember that white areas in your design will be transparent. If using white vinyl, any unprinted areas will remain white.
Designing your printable decal vinyl requires a