Ever dreamt of transforming a plain t-shirt into a personalized masterpiece, or adding a unique touch to a mug, all from the comfort of your home? That’s where printable transfer paper steps in – a true game-changer for DIY enthusiasts, small business owners, and anyone who loves a good craft project. But let’s be honest, diving into the world of heat transfers can feel a little daunting. Will it stick? Will the colors pop? Will I iron it on backward like I once did with my favorite band's logo, turning a cool design into a mirrored mess? (Trust me, you don’t want to mess that up!)
This guide is your friendly co-pilot, designed to navigate you through everything you need to know about printable transfer paper. We’re going to cover the basics, demystify the choices, share pro tips, and, most importantly, help you avoid the common pitfalls so your projects turn out exactly how you envisioned. Get ready to unleash your inner designer and create something truly awesome!
---
The Grand Unveiling: What Exactly *Is* Printable Transfer Paper?
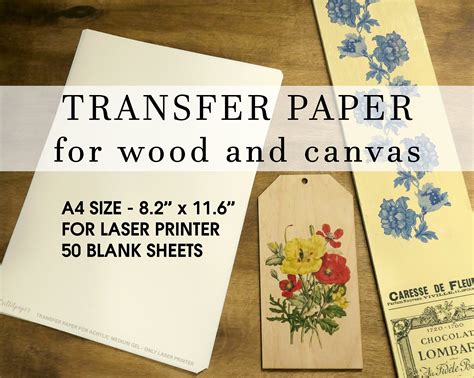
Think of printable transfer paper as a special sheet that acts as a bridge between your digital design and a physical object. It allows you to print any image or text from your inkjet or laser printer directly onto it, and then, using heat, transfer that design onto fabric, ceramics, wood, or other surfaces. It’s like magic, but with a bit of science and the right technique!
- Your Home Printer's New Best Friend: This paper is specifically designed to work with standard home printers, making high-quality customization accessible to everyone.
- The Heat is On: The "transfer" part happens when you apply heat (typically with a household iron or a heat press) which activates the adhesive on the paper, bonding your design permanently to the surface.
- A World of Possibilities: From custom apparel and tote bags to unique coasters and wall art, the only limit is your imagination.
- Why It's So Popular: It's cost-effective, relatively easy to use, and offers immense creative freedom compared to traditional screen printing or vinyl cutting for beginners.
- Not Just for Fabric: While most commonly associated with t-shirts, modern printable transfer paper options extend to rigid surfaces, opening up new DIY avenues.
- The Magic Layer: This paper has a unique coating that holds the ink and then releases it cleanly onto your chosen material under heat and pressure.
- A Quick Setup: No complex software or expensive machinery needed – just your printer, your design, and a heat source!
Picking Your Perfect Partner: Light vs. Dark, Inkjet vs. Laser
Choosing the right printable transfer paper is like picking the right brush for a painting – essential for the best outcome. This isn't a one-size-fits-all situation, and understanding the nuances can save you a lot of headache (and wasted paper!).
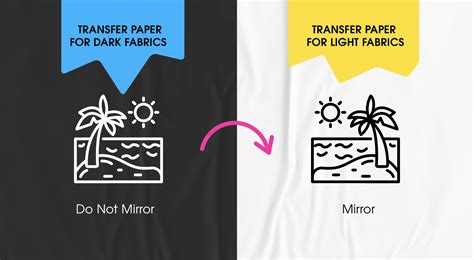
- Light Fabric Transfer Paper:
- Best For: White or very light-colored fabrics.
- How it Works: The design is translucent, allowing the fabric color to show through. This means your fabric acts as the "white" in your design.
- Printing Tip: You generally *do not* mirror your image when printing for light fabrics, as the image is transferred face down. Always check the specific paper instructions!
- My Experience: I once tried to use light fabric paper on a gray t-shirt, thinking "how different could it be?" The result was… pale and ghostly. Learn from my folly – stick to white or very light colors!
- Dark Fabric Transfer Paper:
- Best For: Black, dark, or brightly colored fabrics.
- How it Works: This paper has an opaque white backing, so the colors of your design will appear vibrant even on dark backgrounds.
- Printing Tip: You *do* mirror your image when printing for dark fabrics, as the image is transferred face up, then peeled away.
- The Opaque Advantage: It creates a solid base for your colors, preventing the fabric color from muting your design.
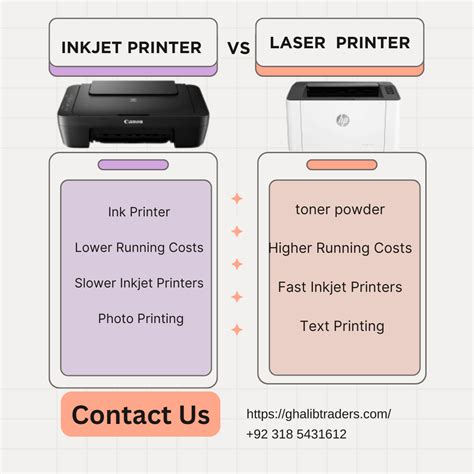
- Inkjet Transfer Paper:
- Compatibility: Designed specifically for inkjet printers, which are the most common home printers.
- Ink Type: Uses dye-based or pigment-based inks. Pigment inks are generally more fade-resistant.
- Cost-Effective: Often more affordable and readily available for the average user.
- Laser Transfer Paper:
- Compatibility: Requires a laser printer.
- Durability: Designs transferred with laser paper tend to be more durable and can withstand more washes.
- Finer Details: Can sometimes capture finer details more precisely due to the way laser printers fuse toner.
- Surface-Specific Papers: Beyond fabric, you'll find specialized papers for hard surfaces like ceramic mugs, wood, or metal. Always buy paper specifically labeled for your intended surface.
Design & Print Like a Pro (No More Fuzzy Pics!)

The quality of your final transfer starts long before the iron heats up. Getting your design and print settings right is crucial for vibrant, crisp results with your printable transfer paper.
- High-Resolution is Your Friend: Always start with a high-resolution image (at least 300 DPI) to avoid pixelation. A fuzzy image on screen will be even fuzzier on your fabric.
- Mirror, Mirror, On the Wall (or Fabric!): For dark fabric transfer paper and often for hard surfaces, you *must* mirror your image before printing. If you forget, all your text will be backward! (I’ve been there, it’s a classic beginner mistake.)
- Print Settings Matter: Don't just hit "print"! In your printer settings, select the highest quality print setting (e.g., "Best Photo" or "High Quality").
- Paper Type Selection: Choose "Heavyweight Matte Paper," "Photo Paper," or similar settings in your printer dialogue. This tells your printer to lay down more ink and often produces better saturation.
- Trim Precisely: Cut out your design as close to the edges as possible. Any untransferred paper will leave a thin, sometimes glossy, film around your design. Precision here makes a huge difference!
- Test Print (Optional, but Smart): If you're nervous or using a new paper, do a small test print on regular paper first to check colors and mirroring.
- No Bleeding Edges: Ensure your design fits within the printable area and doesn't go too close to the paper's edge, where ink can sometimes bleed slightly.
The Moment of Truth: Mastering the Transfer Process
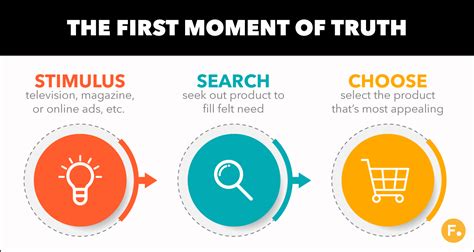
This is where your vision comes to life! The application of printable transfer paper requires precision and consistent heat. Get this right, and you'll have a professional-looking result.
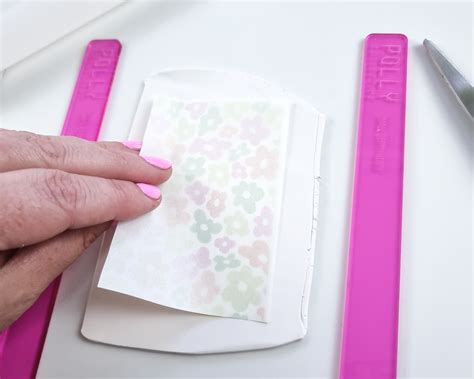
- Prep Your Surface: For fabric, pre-wash and dry it to prevent shrinkage after transfer. Iron out any wrinkles thoroughly. For hard surfaces, ensure they are clean and dry.
- Flat, Firm Surface: Use a very hard, flat, heat-resistant surface for ironing. An ironing board might be too soft and uneven. A wooden cutting board or a sturdy table with a thick towel underneath works wonders.
- Consistent Heat & Pressure: This is key!
- Iron: Set your iron to the highest temperature (cotton/linen setting) with no steam. Apply firm, even pressure, moving the iron constantly for the recommended time (check your paper's instructions). Don't just leave it in one spot!
- Heat Press: If you have one, use the recommended temperature and pressure settings for your paper. This is my favorite strategy because it saved me countless times from uneven transfers – the consistency is unmatched!
- Peel When Ready: Some papers are "hot peel" (peel immediately after ironing), others are "cold peel" (let cool completely before peeling). Following this instruction is critical to avoid cracking or incomplete transfers.
- Work in Sections: For larger designs, work in smaller sections, ensuring you apply enough heat and pressure to each area before moving on.
- Patience is a Virtue: Don't rush the cooling process if it's a cold peel. Ripping off the backing too early can ruin your design.
- Remove the Backing Smoothly: Once cooled (if cold peel), gently peel away the backing paper. If you notice any part of the design lifting, re-press that area.
Tackling Troubles: Common Hiccups & How to Fix Them

Even with the best intentions, things can sometimes go sideways. Don't panic! Most common printable transfer paper problems have simple solutions.
- Faded or Dull Colors:
- Cause: Not enough heat or pressure, or incorrect printer settings.
- Fix: Increase iron temperature, apply more pressure, or adjust printer settings to "Best Quality" and "Heavyweight Matte Paper."
- Cracking or Peeling Design:
- Cause: Insufficient heat/pressure, wrong peeling temperature (hot vs. cold peel), or over-stretching the fabric immediately after transfer.
- Fix: Ensure proper heat and pressure during transfer. Follow hot/cold peel instructions precisely. Let the fabric cool and "cure" before stretching.
- Design Not Sticking Completely:
- Cause: Cold spots, insufficient pressure, or the surface wasn't clean/prepped.
- Fix: Go over the area again with more heat and pressure. Ensure your ironing surface is perfectly flat. Clean your surface thoroughly.
- White Border Around Design:
- Cause: Not trimming close enough to the design.
- Fix: Next time, trim more precisely. For the current project, there's not much you can do, but think of it as a "frame"!
- Design Appears Backwards:
- Cause: Forgetting to mirror the image (for dark fabric paper).
- Fix: Unfortunately, for this project, you're stuck! Next time, always double-check the mirroring setting in your print dialogue. I've wasted a few good t-shirts this way – live and learn!
Beyond the T-Shirt: Creative Project Inspirations
While custom apparel is the go-to, printable transfer paper opens up a universe of DIY possibilities. Don't limit your imagination!
- Personalized Tote Bags: Great for gifts, grocery runs, or just carrying your essentials in style. Design a unique graphic or add a favorite quote.
- Custom Mugs & Coasters: Use hard-surface transfer paper to create unique coffee mugs, tea cups, or a set of personalized coasters for your home or as gifts.
- Decorative Pillows: Jazz up plain throw pillows with intricate designs, family photos, or quirky sayings.
- Unique Wall Art: Print larger designs onto fabric, then frame them or stretch them over a canvas for custom wall decor. This is a fantastic way to display custom illustrations.
- Wooden Signs & Boxes: For rustic decor, transfer designs onto sanded wood for personalized signs, keepsake boxes, or even cutting boards (though not food-safe unless sealed).
- Baby Onesies & Bibs: Create adorable, unique outfits for the little ones in your life. Perfect for baby shower gifts!
- Party Favors: Design custom labels for water bottles, candy bags, or small fabric pouches for a personalized touch at any event.
- DIY Laptop & Phone Cases: With the right adhesive and technique, you can even transfer designs onto plain laptop or phone cases for a truly custom look.
Keeping It Fresh: Care Tips for Lasting Designs

You've put in the effort, now let's make sure your beautiful printable transfer paper creations last! Proper care can significantly extend the life of your transferred designs.
- Wait Before Washing: Allow the design to "cure" for at least 24 hours, preferably 72 hours, before the first wash. This allows the adhesive to fully bond.
- Wash Inside Out: Always turn garments inside out before washing. This protects the design from friction and abrasion.
- Cold Water, Gentle Cycle: Wash in cold water on a delicate or gentle cycle. Hot water and aggressive washing can cause cracking, fading, or peeling.
- Mild Detergent: Use a mild detergent and avoid harsh chemicals or bleach, which can degrade the transfer.
- Air Dry or Low Heat: Tumble dry on a low heat setting, or even better, air dry your items. High heat can reactivate the adhesive and cause cracking or peeling. I prefer air drying for all my custom apparel, just to be safe.
- Avoid Direct Ironing: Never iron directly onto the transferred design. If you need to iron the garment, turn it inside out.
- Don't Dry Clean: The chemicals used in dry cleaning can damage the transfer.
- Store Properly: Store custom garments folded neatly, avoiding excessive creasing directly on the design.
---
Tips for Personalizing Your Printable Transfer Paper Projects
The real magic of printable transfer paper lies in making something truly your own. Here’s how to add that extra layer of personalization.
- Add Names & Dates: Simple but effective! Birthdays, anniversaries, graduations, or family reunions become instant keepsakes.
- Incorporate Inside Jokes: For gifts for friends or family, nothing beats a design that references a shared laugh or a unique memory.
- Use Your Own Photos: Family portraits, pet pictures, or memorable vacation snapshots can be fantastic transferred onto various items.
- Hand-Drawn Elements: Scan your own sketches or doodles, and print them onto the paper for a truly unique, artistic touch.
- Combine with Other Crafts: Use fabric markers to add details or outlines after transferring, or embellish with glitter, patches, or embroidery.
- Consider the Recipient's Style: Think about their favorite colors, hobbies, or aesthetic when designing. This is my favorite approach because it ensures the gift will be loved and actually used.
- Create Thematic Collections: Design a set of items around a theme – for example, a series of literary quotes on tote bags, or botanical illustrations on coasters.
Common Pitfalls: What to AVOID When Using Printable Transfer Paper
We've talked about what *to* do, but knowing what *not* to do can be just as important. Learn from the mistakes of others (and my own trial-and-error!).
- Don't Rush the Cooling Process: If your paper is a "cold peel," resist the urge to peel it hot. You'll likely ruin the design, and it’s a frustrating waste of effort.
- Avoid Over-Stretching Immediately: After transferring to fabric, let the material cool down and settle before stretching it. Stretching too soon can lead to cracks.
- Don't Use a Steamer/Steam Iron: Steam is the enemy of a good transfer. Ensure your iron is on a "dry" setting with no steam. The moisture prevents proper adhesion.
- Steer Clear of Textured Fabrics: While you *can* transfer onto some textured fabrics, very rough or ribbed materials (like certain knits or corduroy) might not give you a smooth, even transfer. Stick to smooth, tightly woven fabrics for best results.
- Don't Forget to Mirror: This is arguably the most common mistake for beginners, especially with dark fabric paper. Double-check, triple-check, and then check again! Don't be like me and end up with a backward "World's Best Dad" shirt!
- Avoid Uneven Pressure: Lifting your iron too much, or not applying consistent pressure across the entire design, will result in patchy or incomplete transfers. Press firmly and evenly.
- Don't Over-Iron: While consistency is key, over-ironing can sometimes lead to discolored transfers or damage to the fabric itself. Follow the recommended time for your paper.
---
There you have it – your comprehensive guide to mastering printable transfer paper! It might seem like a lot of steps, but once you get the hang of it, you’ll find it incredibly intuitive and satisfying. From turning an old t-shirt into a custom statement piece to crafting unique gifts for loved ones, the possibilities are endless.
Remember, every creative journey has its learning curve. Don’t be afraid to experiment, and learn from any "oops" moments – they're just part of the fun! Now go forth, get creative, and transform your world, one amazing transfer at a time. Happy crafting!