Oh, the humble name tag! It might seem like such a small, unassuming detail, but trust me, its impact is anything but. From fostering a sense of belonging in a bustling classroom to streamlining operations in a dynamic office, or even adding a touch of personalized charm to your home study, printable name tags for desks are unsung heroes. I remember a chaotic first day of school for my eldest – new teacher, new classmates, and a sea of unfamiliar faces. When we finally found his desk, a brightly colored, beautifully designed name tag was waiting, instantly making the space feel like *his*. That tiny piece of paper transformed a daunting environment into a welcoming one, and it was in that moment I truly grasped the power of a well-placed, thoughtful desk name tag.
This isn't just about sticking a label on a desk; it's about creating connection, clarity, and a sense of identity. Whether you're a dedicated teacher looking to personalize your students' learning journeys, an office manager aiming for seamless hot-desking, an event planner striving for professional flair, or a parent wanting to organize a creative corner, you've landed in the perfect spot. We're going to dive deep, exploring every facet of printable name tags – from design basics and printing hacks to advanced customization and innovative display ideas. We’ll uncover how these simple tags can solve myriad organizational challenges, spark creativity, and even elevate professional environments. Get ready to transform your desks from mere surfaces into personalized, purposeful spaces.
Table of Contents

- [The Classroom Canvas: Engaging Name Tags for Young Learners](#the-classroom-canvas-engaging-name-tags-for-young-learners)
- [Professional Polish: Sleek & Functional Name Tags for the Office](#professional-polish-sleek--functional-name-tags-for-the-office)
- [Event Ready: Dynamic Desk Tags for Conferences & Workshops](#event-ready-dynamic-desk-tags-for-conferences--workshops)
- [Home Sweet Desk: Personalized Tags for Study & Creative Spaces](#home-sweet-desk-personalized-tags-for-study--creative-spaces)
- [Design Demystified: Crafting Your Tags from Concept to Print](#design-demystified-crafting-your-tags-from-concept-to-print)
- [Printing Perfection: Tips & Tricks for Flawless Output](#printing-perfection-tips--tricks-for-flawless-output)
- [Durability & Display: Making Your Name Tags Last & Stand Out](#durability--display-making-your-name-tags-last--stand-out)
- [Beyond the Basics: Creative & Interactive Name Tag Ideas](#beyond-the-basics-creative--interactive-name-tag-ideas)
- [The Digital Edge: Integrating Tech for Smart Name Tag Solutions](#the-digital-edge-integrating-tech-for-smart-name-tag-solutions)
- [How to Choose the Best Printable Name Tags for Desks for Your Needs](#how-to-choose-the-best-printable-name-tags-for-desks-for-your-needs)
- [Common Pitfalls to Avoid When Creating Printable Name Tags](#common-pitfalls-to-avoid-when-creating-printable-name-tags)
- [Advanced Tips for Experts: Elevating Your Desk Name Tag Game](#advanced-tips-for-experts-elevating-your-desk-name-tag-game)
- [Conclusion: Your Desk, Reimagined](#conclusion-your-desk-reimagined)
---
The Classroom Canvas: Engaging Name Tags for Young Learners
For educators, a desk isn't just a surface; it's a launchpad for learning, and a printable name tag for desks can be so much more than just a name. It's a tool for identity, a learning aid, and a classroom management staple. Crafting engaging name tags for young learners means thinking about their developmental stage, their need for visual cues, and how to make their space truly their own.
1. Alphabet & Number Lines: For early learners, integrating the alphabet (uppercase and lowercase) and a number line (0-20 or 0-100) directly onto the name tag is a game-changer. I've seen teachers use these daily as quick references, saving valuable teaching time.
2. Sight Word or High-Frequency Word Lists: A small, curated list of common sight words can be incredibly helpful for emergent readers. It provides an immediate resource during independent work, fostering independence.
3. Color Recognition Swatches: For pre-K and kindergarten, small colored squares with their names can aid in color recognition and vocabulary building. Imagine a child pointing to "blue" on their tag when asked!
4. Shape Identifiers: Similarly, small illustrations of basic geometric shapes (circle, square, triangle) can be a constant visual reminder, perfect for early math concepts.
5. Left/Right Hand Cues: A discreet "L" and "R" or even a small drawing of a hand can help children orient themselves, especially useful during writing or cutting tasks. I once used a name tag with a tiny green dot on the left side of the "L" for a student who struggled with this, and it worked wonders!
6. Motivational Affirmations: A simple "You Are Amazing!" or "Keep Trying!" can boost a child's confidence. My own son’s teacher had "You've Got This!" on his, and he genuinely loved seeing it every morning.
7. "All About Me" Sections: Include a small space for students to draw their favorite animal or write their favorite color. This personal touch makes the desk truly theirs and can be a great conversation starter.
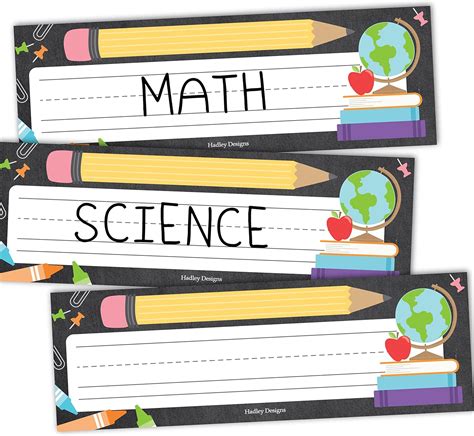
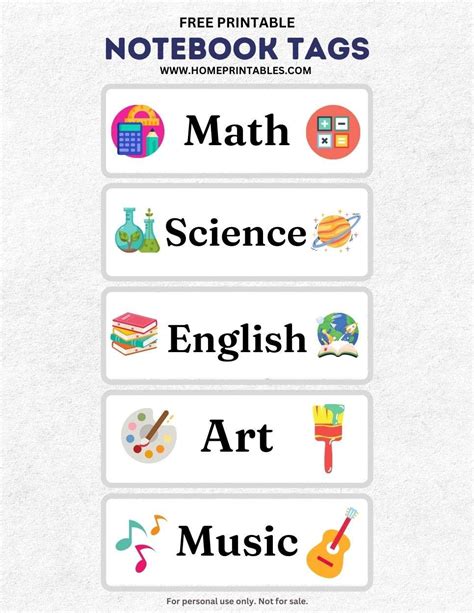
8. Themed Designs: Align name tags with classroom themes (e.g., space, jungle, ocean). A rocket ship name tag for a "space explorers" theme makes the classroom feel cohesive and exciting.
9. Visual Schedules/Reminders: For students who benefit from visual cues, a tiny icon representing "read," "write," or "listen" can be a helpful reminder of classroom expectations or daily routines.
10. Behavior Chart Integration (Subtle): A small, laminated section where a teacher can discreetly place a sticker or draw a happy face for positive reinforcement. It's less disruptive than a large chart.
11. Collaborative Group Indicators: Use color-coded name tags or a specific icon to denote group assignments, making transitions smoother and identifying team members at a glance.
12. Foreign Language Reinforcement: For language immersion classrooms, include common phrases or alphabet letters from the target language. For instance, a French class might have "Bonjour!" and "Merci!" on the tag.
Professional Polish: Sleek & Functional Name Tags for the Office
In the professional realm, printable name tags for desks are all about clarity, consistency, and conveying a sense of organized professionalism. Whether you're managing a bustling open-plan office, facilitating a training session, or welcoming new team members, these tags can significantly enhance the workspace.
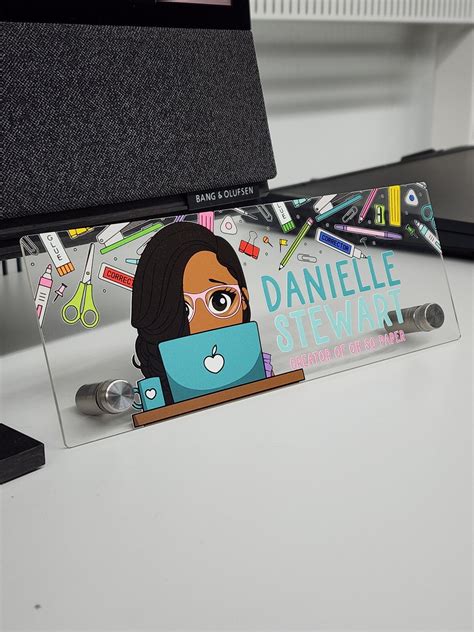
1. Standardized Employee Identification: A uniform template with name, title, and perhaps department logo ensures consistency across all desks, especially in larger organizations. This was invaluable when I helped onboard 50 new hires; everyone knew exactly where to go.
2. Hot-Desking Solutions: For flexible workspaces, temporary name tags allow employees to claim a desk for the day, making it easy for colleagues to identify who's where. We once used dry-erase compatible tags for this, which were a huge hit.
3. Visitor & Guest Designation: Clearly mark temporary workstations for visitors, interns, or external contractors. This helps integrate them smoothly and lets permanent staff know who's new.
4. Project Team Markers: Use specific colors or project icons on name tags to easily identify members of different project teams, fostering collaboration and quick identification.
5. Departmental Identification: For offices with multiple departments on one floor, color-coding or adding a department name to the tag can quickly guide visitors or new employees.
6. New Hire Welcome: A personalized name tag waiting on a new employee's desk on their first day is a warm, welcoming gesture that immediately makes them feel part of the team. My first name tag at a new job, beautifully printed, instantly made me feel valued.
7. Training & Workshop Desks: For internal training sessions, name tags help trainers learn names quickly and facilitate interaction among participants. It breaks down barriers immediately.
8. Temporary Role Indicators: For employees stepping into temporary leadership or specialized roles, a specific tag can denote their current function without needing a full office reshuffle.
9. "Do Not Disturb" / "In a Meeting" Flip Tags: Design two-sided tags that can be flipped to indicate availability, useful in open-plan or shared office environments. This prevents interruptions without needing to physically move.
10. Language Preference/Availability: For diverse teams, a small icon indicating languages spoken (e.g., flags) can facilitate communication.
11. "Ask Me About..." Prompts: For team-building or cross-departmental collaboration, add a small section where individuals can write a fun fact or a skill they possess. "Ask me about the best coffee shops!"
12. Brand Reinforcement: Incorporate company branding, fonts, and colors into the design. This subtle reinforcement strengthens corporate identity and creates a professional aesthetic.
Event Ready: Dynamic Desk Tags for Conferences & Workshops
Events, conferences, and workshops thrive on organization and connection. Printable name tags for desks play a crucial role in managing attendees, facilitating networking, and ensuring a smooth flow of information. They are the silent orchestrators of a well-run event.
1. Attendee Seating Assignments: Pre-printed name tags indicating assigned seats streamline the check-in process and eliminate confusion, especially for formal dinners or structured sessions.
2. Speaker & Presenter Identification: Clearly marked desk tags for speakers at panels or breakout sessions instantly identify them to the audience and fellow panelists.
3. Workshop Station Labels: For hands-on workshops, use name tags to label different activity stations (e.g., "Coding Challenge," "Design Sprint," "Networking Hub").
4. Exhibitor Booth Identification: At trade shows or expos, desk name tags for booth staff help visitors identify who they're speaking with and their role.
5. VIP/Special Guest Designation: Discreetly highlight VIPs or special guests with a unique design element on their desk tag, allowing staff to offer tailored assistance.
6. Dietary Restriction Cues: For events with catered meals, a small icon on the desk tag can alert waitstaff to dietary needs without public announcement. This saved us a lot of hassle at a recent corporate retreat.
7. Language Preference for International Events: Similar to office settings, flags or language symbols can help international attendees connect with others who speak their language.
8. Networking Conversation Starters: Include a space for attendees to write a fun fact or their professional interests, sparking initial conversations. "My favorite hobby is hiking!"
9. Feedback/Question Prompts: Design tags with a small section for attendees to jot down questions for a Q&A session or key takeaways from a presentation.
10. Temporary Team Formation: For group activities, use color-coded or numbered tags to quickly form teams, making breakout sessions efficient and engaging.
11. Post-Event Call to Action: A QR code on the name tag leading to a feedback survey or event photos can extend engagement beyond the physical event.
12. Brand Sponsorship Recognition: If applicable, a small, tasteful logo of a key sponsor can be integrated into the design, offering subtle brand exposure.
Home Sweet Desk: Personalized Tags for Study & Creative Spaces
Our home desks are often more than just a place to work; they're sanctuaries for creativity, learning, and personal projects. Printable name tags for desks in a home environment add a delightful touch of organization, personalization, and even a dash of inspiration. This is where your personal style truly shines!
1. Kids' Study Zone Identification: Clearly mark whose desk is whose in a shared study area, or simply give a child ownership over their personal learning space. My daughter loves her "Captain Creative" desk tag!
2. Hobby & Craft Station Labels: Organize different craft areas (e.g., "Painting Corner," "Knitting Nook," "DIY Workshop") with clear, thematic name tags. It keeps supplies organized and inspires creativity.
3. Family Command Center Designations: If you have a shared family desk for bills, calendars, and mail, use name tags to assign sections to different family members.
4. Personalized Homework Stations: Beyond just names, include a small section for daily goals or a motivational quote for homework. "Today's goal: Master Math!"
5. Creative Project Starters: Design tags with prompts or ideas related to the desk's purpose. For an art desk, maybe "What will you create today?"
6. "Inspiration Station" Tags: Dedicate a small section of your desk to inspiration, and use a tag to label it, perhaps with a rotating quote or image. This is my go-to for battling creative blocks.
7. Seasonal & Holiday Themes: Change out name tags seasonally (e.g., a pumpkin tag for autumn, a snowflake for winter) to keep the home desk feeling fresh and festive.
8. "Work in Progress" Markers: For ongoing projects, a small, flip-style tag can indicate whether a project is "Active" or "On Hold," helping you manage personal tasks.
9. Gaming Setup Personalization: For gamers, a custom tag with their gamer tag or a favorite character can add a unique, personal touch to their battle station.
10. Shared Family Computer Designations: If multiple family members use the same computer desk, use tags to designate user profiles or preferred settings.
11. Home Office Zone Differentiation: In a multi-functional room, use a desk tag to clearly define your "work zone" from other areas, mentally compartmentalizing your space.
12. Gardening Bench Labels: For indoor plant propagation or small gardening projects, labels can identify plant types, planting dates, or care instructions, making it feel like a dedicated green thumb station.
Design Demystified: Crafting Your Tags from Concept to Print

The beauty of printable name tags for desks lies in their customizability. You don't need to be a graphic designer to create stunning, functional tags. This category breaks down the design process, from choosing the right tools to perfecting your aesthetic.
1. Software Selection:
- Beginner-Friendly: Microsoft Word, Google Docs, Canva (my personal favorite for quick, beautiful designs!), or free online label makers. These offer pre-made templates and intuitive drag-and-drop interfaces.
- Intermediate: Microsoft PowerPoint or Publisher, Apple Pages. More control over elements and layouts.
- Advanced: Adobe InDesign, Illustrator, Photoshop. For professional-grade, highly customized designs with intricate details and branding.
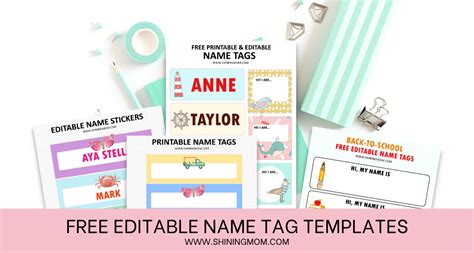
2. Template Exploration: Start with pre-designed templates. Most software and online tools offer a vast library. Search for "desk name tag template free" or "printable desk label template."
3. Font Psychology: Choose fonts that match your context.
- Classroom: Fun, legible, sans-serif fonts (e.g., Comic Sans, KG Primary Penmanship).
- Office: Professional, clean, easy-to-read fonts (e.g., Arial, Calibri, Montserrat).
- Home/Creative: Expressive, personal fonts (e.g., script, unique display fonts), but ensure readability.
4. Color Palette Cohesion: Select colors that align with your brand, classroom theme, or personal aesthetic. Use a limited palette (2-3 main colors) for a polished look.
5. Iconography & Imagery: Incorporate small, relevant icons (e.g., a book for reading, a computer for tech, a coffee cup for a break area) to add visual interest and convey meaning without clutter.
6. Information Hierarchy: Decide what information is most important and make it the most prominent (e.g., name larger than title). Think about how the eye scans the tag.
7. White Space Importance: Don't overcrowd your tag. Ample white space makes the tag look clean, professional, and easy to read.
8. Test Print Before Batch Printing: Always print one or two samples on plain paper first to check alignment, colors, and readability. Trust me, I once printed 100 event tags only to realize the logo was pixelated – a costly mistake!
9. Consider Size & Orientation: Will your tags be landscape or portrait? How large do they need to be to be legible from a distance but still fit on the desk? Standard sizes are often around 8.5" x 2.5" or 10" x 3".
10. QR Codes & Barcodes: For advanced applications, embed QR codes linking to bios, contact info, or online resources. This is particularly useful for events or smart office solutions.
11. Accessibility Considerations: For classroom or inclusive office environments, consider using high-contrast colors and larger, clear fonts for individuals with visual impairments.
12. Version Control: If you're creating multiple designs or iterations, save them with clear version numbers (e.g., "NameTag_V1_Final," "NameTag_V2_Classroom"). This helps track changes and avoid confusion.
Printing Perfection: Tips & Tricks for Flawless Output
Once your design is ready, the next step is bringing it to life. Printing printable name tags for desks effectively requires attention to detail, from paper choice to printer settings. Get this right, and your tags will look professional and crisp.
1. Paper Type Matters:
- Standard Cardstock (65-110 lb): My personal preference for most desk tags. It offers good durability and a professional feel without being overly thick.
- Photo Paper (Matte or Glossy): For vibrant colors and a premium look, especially if your design is graphics-heavy. Glossy can sometimes cause glare, so matte is often a safer bet for readability.
- Label Sheets (Full Sheet or Pre-cut): Ideal for adhesive tags. Ensure you use templates specifically for your label brand (e.g., Avery, Online Labels) for perfect alignment.
- Laminating Pouches: If you plan to laminate, ensure your paper isn't too thick to fit through the laminator.
2. Printer Calibration & Settings:
- Best Quality/Photo Settings: Always opt for the highest quality print setting your printer offers, especially for color tags.
- Correct Paper Type Selection: In your printer settings, select "cardstock," "photo paper," or "heavy paper" to ensure the printer uses the correct amount of ink and heat.
- Print Preview: Crucial for checking margins and alignment before committing to a print run.
3. Ink Levels Check: Nothing is worse than running out of ink halfway through a batch! Always check your ink levels before starting a large print job.
4. Consider Professional Printing: For very large quantities, highly specific paper, or complex designs, a local print shop can often offer better quality, cost-effectiveness per unit, and specialized finishes. I've used professional printers for large events, and the difference in quality is noticeable.
5. Cutting Tools:
- Paper Trimmer/Guillotine: For straight, clean cuts. Essential for professional-looking edges.
- Craft Knife & Cutting Mat: For intricate cuts or if you don't have a trimmer.
- Scissors: For smaller batches or free-form shapes.
- Corner Rounder: A small tool that gives a polished, rounded edge to your tags, making them feel softer and more professional.
6. Batch Printing & Alignment: When printing multiple tags per page, ensure your design software or template is perfectly aligned with your paper stock. Small misalignments can lead to wasted paper.
7. Drying Time: Allow ink (especially from inkjet printers) to fully dry before handling, cutting, or laminating to prevent smudging.
8. Double-Sided Printing: If your tags require information on both sides, ensure your printer supports duplex printing and you've set up your design correctly for flip-over.
9. Environmentally Friendly Options: Explore recycled paper options or choose printers that use sustainable ink where possible.
10. Template Management: If using pre-made label templates, download them directly from the manufacturer's website to ensure compatibility with your specific product.
11. Troubleshooting: If colors look off, try cleaning your print heads. If alignment is an issue, re-check your margins in your design software.
12. Lamination Preparation: If laminating, print on slightly smaller paper to leave a protective border around the tag once laminated. This prevents peeling.
Durability & Display: Making Your Name Tags Last & Stand Out
A beautifully designed and perfectly printed name tag is only as good as its longevity and visibility. This section focuses on methods to ensure your printable name tags for desks withstand the test of time and effectively communicate their message.
1. Lamination: The Ultimate Protector:
- Cold Lamination: Uses adhesive sheets, no heat required. Great for heat-sensitive prints or smaller batches.
- Hot Lamination: Uses heat-activated pouches. Offers a more rigid, durable finish. This is my preferred method for classroom tags that need to last all year.
- Benefits: Protects against spills, tears, fading, and general wear and tear. Makes tags reusable.
2. Self-Adhesive Vinyl or Contact Paper: A more DIY lamination alternative. Clear contact paper can be applied over the printed tag for a water-resistant, durable finish.
3. Acrylic Desk Stands/Holders:
- L-shaped or Tent-Style: Common for offices and events. They hold the tag upright for maximum visibility.
- Slanted Holders: Offer a slight angle for easier reading.
- Custom Sizes: Available to fit various tag dimensions.
4. Clip-on Stands: Small clips attached to a base that hold the name tag. These are versatile and easy to reposition.
5. Reusable Adhesive Strips/Dots: For temporary placement, use removable adhesive dots or strips (e.g., Command Strips, Blu Tack) that won't damage desk surfaces.
6. Magnetic Backing: Attach magnetic strips to the back of laminated tags for easy placement on metal desks or whiteboards. This is perfect for hot-desking or flexible classroom setups.
7. Weighting for Stability: For cardstock tags without a holder, a small, flat weight (e.g., a decorative stone, a paperweight) can keep them from blowing away or shifting.
8. Clear Plastic Sleeves/Folders: For classroom tags, placing them inside clear plastic sleeves can offer protection and allow for dry-erase marker use directly on the sleeve.
9. Binder Clips with Cardboard Base: A clever DIY display method. Use a large binder clip as a stand, with the tag inserted between the clip arms, often on a small cardboard base for stability.
10. Waterproof Paper: For environments prone to moisture (e.g., outdoor events, craft fairs), consider printing directly onto specialized waterproof paper. It’s more expensive but highly effective.
11. UV Protection Spray: For tags exposed to sunlight, a clear UV protection spray can help prevent fading. This is particularly relevant for desk tags near windows.
12. Double-Sided Printing for Reversibility: Print different information on each side (e.g., name on one side, "Do Not Disturb" on the other) for versatile use without needing multiple tags.
Beyond the Basics: Creative & Interactive Name Tag Ideas
Let's break free from the traditional rectangular label! Printable name tags for desks can be so much more than just a name. This section delves into imaginative ways to make your desk tags truly engaging, functional, and memorable.
1. "Flip-Up" Interactive Tags: Design a tag that folds or has a flap. One side shows the name, the other reveals a fun fact, a project status, or a call to action. I used this for a team-building exercise once, with "What's Your Superpower?" on the hidden flap – it was a great icebreaker!
2. Dry-Erase Overlay: Laminate your name tags and encourage users to write on them with dry-erase markers. This allows for daily updates, goal setting, or quick notes without needing new tags.
3. Pop-Up Elements: Incorporate simple 3D pop-up designs. For a classroom, a small pop-up animal or character; for an office, a miniature pop-up graph or icon.
4. Puzzle Piece Tags: For team-building events, design individual name tags as puzzle pieces that fit together when desks are arranged in groups. It's a subtle way to encourage collaboration.
5. QR Code Integration for Digital Profiles: Embed a QR code that links to a LinkedIn profile, a personal website, a student portfolio, or a digital contact card. This transforms a static tag into a dynamic portal.
6. Miniature "About Me" Boards: Create a slightly larger, foldable tag that opens up to reveal a small space for photos, drawings, or quick facts. This is fantastic for new employee introductions or classroom "star of the week."
7. Themed Cut-Out Shapes: Instead of standard rectangles, cut tags into shapes relevant to your context (e.g., a star for a star student, a cloud for a creative space, a gear for an engineering team).
8. Augmented Reality (AR) Integration: For the truly tech-savvy, design tags with AR markers. When scanned with a smartphone app, these could trigger a short video introduction, a 3D model, or interactive content related to the person or desk.
9. Seed Paper Tags: Print on seed paper, and at the end of their use, the tags can be planted to grow flowers or herbs. An eco-friendly and memorable touch for events or sustainable offices.
10. Sensory Elements (Child-Friendly): For younger learners, incorporate small textured elements (e.g., sandpaper letters for tactile learning, a small piece of felt) onto the laminated tag.
11. "Status Slider" Tags: Create a laminated tag with a small, movable paper clip or slider that indicates status (e.g., "Available," "Deep Work," "Lunch," "Meeting"). This adds a practical, visual communication tool.
12. "Mood Meter" Tags: For a fun, empathetic classroom or creative office, include a small area where individuals can use a clothes pin or sticker to indicate their current mood (e.g., "Happy," "Focused," "Need Coffee!"). It's a light-hearted way to foster understanding.
The Digital Edge: Integrating Tech for Smart Name Tag Solutions
While the core of our discussion is "printable," we live in a digital world. Leveraging technology can elevate the creation, management, and even the functionality of printable name tags for desks. This category explores how digital tools and smart solutions can enhance your name tag strategy.
1. Mail Merge for Bulk Personalization: For large quantities of name tags, mail merge in Microsoft Word or Google Docs is an absolute lifesaver. You create one template, link it to a spreadsheet (Excel, Google Sheets) of names and details, and it automatically generates all your personalized tags. This saved me countless hours preparing for a 300-person conference.
2. Online Design Tools with Cloud Storage: Platforms like Canva, Adobe Spark, or even Google Slides allow you to design tags online, collaborate with others, and store your templates in the cloud for easy access and future edits.
3. PDF Fillable Forms: Create a master PDF template with editable fields. Users can type in their names and details directly into the PDF before printing, ensuring consistent formatting.
4. Spreadsheet Management for Data: Maintain an organized spreadsheet of all names, titles, departments, and any other relevant information for your name tags. This centralizes your data and makes updates simple.
5. Automated Name Tag Generators: Some event management software or online tools offer integrated name tag generators, pulling attendee data directly from registration lists and formatting it into printable layouts.
6. QR Code Generators: Easily generate QR codes online (many free tools available) and integrate them into your designs. These