Have you ever found yourself at a critical meeting, a pivotal pitch, or a bustling trade show, scrambling to hand over loose documents? Or perhaps you’ve received a stack of papers from a potential partner, only for them to feel… uninspired? Trust me, I’ve been there. I remember one frantic morning, preparing for a last-minute client meeting, realizing my meticulously crafted proposal was going into a generic, flimsy folder. The panic was real! I knew my content was gold, but the packaging felt like pyrite. It was in that moment of near-disaster that the true power of a custom, printable presentation folder clicked for me. It’s not just about organizing papers; it’s about crafting an experience, extending your brand’s handshake, and leaving an indelible mark long after the conversation ends.
In today’s hyper-competitive landscape, every detail counts. A presentation folder is often the first tangible touchpoint a potential client, partner, or attendee has with your brand. It’s a silent ambassador, speaking volumes about your professionalism, attention to detail, and commitment to quality. But "printable presentation folders" can mean so many things – from a simple DIY project at home to a sophisticated, professionally printed masterpiece. Where do you even begin? How do you ensure your folder not only holds documents but also captivates your audience and reinforces your message?
This comprehensive guide is born from countless hours of research, hands-on experimentation, and a genuine passion for helping you make a powerful impression. We’re going to dive deep into every facet of printable presentation folders, exploring everything from foundational concepts and design principles to advanced customization techniques, material choices, and savvy printing strategies. Whether you're a small business owner looking to elevate your brand, a marketing professional seeking innovative solutions, a student aiming for a polished academic presentation, or an event organizer wanting to leave a lasting memory, this article is designed for you. We’ll cover how to choose the best options for your specific needs, common pitfalls to sidestep, and even advanced tips that will make you a folder-printing guru. Get ready to transform those loose papers into a cohesive, compelling, and unforgettable brand statement!
---
Table of Contents

- [The Foundation: What Exactly Are Printable Presentation Folders?](#the-foundation-what-exactly-are-printable-presentation-folders)
- [Unleashing Creativity: Design Principles for Impactful Folders](#unleashing-creativity-design-principles-for-impactful-folders)
- [Beyond the Basics: Customization Options That Make You Shine](#beyond-the-basics-customization-options-that-make-you-shine)
- [DIY vs. Professional: Navigating Your Printing Journey](#diy-vs-professional-navigating-your-printing-journey)
- [Material Matters: Choosing the Right Stock for Durability & Style](#material-matters-choosing-the-right-stock-for-durability--style)
- [Strategic Storytelling: How to Leverage Folders for Different Scenarios](#strategic-storytelling-how-to-leverage-folders-for-different-scenarios)
- [Troubleshooting & Tips: Avoiding Common Pitfalls and Mastering the Process](#troubleshooting--tips-avoiding-common-pitfalls-and-mastering-the-process)
- [The Future of Folders: Trends & Innovations to Watch](#the-future-of-folders-trends--innovations-to-watch)
- [How to Choose the Best Printable Presentation Folder for Your Needs](#how-to-choose-the-best-printable-presentation-folder-for-your-needs)
- [Common Pitfalls to Avoid When Working with Printable Presentation Folders](#common-pitfalls-to-avoid-when-working-with-printable-presentation-folders)
- [Advanced Tips for Experts: Maximizing Your Printable Folder Impact](#advanced-tips-for-experts-maximizing-your-printable-folder-impact)
- [Conclusion](#conclusion)
---
The Foundation: What Exactly Are Printable Presentation Folders?
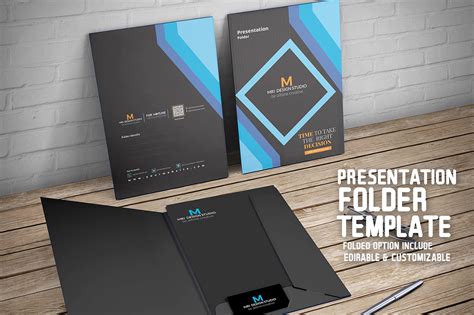
Let's start with the basics, shall we? For those new to the game, a printable presentation folder is essentially a specialized folder designed with pockets, slits, and sometimes other features, specifically created to hold and organize documents for presentations, proposals, conferences, or promotional materials. The "printable" aspect means you can customize its exterior and sometimes interior with your own designs, branding, text, and imagery. It's not just a blank canvas; it's a powerful tool for visual communication.
Here’s a deeper dive into what makes these folders so versatile and effective:
- More Than Just Paper Holders: Think of them as miniature billboards for your brand or message. They communicate professionalism and attention to detail before anyone even reads the contents.
- Customization at Its Core: Unlike off-the-shelf folders, printable versions allow for full creative control. You can choose colors, fonts, logos, images, and specific messaging that aligns perfectly with your objectives.
- Standard Sizes & Shapes: Most commonly, they come in sizes designed to hold standard 8.5" x 11" (Letter) or A4 documents. This typically means the folder itself is slightly larger, around 9" x 12" when closed, to accommodate the papers comfortably.
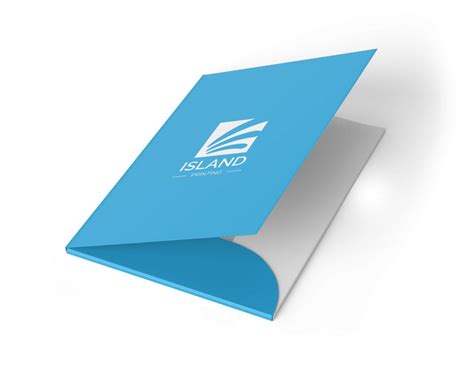
- Pocket Power: The defining feature is usually one or two internal pockets, designed to secure documents. These pockets can vary in depth and style.
- Business Card Slits: A common and highly practical addition, these die-cut slits within the pocket allow you to securely insert a business card, ensuring your contact information is always readily available.
- Spine Options: Some folders feature a spine (or backbone) which allows them to hold a greater volume of documents without bulging. This can range from a narrow 1/8-inch spine to a wider 1-inch spine.
- Material Variety: While often made from sturdy cardstock, printable presentation folders can come in various paper weights and finishes, including matte, glossy, linen, or even recycled options. We’ll explore this in detail later!
- Purpose-Driven Design: The specific design and features of your printable presentation folders should always serve a purpose. Are they for a sales pitch? A press kit? A new employee welcome packet? The answer will dictate your choices.
- DIY or Professional: A key distinction is whether you print them yourself (DIY) or send your design to a professional printer. Both have their merits, depending on quantity, budget, and desired quality.
- Enhancing Perceived Value: A well-designed, high-quality folder instantly elevates the perceived value of its contents. It signals that what’s inside is important and worth paying attention to.
- Brand Consistency: For businesses, they are invaluable for maintaining brand consistency across all touchpoints. Every folder distributed reinforces your brand identity.
- My first foray into DIY folders: I remember my initial excitement trying to print a basic folder for a local community event using my home printer. I quickly learned that while possible for small batches, getting consistent, vibrant colors and a clean fold required more than just enthusiasm! That early experience taught me the importance of understanding both design *and* printing limitations.
Unleashing Creativity: Design Principles for Impactful Folders
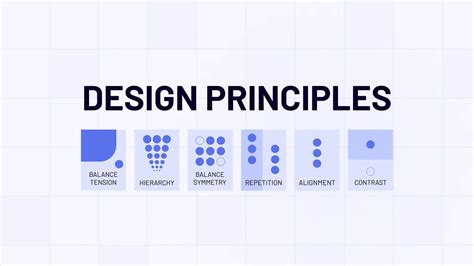
Now that we know what printable presentation folders are, let's talk about making them sing! Design isn't just about making things look pretty; it's about making them communicate effectively. Your folder's design is your first impression, your visual handshake. Here’s how to ensure it’s a firm, memorable one.
- Brand Identity First: Your logo, brand colors, and primary fonts should be prominently featured. Consistency here builds recognition and trust. Don't go rogue with new colors unless it's a specific campaign that calls for it.
- Less is More (Often): Avoid clutter. A clean, uncluttered design often speaks louder than a busy one. Focus on key information and visuals that draw the eye, rather than overwhelming it.
- High-Resolution Graphics: This is non-negotiable. Pixelated logos or blurry images scream amateur. Always use vector graphics for logos and high-resolution (at least 300 DPI) images for printing.
- Strategic Placement of Information:
- Front Cover: Your logo, company name, a compelling tagline, or the presentation title. This is prime real estate.
- Back Cover: Contact information, website, social media handles, or a concise call to action.
- Inside Pockets: Often overlooked, but great for subtle branding, a mission statement, or a pattern that complements your design.
- Readability is Key: Ensure all text is legible. Choose fonts that are easy to read and large enough, especially for contact details. Contrast between text and background color is vital.
- Leverage White Space: Don't be afraid of empty space. It helps guide the eye, reduces visual fatigue, and makes your key elements pop. It’s like the silence in music – just as important as the notes.
- Color Psychology: Understand what your chosen colors communicate. Blues often convey trust and professionalism, greens suggest growth or nature, reds can be bold or urgent. Align colors with your brand's message.
- Target Audience Considerations: Who are you giving this to? A corporate CEO will appreciate a sleek, minimalist design, while a creative agency might embrace something more vibrant and experimental. Tailor your aesthetic.
- Proofread, Proofread, Proofread: Typos are professionalism killers. Get multiple sets of eyes on your design before printing. A simple spelling error can undermine your entire message.
- Consistency Across Materials: Your folder design should ideally echo the design of your business cards, letterheads, and website. This creates a cohesive and professional brand experience.
- My "Aha!" Design Moment: I once helped a startup design their first printable presentation folders. They initially wanted a very busy, information-packed front cover. I encouraged them to simplify, focusing on their unique logo and a single, powerful image. The feedback they received was overwhelmingly positive, with clients commenting on the "sophisticated" and "memorable" design. It really drove home that impact often comes from restraint and clarity.
- A friend's cautionary tale: My friend, a talented graphic designer, once rushed a folder design for a client. In her haste, she used a low-res image she found online. The printed folders looked fuzzy and unprofessional, and she had to absorb the cost of reprinting. It was a tough lesson in always ensuring high-quality assets.
Beyond the Basics: Customization Options That Make You Shine

Once you’ve nailed the design, it’s time to think about the physical structure and special touches that make your printable presentation folders truly unique. This is where you move from "good" to "unforgettable."
- Pocket Styles & Configuration:
- Standard Single/Double Pockets: The most common, usually 3-4 inches high.
- Expandable Pockets: For when you have a lot of documents. These have a gusset that allows them to expand.
- Vertical Pockets: Less common but can offer a unique visual appeal.
- Slanted Pockets: Adds a touch of modern design.
- Business Card Slits Galore:
- Standard Horizontal Slits: The most common.
- Vertical Slits: For vertically oriented business cards.
- CD/DVD Slits: If you're distributing digital media alongside physical documents.
- USB Drive Slots: Increasingly popular for tech-focused presentations.
- Spine Width: As mentioned, a spine allows for more capacity. Consider your typical document volume. A 1/8" spine holds about 25 sheets, while a 1" spine can hold up to 200. Don't underestimate how quickly documents add up!
- Die-Cutting: This is where things get really creative! Die-cutting allows for custom shapes, windows, or intricate designs cut into the folder itself. Imagine a folder with a window showing your logo on the first document inside, or a unique flap design.
- Foil Stamping: Adds a touch of luxury and sophistication. A metallic (gold, silver, copper) or pigmented foil is applied to specific areas of your design, creating a shimmering effect that catches the light. Perfect for logos or key text.
- Embossing & Debossing:
- Embossing: Raises parts of your design, giving it a tactile, three-dimensional feel.
- Debossing: Indents parts of your design, creating a recessed effect. Both add a premium, handcrafted feel.
- Spot UV Coating: A high-gloss, clear coating applied to specific areas of your design (e.g., your logo or a graphic). It creates a striking contrast between matte and shiny finishes, drawing attention to key elements.
- Laminations:
- Gloss Lamination: Provides a high-shine, protective finish, making colors pop.
- Matte Lamination: Offers a sophisticated, non-reflective finish, often conveying a more subdued, high-end feel.
- Soft-Touch Lamination: My personal favorite! It provides a velvety, almost rubbery texture that feels incredibly luxurious and leaves a lasting impression. This is my go-to choice because it truly elevates the tactile experience.
- Perforated Tear-Off Panels: Useful for feedback forms, coupons, or detachable contact cards. This adds functional value beyond just holding documents.
- Elastic Closures or Velcro Dots: For extra security, especially if the folder will be handled a lot or contains sensitive documents.
- My experience with Soft-Touch: I once used a printable presentation folder with a soft-touch laminate for a high-stakes investor pitch. The tactile experience was so unexpected and pleasant that multiple investors commented on the quality of the folder itself, even before opening it. It subtly communicated our brand's attention to detail and commitment to excellence. That's the kind of subtle impact these customizations can have!
DIY vs. Professional: Navigating Your Printing Journey
Deciding whether to print your printable presentation folders yourself or outsource to a professional printer is a crucial step. Each path has its own set of advantages and challenges, and the best choice depends heavily on your specific needs, budget, quantity, and desired quality.
### The DIY Route: Printing at Home or Office
Pros:
- Cost-Effective for Small Runs: For a handful of folders (e.g., for a student project, a very small meeting, or a personal portfolio), printing yourself can save money on setup fees.
- Quick Turnaround: No waiting for external printers. You can design and print on demand.
- Full Control: You have immediate oversight of the entire process from design to print.
- Experimentation: Easier to print a few test versions to check colors and layout without incurring significant costs.
- Learning Opportunity: Great for understanding the basics of design, paper, and printing.
Cons:
- Limited Quality: Standard home/office printers rarely match the resolution, color accuracy, and finishing options of commercial printers. Colors might appear duller, and gradients less smooth.
- Paper Limitations: Most consumer printers can't handle heavy cardstock required for durable folders. You'll be limited to lighter paper weights, which can feel flimsy.
- Finishing Challenges: Achieving clean folds, precise cuts for pockets, or adding special finishes (like foil or embossing) is virtually impossible without specialized equipment.
- Time-Consuming: Designing, printing, cutting, and assembling even a moderate number of folders can be incredibly time-intensive.
- Inconsistent Results: Maintaining consistent color and cut accuracy across multiple folders can be difficult with home equipment.
- Cost of Supplies: Ink cartridges and specialty paper can be surprisingly expensive for larger quantities, often negating initial savings.
### The Professional Printing Route: Partnering with Experts
Pros:
- Superior Quality: Commercial printers use high-resolution presses, specialized inks, and advanced color management systems, resulting in crisp graphics, vibrant colors, and professional finishes.
- Wide Range of Options: Access to heavy cardstock, unique textures, and all the advanced customization options we discussed (foil stamping, embossing, spot UV, laminations, custom die-cuts).
- Precision and Consistency: Professional printers ensure accurate cutting, folding, and consistent quality across your entire order, whether it's 50 or 5,000 folders.
- Time Savings: You provide the design file, and they handle the production, freeing up your time for other tasks.
- Expert Advice: Reputable printers offer valuable insights on paper choices, design specifications, and cost-saving tips.
- Bulk Discounts: The cost per folder significantly decreases with larger orders, making it highly cost-effective for businesses.
- E-E-A-T for Your Brand: High-quality printed materials signal professionalism and trustworthiness to your audience, directly enhancing your brand's E-E-A-T.
Cons:
- Higher Initial Cost: Setup fees and minimum order quantities can make small runs more expensive than DIY.
- Longer Turnaround Times: Production and shipping take time, so planning ahead is crucial.
- Less Immediate Control: You send off your files and trust the printer to execute your vision. (This is why choosing a reputable printer is key!)
- Design File Requirements: Professional printers often require specific file formats (e.g., print-ready PDFs with bleed and crop marks) that can be intimidating for beginners.
My personal recommendation: For anything beyond a handful of personal use folders, always go professional. The difference in quality, durability, and the sheer impact it has on your brand perception is worth the investment. I once tried to print 50 branded folders for a local event on my office printer. Not only did it take *days* of my time, but the colors were off, the folds were uneven, and they just looked… homemade. Never again for professional use! Save yourself the headache and the inferior product.
Material Matters: Choosing the Right Stock for Durability & Style

The paper stock you choose for your printable presentation folders is far more important than many realize. It affects not only the folder's durability and longevity but also its tactile feel, visual appeal, and even how well your chosen finishes will perform. Think of it as the canvas for your masterpiece.
- Weight (GSM or lbs): This refers to the thickness and sturdiness of the paper.
- Lightweight (e.g., 200-250 GSM / 80-100 lb text): Too flimsy for folders. Avoid.
- Medium Weight (e.g., 250-300 GSM / 100-120 lb cover): Suitable for basic, less-handled folders, but might still feel a bit light.
- Heavy Weight (e.g., 300-350 GSM / 120-140 lb cover): The sweet spot for most durable presentation folders. Offers a substantial, high-quality feel.
- Extra Heavy Weight (e.g., 350 GSM+ / 160 lb cover+): For ultra-premium folders that need to withstand significant handling.
- Coated vs. Uncoated:
- Coated Stock: Has a layer of clay or other materials that makes the surface smooth and less porous.
- Gloss Coated: High shine, vibrant colors, good for photos. Can show fingerprints.
- Matte Coated: Smooth, subtle sheen, reduces glare, sophisticated look. Colors are more subdued.
- Silk/Dull Coated: A middle ground between gloss and matte, with a slight sheen and soft feel.
- Uncoated Stock: No coating, more porous, natural feel. Absorbs ink more, so colors appear softer. Great for a rustic, organic, or eco-friendly look. Easy to write on.
- Texture & Finish:
- Smooth: The most common. Versatile for almost any design.
- Linen: Mimics the texture of linen fabric, adding a classic, elegant feel.
- Recycled/Kraft: Often has a slightly rougher, more earthy texture. Perfect for brands emphasizing sustainability.
- Vellum: A translucent paper that can be used for inserts or overlays, adding a unique visual layer.
- Color of Stock: While most folders are printed on white stock, don't forget the option of colored stock. A black folder with white or metallic foil print can be incredibly striking. Just remember that printing full-color designs on colored stock can alter the perceived color of your design.
- Sustainability & Eco-Friendly Options:
- Recycled Content: Look for folders made with post-consumer waste (PCW) content.
- FSC Certified: Ensures the paper comes from responsibly managed forests.
- Biodegradable/Compostable: Increasingly available, aligning with strong eco-conscious branding.
- Durability Considerations: If your folders will be handled frequently, passed around, or reused, opt for a heavier stock with a protective laminate (like gloss or matte lamination). This prevents tearing, creasing, and smudging.
- Writing Surface: If you anticipate people writing notes directly on the folder, an uncoated stock or a matte-laminated finish is preferable as gloss can be difficult to write on.
- Budget vs. Impact: While heavier, custom stocks cost more, the perceived value and durability can often justify the expense. Skimping on paper can undermine an otherwise excellent design.
- My printable presentation folder material epiphany: I once chose a slightly lighter stock to save a few dollars on a large order. The folders arrived, and while the print was beautiful, they felt distinctly "flimsy." The client, a luxury brand, subtly hinted that they expected something more substantial. It taught me that the tactile experience of the material is an integral part of branding, and sometimes, a small saving can lead to a significant perceived value loss. My subjective tip: when in doubt, go a little heavier on the stock. It rarely disappoints.
Strategic Storytelling: How to Leverage Folders for Different Scenarios
Printable presentation folders aren't just for holding papers; they're powerful tools for strategic communication. Each scenario calls for a slightly different approach to design, content, and features. Let’s explore how to make your folders tell the right story, every time.
- Sales & Marketing Pitches:
- Goal: Persuade, inform, and close deals.
- Design: Professional, branded, clear call to action (e.g., "Visit Our Website," "Book a Demo").
- Content: Product/service brochures, case studies, pricing sheets, testimonials, contact forms.
- Customization: Business card slits, perhaps a CD/USB slot for a demo reel. High-quality finish (soft-touch laminate) to reflect premium offerings.
- Personal Scenario: I used custom printable presentation folders for a crucial sales pitch to a major corporation. Each folder contained personalized data relevant to *their* needs, and the sleek design signaled our professionalism. The client later mentioned how impressed they were with the thoroughness and presentation.
- Conferences & Trade Shows:
- Goal: Brand awareness, lead generation, distribute information efficiently.
- Design: Bold, eye-catching, easy to read from a distance, event branding alongside your own.
- Content: Product sheets, event schedule, maps, giveaways, lead capture forms.
- Customization: Dual pockets for separating your info from general event info, perhaps a perforated tear-off for a prize draw.
- New Client Onboarding & Welcome Kits:
- Goal: Make new clients feel valued, provide essential information, set expectations.
- Design: Warm, welcoming, trustworthy, reflecting your brand's commitment to service.
- Content: Welcome letter, service agreement, contact list, FAQ, "What to Expect" guide, small branded gift.
- Customization: Maybe a slightly wider spine for more documents, a personalized touch with the client's name if possible.
- Employee Onboarding & HR Kits:
- Goal: Integrate new hires, provide essential HR documents, reinforce company culture.
- Design: Professional, yet friendly, reflecting company values.
- Content: Employee handbook, benefits information, forms, welcome letter, organizational chart.
- Customization: Durable stock (will be handled frequently), perhaps an internal pocket for a pen or small notebook.
- Academic & Educational Presentations:
- Goal: Organize research, present findings clearly, impress professors/peers.
- Design: Clean, organized, academic in tone, perhaps featuring university logo.
- Content: Research papers, appendices, project outlines, bibliography, presentation slides.
- Customization: Simple, sturdy design, perhaps with a clear window on the front for a title page.
- Press Kits & Media Events:
- Goal: Provide comprehensive information to journalists, generate positive media coverage.
- Design: Sleek, high-end, professional, strong branding.
- Content: Press releases, high-res images, company backgrounder, executive bios, product samples (if applicable).
- Customization: USB slot for digital assets, an elegant finish like spot UV or foil stamping.
- Real Estate & Financial Services:
- Goal: Present complex information clearly, build trust, convey reliability.
- Design: Conservative, trustworthy, professional, clean, clear contact information.
- Content: Property listings, financial reports, loan documents, client testimonials.
- Customization: High-quality, durable stock, perhaps a matte laminate for a subdued, serious feel.
- Another personal scenario: I once received a home loan application in a beautifully branded printable presentation folder from a local credit union. It instantly conveyed professionalism and made handling all the paperwork feel less daunting. The attention to detail really stood out and built immediate trust.
- Charity & Fundraising Events:
- Goal: Inspire donations, provide information about the cause, thank donors.
- Design: Evocative, emotional, clear messaging about impact, prominent charity logo.
- Content: Mission statement, success stories, donation forms, annual reports, thank you notes.
- Customization: Environmentally friendly paper options, perhaps a message of gratitude printed inside.
Troubleshooting & Tips: Avoiding Common Pitfalls and Mastering the Process
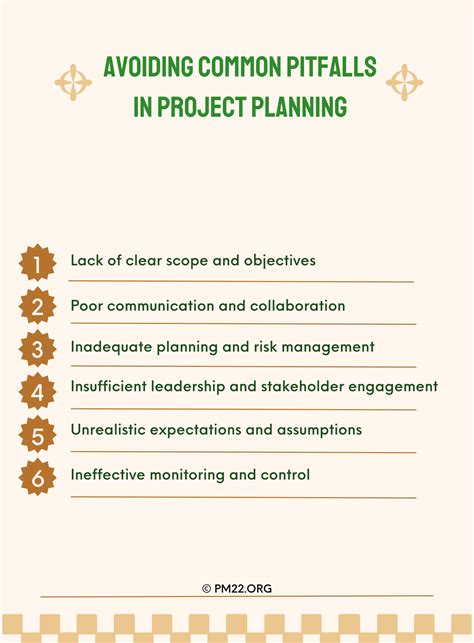
Even with the best intentions, things can sometimes go sideways when dealing with printable presentation folders. Having faced my fair share of hiccups, I’ve compiled a list of common issues and smart tips to help you navigate the process smoothly and achieve flawless results.
- Color Discrepancies (The "Why Does It Look Different?" Syndrome):
- Pitfall: Your design looks perfect on screen, but the printed version has different colors.
- Tip: Always design in CMYK mode for print (not RGB, which is for screens). Understand that screen colors (RGB) are additive light, while print colors (CMYK) are subtractive ink. A good printer will provide color proofs.
- Humorous Warning: Don't be like me and assume that vibrant neon green on your monitor will translate perfectly to print. It often becomes a rather dull pond-scum green. Always get a physical proof if color accuracy is paramount!
- Low-Resolution Images (The "Pixelated Logo" Problem):
- Pitfall: Blurry or jagged logos/images on the printed folder.
- Tip: Use vector graphics (AI, EPS, SVG) for logos and text, as they scale infinitely without losing quality. For raster images (photos), ensure they are at least 300 DPI (dots per inch) at the final print size.
- Incorrect Bleed and Margins (The "Cut-Off Text" Disaster):
- Pitfall: Important text or design elements are cut off at the edges, or white lines appear where they shouldn't.
- Tip: Design with "bleed" – extend your background colors/images beyond the trim line (typically 1/8 inch or 0.125 inches on each side). Keep important text and images within a "safe zone" (usually 1/8 to 1/4 inch inside the trim line) to prevent them from being cut off.
- Typographical Errors (The "Oops, Spelled That Wrong" Moment):
- Pitfall: A glaring typo on your perfectly designed folder.
- Tip: Proofread, proofread, proofread! Get multiple people to review the text. Read it backward. Read it aloud. Even better, get a professional proofreader.
- Choosing the Wrong Paper Stock (The "Flimsy Feeling" Flop):
- Pitfall: The folder feels cheap or doesn't hold up well.
- Tip: Refer back to the "Material Matters" section. For most printable presentation folders, aim for at least 120 lb cover (300 GSM) or higher. Request samples from your printer to feel the different stocks.
- Over-Designing (The "Too Much Going On" Mess):
- Pitfall: A folder that's visually chaotic and hard to understand.
- Tip: Embrace simplicity and white space. Focus on one or two key messages and visuals. Your folder is a guide, not a novel.
- Ignoring Pocket Design & Business Card Slits:
- Pitfall: Forgetting to account for the pockets and card slits in your design, leading to misaligned text or logos.
- Tip: Your printer will provide a dieline template. Always use this template to ensure your design elements clear the pocket folds and card slits.
- Not Requesting a Proof:
- Pitfall: Discovering a major error only after the entire order is printed.
- Tip: Always, always, *always* request a proof. A digital PDF proof is standard, but for critical orders, a physical hard-copy proof is highly recommended, even if it incurs an extra cost. It's cheap insurance!
- **Poor