There’s a unique kind of joy that comes from settling down with a good book, isn’t there? The crisp turning of pages, the scent of old paper or new ink, and the quiet escape into another world. But what if that simple pleasure could be enhanced, made even more personal and creatively satisfying? That’s where the magic of printable bookmark coloring enters the scene, transforming a humble page-marker into a canvas for your imagination.
I remember distinctly a particularly stressful period in my life. My mind was racing, my hands were restless, and finding a quiet moment felt impossible. One afternoon, scrolling aimlessly online, I stumbled upon a simple black-and-white outline of a bookmark – intricate, yet inviting. On a whim, I printed it, grabbed some old colored pencils, and just started to fill in the lines. What began as a distraction quickly morphed into a profound sense of calm. The world outside faded, my thoughts quieted, and for the first time in days, I felt genuinely present and at peace. That little piece of paper, colored by my own hand, became more than just a bookmark; it was a tangible reminder of a moment of tranquility I’d created for myself.
This comprehensive guide is born from that very experience – a desire to share the simple, profound joy that printable bookmark coloring offers. Whether you’re a seasoned artist looking for a new miniature canvas, a parent seeking a fun and educational activity for your kids, a teacher wanting engaging classroom resources, or simply someone craving a mindful escape, you’ve come to the right place. We’ll dive deep into everything you need to know: from finding the perfect designs and gathering your tools, to mastering coloring techniques and discovering creative ways to use your finished masterpieces. Get ready to embark on a colorful journey that promises relaxation, creativity, and a touch of personal flair for every book you read. Trust me, you don’t want to miss this!
Table of Contents

- [The Magic of Printable Bookmark Coloring: More Than Just a Page Marker](#the-magic-of-printable-bookmark-coloring-more-than-just-a-page-marker)
- [Unleashing Your Inner Artist: Choosing Your Perfect Printable Bookmark Designs](#unleashing-your-inner-artist-choosing-your-perfect-printable-bookmark-designs)
- [The Essential Toolkit: What You Need to Bring Your Bookmarks to Life](#the-essential-toolkit-what-you-need-to-bring-your-bookmarks-to-life)
- [From Screen to Page: Step-by-Step Printing & Preparation for Your Bookmarks](#from-screen-to-page-step-by-step-printing--preparation-for-your-bookmarks)
- [Mastering the Art of Color: Techniques for Every Skill Level](#mastering-the-art-of-color-techniques-for-every-skill-level)
- [Beyond the Page: Creative Uses & Gifting Ideas for Your Finished Bookmarks](#beyond-the-page-creative-uses--gifting-ideas-for-your-finished-bookmarks)
- [Theme Spotlights: A Gallery of Inspiration for Printable Bookmark Coloring](#theme-spotlights-a-gallery-of-inspiration-for-printable-bookmark-coloring)
- [Mindfulness & Self-Care: Coloring as Therapy for the Soul](#mindfulness--self-care-coloring-as-therapy-for-the-soul)
- [Kid-Friendly Fun & Educational Resources: Engaging Young Minds with Bookmarks](#kid-friendly-fun--educational-resources-engaging-young-minds-with-bookmarks)
- [Curating Your Collection: Storing, Protecting, & Sharing Your Masterpieces](#curating-your-collection-storing-protecting--sharing-your-masterpieces)
- [How to Choose the Best Printable Bookmarks for Your Needs](#how-to-choose-the-best-printable-bookmarks-for-your-needs)
- [Common Pitfalls to Avoid in Your Coloring Journey](#common-pitfalls-to-avoid-in-your-coloring-journey)
- [Advanced Tips for Elevating Your Bookmark Coloring Game](#advanced-tips-for-elevating-your-bookmark-coloring-game)
- [Conclusion: Your Colorful Journey Awaits!](#conclusion-your-colorful-journey-awaits)
The Magic of Printable Bookmark Coloring: More Than Just a Page Marker
Let’s be honest, in a world full of digital distractions, the simple act of reading a physical book remains a cherished ritual for many. And what's a book without a bookmark? But we're not talking about just any bookmark here. We're talking about the transformative power of printable bookmark coloring – an activity that blends the practicality of reading with the therapeutic joy of creative expression. It’s more than just a craft; it’s an experience.
1. A Portal to Mindfulness: In our fast-paced lives, finding moments of calm can feel like a luxury. Coloring, especially intricate designs on a small canvas like a bookmark, forces you to focus. It's a gentle, accessible form of meditation that quiets the mind.
2. Unleashing Inner Creativity: Regardless of your artistic skill level, printable bookmark coloring allows you to be an artist. You choose the colors, the patterns, the shading. It's a low-pressure way to express yourself without the intimidation of a blank canvas.
3. Personalized Reading Experience: Why use a generic bookmark when you can use one that reflects your personality, your mood, or even the theme of the book you're reading? A hand-colored bookmark adds a unique, personal touch to every literary adventure.
4. Budget-Friendly Hobby: Unlike many creative pursuits that require expensive materials, printable bookmark coloring is incredibly affordable. All you need is a printer, some paper, and basic coloring supplies you might already have.
5. Instant Gratification: Bookmarks are small! This means you can complete a project relatively quickly, giving you a satisfying sense of accomplishment in a short amount of time. Perfect for those who crave quick wins.
6. Therapeutic Stress Relief: The repetitive motion of coloring, combined with the focus on lines and colors, can be incredibly calming. It’s a proven way to reduce anxiety and promote relaxation.
7. Perfect for All Ages: From young children developing fine motor skills to adults seeking a creative outlet, printable bookmark coloring transcends age barriers. It’s an activity the whole family can enjoy together.
8. Unique, Thoughtful Gifts: A hand-colored bookmark makes an incredibly personal and heartfelt gift for any book lover. Imagine giving a friend a bookmark you colored specifically for them, tailored to their favorite book genre or color scheme.
9. Enhances Reading Immersion: Having a beautiful, custom bookmark can actually make the act of reading feel more special. It's a small detail that elevates the entire experience.
10. A Sense of Accomplishment: Finishing a beautifully colored bookmark gives you a tangible piece of art you created. It's a small victory that can boost your mood and confidence.
11. Eco-Friendly Option: Many free printable designs are available, reducing the need to buy mass-produced items and allowing you to utilize paper you already have.
12. Portable Creativity: Once printed, you can take your bookmarks and coloring tools anywhere – to a café, on a trip, or just to another room in your house. It's creativity on the go! My friend, Sarah, loves to take a few printed bookmarks with her when she travels. She told me recently, "It's the perfect way to unwind in a hotel room after a long day of sightseeing, far better than scrolling on my phone!"
Unleashing Your Inner Artist: Choosing Your Perfect Printable Bookmark Designs
The first step on your colorful journey is selecting the designs that speak to you. The world of printable bookmark coloring is vast and varied, offering something for every taste and skill level. Don't be overwhelmed; instead, see it as an exciting treasure hunt!
1. Complexity Levels:
- Beginner-Friendly: Look for designs with large, open areas and thick lines. These are great for practicing basic coloring techniques without getting bogged down in tiny details.
- Intermediate: Designs with a mix of larger areas and some smaller, more intricate elements. Perfect for refining your skills.
- Advanced/Intricate: Mandalas, highly detailed floral patterns, or complex geometric designs. These offer a significant challenge and allow for advanced shading.
2. Popular Themes & Motifs:
- Nature: Flowers, leaves, trees, animals (birds, cats, foxes), landscapes. Timeless and calming.
- Abstract & Geometric: Swirls, zigzags, repeating patterns, tessellations. Great for color experimentation.
- Mandalas: Circular, symmetrical designs that are incredibly therapeutic to color.
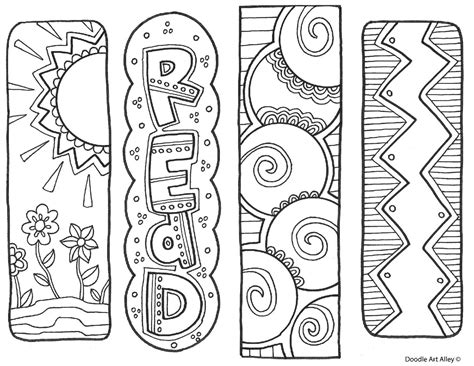
- Literary & Book-Themed: Open books, quill pens, stacks of books, famous literary quotes. Perfect for book lovers!
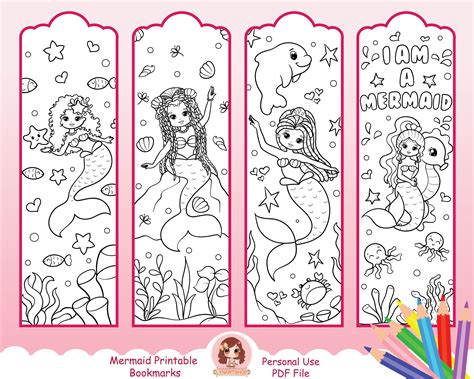
- Fantasy & Whimsical: Dragons, fairies, castles, magical creatures, starry nights. Let your imagination soar.
- Food & Drink: Coffee cups, cupcakes, fruits, vegetables. Fun and often quirky.
- Seasonal & Holiday: Designs for Christmas, Halloween, Easter, or specific seasons like autumn leaves or summer beach scenes.
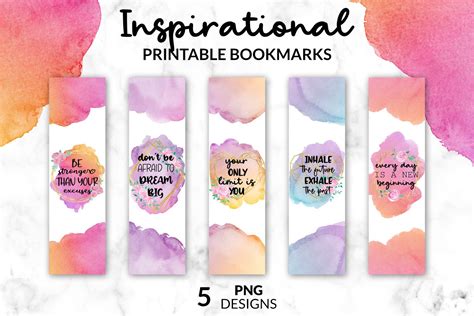
- Inspirational Quotes: Bookmarks with pre-printed quotes or positive affirmations, ready for you to color around them.
- Cute & Kawaii: Adorable characters, smiling animals, simplified designs. Ideal for kids or those who love cuteness.
- Pop Culture: While often not freely available due to copyright, you might find fan-art inspired designs or general themes reminiscent of popular media.
3. Where to Find Designs:
- Free Websites: Many blogs, coloring sites (e.g., Crayola, The Spruce Crafts), and individual artists offer free downloads. A quick Google search for "free printable bookmark coloring pages" will yield tons of results.
- Etsy & Creative Market: For unique, high-quality, and often more intricate designs, consider purchasing digital downloads from independent artists. This supports creators and often provides exclusive patterns.
- Pinterest: A visual goldmine! Search for "printable coloring bookmarks" and you'll find endless inspiration and links to download sites.
- Coloring Book Websites/Apps: Some digital coloring apps or websites allow you to export designs, which you could then resize for bookmarks.
- Your Own Creativity: If you're feeling adventurous, you can even draw your own outlines and then print them to color!
4. Considering Size & Shape:
- Most printable bookmark coloring designs are standard rectangular shapes, but some might be wider, narrower, or even have unique die-cut shapes (though these require careful cutting).
- Consider the book you'll be using it in. A very thick, wide bookmark might not fit well in a delicate paperback.
5. Licensing & Usage: Always check if the design is for personal use only (most free ones are) or if it comes with a commercial license if you plan to sell your finished products.
6. Reader Experience Levels:
- For Beginners: Start with simple, bold outlines. Look for "easy printable bookmark coloring" or "kids coloring bookmarks." Don't aim for perfection; focus on enjoying the process.
- For Experts: Seek out highly detailed, intricate patterns. Think about designs that allow for advanced blending, layering, and texture work. Search for "adult printable coloring bookmarks" or "mandala bookmark coloring."
7. Personal Connection: Choose designs that genuinely appeal to you. If you love cats, find cat bookmarks. If you're into fantasy, seek out dragons and wizards. Your personal connection to the image will make the coloring process even more enjoyable. My friend, Mark, who's usually really stressed with work, found that coloring bookmarks with intricate geometric patterns was surprisingly meditative for him. He said, "I thought I'd be bored, but the precision really helped clear my head after a long day of spreadsheets!"
8. Test Prints: Before committing to a whole sheet, do a test print of one design to see how it looks on your chosen paper and with your printer settings. This saves ink and paper in the long run.
The Essential Toolkit: What You Need to Bring Your Bookmarks to Life
You've picked out your stunning printable bookmark coloring designs – fantastic! Now, let's talk about the tools you'll need to transform those digital files into vibrant, tangible pieces of art. The good news is, you likely have most of these lying around already!
1. Printer:
- Inkjet vs. Laser: Either works! Inkjet printers are common for home use and are great for crisp lines. Laser printers offer very precise, smudge-proof lines, which can be advantageous.
- Color vs. Black & White: You only need a black ink cartridge for the outlines. Color ink is irrelevant for printing the coloring pages themselves, though it's good to have for other projects.
- Settings: Ensure your printer is set to "Best" or "High Quality" for crisp lines. Avoid "Draft" mode.
2. Paper: This is arguably the most crucial component after the design itself!
- Cardstock (Recommended): This is your best friend for bookmarks.
- Weight: Aim for 65lb (176gsm) to 110lb (298gsm) cardstock. Thicker paper holds up better to coloring, handling, and wear. It also prevents bleed-through, especially with markers.
- Finish: Matte or smooth cardstock is ideal. Glossy paper won't absorb colors well.
- Regular Printer Paper (80-90gsm): Use this for practice or if you're laminating everything immediately. It's thin and prone to buckling with wet mediums or heavy pressure from pencils.
- Watercolor Paper (for watercolor pencils/paints): If you plan to use watercolors, opt for cold-press watercolor paper around 90lb (190gsm) or higher.
- Pro Tip: Always check your printer's specifications for the maximum paper weight it can handle.
3. Coloring Mediums: This is where the fun really begins!
- Colored Pencils:
- Artist Grade: Softer leads, blend beautifully, vibrant colors. Brands like Prismacolor, Faber-Castell Polychromos.
- Student Grade: More affordable, harder leads, good for beginners. Brands like Crayola, Staedtler.
- Techniques: Excellent for layering, blending, shading, and intricate details.
- Markers:
- Alcohol-Based: (e.g., Copic, Ohuhu) Very vibrant, blend seamlessly, but can bleed through thin paper. Best for cardstock.
- Water-Based: (e.g., Crayola, Tombow Dual Brush Pens) Less bleed-through, good for broad strokes, can be blended with water.
- Fine-Tip Markers: Great for small details and crisp lines.
- Gel Pens: Add sparkle, metallic sheen, or neon pop. Excellent for accents and small details.
- Crayons: Great for young children, offering bold, opaque color. Less precise but very accessible.
- Watercolor Pencils/Paints: For a softer, more translucent look. Requires appropriate paper and water brushes.
- Pastels (Soft or Oil): Can create beautiful soft blends, but can be messy and require a fixative.
4. Cutting Tools:
- Scissors: Sharp craft scissors are perfectly fine for most bookmarks.
- Paper Trimmer/Guillotine: For perfectly straight, clean edges, a paper trimmer is a game-changer.
- Craft Knife/X-Acto Knife & Cutting Mat: For intricate cuts or if you want perfectly crisp corners. Use with extreme caution.
5. Optional Finishing Touches (Highly Recommended for Durability!):
- Laminator & Pouches: For professional-looking, durable, waterproof bookmarks. My personal favorite way to finish them. I still remember the first time I laminated a bookmark; it instantly elevated it from a paper craft to a polished keepsake!
- Self-Laminating Sheets: No machine needed, just peel and stick. A good alternative if you don't have a laminator.
- Clear Contact Paper: Another budget-friendly way to protect your bookmarks.
- Mod Podge/Clear Craft Sealer: Can be brushed on for protection and a slight sheen.
- Hole Punch: For adding tassels.
- Tassels/Ribbon/Yarn: To add flair and make them easier to spot in a book.
6. Erasers:
- Kneaded Eraser: Great for lifting pencil color without damaging paper.
- Rubber Eraser: For general pencil marks.
7. Sharpeners: Keep those colored pencils sharp for crisp lines and fine details.
8. Scrap Paper: Always keep some on hand for testing colors, practicing blends, or protecting your work surface.
9. Ruler: For precise cutting or drawing straight lines.
Having the right tools makes all the difference in your printable bookmark coloring experience. Investing a little in good quality paper and your preferred coloring medium will significantly enhance your results and your enjoyment!
From Screen to Page: Step-by-Step Printing & Preparation for Your Bookmarks
So, you’ve chosen your stunning printable bookmark coloring designs and gathered all your essential tools. Now comes the exciting part: bringing those digital images to life on paper! This section will walk you through the printing process and the crucial steps to prepare your bookmarks for coloring.
### Step 1: Downloading Your Designs
1. Locate the Download Button: On most websites, you’ll find a prominent "Download," "Print," or "Get Freebie" button. Click it.
2. Choose Your Format: Most printable bookmark coloring designs will be in PDF format, which is ideal for printing. Some might be JPG or PNG images. PDF is generally preferred as it maintains quality and sizing.
3. Save to a Clear Location: Save the file to a folder you can easily find, like "My Printable Bookmarks" on your desktop or in your "Downloads" folder.
### Step 2: Preparing for Printing
1. Open the File: Double-click the saved PDF or image file to open it. It will likely open in your default PDF viewer (like Adobe Acrobat Reader) or image viewer.
2. Check Page Setup/Print Preview:
- Before hitting print, always check the print preview. This shows you exactly how the bookmarks will appear on the page.
- Ensure the orientation is correct (usually Portrait for bookmarks).
- Verify that the bookmarks are not cut off at the edges. If they are, adjust the scaling (see next point).
3. Scaling and Sizing:
- "Actual Size" or "100%": For most printable bookmark coloring designs, you’ll want to print at "Actual Size" or "100% scale" to ensure they come out at their intended dimensions.
- "Fit to Page": Avoid "Fit to Page" unless the design explicitly states it, as this can slightly distort or shrink the bookmarks.
- Custom Scaling: If you want larger or smaller bookmarks, you can adjust the percentage (e.g., 80% for smaller, 120% for larger), but be mindful of potential pixelation if you enlarge too much.
4. Printer Settings - The Crucial Part!
- Paper Type: In your printer settings, select the correct paper type you’re using (e.g., "Cardstock," "Heavyweight Paper," or "Matte Photo Paper"). This tells the printer to adjust ink saturation and roller speed for optimal results.
- Print Quality: Always choose "Best" or "High Quality." This ensures crisp, clear lines for your coloring. "Draft" or "Normal" quality might result in fuzzy lines that are difficult to color within.
- Color Mode: Even though you're coloring them, ensure it's set to "Grayscale" or "Black and White" unless the design itself has color elements you want to retain. This saves color ink.
- Double-Check Tray: Make sure the paper you intend to use is loaded correctly in the printer's paper tray.
### Step 3: The Printing Process
1. Load Paper: Place your chosen cardstock (or other paper) into your printer's paper tray. Pay attention to which side should be facing up for printing, as some printers load face down.
2. Click Print: Once all settings are correct, hit the "Print" button.
3. Patience is a Virtue: Allow the printer to do its job. Don't rush it or try to pull the paper out prematurely.
4. Let Ink Dry (if applicable): If you're using an inkjet printer, especially on thicker paper, let the ink dry for a minute or two before handling extensively to prevent smudging. Laser prints are usually dry immediately.
### Step 4: Cutting Your Bookmarks
1. Gather Your Tools: Get your scissors, paper trimmer, or craft knife and cutting mat ready.
2. Score Lines (Optional for folding): If your design includes fold lines (e.g., for a corner bookmark), you might want to lightly score them with a dull knife or scoring tool before cutting the outer edges.
3. Cut Carefully:
- Scissors: Cut along the provided lines. Take your time for clean edges.
- Paper Trimmer: Align the printed lines precisely with the trimmer's guide and slice. This is excellent for perfectly straight lines.
- Craft Knife: Place your bookmark on a cutting mat. Use a ruler as a guide and carefully cut along the lines. This offers the most precision but requires extreme caution.
- Beginner Tip: If you're new to cutting, practice on a scrap piece first.
4. Remove Excess Paper: Discard the trimmed edges.
### Step 5: Final Preparations
1. Check for Smudges: Briefly inspect your printed and cut bookmarks for any smudges or print errors.
2. Condition Paper (Optional, for some mediums): If you plan to use alcohol markers, some artists lightly buff the paper's surface with a soft cloth to improve blending, but this isn't usually necessary for cardstock.
3. Gather Coloring Supplies: Now that your bookmarks are ready, grab your colored pencils, markers, or whatever medium you've chosen, and get ready to add some color!
My sister once printed a batch of printable bookmark coloring pages for a kids' party, and she forgot to change the paper setting from "plain paper" to "cardstock." The ink ran, the paper buckled, and it was a bit of a soggy mess! She laughed it off, but it was a great reminder: don't be like her and forget to adjust your printer settings! A little preparation goes a long way in ensuring your coloring journey starts off on the right foot.
Mastering the Art of Color: Techniques for Every Skill Level
You've got your beautifully printed printable bookmark coloring pages, and your tools are ready. Now, let's dive into the exhilarating world of coloring! Whether you're a complete novice or a seasoned coloring enthusiast, there are techniques that can elevate your bookmarks from simple outlines to vibrant works of art.
### For Beginners: Getting Started with Confidence
1. Light to Dark: Always start with lighter pressure and lighter colors. You can always add more color and darker shades, but it's very difficult to lighten an area once it's too dark.
2. Directional Strokes: Color in one consistent direction (e.g., all vertical, all horizontal, or following the curve of the design). This creates a smoother, more even application of color and prevents a messy, scribbled look.
3. Layering Colors: Don't try to get full opacity in one go. Apply light layers of color, gradually building up intensity. This also allows for smoother blends.
4. Outline First: For a crisp look, lightly outline the area you're coloring with the chosen color before filling it in. This helps you stay within the lines.
5. Color Swatches: Before committing to a color on your bookmark, test it out on a scrap piece of paper. Colors can look different on paper than they do in their container.
6. Patience: Don't rush! Coloring is a meditative process. Enjoy the journey, not just the destination.
### For Intermediate Colorists: Adding Depth and Dimension
1. Blending:
- Pencil Blending: Use two or more colors that are close in hue. Apply the lighter color first, then layer the darker color over it, then blend by coloring over the transition area with the lighter color again, or a third, neutral color (like a light grey or white).
- Burnishing (with Pencils): Apply heavy pressure with a light-colored pencil (or a colorless blender pencil) over an area you've already colored. This smooths out the pigment, fills in the paper's tooth, and creates a rich, polished, almost waxy finish.
- Marker Blending: If using alcohol markers, apply a lighter color, then quickly apply a darker color to the edge you want to blend, and immediately go back over the transition with the lighter color to feather it out.
2. Shading for Dimension:
- Light Source: Imagine where the light is coming from. Areas closest to the light source will be lightest, and areas furthest away will be darkest (or have shadows).
- Gradual Transition: Create a smooth gradient from light to dark within an object to make it appear three-dimensional. For example, a sphere isn't just one color; it has highlights, mid-tones, and shadows.
3. Color Harmony & Theory:
- Analogous Colors: Colors next to each other on the color wheel (e.g., blue, blue-green, green) create a harmonious, calm feel.
- Complementary Colors: Colors opposite each other (e.g., red and green, blue and orange) create high contrast and vibrancy when used together. Use them sparingly for accents.
- Monochromatic: Using different shades, tints, and tones of a single color (e.g., light blue, medium blue, dark blue) creates a sophisticated look.
4. Adding Texture:
- Stippling: Using small dots to create texture.
- Hatching/Cross-hatching: Using parallel or intersecting lines to create shadows and texture.
- Varying Pressure: Using different pressure levels with your colored pencils can create varied textures and intensities.
5. Backgrounds: Don't forget the background! A subtle wash of color, a light gradient, or even a simple pattern can make your main design pop.
6. Outlining & Details: Once you've colored the main areas, go back in with a fine-tip marker or a very sharp colored pencil (or even a black pen) to crisp up the outlines and add tiny details or patterns.
7. Using a White Gel Pen: A white gel pen is fantastic for adding highlights, reflections, or tiny stars to bring an element to life. It can make a huge difference!
### For Experts: Pushing the Boundaries
1. Advanced Blending Techniques:
- Solvents: Use mineral spirits (like Gamsol) with colored pencils to create paint-like blends.
- Layering Many Colors: Build up 7-10 layers of different colors to create incredibly rich, deep, and complex hues.
2. Color Palettes: Experiment with unconventional color palettes. Instead of traditional green leaves, try purple or blue leaves.
3. Negative Space Coloring: Sometimes, coloring the area *around* the main subject can make the subject stand out more effectively than coloring the subject itself.
4. Mixed Media: Combine different coloring mediums on one bookmark. Use watercolors for a base wash, then add colored pencil details, and finish with gel pen accents.
5. Creating Your Own Patterns: If a section is large and open, consider adding your own small patterns or zentangle-inspired designs within that space.
6. Feathering and Fading: Create subtle, almost imperceptible transitions between colors, or make colors gently fade out into white.
7. Embossing (Subtle): Use a stylus or blunt tool to lightly impress lines into the paper *before* coloring. When you color over them, the impressed lines will remain white, creating a subtle embossed effect.
Remember, the goal of printable bookmark coloring is to enjoy the process and create something that brings *you* joy. Don't be afraid to experiment, make "happy accidents," and develop your own unique style. My partner, who is a fantastic artist, showed me how much difference a tiny bit of white gel pen highlight can make to a bookmark. "It's like adding a sparkle to its eye," he said. And he was right –