Oh, my fellow crafting enthusiast, have you ever looked at a plain towel and thought, "This could be so much more"? I know I have! There's a unique joy in transforming everyday items into personalized treasures, and when it comes to towels, embroidery is the perfect magic wand. But let's be honest, freehanding designs can be daunting, and sometimes, you just need a little guidance to get started or to perfect that intricate pattern. That's exactly where the wonder of a stensil for embroidery for towels printable comes in!
Trust me, you're not alone in seeking this. For years, I struggled with uneven lettering or wonky floral patterns, wishing there was an easier way to get that professional, polished look without the guesswork. I vividly remember one disastrous attempt at embroidering a gift for my aunt – it was supposed to be a lovely monogram, but it ended up looking like a tipsy alphabet. I almost gave up! Then, I discovered the sheer brilliance of printable stencils, and it utterly transformed my embroidery journey. It’s like having an expert designer right there with you, guiding your needle every step of the way.
This comprehensive guide is your personal roadmap to mastering the art of embroidering towels using printable stencils. Whether you're a complete beginner eager to dip your toes into the satisfying world of needlework, or a seasoned stitcher looking for fresh inspiration and advanced techniques, you've landed in the perfect spot. We're going to dive deep into everything from finding the perfect design and transferring it flawlessly, to selecting the right stitches and even creating your own unique stencils. Get ready to unleash your creativity, add a touch of handmade elegance to your home, and craft unforgettable gifts. Let's make some towel magic together!
---
Table of Contents

- [The Heart of the Matter: Why Stencils for Towel Embroidery?](#the-heart-of-the-matter-why-stencils-for-towel-embroidery)
- [Unlocking Your Creativity: Where to Find Printable Stencils](#unlocking-your-creativity-where-to-find-printable-stencils)
- [From Screen to Fabric: Mastering Stencil Transfer Techniques](#from-screen-to-fabric-mastering-stencil-transfer-techniques)
- [Designs for Every Towel & Every Mood: Popular Stencil Themes](#designs-for-every-towel-and-every-mood-popular-stencil-themes)
- [Stitch by Stitch: Bringing Your Stencil to Life with Embroidery](#stitch-by-stitch-bringing-your-stencil-to-life-with-embroidery)
- [Beyond the Basics: Customizing & Creating Your Own Stencils](#beyond-the-basics-customizing-and-creating-your-own-stencils)
- [The "Ah-Ha!" Moments: Essential Tools & Materials for Success](#the-ah-ha-moments-essential-tools-and-materials-for-success)
- [Caring for Your Masterpiece: Longevity & Maintenance of Embroidered Towels](#caring-for-your-masterpiece-longevity-and-maintenance-of-embroidered-towels)
- [Project Spotlight: Inspired Ideas for Embroidered Towels](#project-spotlight-inspired-ideas-for-embroidered-towels)
- [How to Choose the Best Stencil for Your Needs](#how-to-choose-the-best-stencil-for-your-needs)
- [Common Pitfalls to Avoid](#common-pitfalls-to-avoid)
- [Advanced Tips for Experts](#advanced-tips-for-experts)
- [Conclusion: Stitch Your Story!](#conclusion-stitch-your-story)
---
The Heart of the Matter: Why Stencils for Towel Embroidery?
Let's talk about why using a stensil for embroidery for towels printable is such a game-changer. It's not just about making things easier; it's about unlocking a whole new level of creative freedom and confidence. For many, the idea of embroidering can feel intimidating, especially when faced with a blank canvas (or in this case, a blank towel!). Stencils bridge that gap, making beautiful, intricate designs accessible to everyone.
Here's why you'll fall in love with printable embroidery stencils for your towels:
1. Precision and Professional Finish: Say goodbye to wobbly lines and uneven shapes. Stencils provide a clear, crisp outline, ensuring your finished embroidery looks neat, symmetrical, and truly professional. This is especially vital for monograms or detailed patterns.
2. Boost Your Confidence: For beginners, the fear of "messing up" can be paralyzing. A stencil acts as your guiding hand, allowing you to focus on your stitches rather than fretting over the design's accuracy. This confidence boost is invaluable!
3. Explore Complex Designs: Ever dreamed of embroidering a delicate floral wreath or an intricate Celtic knot? Stencils make these challenging patterns achievable. You don't need to be an artist to stitch like one.
4. Time-Saving Convenience: Instead of painstakingly sketching or trying to freehand, you can simply print, transfer, and start stitching. It significantly cuts down on the prep time, letting you get straight to the fun part.
5. Consistency Across Multiple Projects: If you're making a set of towels, or gifts for several people, stencils ensure that each piece has a consistent design. This uniformity elevates the overall aesthetic of your collection. I once had to embroider 10 hand towels for a bridal shower, and a single printable stencil for the initial saved me hours and ensured every "M" looked identical and perfect!
6. Cost-Effective Creativity: Many fantastic stencils are available for free online, or at a very low cost. This makes intricate and beautiful embroidery accessible without breaking the bank on expensive patterns or tools.
7. Limitless Design Possibilities: From classic monograms and elegant florals to whimsical animals and geometric patterns, the world of printable stencils is vast. Whatever your style or project theme, there's a stencil out there for you.
8. Adaptable to Various Towel Types: Whether it's a plush bath towel, a crisp linen tea towel, or a textured hand towel, stencils can be adapted. The key lies in the transfer method, which we’ll explore in detail.
9. A Fantastic Learning Tool: Stencils aren't just for following; they teach you about proportion, spacing, and how different elements come together. They can even inspire you to eventually design your own!
10. Stress-Free Gifting: Hand-embroidered towels make incredibly thoughtful and personal gifts. With a stencil, you can be sure your gift will be cherished for its beauty and your effort, not for its charming imperfections (unless that's the look you're going for!). My sister still raves about the custom-initialed kitchen towels I made her for her housewarming, all thanks to a simple, elegant printable stencil.
11. An Outlet for Personal Expression: Even with a stencil, your choice of colors, stitches, and personal touches make each piece uniquely yours. It’s a wonderful way to infuse your personality into your home decor or gifts.
---
Unlocking Your Creativity: Where to Find Printable Stencils
The digital age has truly blessed us crafters with an abundance of resources! Finding a stensil for embroidery for towels printable is easier than ever, whether you're looking for freebies or something truly unique. The world is your oyster, or in this case, your digital design library!
Here's a breakdown of where to hunt for those perfect printable stencils:
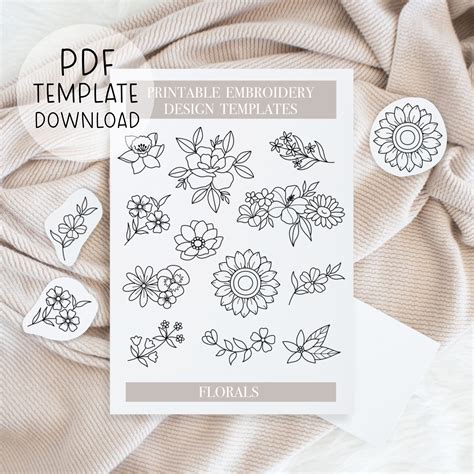
1. Free Online Crafting Blogs & Websites: Many talented bloggers and crafting communities generously share free printable embroidery patterns. These are often accompanied by tutorials, making them perfect for beginners. Just search for "free embroidery patterns printable" or "free printable stencils for towels."
2. Pinterest & Instagram: These visual platforms are goldmines! Search for "embroidery stencils," "towel embroidery designs," or "printable patterns." You'll find countless images, many of which link directly to free downloads or shops where you can purchase them.
3. Etsy: The ultimate marketplace for handmade and digital craft supplies. Search for "printable embroidery patterns," "digital embroidery stencils," or "towel embroidery designs." You'll find a huge variety, often from independent designers, ensuring unique and creative options. Plus, you're supporting small businesses!
4. Craft Supply Retailers (Online & Brick-and-Mortar): Websites like DMC, Sulky, and even larger craft stores like Joann or Michaels often have free pattern libraries or digital pattern sections. They might require a quick sign-up, but the resources are usually high quality.
5. Embroidery Specific Websites & Forums: Dedicated embroidery communities (like Needle 'n Thread forums, or specific Facebook groups) often have sections where members share their designs or recommend reliable sources. These are great for discovering niche or specialized stencils.
6. Design Software Marketplaces (e.g., Creative Market, Design Bundles): If you're looking for professional-grade, high-resolution graphics that you can then adapt into stencils, these platforms offer a vast array of SVG, PNG, and JPG files that can be printed. You might need basic graphic design skills to manipulate them, but the quality is top-notch.
7. Children's Activity Sites: Believe it or not, sites designed for kids' crafts often have simple, charming designs perfect for beginner embroidery or for adding a playful touch to a child's bath towel. Think cute animals, simple shapes, or basic alphabet letters.
8. Public Domain Image Libraries: For vintage or classic designs, explore public domain image websites. You can find beautiful botanical illustrations, historical motifs, or classic monograms that can be printed and adapted. Just ensure they are indeed in the public domain for free use.
9. Book and Magazine Resources: While not "printable" in the digital sense, many embroidery books and craft magazines come with pull-out patterns or provide online access to their pattern libraries. These are often curated and well-tested.
10. Your Own Drawings: Don't underestimate your own artistic flair! A simple sketch you make can easily become a printable stencil. Just draw it, scan it, and print it to your desired size. This is how I created a custom coffee cup design for my husband's kitchen towel – it started as a doodle on a napkin!
11. Social Media Influencers/Designers: Many designers offer free patterns as part of their newsletters or as promotional giveaways. Follow your favorite embroidery artists, and you might stumble upon some fantastic freebies.
12. Subscription Boxes & Services: Some embroidery subscription boxes or digital pattern services offer exclusive monthly designs, which can be a great way to constantly discover new stensil for embroidery for towels printable options.
---
From Screen to Fabric: Mastering Stencil Transfer Techniques

Once you've found that perfect stensil for embroidery for towels printable, the next crucial step is getting it onto your towel accurately. This is where many crafters feel a bit nervous, but with the right technique, it’s a breeze! The key is understanding that different fabrics and stencil designs might call for different transfer methods.
Here are the most effective ways to transfer your printable stencil to your towel:
1. Light Box/Window Method (Best for Thin/Light-Colored Towels):
- How it works: Place your printed stencil on a light source (a light box, or tape it to a sunny window). Position your towel over the stencil. The light will shine through, allowing you to trace the design directly onto the towel using a fabric marker or pencil.
- My Scenario: This is my go-to for kitchen towels or linen towels because they're thinner. I once had a delicate floral pattern to transfer, and this method allowed me to capture every tiny detail without smudging.
- Pros: Very accurate, no extra materials needed if you have a window, good for intricate details.
- Cons: Only works for lighter, thinner fabrics; can be awkward if the stencil is large.
2. Carbon/Tracing Paper Method (Versatile for Various Towels):
- How it works: You'll need special dressmaker's carbon paper (also called transfer paper). Place the carbon paper, color-side down, onto your towel. Position your printed stencil on top of the carbon paper. Using a stylus, dull pencil, or empty ballpoint pen, trace firmly over the stencil lines.
- My Scenario: When I was embroidering a thick, plush bath towel for a friend, the window method was useless. Carbon paper saved the day, leaving a clear, crisp blue line that was easy to follow.
- Pros: Works on almost any fabric color or thickness; good for detailed designs.
- Cons: Can sometimes leave residue if you press too hard or use the wrong type of paper; might need to test on a scrap first.
3. Water-Soluble Stabilizer Method (Ideal for Terry Cloth & Plush Towels):
- How it works: Print your stencil directly onto a water-soluble stabilizer sheet (available at craft stores). Pin or baste this sheet onto your towel. Stitch directly through both the stabilizer and the towel. Once finished, rinse the towel under water, and the stabilizer will dissolve, leaving only your embroidery.
- My Scenario: This is a lifesaver for towels with a deep pile, like fluffy bath towels, where tracing is impossible. I used this for a baby towel, and the soft stabilizer didn't distort the fabric at all.
- Pros: Extremely accurate for fluffy fabrics, no tracing marks, provides stability for stitching.
- Cons: Costs extra for the stabilizer sheets; requires a rinsing step.
4. Heat Transfer Pen/Pencil Method (Great for Permanent Lines):
- How it works: Trace your stencil onto tracing paper using a heat transfer pen or pencil. Then, place the tracing paper (design-side down) onto your towel and press with a warm iron. The heat transfers the design permanently to the fabric.
- Pros: Clear, permanent lines; good for intricate designs.
- Cons: The lines are permanent, so accuracy is paramount; works best on lighter fabrics as the lines can be dark. Always test on a scrap first!
- Warning: Don't be like me and accidentally transfer a design upside down on a gift! Double-check your orientation before ironing!
5. Pouncing Method (For Large, Simple Designs):
- How it works: Print your stencil onto thick paper or cardstock. Use a needle or pounce wheel to prick small holes along the stencil lines, creating a perforated pattern. Place the perforated stencil on your towel. Use a pounce pad (a small cloth bag filled with chalk powder or pigment) to dab powder through the holes onto the towel.
- Pros: Good for very large designs or rough textures; removable chalk.
- Cons: Less precise for intricate details; can be messy.
6. Freezer Paper Method (Best for Applique or Stenciled Painting, but Adaptable):
- How it works: Print your stencil onto freezer paper (the waxy side faces down). Cut out the design. Iron the freezer paper onto your towel. The heat temporarily adheres it. You can then stitch around the edges, or use it as a guide for painting. It peels off cleanly.
- Pros: Creates a crisp edge, no residue.
- Cons: Not ideal for very fine lines; primarily used for appliqué or fabric painting, but can guide embroidery.
7. Temporary Adhesive Spray/Fabric Glue (For Securing Stencils):
- How it works: While not a transfer method itself, a light mist of temporary fabric adhesive spray on the back of your paper stencil can hold it securely to your towel, preventing slippage during tracing with a fabric marker.
- Pros: Prevents design distortion; easy to reposition.
- Cons: Can sometimes leave a slight residue if overused; not suitable for delicate fabrics.
8. Digital Projector Method (Modern & Large Scale):
- How it works: Project your digital stencil design directly onto your towel. Trace the projected lines with a fabric marker.
- Pros: Excellent for large-scale designs, very accurate, no printing required.
- Cons: Requires a projector; can be tricky to keep the fabric still and flat.
9. Disappearing Ink/Fabric Pens:
- How it works: Once you've chosen a transfer method (like light box or carbon paper), use a disappearing ink pen or a water-soluble fabric pen to trace the design. These marks vanish over time or with water, ensuring no visible lines are left on your finished work.
- Pros: No permanent marks; very clean finish.
- Cons: Marks can disappear too quickly if you're a slow stitcher; always test on a scrap first to ensure it disappears completely.
10. Embroidery Hoop and Tracing:
- How it works: For smaller designs, secure your towel tightly in an embroidery hoop. Tape your stencil underneath the hooped fabric (if thin enough). Use a light source to trace. The hoop provides tension, making tracing easier.
- Pros: Keeps fabric taut; good for small, detailed areas.
- Cons: Limited by hoop size.
11. Practice Makes Perfect:
- General Tip: No matter which method you choose, always practice on a scrap piece of similar towel fabric first. This helps you get a feel for the pressure needed, the marker's flow, and how the stencil interacts with the fabric.
---
Designs for Every Towel & Every Mood: Popular Stencil Themes
The beauty of a stensil for embroidery for towels printable lies in its versatility. There's truly a design for every personality, every room, and every occasion. From adding a touch of elegance to your guest bath to making a playful statement in the kitchen, stencils open up a world of possibilities.
Here are some of the most popular and inspiring stencil themes you can explore for your towel embroidery projects:
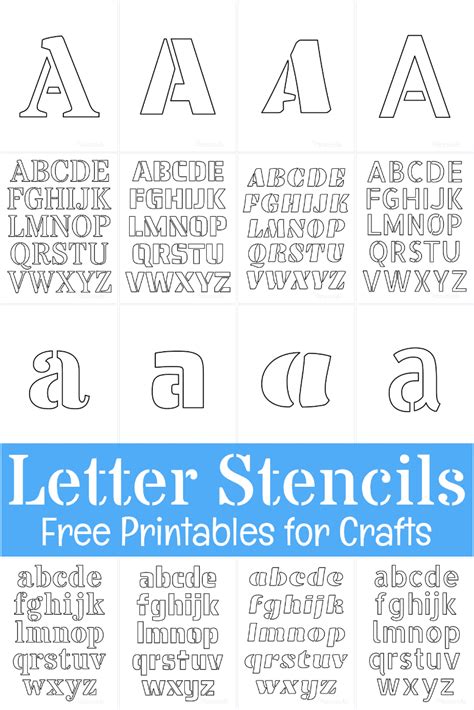
1. Monograms & Initials:
- Description: Classic, timeless, and incredibly personal. Monograms can range from simple single initials to intricate three-letter designs. They are perfect for wedding gifts, housewarmings, or adding a personal touch to your own linens.
- My Scenario: My mother-in-law loves personalized items. I used a beautiful script monogram stencil for her bath towels, and she genuinely gasped when she saw them. It made her feel so special!
- Examples: Elegant script "C," bold block "J & K" for a couple, intertwined floral initial "A."
2. Botanical & Floral Motifs:
- Description: Delicate flowers, trailing vines, leafy patterns, and charming wreaths bring a touch of nature indoors. These designs are wonderfully versatile, fitting anywhere from a rustic farmhouse kitchen to a chic modern bathroom.
- Examples: A dainty lavender sprig, a vibrant sunflower, an intricate rose garland, a subtle fern pattern.
- Subjective Tip: I find that a simple single flower, like a daisy or a poppy, embroidered in a bright color, can instantly cheer up a plain white hand towel.
3. Geometric Patterns:
- Description: For those who appreciate clean lines, modern aesthetics, and abstract beauty. Think chevrons, quatrefoils, hexagons, or simple stripes. These can add a contemporary edge to your towels.
- Examples: A bold chevron border, a subtle honeycomb pattern, interlocking squares, a minimalist diamond motif.
4. Whimsical & Playful Designs:
- Description: Perfect for children's towels, guest bathrooms, or adding a dash of fun to the kitchen. These designs often feature cute animals, quirky food items, or lighthearted sayings.
- Examples: A cheerful rubber ducky, a sleepy sloth, a "Squeeze the Day" lemon motif, a friendly octopus for a kid's bath towel.
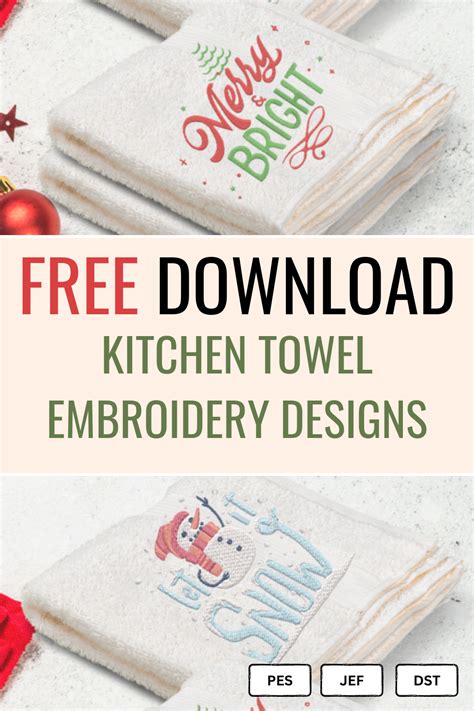
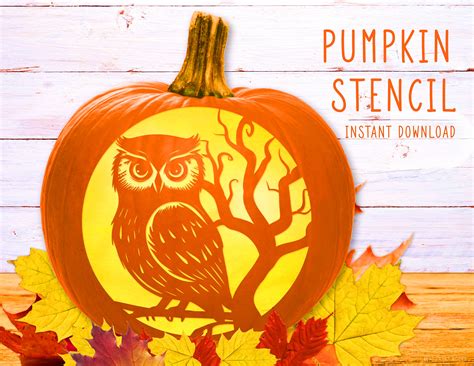
5. Holiday & Seasonal Themes:
- Description: Get into the festive spirit! Whether it's a holly branch for Christmas, a spooky ghost for Halloween, or a patriotic star for the Fourth of July, seasonal stencils are fantastic for decorating and gifting.
- Examples: A delicate snowflake, a pumpkin with swirling vines, a tiny Easter bunny, a classic heart for Valentine's Day.
6. Food & Drink Related (Kitchen Towels):
- Description: Specifically designed for kitchen towels, these stencils often feature coffee cups, teapots, baking utensils, fruits, vegetables, or witty food-related phrases.
- Examples: A steaming coffee mug, a bunch of grapes, "Bake Happy" script, a charming whisk design.
- My Scenario: For my friend who loves to bake, I found a delightful stencil of a cupcake with sprinkles. I embroidered it on a set of kitchen towels, and she uses them constantly!
7. Nautical & Coastal Themes:
- Description: Evoke the serene beauty of the ocean with anchors, seashells, lighthouses, or graceful waves. Ideal for beach houses, bathroom decor, or gifts for sea-lovers.
- Examples: A classic anchor, a delicate starfish, a stylized wave pattern, a small sailboat.
8. Sayings & Quotes:
- Description: Sometimes, a well-chosen phrase is all you need. "Wash Your Worries Away," "Good Morning Sunshine," "Home Sweet Home" – these can add personality and warmth.
- Examples: "Live, Laugh, Love," "Dream Big," "Kitchen Rules," "Relax & Unwind."
9. Animals & Wildlife:
- Description: From majestic stags to playful puppies, animal stencils are always a hit. They can be realistic, stylized, or utterly whimsical.
- Examples: A graceful butterfly, a cute cat silhouette, a majestic lion's head, a charming pair of birds.
10. Borders & Edges:
- Description: Not all designs need to be central. A beautiful border can elevate a simple towel, adding elegance along the hem or edges.
- Examples: A scrollwork border, a subtle dot pattern, a continuous vine, a Greek key design.
11. Abstract & Modern Art:
- Description: For those who prefer a contemporary, artistic flair. These designs might involve abstract shapes, splashes of color, or minimalist forms.
- Examples: Intersecting lines, organic blobs, layered geometric forms, a "paint stroke" effect.
12. Cultural & Ethnic Motifs:
- Description: Explore patterns from different cultures – Celtic knots, Moroccan tile patterns, Japanese waves, or folk art designs. These can add a unique and global touch to your towels.
- Examples: A repeating Celtic knot, an intricate mandala, a stylized tribal pattern.
---
Stitch by Stitch: Bringing Your Stencil to Life with Embroidery

Once your stensil for embroidery for towels printable is perfectly transferred to your towel, the real magic begins: the stitching! Choosing the right stitches can dramatically change the look and feel of your design. Don't be overwhelmed; even a few basic stitches can create stunning results, and combining them opens up endless creative avenues.
Here's how to bring your stencil to life, stitch by delightful stitch:
1. The Backstitch (Outline & Fine Details):
- Description: This is your bread-and-butter stitch for creating clear, solid outlines. It forms a continuous line, perfect for text, thin stems, or the edges of shapes.
- How to: Bring needle up, go down a short distance, come up a short distance *ahead* of where you went down, then go down into the end of the previous stitch.
- My Scenario: When I'm outlining a delicate script monogram, the backstitch is my absolute favorite. It gives such a crisp finish that really makes the letters pop.
2. The Stem Stitch (Thick Lines & Organic Shapes):
- Description: Great for thicker outlines, curved lines, and filling in areas with a textured look. It creates a rope-like, slightly raised line.
- How to: Bring needle up, go down a short distance, then come up *halfway* between those two points, keeping the working thread below the needle. Repeat.
- My Scenario: For the stem of a floral design, or a gentle wave pattern, the stem stitch adds a beautiful organic flow.
3. The Satin Stitch (Filling in Areas):
- Description: The ultimate stitch for smooth, solid fill. It creates a beautiful, lustrous surface, perfect for leaves, petals, or small shapes that you want to be completely filled with color.
- How to: Work parallel stitches very close together, covering the area completely. Keep your tension even for a smooth finish.
- Warning: Don't be like me and run out of floss halfway through a large satin-stitched area! Always make sure you have enough thread!
4. The French Knot (Texture & Detail):
- Description: Adds wonderful texture and small, raised dots. Perfect for flower centers, eyes on animals, or decorative accents.
- How to: Bring needle up, wrap thread around needle 1-3 times, insert needle very close to where it emerged (but not in the exact same spot), pull thread through.
- My Scenario: For the center of a sunflower stencil, a cluster of French knots in a contrasting color adds such a delightful tactile element.
5. The Chain Stitch (Bold Outlines & Fill):
- Description: Creates a strong, linked chain effect. It's excellent for bold outlines, decorative borders, or filling larger areas with texture.
- How to: Bring needle up, make a loop with the thread, go down where the thread emerged, and come up inside the loop. Repeat.
6. The Lazy Daisy / Detached Chain Stitch (Petals & Leaves):
- Description: Forms a single loop, perfect for individual flower petals, small leaves, or tear-drop shapes.
- How to: Bring needle up, make a loop, go down where the thread emerged, then come up at the tip of where you want the petal to end, catching the loop with a tiny straight stitch.
7. The Feather Stitch (Open, Flowing Lines):
- Description: Creates a lovely, airy, open stitch that resembles delicate feathers or ferns. Great for borders, organic shapes, or creating a whimsical texture.
- How to: Works with diagonal stitches that cross over each other, creating a V-shape.
8. The Straight Stitch (Simple Accents & Details):
- Description: The simplest stitch, forming a single straight line. Used for small details, radiating lines, or as part of more complex stitches.
- My Scenario: Sometimes, all a simple design needs are a few strategic straight stitches – like rays around a sun or subtle texture in a leaf.
9. The Running Stitch (Gathering & Simple Lines):
- Description: A basic, quick stitch that creates a dotted line. Not typically used for prominent outlines in decorative embroidery but good for subtle details or temporary basting.
- How to: Simply weave the needle in and out of the fabric in a straight line.
10. Couching (Thick Lines & Unusual Materials):
- Description: Used to secure a thicker thread, yarn, or even ribbon onto the fabric surface using smaller, fine stitches. Creates a bold, textured line.
- My Scenario: For a very thick, bold border on a bath towel, I once couched a piece of decorative yarn, and it created a fantastic, luxurious effect.
11. Varying Thread Strands:
- Description: Don't always use all six strands of embroidery floss! Using fewer strands (1-3) creates a finer, more delicate line, while more strands create a bolder, thicker look. Experiment to see what best suits your stencil and desired effect.
12. Combining Stitches for Impact:
- Expert Tip: The real magic happens when you combine stitches! Use backstitch for outlines, satin stitch for fills, and French knots for accents. A stem stitch for a stem, lazy daisies for petals, and a French knot for the center creates a beautiful flower. Don't be afraid to experiment with different combinations to add depth and interest to your stensil for embroidery for towels printable design.
---
Beyond the Basics: Customizing & Creating Your Own Stencils
While pre-made stencils are fantastic, there comes a point in every crafter's journey where you want something truly unique. Customizing existing designs or even creating your own stensil for embroidery for towels printable allows for unparalleled personal expression. It's like moving from following a recipe to becoming a master chef in your own kitchen!
Here's how to take your stencil game to the next level:
1. Resizing Existing Stencils:
- How to: Most digital stencils can be resized easily using your printer settings. If you have a physical stencil, use a photocopier with resizing options. This allows you to adapt a design for a hand towel, bath towel, or even a small washcloth.
- My Scenario: I found a gorgeous intricate wreath, but it was too big for my guest towels. A quick resize on the printer, and it fit perfectly, making the towels feel elegant without being overwhelming.
2. Mirroring & Flipping Designs:
- How to: Digitally, most image editing software (even basic ones like Paint or Preview) allow you to mirror or flip an image. This is excellent for creating symmetrical pairs or adapting a design to face a different direction.
- Pros: Great for achieving balance, especially on a set of towels or for creating a cohesive design around a central element.
3. Combining Multiple Stencils:
- How to: Don't be afraid to mix and match! Take a monogram from one stencil, a floral border from another, and a small animal from a third. Print them out, arrange them, and trace them onto your towel as one cohesive design.
- My Scenario: For a baby shower gift, I combined a sweet cloud stencil with a tiny hot air balloon and the baby's initial. It looked utterly bespoke and everyone thought I'd designed it from scratch!
4. Adding Personal Touches to Pre-made Designs:
- How to: Once a stencil is transferred, use a fabric marker to add small, personal elements. Maybe a tiny bee buzzing around a flower, a few extra leaves, or a small heart next to a monogram.
- Pros: Makes the design uniquely yours without having to create a whole new stencil.
5. Digitizing Your Hand-Drawn Sketches:
- How to: Draw your design on paper. Scan it or take a clear, well-lit photo with your phone. Import the image into a simple graphic design program (even free ones like Canva or GIMP). Clean up the lines, adjust contrast, and then print it out.
- Pros: Brings your unique ideas to life; truly custom designs.
6. Using Silhouette/Cricut Machines for Stencil Creation:
- How to: If you own a cutting machine, you can design your own stencils in their software, then cut them out of cardstock, plastic stencil material, or even adhesive vinyl. These can then be used repeatedly or as a direct guide for