Have you ever gazed at a piece of art or a beautiful invitation and wondered, "How did they get that subtle, ethereal glow?" Or perhaps you’ve sketched a design, dreaming of a way to layer textures and light, but felt limited by opaque materials? Trust me, you’re not alone. I remember my first foray into the world of creative paper – a disastrous attempt to print a delicate floral pattern on what I thought was "just fancy paper." The ink smeared, the colors dulled, and my vision crumbled faster than cheap cardstock. It wasn't until I discovered the magic of printable translucent paper that my projects truly began to shine, quite literally. This isn't just paper; it's a canvas for light, a whisper of design, and a gateway to a whole new dimension of creativity.
This comprehensive guide is born from countless hours of experimentation, a few ruined printer cartridges, and the sheer joy of seeing ideas come to life with a translucent touch. Whether you're a seasoned crafter, a budding designer, a DIY wedding planner, or a small business owner looking to elevate your branding, understanding this unique material is a game-changer. We’re going to peel back the layers – pun intended – and explore everything from the different types of translucent paper to advanced printing techniques, common pitfalls, and a treasure trove of project ideas. Prepare to transform your ordinary into extraordinary, adding depth, elegance, and a touch of the sublime to everything you create. By the end of this journey, you’ll not only be an expert on printable translucent paper but also brimming with inspiration for your next masterpiece.
---
Table of Contents

- [1. Understanding the Magic: What is Printable Translucent Paper?](#1-understanding-the-magic-what-is-printable-translucent-paper)
- [2. Getting Started: Choosing Your Paper, Printer & Basic Setup](#2-getting-started-choosing-your-paper-printer--basic-setup)
- [3. Crafting Wonders: DIY Projects & Creative Uses](#3-crafting-wonders-diy-projects--creative-uses)
- [4. Professional Polish: Design, Architectural & Business Applications](#4-professional-polish-design-architectural--business-applications)
- [5. Troubleshooting & Triumphs: Common Problems and Smart Solutions](#5-troubleshooting--triumphs-common-problems-and-smart-solutions)
- [6. Longevity & Luster: Care, Storage & Preservation Tips](#6-longevity--luster-care-storage--preservation-tips)
- [7. Advanced Alchemy: Beyond the Basics of Translucent Printing](#7-advanced-alchemy-beyond-the-basics-of-translucent-printing)
- [8. Eco-Conscious Creations: Sustainable Translucent Paper Options](#8-eco-conscious-creations-sustainable-translucent-paper-options)
- [9. The Future is Bright: Innovations and Trends in Translucent Printing](#9-the-future-is-bright-innovations-and-trends-in-translucent-printing)
- [How to Choose the Best Printable Translucent Paper for Your Needs](#how-to-choose-the-best-printable-translucent-paper-for-your-needs)
- [Common Pitfalls to Avoid When Working with Translucent Paper](#common-pitfalls-to-avoid-when-working-with-translucent-paper)
- [Advanced Tips for Mastering Printable Translucent Paper](#advanced-tips-for-mastering-printable-translucent-paper)
- [Conclusion: Your Translucent Journey Awaits!](#conclusion-your-translucent-journey-awaits)
---
1. Understanding the Magic: What is Printable Translucent Paper?
Imagine a material that allows light to pass through it, softening colors, creating overlays, and adding an ethereal quality to your designs. That's the essence of printable translucent paper. It's not completely transparent like glass, but rather diffuses light, giving a frosted or hazy appearance. This unique characteristic makes it incredibly versatile for both artistic and practical applications. But what exactly *is* it, and what makes different types stand out? Let's dive in!
Here's what makes this paper so special:
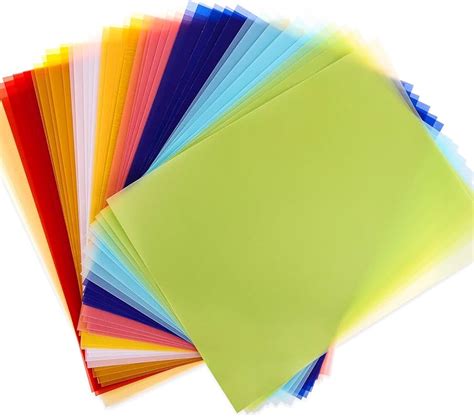
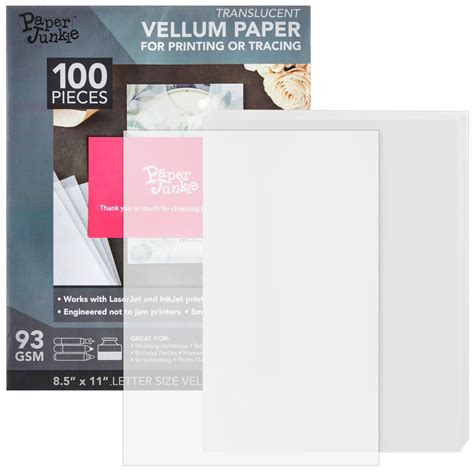
1. Vellum Paper: This is perhaps the most common type people think of. Traditionally made from calfskin (hence "vellum"), modern vellum is typically plant-based, often made from cellulose fibers processed to be smooth and non-porous. It has a beautiful, somewhat waxy feel and a subtle frosted look. It's fantastic for invitations!
2. Tracing Paper: Often thinner and less expensive than vellum, tracing paper is designed for exactly what its name implies – tracing. It's smooth, allows for clear visibility of underlying images, and comes in various weights. While excellent for drawing, some varieties can be printed on successfully.
3. Translucent Film/Acetate: These are synthetic alternatives, often made from polyester or similar plastics. They can be more durable, water-resistant, and offer a clearer, more glass-like transparency than paper-based options. They come in matte or glossy finishes and are often used for overhead projector sheets or specialized craft projects.
4. Frosted Film/Paper: A variation that leans more towards opacity than true transparency, offering a soft, diffused look. Think privacy film for windows, but in a printable sheet. It's great for creating a subtle glow.
5. Inkjet vs. Laser Specificity: Not all translucent papers are created equal when it comes to printing. Some are specially coated for inkjet printers (allowing ink to dry without smearing), while others are designed to withstand the heat of laser printers without melting or warping. Always check the packaging!
6. Weight (GSM): Like all papers, translucent options come in different grammage (grams per square meter). Thinner papers (e.g., 60-90 GSM) are delicate and excellent for layering, while thicker papers (e.g., 120-200 GSM) offer more rigidity, suitable for card overlays or standalone pieces.
7. Surface Finish: Some translucent papers have a very smooth, almost slick surface, while others might have a slightly textured or matte finish. This affects how ink adheres and the overall visual effect.
8. Color: While often thought of as clear or white, translucent papers can also come in subtle tints – pastels, smoky grays, or even vibrant hues – adding another layer of creative possibility.
9. Durability: Synthetic films are generally more tear-resistant and waterproof than paper-based options. If your project needs to withstand handling or moisture, a film might be the better choice.
10. Light Diffusion: The degree to which light is scattered varies. Some papers offer a soft, even diffusion, while others might be more "cloudy" or "frosted," affecting how much of the underlying image is visible.
11. My personal discovery: I once tried to use standard tracing paper for a wedding invitation overlay, thinking all translucent papers were the same. The inkjet ink beaded up and never truly dried, creating a smudgy disaster. That's when I learned that finding paper explicitly labeled as "printable" for your *specific printer type* (inkjet or laser) is non-negotiable. It saved me a lot of heartache (and ink!).
12. The "aha!" moment: My friend, a professional architect, introduced me to architectural vellum. The way his intricate blueprints came to life with crisp lines and subtle opacity was astounding. It wasn't just functional; it was beautiful. It showed me how even technical applications could benefit from the aesthetic appeal of good printable translucent paper.
---
2. Getting Started: Choosing Your Paper, Printer & Basic Setup
Embarking on your translucent paper journey requires a little preparation. Don't just grab any paper and hope for the best! The right combination of paper, printer, and settings will make all the difference between a frustrating mess and a stunning success. This section is your beginner's roadmap.
Here’s how to set yourself up for success:
1. Identify Your Printer Type: Is it an inkjet or a laser printer? This is the *most critical* first step. Inkjet printers spray liquid ink, while laser printers use toner powder and heat. Translucent papers are typically designed for one or the other.
2. Match Paper to Printer: Purchase printable translucent paper specifically formulated for your printer.
- Inkjet Translucent Paper: Often has a special coating to absorb and dry liquid ink quickly, preventing smudges and bleeding.
- Laser Translucent Paper: Designed to withstand high heat without melting, warping, or damaging the printer. Using inkjet paper in a laser printer can cause it to melt and ruin your machine – a costly mistake!
3. Consider Paper Weight (GSM): Thinner papers (e.g., 60-90 GSM) are great for overlays and delicate designs, but can be prone to jamming if your printer isn't gentle. Thicker papers (e.g., 120-150 GSM) are more robust for cards or sturdier projects but might require your printer to have a "straight-through" or "manual feed" path.
4. Printer Settings are Your Best Friend:
- Media Type: Select "Vellum," "Transparency," "Photo Paper," or "Heavy Paper" in your printer settings, depending on your paper's specific type and weight. This tells the printer to adjust heat/ink application.
- Print Quality: Choose "Best" or "High Quality" for crisp details, especially for intricate designs or full-color prints.
- Print Speed: Slow down the print speed if possible. This allows ink more time to dry on inkjet, or toner more time to adhere on laser, reducing potential smudging or poor adhesion.
5. Test, Test, Test: Always run a small test print on a scrap piece of your chosen printable translucent paper before committing to your final project. This helps you check color accuracy, ink adhesion, and potential smudging.
6. Load Paper Correctly: Many translucent papers have a "print side." Ensure you load it into your printer correctly, often with the smoother or coated side facing up or down, as indicated by the paper manufacturer.
7. Manual Feed Tray (if available): If your printer has a manual feed slot, use it! This often provides a straighter paper path, reducing the chance of jams and ensuring better print quality, especially for thicker or more delicate sheets.
8. Allow for Drying Time: Especially with inkjet prints on translucent paper, ink can take longer to dry due to the less porous surface. Handle prints carefully and allow ample drying time before layering or cutting.
9. Keep it Clean: Ensure your printer's rollers are clean, as dust or debris can easily transfer onto the smooth surface of translucent paper, showing up clearly on your final print.
10. Design Considerations: Remember that translucent paper will mute colors slightly and allow light to pass through. Design with this in mind – bolder colors tend to show up better, and white areas will be translucent, not opaque. Think about what will be *behind* the paper.
11. My "almost ruined" moment: I was printing wedding RSVPs on a beautiful vellum, forgot to switch my printer settings from "plain paper," and ended up with splotchy, uneven text. A quick adjustment to "photo paper, matte" made all the difference. It's a small step that yields huge results!
12. A common beginner's mistake: My neighbor tried to print a vibrant photo on a basic tracing paper she had for sketching. The colors were incredibly dull, and the ink never fully absorbed. It's a classic example of not understanding that general "translucent" doesn't mean "printable translucent paper" for photos. Different papers, different purposes!
---
3. Crafting Wonders: DIY Projects & Creative Uses
Now that you're armed with the knowledge of how to prepare, let's unleash the creative beast! Printable translucent paper is a DIY dream come true, offering endless possibilities for adding a touch of elegance, mystery, or whimsy to your projects. From home decor to personalized gifts, the only limit is your imagination.
Here are 10-12 inspiring ideas to get your creative juices flowing:
1. Ethereal Invitations & Stationery: Print delicate patterns, monograms, or event details on translucent overlays for wedding invitations, baby shower announcements, or elegant greeting cards. Layer it over a solid colored cardstock for a stunning effect.
2. Unique Envelopes & Liners: Create custom envelope liners with intricate designs or map patterns printed on translucent paper. Or, make entire translucent envelopes for a peek-through effect that builds anticipation.
3. Layered Scrapbook Pages: Add depth and visual interest to your scrapbook layouts by printing quotes, subtle patterns, or photos on translucent sheets and layering them over opaque photos or backgrounds.
4. DIY Lanterns & Luminaries: Print intricate designs, silhouettes, or even soft-focus photos onto translucent paper. Assemble these into small paper lanterns or wrap them around LED candles for a soft, glowing ambiance.
5. Personalized Gift Wrap & Tags: For small gifts, use sheets of printable translucent paper as unique wrapping, allowing a hint of the gift inside to show through. Create elegant gift tags with layered designs.
6. Custom Bookmarks: Print artistic designs, literary quotes, or personal photos on thicker translucent paper. Add a tassel for a beautiful and personalized bookmark.
7. Window Clings & Decals: If using translucent film (acetate), you can create temporary window decorations. Print seasonal designs, privacy patterns, or decorative elements that filter light beautifully.
8. DIY Stencils: Print complex stencil designs onto thicker translucent paper or film, then carefully cut them out. The translucency helps with placement, and the material is durable enough for repeated use.
9. Decorative Food Wraps & Labels: For baked goods or homemade treats, print custom labels or small wraps. Imagine a delicate translucent band around a cupcake box or a cookie bag, showcasing your brand or a sweet message. (Ensure food-safe inks if direct contact is possible.)
10. Mood Lighting Inserts: Print abstract patterns or nature scenes onto translucent paper and insert them into lampshades or light box frames to create custom mood lighting.
11. My favorite wedding hack: For my sister's wedding, we printed the guest names and table numbers on small strips of vellum using an elegant script font. We then wrapped these around simple white napkins, securing them with a touch of twine and a sprig of rosemary. It was an incredibly inexpensive way to add a touch of sophistication and personalized flair to each place setting, and the translucent quality caught the candlelight beautifully.
12. A whimsical children's project: My kids and I once printed out various animal silhouettes on different colored translucent papers. We then cut them out and glued them onto old glass jars, adding LED tea lights inside. When lit, the animal shapes glowed softly, creating a magical "zoo" in their room. It was a simple project, but seeing their faces light up with the glowing animals was priceless, and it truly showcased how printable translucent paper can transform everyday objects.
---
4. Professional Polish: Design, Architectural & Business Applications
Beyond the realm of crafts and DIY, printable translucent paper holds significant value in professional settings. From architectural blueprints to sleek product packaging and sophisticated branding elements, its ability to layer, diffuse light, and add a tactile dimension makes it an invaluable tool for designers, architects, and businesses aiming for that extra touch of class and innovation.
Here are 10-12 ways professionals leverage this versatile material:
1. Architectural Renderings & Blueprints: Architects often use large-format translucent vellum or film for printing blueprints, overlays for site plans, or conceptual sketches. The translucency allows for easy layering and revisions.
2. Product Packaging & Branding: Incorporate translucent elements into packaging to create a premium, mysterious, or eco-friendly aesthetic. Think semi-transparent sleeves for luxury items, or frosted labels that allow the product inside to subtly show through.
3. Corporate Stationery & Business Cards: A translucent overlay on a business card, or a logo subtly printed on translucent paper for letterheads, can convey sophistication and modernity. It's a memorable tactile experience.
4. Marketing & Promotional Materials: Create unique brochures, flyers, or inserts with translucent pages. Use them to highlight key information, reveal images in layers, or add an interactive element to your print marketing.
5. Photography & Lighting Effects: Photographers can print abstract patterns, textures, or even soft-focus images on large translucent sheets to use as diffusers for studio lighting, creating unique shadows and light effects.
6. Art & Illustration Portfolios: Presenting artwork with translucent overlays for titles, artist statements, or subtle protective layers can elevate a professional portfolio, adding a curated, gallery-like feel.
7. Retail Window Displays: Print large-scale graphics or patterns on translucent film to create dynamic and eye-catching window displays that interact with natural light, drawing customers in.
8. Event Signage & Wayfinding: For high-end events, print elegant directional signs or table numbers on thick translucent paper, perhaps mounted on clear acrylic, for a refined and modern look.
9. Textile Design & Pattern Making: Designers can print patterns on translucent film to use as templates for cutting fabric or for projecting patterns onto surfaces.
10. Interior Design Mood Boards: Layer different textures, patterns, and color swatches on a translucent background for a sophisticated and cohesive mood board presentation to clients.
11. The "wow" client presentation: I once worked with a branding agency that used printable translucent paper for the cover page of their final brand guidelines document. The client's new logo was printed in white on the translucent sheet, and underneath was a vibrant brand photo. As you opened the document, the logo lifted, revealing the full photo. It was a simple, elegant touch that made a huge impact and immediately conveyed the brand's sophisticated aesthetic. It showed me how a subtle material choice can significantly elevate perceived value.
12. My architect friend's secret weapon: My friend, an architect, frequently uses a specialized translucent film for his preliminary sketches and overlaying different iterations of a building design. He can quickly print new elements onto the film and layer them over existing drawings, making it incredibly efficient for client feedback and design evolution. It's a practical application that saves time and allows for clear, iterative communication.
---
5. Troubleshooting & Triumphs: Common Problems and Smart Solutions
Even with the best intentions, working with printable translucent paper can sometimes throw a curveball. Ink smudges, paper jams, or colors that just don't look right – these are common hurdles. But fear not! Most problems have simple solutions. This section is your go-to guide for turning potential frustrations into triumphant results.
Here's how to navigate common issues:
1. Problem: Ink Smudging or Not Drying (Inkjet Printers):
- Solution: Ensure you're using inkjet-specific translucent paper. Select "Photo Paper," "Vellum," or "Heavy Paper" in your printer settings to reduce ink saturation and slow down printing. Allow ample drying time (10-30 minutes, or even longer for heavy ink coverage) before handling.
2. Problem: Paper Jams or Misfeeds:
- Solution: Translucent paper can be delicate or slick. Use your printer's manual feed tray if available, as it provides a straighter path. Fan the paper stack before loading to prevent sheets from sticking together. Reduce the number of sheets in the tray.
3. Problem: Toner Flaking or Poor Adhesion (Laser Printers):
- Solution: You *must* use laser-specific translucent paper. Ensure your printer settings are adjusted to "Transparency" or "Heavy Paper" to allow for proper fusing temperature. Clean your printer's fuser rollers if possible (check your printer manual).
4. Problem: Dull or Washed-Out Colors:
- Solution: This is often inherent to the translucency, as light passes through rather than reflecting off. Design with bolder colors. In your printer settings, try "Best" quality and ensure color management profiles are correct. Consider printing a slightly darker version of your image.
5. Problem: Streaks or Lines on Print:
- Solution: This usually indicates a dirty printhead (inkjet) or fuser/drum (laser). Run a cleaning cycle through your printer's utility software. For inkjet, ensure the paper isn't overloaded with ink, which can cause pooling and streaking.
6. Problem: Paper Curling or Warping:
- Solution: This is more common with laser printers due to heat. Allow prints to cool completely on a flat surface. You can gently press them under a heavy book after printing. For inkjet, excessive moisture or humidity can cause curling; store paper flat in a dry environment.
7. Problem: Uneven or Patchy Printing:
- Solution: Ensure your ink/toner cartridges aren't low. For inkjet, run a nozzle check and head cleaning. For laser, gently shake the toner cartridge to redistribute toner powder. Check that the paper is loaded evenly and not skewed.
8. Problem: Difficulty Cutting or Creasing:
- Solution: Translucent paper can be slippery. Use a sharp craft knife or guillotine for clean cuts. For creasing, use a scoring tool (bone folder) and a ruler to create a crisp fold line before gently folding. Avoid pressing too hard, which can tear delicate vellum.
9. Problem: Static Cling:
- Solution: Synthetic translucent films can build up static. Wipe the paper gently with an anti-static cloth or dryer sheet before loading. Ensure your workspace isn't overly dry.
10. The "lesson learned" moment: I once tried to print a deeply saturated black background on vellum for a client's invitation. The inkjet printer laid down so much ink that it never truly dried, and the paper warped significantly. I learned that for solid, dark areas, it's often better to either choose a pre-colored translucent paper or design with negative space, letting the translucency be the star, rather than trying to achieve opaque black.
11. My colleague's quick fix: My graphic designer colleague was in a panic because her laser prints on a new batch of translucent film were flaking. After a quick call to the paper manufacturer, she realized she had accidentally bought *inkjet* film. A simple swap to the correct printable translucent paper designed for laser printers instantly solved her problem. It's a testament to how crucial matching paper to printer truly is.
12. A humorous warning: Don't be like me and forget to check your printer's paper settings before a big print run! I once printed 50 wedding menu overlays on "plain paper" settings, and they all came out muddy. Had to reprint them all. Panik nggak tuh? (A little Indonesian slang for "Are you panicking?"). Always double-check!
---
6. Longevity & Luster: Care, Storage & Preservation Tips
You've put time, effort, and creativity into your projects using printable translucent paper. Now, how do you ensure they last, maintaining their ethereal beauty and structural integrity? Proper care, storage, and preservation are key to ensuring your translucent masterpieces stand the test of time, resisting fading, yellowing, and damage.
Here are 10-12 essential tips for long-term preservation:
1. Store Flat and Dry: The most fundamental rule. Store unused sheets and finished projects flat in a cool, dry place. Humidity can cause warping, and direct sunlight can lead to fading or yellowing.
2. Use Archival-Safe Materials: For long-term projects like scrapbooks or art pieces, ensure any adhesives, sleeves, or backing materials you use are acid-free and archival-safe. This prevents chemical reactions that can degrade the translucent paper over time.
3. Protect from Direct Sunlight: UV rays are the enemy of paper, causing colors to fade and the paper itself to yellow and become brittle. Display finished pieces away from direct windows or use UV-protective frames/sprays.
4. Handle with Care: The smooth surface of translucent paper can easily show fingerprints and smudges. Handle sheets by the edges, or wear cotton gloves for delicate projects.
5. Avoid Excessive Heat: Especially for laser-printed translucent paper, prolonged exposure to high heat can cause toner to melt or deform the paper. Store away from heat sources.
6. Use a Fixative Spray (Optional): For inkjet prints, especially those with heavy ink coverage, a matte or gloss fixative spray can offer an extra layer of protection against smudging and fading. Test on a scrap piece first!
7. Individual Sleeves/Interleaving: For valuable prints or delicate layers, store them in individual archival polypropylene sleeves or interleave them with acid-free tissue paper to prevent sticking or transfer.
8. Keep Away from Moisture: Water can cause ink to run (inkjet) or paper to warp. Ensure your storage area is dry, and consider using desiccants (like silica gel packets) in enclosed storage boxes if humidity is a concern.
9. Roll Large Prints Carefully: If you must roll large architectural plans or artwork, roll them around an acid-free tube, print-side out, and secure with a paper band. Avoid tight rolling, which can create creases.
10. Regular Inspection: Periodically check stored projects for any signs of degradation – discoloration, brittleness, or pest damage – and address them promptly.
11. My own regrettable experience: I once created a beautiful, layered journal cover using printable translucent paper and displayed it on a shelf near a window. Within a year, the vibrant colors had noticeably faded, and the paper had yellowed around the edges. It was a harsh lesson in the importance of UV protection and proper display for delicate materials. Now, I always consider the display environment for any project I make.
12. A clever archival trick: My aunt, a calligrapher, stores her original vellum art pieces in flat, archival boxes, interleaved with acid-free glassine paper. This prevents any potential ink transfer or abrasion between the delicate sheets, ensuring her beautiful artwork remains pristine for years to come. It’s a simple yet effective method for preserving the luster of printable translucent paper.
---
7. Advanced Alchemy: Beyond the Basics of Translucent Printing
You've mastered the fundamentals and tackled common issues. Now, it's time to push the boundaries of what printable translucent paper can do. This section is for the adventurous, the experimental, and those looking to truly elevate their projects with sophisticated techniques and innovative applications.
Here are 10-12 advanced strategies and insights:
1. Duplex Printing for Depth: For some translucent papers, printing a complementary or ghosted image on the reverse side can create an incredible illusion of depth, especially when viewed with backlighting. Experiment with subtle gradients or patterns.
2. White Ink Printing (Specialty Printers): If you have access to a printer capable of white ink, printing white elements on translucent paper is a game-changer. It creates opaque areas that pop against the translucent background, ideal for logos or highlights.
3. Layered Photography & Composites: Print different elements of a photograph onto multiple sheets of translucent paper. When layered together with slight offsets, they create a stunning 3D effect, particularly effective for portraits or landscapes.
4. Embossing & Debossing: After printing, use an embossing machine or stylus to create raised or recessed patterns on your translucent paper. The subtle texture adds another dimension without obscuring the printed design.
5. Heat Transfer & Foiling: Certain translucent films can be used with heat transfer foils. Print your design in black toner on laser-printable translucent film, then apply foil sheets and run through a laminator or heat press for metallic accents.
6. Mixed Media Integration: Combine printed translucent elements with other materials like fabric, wood, or acrylic. Print a design on vellum, then embed it into resin for a unique jewelry piece or coaster.
7. Backlit Displays & Lightboxes: Design specifically for backlighting. Print high-contrast images or stained-glass style patterns on thick translucent film, then place them in custom lightboxes for striking visual displays.
8. Creating Custom Overlays for Maps/Diagrams: For technical fields, print data layers onto separate translucent sheets. These can be overlaid onto a base map or diagram, allowing for dynamic data visualization and analysis.
9. Watermarking & Security Features: Subtle, custom watermarks can be printed on translucent paper for official documents, certificates, or unique product authentication, adding a layer of security and elegance.
10. Sculptural Paper Art: With thicker, more rigid translucent paper, you can print patterns, cut them out, and then fold, score, and assemble them into delicate 3D paper sculptures or lampshades.
11. My "eureka" moment with lightboxes: I once designed a series of abstract patterns and printed them on heavy translucent film. I then built simple wooden frames with LED strips inside. The way the light diffused through the film, illuminating the intricate patterns, was mesmerizing. It transformed simple prints into dynamic art installations, showing me the true power of designing *with* light, not just on paper.
12. The magic of white ink: A professional print shop I collaborated with showed me the capabilities of white ink on a translucent business card. My client's logo, printed in opaque white on a frosted translucent background, felt incredibly luxurious and unique. It was a stark contrast to the standard CMYK printing and immediately made the card stand out. It’s a premium option, but for experts, it’s a powerful tool for visual impact.
---
8. Eco-Conscious Creations: Sustainable Translucent Paper Options
In today's world, sustainability isn't just a trend; it's a responsibility. For creators and businesses, choosing environmentally friendly materials is becoming increasingly important. The good news is that the world of printable translucent paper is evolving, offering more sustainable alternatives without sacrificing quality or creative potential.
Here are 10-12 ways to