
Have you ever walked into a workshop, a storage area, or even a small home garage and noticed that faint, unmistakable scent of something volatile? Maybe it was the sharp tang of acetone, the subtle sweetness of propane, or the metallic whisper of acetylene. In that moment, a little alarm bell rings in your head, right? You instinctively look for signs, for warnings, for anything that tells you how to proceed safely. That gut feeling, that immediate search for visual cues – that’s precisely why "printable flammable gas signs" aren't just pieces of paper; they are frontline defenders in the silent battle against preventable accidents.
This isn't just about sticking a label on a tank; it's about a fundamental commitment to safety, a clear communication that transcends language barriers, and a proactive step to protect lives and property. I remember vividly, early in my career, overseeing a small, bustling fabrication shop. We had gas cylinders everywhere – oxygen, acetylene, argon – and while we thought we had everything covered, a routine safety audit highlighted a critical oversight: our signage was inconsistent, faded, and in some areas, entirely absent for *flammable* gases. It was a stark wake-up call. We were relying on assumptions, and assumptions, as they say, are the mother of all screw-ups in safety. That day, I realized the profound difference between *having* signs and *having the right signs, placed correctly, understood universally.* This guide is born from that experience, from countless hours of research, and from a deep-seated belief that safety should never be an afterthought.
Whether you're a small business owner, a home workshop enthusiast, a facility manager, or simply someone who stores a propane tank for their grill, understanding and utilizing proper flammable gas signage is non-negotiable. We're going to dive deep, exploring everything from the foundational "why" to the intricate "how," ensuring you’re equipped not just with information, but with the confidence to make your space genuinely safer. We'll cover regulatory compliance, design principles, practical application, and even how to make your own effective signs when speed is of the essence. So, let’s roll up our sleeves and ensure your peace of mind – and the safety of everyone around your flammable materials – is ironclad.
---
Table of Contents

- [Understanding the "Why": The Critical Role of Flammable Gas Signs](#understanding-the-why-the-critical-role-of-flammable-gas-signs)
- [Decoding the Symbols: What Does Your Flammable Gas Sign Really Mean?](#decoding-the-symbols-what-does-your-flammable-gas-sign-really-mean)
- [DIY Safety: How to Create Your Own Printable Flammable Gas Signs](#diy-safety-how-to-create-your-own-printable-flammable-gas-signs)
- [Beyond the Basics: Advanced Customization and Professional Standards](#beyond-the-basics-advanced-customization-and-professional-standards)
- [Placement Power: Where to Put Your Flammable Gas Signs for Maximum Impact](#placement-power-where-to-put-your-flammable-gas-signs-for-maximum-impact)
- [The Digital Toolkit: Best Resources for Printable Flammable Gas Signs](#the-digital-toolkit-best-resources-for-printable-flammable-gas-signs)
- [Maintaining Vigilance: Ensuring Your Signs Remain Effective and Compliant](#maintaining-vigilance-ensuring-your-signs-remain-effective-and-compliant)
- [Legal Labyrinth: Navigating Regulations for Flammable Gas Signage](#legal-labyrinth-navigating-regulations-for-flammable-gas-signage)
- [Beyond the Sign: A Holistic Approach to Flammable Gas Safety](#beyond-the-sign-a-holistic-approach-to-flammable-gas-safety)
- [How to Choose the Best Printable Flammable Gas Sign for Your Needs](#how-to-choose-the-best-printable-flammable-gas-sign-for-your-needs)
- [Common Pitfalls to Avoid When Using Flammable Gas Signs](#common-pitfalls-to-avoid-when-using-flammable-gas-signs)
- [Advanced Tips for Experts: Optimizing Your Flammable Gas Signage Strategy](#advanced-tips-for-experts-optimizing-your-flammable-gas-signage-strategy)
- [Conclusion: Your Commitment to Safety, Clearly Displayed](#conclusion-your-commitment-to-safety-clearly-displayed)
---
Understanding the "Why": The Critical Role of Flammable Gas Signs
Let’s start with the heart of the matter: why are these signs so incredibly important? It’s not just about ticking a box for compliance; it's about creating a tangible barrier between potential disaster and everyday operations. Flammable gases are, by their very nature, unpredictable and unforgiving if mishandled. A small leak, an unexpected spark, or a lack of awareness can escalate into a catastrophic event in mere seconds.
Here's why a printable flammable gas sign is far more than just paper and ink:
1. Immediate Hazard Recognition: The primary purpose is instant identification. When someone sees that iconic flame pictogram, their brain registers "DANGER: Flammable Material" even before they read any accompanying text. This split-second recognition can be the difference in an emergency.
2. Guiding Emergency Responders: Imagine a fire breaking out. First responders don't have time for guesswork. Clear, strategically placed flammable gas signs quickly inform them of specific hazards, allowing them to adapt their approach, bring appropriate equipment, and protect themselves and others more effectively. I once witnessed a training exercise where firefighters had to locate hidden "hazards" – the areas with correct signage were always addressed fastest and safest.
3. Preventing Accidental Ignition: These signs serve as constant reminders to avoid open flames, sparks, and heat sources in the vicinity. For instance, a sign near a propane storage cage reminds workers not to use grinding equipment or smoke cigarettes nearby.
4. Informing Personnel and Visitors: Not everyone who enters your space will be an expert on hazardous materials. Contractors, delivery drivers, new employees, or even curious visitors need to be immediately aware of potential dangers. A prominent sign educates and warns simultaneously.
5. Promoting Safe Handling Practices: Beyond just warning of flammability, signs often accompany or imply specific handling instructions – for example, indicating the need for proper ventilation or specialized personal protective equipment (PPE).
6. Ensuring Regulatory Compliance: OSHA (Occupational Safety and Health Administration) in the U.S., along with numerous international bodies like the European Agency for Safety and Health at Work (EU-OSHA) and national standards organizations, mandate specific signage for hazardous materials. Failing to comply can result in hefty fines, legal liabilities, and, most importantly, unnecessary risks to human life.
7. Reinforcing Safety Culture: When an organization consistently uses clear, correct, and well-maintained safety signage, it sends a powerful message: "We take safety seriously here." This fosters a proactive safety culture where everyone is more aware and accountable.
8. Delineating Hazardous Zones: Signs help to clearly mark off areas where flammable gases are stored or used, creating a visual boundary that indicates a higher level of caution is required. This is especially crucial in multi-purpose facilities.
9. Language and Literacy Independent: While text is important, the universal pictograms (like the GHS flame symbol) transcend language barriers, ensuring that the critical message of flammability is understood by anyone, regardless of their native tongue or literacy level.
10. Aiding in Inventory and Management: For those managing multiple types of gases, clear signage helps in quickly identifying cylinders, ensuring they are stored correctly, and preventing accidental mix-ups that could have dangerous consequences.
11. Cost-Effectiveness in Prevention: The cost of a few printable flammable gas signs is negligible compared to the financial and human cost of an accident – property damage, medical expenses, lost productivity, legal fees, and irreparable reputational damage. It's an investment in prevention.
12. Peace of Mind: For me, knowing that a facility has clear, visible safety signs, especially for something as volatile as flammable gases, provides a significant sense of reassurance. It means someone has thought about the risks and taken steps to mitigate them.
Decoding the Symbols: What Does Your Flammable Gas Sign Really Mean?
Understanding the visual language of safety signs is paramount. It’s not enough to just put up a sign; you need to know what the symbols communicate and why they are chosen. The world of hazard communication relies on standardized pictograms and colors to ensure clarity and consistency across industries and borders. When it comes to a printable flammable gas sign, there are a few key symbols and conventions you absolutely need to recognize.
Let's break down the most common and critical elements:
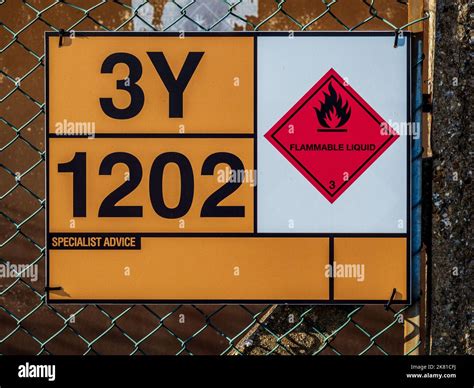
1. The Flame Pictogram (GHS): This is the universally recognized symbol for flammability. It's a black flame with a white background, encased in a red diamond with a black border.
- Meaning: Indicates that a substance is flammable, pyrophoric (ignites spontaneously in air), self-heating, emits flammable gas, or is an organic peroxide.
- My take: This is the absolute non-negotiable symbol. If you only have space for one thing on your sign, make it this. It instantly communicates the core hazard.
2. The Gas Cylinder Pictogram (GHS): Another GHS (Globally Harmonized System) pictogram, this symbol shows a gas cylinder.
- Meaning: Indicates that the product is a compressed gas, liquefied gas, refrigerated liquefied gas, or dissolved gas. These gases are often under high pressure and can explode if heated or ruptured.
- Application: Crucial for flammable gases stored under pressure (e.g., propane, acetylene, hydrogen). It warns of the *form* of the flammable hazard.
3. NFPA 704 Diamond (Fire Diamond): This iconic diamond shape, often seen on buildings and large storage tanks, provides a rapid overview of hazards. It has four colored sections:
- Red (Top): Fire Hazard (Flammability). A number from 0 (no hazard) to 4 (extremely flammable gas, liquid, or solid). For flammable gases, you'll often see a "4" or "3."
- Blue (Left): Health Hazard. Number from 0 to 4.
- Yellow (Right): Instability Hazard (Reactivity). Number from 0 to 4.
- White (Bottom): Specific Hazards. Letters like "W" (water reactive), "OX" (oxidizer), "SA" (simple asphyxiant).
- Personal Scenario: I remember a fire drill where we had to quickly identify the NFPA diamonds on mock storage units. Those numbers and colors became second nature for rapid risk assessment. It’s an incredibly efficient system for emergency crews.
4. OSHA/ANSI Z535 Standard Elements: These standards dictate the overall design of safety signs in the U.S. and often influence international designs.
- Signal Words:
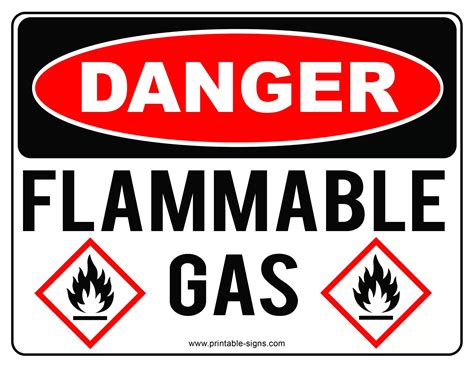
- DANGER (Red panel): Indicates an imminently hazardous situation which, if not avoided, will result in death or serious injury. *This is typically used for flammable gases where explosion or severe burns are possible.*
- WARNING (Orange panel): Indicates a potentially hazardous situation which, if not avoided, could result in death or serious injury.
- CAUTION (Yellow panel): Indicates a potentially hazardous situation which, if not avoided, may result in minor or moderate injury.
- Text: Clear, concise instructions or warnings. For example, "FLAMMABLE GAS," "NO SMOKING," "KEEP AWAY FROM HEAT AND FLAME."
- Pictograms: As mentioned, the GHS flame is standard.
- My perspective: The signal word is critical. For flammable gases, if there's any risk of ignition, "DANGER" is almost always the appropriate choice. It leaves no room for misinterpretation.
5. ISO 7010 Symbols: International Organization for Standardization (ISO) symbols are increasingly common, designed for global recognition.
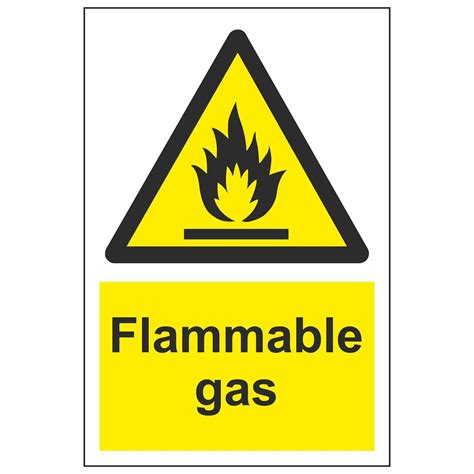
- Flammable Material (Flame symbol): Similar to GHS, often a black flame on a yellow triangle with a black border.
- No Smoking/No Open Flames: A black cigarette or flame with a diagonal red line through it, on a white background, in a red circle. This is an essential companion to any printable flammable gas sign.
6. Specific Gas Identification: While not a universal symbol, including the *name* of the gas (e.g., "Propane," "Acetylene," "Hydrogen") is vital. This adds specific context to the general flammability warning.
7. Pictogram Placement: GHS pictograms are designed to be prominently displayed on labels and Safety Data Sheets (SDSs), but their use on general area warning signs is also widely accepted and recommended.
Understanding these elements allows you to not just *print* a sign, but to *understand* and *verify* its message, ensuring it communicates the precise hazard effectively. This level of detail elevates a simple sign into a powerful safety tool.
DIY Safety: How to Create Your Own Printable Flammable Gas Signs
Sometimes, you need a printable flammable gas sign *now*. Maybe you've got a new temporary setup, a sudden need for a specific warning, or you're operating on a tight budget. Creating your own signs can be a viable, temporary, or even permanent solution if done correctly and with adherence to standards. But remember, "DIY" doesn't mean "compromise on safety."
Here's a step-by-step guide to creating effective printable signs:
1. Identify the Specific Hazard: Don't just generically label "flammable." What *kind* of flammable gas? Propane? Acetylene? Natural gas? Knowing the specific gas helps you add relevant warnings (e.g., "Heavier than air, accumulates in low areas" for propane).
- Hypothetical Scenario: I once had a small project where we temporarily moved some welding gas cylinders. We needed immediate, clear signs for "Acetylene - FLAMMABLE" and "Oxygen - Oxidizer" to prevent confusion and ensure proper handling in the new, temporary location. A quick print job saved the day, but it was rigorously checked for accuracy.
2. Choose the Right Format/Template:
- Online Safety Sign Generators: Many websites offer free or paid tools to design custom safety signs. They often have pre-loaded pictograms and signal words.
- Graphic Design Software: If you're comfortable with programs like Adobe Illustrator, Canva, or even Microsoft PowerPoint/Word, you can create your own from scratch.
- Pre-designed Templates: Search for "free printable flammable gas sign template" or "GHS flammable pictogram printable." Many safety organizations provide these.
3. Incorporate Essential Elements (Minimum Requirements):
- GHS Flame Pictogram: Absolutely essential. A large, clear red diamond with the black flame.
- Signal Word: "DANGER" (red panel) is almost always appropriate for flammable gases.
- Hazard Statement: Clear, concise text like "FLAMMABLE GAS," "EXTREMELY FLAMMABLE," or "DANGER: PROPANE GAS – FLAMMABLE."
- Specific Gas Name: If applicable (e.g., "ACETYLENE").
- Optional but Recommended: GHS gas cylinder pictogram, "No Smoking" pictogram.
4. Design for Readability and Impact:
- Contrast: Use high-contrast colors. Black text on a white or yellow background, or white text on a red background, works best.
- Font: Use clear, sans-serif fonts (e.g., Arial, Helvetica) in a size appropriate for the viewing distance. Large and bold is always better.
- Simplicity: Avoid clutter. The message should be understood at a glance.
- Borders: A clear border helps define the sign.
5. Print on Durable Material:
- Paper: For temporary signs, heavy-duty cardstock or even regular paper is fine.
- Lamination: *Crucial* for durability. Laminating protects against moisture, fading, and tearing, making your printable flammable gas sign last much longer, especially in a workshop environment. This is my go-to step for any DIY sign.
- Adhesive-backed Vinyl: You can print directly onto self-adhesive vinyl sheets using a standard inkjet or laser printer, then cut them out. These are more durable than paper and can be applied directly.
6. Choose the Right Printer and Settings:
- Color Printer: Essential for accurate GHS and signal word colors (red, yellow, orange).
- High Resolution: Ensure your print settings are at a high DPI (dots per inch) for crisp, clear images and text.
- Ink/Toner: Use fade-resistant ink if possible, especially if the sign will be exposed to sunlight.
7. Placement and Maintenance:
- Strategic Placement: Covered in detail in another section, but ensure it's visible, unobstructed, and at eye level.
- Secure Attachment: Use strong adhesive, zip ties, or screws. A sign that falls down is useless.
- Regular Inspection: Check your homemade signs regularly for fading, damage, or peeling. Replace them as soon as they show signs of wear. *Trust me, a faded, illegible sign is worse than no sign at all because it creates a false sense of security.*
8. Review Against Regulations: Before making it permanent, quickly cross-reference your design with basic OSHA/ANSI guidelines (or your local equivalent). Ensure you haven't missed a critical element.
Creating your own printable flammable gas sign is empowering, but it carries the responsibility of accuracy and durability. Do it right, and it will be a valuable addition to your safety protocols.
Beyond the Basics: Advanced Customization and Professional Standards

While creating a basic printable flammable gas sign is a great starting point, truly optimized safety communication often requires a deeper dive into customization and adherence to professional-grade standards. For larger facilities, specific industrial applications, or environments with unique challenges, a generic sign simply won't cut it.
Here’s how to elevate your flammable gas signage strategy:
1. Integrating Facility-Specific Information:
- Emergency Contact Numbers: Add internal emergency lines, specific department contacts, or facility security numbers directly on the sign.
- Evacuation Routes/Assembly Points: While not directly on the gas sign, ensure nearby signs direct personnel to safety, especially if the flammable gas area is a potential ignition source.
- PPE Requirements: If specific PPE (e.g., respirators, flame-retardant clothing) is required when working with the gas, a small pictogram or text reminder can be included.
2. Advanced Material Selection for Printables:
- UV-Resistant Inks and Materials: For outdoor or sun-exposed areas, invest in UV-resistant vinyl or specialty papers and inks to prevent fading. This significantly extends the life of your printable flammable gas sign.
- Chemical-Resistant Coatings: In industrial environments, signs can be exposed to chemicals. Consider laminates or coatings that resist specific solvents or acids.
- Reflective or Glow-in-the-Dark Options: For low-light conditions or power outages, signs made with reflective vinyl or glow-in-the-dark properties can be life-saving.
3. QR Codes and Digital Integration:
- Scan for SDS: Add a QR code to your sign that links directly to the Safety Data Sheet (SDS) for the specific flammable gas. This provides instant, comprehensive hazard information to trained personnel.
- Emergency Procedures: Link to facility-specific emergency response plans relevant to a flammable gas incident.
- Maintenance Logs: For experts, a QR code could link to a digital maintenance log for the gas cylinders or storage area, recording inspection dates and findings.
4. Multi-Language Considerations:
- Bilingual/Trilingual Signs: In diverse workforces or international settings, design signs with warnings in multiple predominant languages. The pictograms help, but specific instructions benefit from translation.
- My learning: In a previous role managing a site with a significant number of non-English speaking workers, we implemented bilingual signs (English and Spanish) for all critical hazards, including flammable materials. The improved understanding and reduced incidents were immediate and measurable.
5. Integration with Safety Systems:
- Lockout/Tagout (LOTO) Points: Ensure flammable gas storage or supply lines have clear LOTO points, and that signs indicate where these are.
- Fire Suppression System Indicators: If a specific fire suppression system (e.g., CO2 flood, foam) is installed for the flammable gas area, signs should indicate this.
6. Consistency Across the Facility:
- Standardized Branding: Use a consistent color scheme, font, and layout for *all* safety signs within a facility. This creates a unified and easily recognizable safety communication system.
- Hierarchy of Warnings: Ensure that the most critical hazards (like flammable gases) are always identified with "DANGER" and are the most prominent.
7. Regular Review and Updates:
- Regulatory Changes: Safety regulations (OSHA, NFPA, GHS) evolve. Regularly review your signage to ensure it aligns with the latest standards.
- Process Changes: If new equipment is installed, processes change, or different gases are introduced, update signage accordingly. A sign is only as good as its relevance.
8. Professional Consultation: For complex industrial environments, consider consulting with a safety professional or industrial hygienist. They can conduct a comprehensive risk assessment and recommend optimal signage solutions tailored to your specific needs. *This is often overlooked, but a fresh, expert pair of eyes can spot critical gaps.*
Advanced customization moves beyond mere compliance to proactive risk management, transforming your printable flammable gas sign into a highly effective tool within a robust safety ecosystem.
Placement Power: Where to Put Your Flammable Gas Signs for Maximum Impact
A perfect printable flammable gas sign is useless if it's not seen. Strategic placement is as critical as the sign's design itself. The goal is to maximize visibility, ensure timely warnings, and guide safe behavior, whether it's for routine operations or emergency situations.
Here's a detailed guide on where to place your flammable gas signs for maximum impact:
1. At Every Entrance to a Hazardous Area:
- Why: This is the first line of defense. Anyone entering a zone where flammable gases are stored or used must be immediately aware of the hazard.
- Examples: Workshop doors, storage room entrances, gates to outdoor cylinder storage cages, laboratory entrances.
- My Tip: Place signs at eye level, typically 5-6 feet from the ground, ensuring they are unobstructed by doors opening, equipment, or other visual clutter.
2. Directly on or Adjacent to Storage Units/Containers:
- Why: Specific identification of the contents. This is crucial for distinguishing between different types of gases (e.g., propane vs. oxygen) and for informing handlers directly at the source of the hazard.
- Examples: On the side of propane tanks, acetylene cylinders, gas cabinets, or bulk storage tanks. For smaller containers, a sticker or label is more appropriate than a large sign, but the principles are the same.
- Personal Anecdote: I once saw a near-miss where a new employee almost grabbed an acetylene cylinder instead of an oxygen cylinder because the labels were old and faded, and there was no clear area sign. Thankfully, a supervisor caught it. *Clear signs directly on the cylinders prevent these dangerous mix-ups.*
3. At Points of Use/Dispensing Stations:
- Why: Where the gas is actively being used or transferred, the risk of ignition is often highest. Signs here serve as immediate reminders for safe operating procedures.
- Examples: Welding stations, gas manifold systems, propane filling stations, laboratory fume hoods where flammable gases are used.
4. Along Access Routes and Pathways:
- Why: If personnel or visitors need to pass through an area adjacent to flammable gas storage, signs along the pathway warn them to proceed with caution.
- Examples: Corridor walls leading to a gas storage room, pathways around outdoor bulk storage.
5. Near Ignition Sources:
- Why: To reinforce the "No Smoking, No Open Flames" message.
- Examples: Near electrical outlets, welding equipment, hot work areas, furnaces, or even designated smoking areas that might be too close.
- My Recommendation: Always pair a "FLAMMABLE GAS" sign with a "NO SMOKING / NO OPEN FLAMES" sign in these areas.
6. Above Eye Level for Overhead Hazards (Less Common for Gas, but Important):
- Why: If gas lines run overhead (though less common for flammable gases without proper containment), signs should be visible from below.
- Examples: Overhead pipe bridges, elevated platforms.
7. At Emergency Shut-off Points:
- Why: In an emergency, knowing where to shut off gas supply can prevent escalation. Signs should clearly mark these valves.
- Examples: Emergency shut-off valves for main gas lines.
8. Considering Viewing Distance and Angle:
- Size Matters: The sign must be large enough to be easily readable from the maximum intended viewing distance. OSHA provides guidelines for minimum letter heights based on viewing distance.
- Angle: Ensure the sign is flat and directly facing the most common approach angle. Avoid placing signs around sharp corners where they might be missed.
9. Clear Line of Sight:
- Avoid Obstructions: Never place a sign behind boxes, equipment, plants, or other objects that could block the view. Regularly check that your signs remain unobstructed. *I've seen signs get covered by new inventory deliveries more times than I can count – a quick check during daily rounds prevents this.*
10. Durability and Environment:
- Outdoor vs. Indoor: Outdoor signs need to withstand weather elements (rain, sun, wind). Laminating or using waterproof materials for your printable flammable gas sign is crucial here.
- Chemical Exposure: In certain industrial settings, signs might need protection from chemical splashes or fumes.
Effective placement transforms your printable flammable gas sign from a static warning into an active participant in your safety strategy, ensuring that the critical message reaches everyone who needs it, exactly when they need it.
The Digital Toolkit: Best Resources for Printable Flammable Gas Signs
In today’s digital age, finding and creating a high-quality printable flammable gas sign is easier than ever. You don't need to be a graphic designer or have a massive budget. A wealth of online resources can provide templates, pictograms, and even custom sign builders that adhere to safety standards.
Here's a breakdown of the best digital resources to help you create your signs:
1. Governmental and Regulatory Agency Websites:
- OSHA (Occupational Safety and Health Administration): Provides extensive guidance on hazard communication, GHS pictograms, and signage requirements. While they don't always offer direct printables, their resources help you *design* compliant signs.
- EPA (Environmental Protection Agency): Offers resources related to hazardous waste and chemical storage, which often includes signage recommendations.
- National Safety Council (NSC): While not a government body, the NSC provides valuable safety resources and sometimes templates.
- My Experience: I frequently reference OSHA's quick cards and fact sheets for the correct pictograms and signal word usage. They are the ultimate authority for U.S. compliance.
2. Safety Supply Companies and Manufacturers:
- Grainger, Uline, Seton, Brady, Safetysign.com: These companies sell physical safety signs, but many also offer free online sign builders, templates, or libraries of pictograms that you can download and print. They often align with ANSI and OSHA standards.
- Benefit: These resources are typically designed to be compliant and professional-looking.
3. Graphic Design and Stock Image Websites:
- Canva: An incredibly user-friendly online graphic design tool with free and paid options. You can search for "flammable gas sign template," "GHS flame pictogram," or "safety sign" and customize to your heart's content.
- Freepik, Pexels, Unsplash: While primarily for photos, you can find vector graphics of GHS pictograms, "No Smoking" symbols, and other safety icons. *Ensure you check licensing agreements for commercial use.*
- Adobe Stock, Shutterstock: Paid options for high-quality,