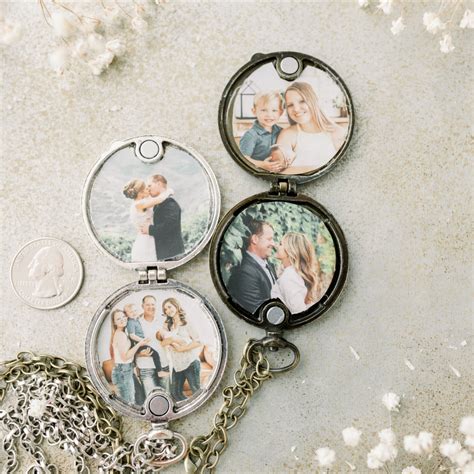
There's something incredibly special about a locket, isn't there? It's more than just a piece of jewelry; it's a tiny, portable treasure chest, holding a secret, a memory, a beloved face close to your heart. But here's the kicker: getting that perfect, tiny picture *into* the locket can feel like trying to thread a needle with your eyes closed, especially if you're aiming for printable locket photos. Trust me, I've been there. I once spent an entire evening wrestling with a pair of crafting scissors and a regular photo print, trying to get a picture of my grandma small enough for a cherished locket – let's just say the results were… abstract.
You're here because you want to avoid that frustration, right? You want to transform those digital memories into tangible, tiny keepsakes that fit flawlessly. Whether you're a seasoned crafter or just dipping your toes into the world of DIY sentimental gifts, this guide is packed with insights, practical steps, and even a few "lessons learned the hard way" to ensure your locket photos are nothing short of perfect. Let's make those little treasures shine!
The Heart of the Locket: Why Printable Photos Matter

Before we dive into the "how-to," let's appreciate *why* we're doing this. A locket photo is a deeply personal statement. It's about preserving a moment, a person, a feeling, and carrying it with you. Digital photos are great, but there's an unmatched warmth and intimacy that comes from a physical print, especially one you've carefully crafted yourself. It's about creating a tangible link to your most precious memories.
Precision Perfected: Measuring & Sizing Your Locket Photos
This is where many people stumble, but it doesn't have to be a headache. Accurate sizing is the cornerstone of great printable locket photos.
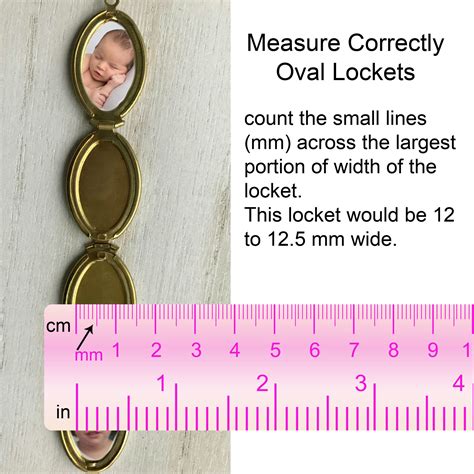
- Measure Twice, Print Once: Don't guess! Use a precise ruler or calipers to measure the inside dimensions of your locket's photo frame. Many lockets aren't perfectly round or oval; they might have slight variations. Note both the height and width in millimeters or inches.
- Create a Digital Template: This is my favorite trick. Take a clear photo of your locket's opening next to a ruler (or scan it). Import this into a simple image editor (even Paint, Google Photos editor, or a free online tool works). You can then overlay your desired photo and resize it to fit the template perfectly.
- Dedicated Locket Photo Apps/Websites: Yes, they exist! Search for "locket photo resizer online" or "print locket pictures app." These tools often have pre-set locket shapes and sizes, making the process incredibly simple.
- Trial & Error (The Smart Way): Instead of wasting your good photo paper, print a few test sizes on plain paper first. Cut them out and see how they fit. This allows for adjustments without commitment.
- Leave a Little Breathing Room: Aim for your photo to be *just slightly* smaller than the opening. This makes insertion easier and prevents the photo from buckling. I find aiming for about 0.5mm smaller on each side works best for a snug, yet manageable fit.
- The Power of Zoom: Don't forget to crop and zoom your original photo so the subject's face is prominent and clear in the tiny space. A full-body shot usually gets lost.
- Consider the Orientation: Will your locket open vertically or horizontally? Ensure your photo is oriented correctly for the best presentation.
The Right Canvas: Choosing Paper & Printer Settings
The quality of your printable locket photos heavily depends on your materials. Don't skimp here!
- Photo Paper is Your Friend: Regular printer paper is too thin and absorbs ink unevenly. Opt for glossy or semi-gloss photo paper. Look for "premium photo paper" for the best results. Matte can work for a vintage look, but glossy tends to make the colors pop more in tiny prints.
- Weight Matters: Choose photo paper with a weight of at least 200gsm (grams per square meter). Thicker paper is more durable and easier to handle when cutting.
- Inkjet vs. Laser: Most home users have inkjet printers, which are perfect for photos. Ensure your ink cartridges are full and in good condition to avoid streaky prints. If you use a laser printer, ensure your paper is compatible with laser printing.
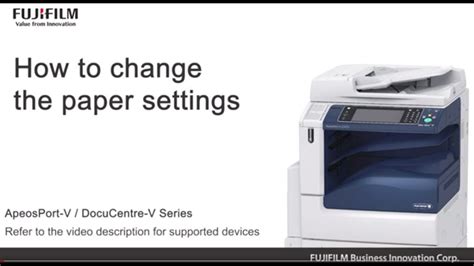
- Printer Settings are Key: Don't just hit "print"! In your printer's settings, select "Photo Paper" as the media type and choose the highest print quality available (e.g., "Best," "High"). This ensures maximum detail and color accuracy for your tiny prints.
- Color Correction: If your photo looks a bit dull, try a quick auto-enhance or color correction in your photo editing software before printing. Brighter, more vibrant photos tend to look better at miniature sizes.
- Smallest Print Size Option: Some printer drivers allow you to print photos at tiny, passport-style sizes directly. Explore these options, as they might be pre-optimized for small prints.
Beyond the Basics: Advanced Tips & Customization
Ready to take your printable locket photos to the next level? These tips will help you add that personal, professional touch.
- Mini Photo Collages: For lockets with multiple frames, consider creating a tiny collage of related images – perhaps a grandparent with each grandchild, or different expressions of your pet. This adds a unique narrative element.
- Sepia Tone or Black & White: For a timeless, classic, or vintage look, convert your photo to sepia or black & white. This can add a powerful emotional resonance, especially for antique lockets. I find that a sepia tone adds such a timeless charm to family heirlooms.
- Protective Coating: Once your photo is printed and cut, consider using a very thin layer of clear sealant or Mod Podge (matte or gloss) applied with a tiny brush. This protects the photo from moisture, smudging, and fading over time.
- Curved Lockets: For lockets with a curved interior, you might need to *gently* curve your photo before inserting it. You can do this by lightly rolling it around a pen or pencil. Don't crease it!
- Layering for Depth: Some larger lockets allow for layering. Print two photos, one slightly smaller than the other, and layer them with a thin spacer for a subtle 3D effect.
- Adding Text: For very specific, meaningful lockets, you could use a tiny font to add a date, initials, or a single word (e.g., "Love," "Hope") to a corner of the photo. Ensure it's legible at that small size.
- Digital Editing Finesse: Use your photo editor to zoom in and adjust brightness, contrast, and sharpness specifically for the locket size. What looks good on a screen might look muddy when tiny.
Don't Be Like Me! Common Pitfalls & How to Avoid Them

We all make mistakes, but you don't have to make these! Avoid these common blunders when creating your printable locket photos.
- Low Resolution Disaster: Using a low-resolution image will result in a blurry, pixelated photo when printed small. Always start with the highest resolution image you can get your hands on. Don't try to stretch a small image.
- The Wrong Paper Choice: As mentioned, regular printer paper or even plain copy paper is a no-go. It will absorb ink, look dull, and easily tear.
- Cutting Catastrophe: Don't be like me and accidentally snip off a cherished smile! Use sharp, small craft scissors (like embroidery scissors) or a craft knife with a cutting mat for precise cuts. Take your time!
- Forgetting to Measure (or Measuring Incorrectly): This is the number one cause of frustration. Re-read the "Measuring & Sizing" section!
- Over-Laminating/Sealing: Too much sealant can warp the photo or make it too thick to fit. Apply very thin, even coats.
- Handling Fresh Prints: Photo paper can be delicate when the ink is still wet. Let your prints dry completely before handling or cutting them to avoid smudges. This usually takes a few minutes, sometimes longer.
- Printing Too Many at Once: Resist the urge to cram dozens of tiny photos onto one sheet if you're not confident in your sizing. Print a few at a time until you've perfected the fit.
Keeping Them Safe: Display & Preservation
Once your beautiful printable locket photos are nestled inside, a little care goes a long way.
- Proper Insertion: Gently slide the photo into the locket. Avoid forcing it, which can bend or crease the print. Tweezers can be incredibly helpful here.
- Securing the Photo: Many lockets have a small lip or a clear plastic cover to hold the photo in place. Ensure it's securely seated. If not, a tiny dot of non-acidic craft glue (like a photo-safe glue stick or gel adhesive) on the back of the photo can keep it from shifting, but use sparingly!
- Avoid Direct Sunlight: Just like larger photos, locket photos can fade over time with prolonged exposure to direct sunlight.
- Clean with Care: When cleaning your locket, avoid getting cleaning solutions directly on the photo. Wipe the metal around it gently.
- Storage: When not wearing your locket, store it in a jewelry box or a soft pouch to protect it from dust and scratches.
Go Forth and Create!
There you have it – everything you need to know to create stunning printable locket photos that will be treasured for years to come. It might seem like a small detail, but these tiny pictures hold immense emotional weight. With a little patience, the right tools, and the tips shared here, you're now equipped to turn those digital memories into physical keepsakes that carry stories, love, and connection. Now go make those little treasures shine and hold your dearest memories truly close!