Ever found yourself staring at a blank surface, brimming with a brilliant idea for a custom sticker, label, or decorative decal, only to wonder how on earth to bring it to life? If you're anything like me, you've probably dabbled in various crafting materials, but nothing quite unlocks the potential for personalized, professional-looking projects like printable adhesive vinyl. I still remember the thrill of printing my first perfect custom label for a spice jar; it felt like a small victory in a world of bland, off-the-shelf solutions.
But let's be honest: diving into the world of "printable adhesive vinyl" can feel a little daunting. With so many types, printer settings, and application techniques, it’s easy to get overwhelmed and end up with a sticky, bubbled mess instead of a masterpiece. Trust me, I've had my share of those "oops" moments! The good news? You don't have to learn everything the hard way. This comprehensive guide is designed to demystify printable vinyl, offering practical advice whether you're a complete beginner or an experienced crafter looking to refine your technique and take your projects to the next level.
---
1. Getting Started: The Absolute Essentials of Printable Vinyl
Before you even think about hitting 'print,' let's lay down the foundational knowledge. Understanding these basics will save you headaches (and wasted vinyl!) down the line.
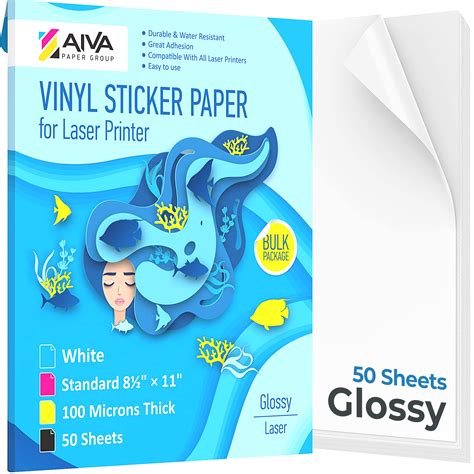
- Understanding What It Is: Printable adhesive vinyl is a material that you can feed through your home inkjet or laser printer to print custom designs, and then cut out and stick to almost any smooth surface. Think of it as a blank canvas sticker. I once tried to print on regular paper and stick it – needless to say, it didn't last through one wash!
- Inkjet vs. Laser Vinyl: This is crucial. Inkjet printable vinyl is designed for inkjet printers, and laser printable vinyl for laser printers. They are *not* interchangeable. Using the wrong type can damage your printer or result in smudged, unusable prints.
- Choosing Your Finish: Printable vinyl comes in various finishes: matte, gloss, clear, and even holographic. Matte is great for a subtle, professional look, while gloss makes colors pop and offers more durability. Clear is fantastic for a "no-background" look on light surfaces.
- The Power of Lamination (or Sealing): For most durable, waterproof, or UV-resistant projects (especially if they'll be outdoors or washed), you’ll want to laminate or seal your printed vinyl. This adds a protective layer over your ink. Don't skip this if you're making things like water bottle stickers or car decals!
- Storage Savvy: Store your printable adhesive vinyl flat, away from direct sunlight and extreme temperatures. Humidity can also affect its performance. This might seem minor, but it keeps your sheets from curling and ensures a smooth feed through the printer.
2. Choosing Your Canvas: Surfaces & Adhesion Tips
Printable adhesive vinyl is incredibly versatile, but not all surfaces are created equal. Knowing what works best will ensure your creations stick around (pun intended!).
- Smooth is King: The best surfaces are smooth, clean, and non-porous. Think glass, metal, smooth plastic, ceramic mugs, laminated wood, or painted walls. Textured surfaces will lead to bubbling and poor adhesion.
- Cleanliness is Next to Stickiness: Always clean your surface thoroughly before application. Use rubbing alcohol for non-porous surfaces to remove oils, dust, and grime. My first tumbler decal peeled because I rushed this step – rookie mistake!
- Surface Temperature Matters: For optimal adhesion, apply vinyl in a moderate temperature environment. Extreme cold can make the adhesive brittle, while extreme heat can make it too gooey.
- Testing is Trustworthy: If you're unsure about a new surface, always test a small, inconspicuous piece of your "printable adhesive vinyl" first. Let it sit for a day or two to gauge adhesion and removal properties.
- Indoor vs. Outdoor Durability: While vinyl is generally durable, for outdoor use or items that will see heavy wear (like car decals or tumblers), invest in waterproof, UV-resistant printable vinyl and ensure you laminate it properly.
3. Printing Perfection: Settings, Ink & Printer Pointers
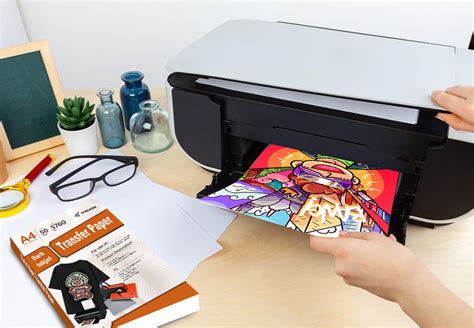
This is where the magic happens, but it’s also where most frustrations begin. Get your printer settings right, and you're halfway to success.
- Printer Type Matters: As mentioned, use inkjet vinyl for inkjet printers and laser vinyl for laser printers. Never mix them.
- Best Quality Settings: Always set your printer to the highest print quality possible. Select "Photo Paper," "Glossy Photo Paper," or "Matte Photo Paper" as your media type, depending on your vinyl finish. This ensures the ink saturation and detail are optimal.
- Check Ink Levels: Low ink can lead to streaky or faded prints. Always check before you start a big project. There's nothing worse than a perfectly designed sticker ruined by a dying ink cartridge.
- Load Correctly: Pay attention to how your printer feeds paper. Most printers require you to load printable vinyl face down, but some load face up. A quick test on a scrap piece of paper (marking which side is 'up' before feeding) can save a sheet of expensive vinyl.
- Allow for Drying Time: Inkjet prints need time to dry, especially on glossy surfaces. Resist the urge to touch or handle them immediately. I typically let mine sit for at least 15-30 minutes, or even a few hours for heavy ink saturation, before moving on to cutting or laminating.
- Calibrate Your Printer: If your cuts aren't lining up with your prints, your printer's calibration might be off. Consult your printer manual for specific calibration steps to ensure print-and-cut precision.
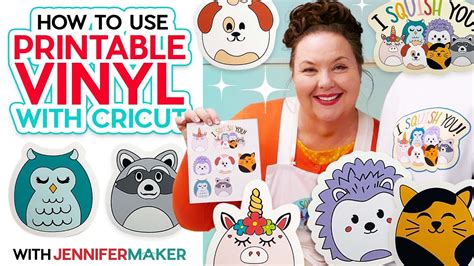
4. Cutting & Weeding Like a Pro: Precision Techniques
Whether you're using a craft cutter like a Cricut or Silhouette, or good old scissors, precision is key for clean results.
- Cutting Machine Settings: This is critical. Every machine, blade, and "printable adhesive vinyl" type will require slightly different settings. Always do a test cut on a small, scrap piece before cutting your full design. My favorite strategy is to start with a lighter pressure and do a double cut if needed; it's better than cutting too deep!
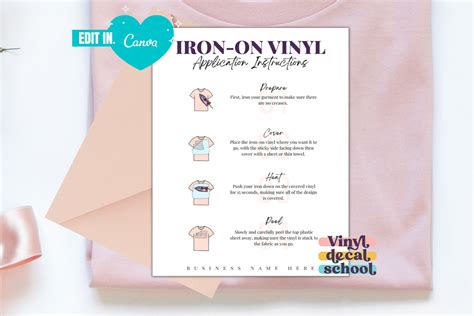
- Mirroring Your Design (If Applicable): If you're doing iron-on vinyl (though this article focuses on adhesive vinyl, people often confuse the two), you *must* mirror your design. For adhesive vinyl, you typically *don't* mirror it, unless you're applying it to the inside of glass for an outward-facing design. Don't be like me and forget to mirror your first iron-on project!
- Weeding Tools are Your Friends: A good weeding tool (a hook or pointy tweezer) makes removing excess vinyl (weeding) much easier, especially for intricate designs.
- Slow and Steady Weeds the Vinyl: When weeding, take your time. Go slowly, and angle your weeding tool to lift the excess vinyl cleanly without tearing your design.
- Clean Cutting Mat: If using a cutting machine, ensure your mat is clean and sticky enough to hold the vinyl firmly during cutting. Loose vinyl can shift and ruin your cut.
5. Application Mastery: Bubble-Free & Long-Lasting Results
The final step: applying your perfectly printed and cut design. This is where patience pays off for a smooth, professional finish.
- The Hinge Method: For larger decals, the hinge method is a game-changer. Apply tape across the middle of your decal, peel back one half of the backing, apply that half, then remove the tape and peel the other half of the backing. This prevents bubbles and misalignment.
- Use a Squeegee (or Credit Card): A squeegee is essential for pressing down your vinyl firmly and smoothing out any air bubbles as you apply it. Work from the center outwards.
- Don't Rush the Transfer: If using transfer tape (for intricate multi-piece designs), press it firmly onto your design, then lift slowly. If parts aren't sticking, press again. Patience is key!
- Dealing with Bubbles: For tiny bubbles, you can often push them out with your finger or a squeegee. For stubborn ones, a tiny pin prick (and then smoothing) can release the air. I find this approach works best for small projects where perfection is paramount.
- Curing Time: Adhesive vinyl typically needs 24-72 hours to fully "cure" or bond to the surface. Avoid washing or heavy handling during this time to ensure maximum adhesion.
6. Creative Project Ideas & Inspiration with Printable Adhesive Vinyl
Now that you're armed with the knowledge, let's get those creative juices flowing! Printable adhesive vinyl opens up a world of DIY possibilities.
- Custom Stickers & Decals: Design your own laptop stickers, water bottle decals, car window graphics, or fun planner stickers.
- Personalized Labels: Create professional-looking labels for pantry jars, craft supplies, essential oil bottles, or organizing bins.
- Home Decor Accents: Design wall decals, custom artwork for picture frames, or unique designs for ceramic tiles.
- Party & Event Decor: Make custom signs, banner elements, personalized party favors, or unique wine bottle labels for weddings or birthdays.
- Small Business Branding: Craft your own product labels, branding stickers for packaging, or custom signage for your shop. I’ve seen small businesses thrive just by elevating their packaging with custom branding!
- Kids' Projects: Let kids design their own temporary tattoos (using special tattoo paper) or sticker sheets for their rooms or toys.
- Gift Personalization: Elevate any gift with a custom-printed message or design on a mug, notebook, or gift box.
7. Troubleshooting & Common Mistakes with Printable Vinyl
Even seasoned crafters run into snags. Here's a quick guide to common issues and how to avoid (or fix) them.
- Smudged Ink:
- Cause: Using the wrong vinyl type (inkjet vinyl in a laser printer, or vice versa), not allowing enough drying time, or touching wet ink.
- Fix: Ensure you're using the correct vinyl, allow ample drying time, and handle prints minimally until dry.
- Bubbles During Application:
- Cause: Applying too quickly, not using a squeegee, or dusty/uneven surface.
- Fix: Apply slowly using the hinge method, smooth with a squeegee, and ensure a clean, smooth surface.
- Vinyl Not Sticking:
- Cause: Dirty surface, textured surface, old/low-quality vinyl, or too cold.
- Fix: Clean surface thoroughly, use on smooth surfaces, ensure fresh vinyl, and apply in moderate temperatures.
- Cuts Not Lining Up with Print (Cutting Machines):
- Cause: Printer calibration issues, incorrect machine settings, or stretched vinyl.
- Fix: Calibrate your printer and cutting machine, ensure vinyl is loaded straight and flat on the mat, and do test cuts.
- Faded or Dull Colors:
- Cause: Low print quality setting, low ink, or using an incompatible vinyl.
- Fix: Use highest print quality setting, check ink levels, and ensure vinyl is designed for your printer type.
---
Tips for Personalizing Your Printable Vinyl Projects

Making something unique is half the fun! Here’s how to truly make your printable vinyl projects shine.
- Think About the Recipient/Purpose: Who is this for? What's their style? What's the item's purpose? A sleek, minimalist label for a pantry jar, or a vibrant, whimsical sticker for a child’s toy box? Tailor your design to match.
- Incorporate Personal Touches: Use inside jokes, significant dates, names, or specific interests. A customized gift is always more appreciated than a generic one. I always try to include a subtle nod to shared memories in my personalized gifts.
- Choose the Right Fonts & Colors: Typography can completely change the mood of a design. Colors evoke emotion; pick a palette that matches your intent.
- Consider Layering (with Caution): For complex designs, you can sometimes print different elements and layer them. However, remember that printable vinyl is thicker than regular vinyl, so keep layering minimal to avoid bulk.
- Embrace Your Imperfections: Sometimes, the most unique elements come from happy accidents. Don't be afraid to experiment! This is my favorite strategy because it allows for spontaneous creativity and often leads to surprisingly cool results.
Common Pitfalls: What to AVOID When Working with Printable Adhesive Vinyl

Learn from my (and countless others') mistakes so your crafting journey is smoother!
- Don't Skip the Test Print: This is arguably the biggest mistake. Printing a full sheet without testing your settings on a scrap is a recipe for wasted vinyl and frustration.
- Don't Overload Your Printer: Only feed one sheet of vinyl at a time to prevent jams and misfeeds.
- Don't Rush the Drying/Curing: Patience is a virtue here. Premature handling or washing can ruin your print or adhesive bond.
- Don't Forget to Clean Your Surface: A dusty or oily surface is the enemy of good adhesion. Cleanliness is paramount.
- Don't Use Household Scissors for Intricate Cuts (Unless You're a Surgeon!): If you're not using a cutting machine, invest in a precision craft knife for detailed work. Trying to cut tiny details with blunt kitchen scissors is a fool's errand – don’t be like me and try to cut a perfect circle freehand with craft scissors right after a cup of coffee!
- Don't Store it Improperly: Leaving your vinyl sheets exposed or curled up can damage them and make them unusable.
---
You've got the knowledge, the tools, and now, the confidence. Printable adhesive vinyl is an incredibly rewarding material to work with, allowing you to turn your digital designs into tangible, durable creations. From professional-looking labels to personalized gifts that truly stand out, the possibilities are endless. So go on, grab a sheet of printable adhesive vinyl, fire up your printer, and start transforming your ideas into reality. Now go make some magic!