Remember that feeling of trying to conjure a magical butterfly or a ferocious tiger onto a squirming little face, only to end up with something that looked more like a confused smudge? Oh, I've been there! More times than I care to admit, I've stressed over finding the perfect design that was both impressive and, crucially, *simple* enough for my less-than-artistic hands. That's why I became obsessed with finding simple face painting designs printable – because sometimes, all you need is a clear visual guide to transform a blank canvas into a work of art (even if it's just for an hour!).
This article is your trusty sidekick for mastering quick, crowd-pleasing face paint creations. Whether you're a parent gearing up for a birthday party, a teacher prepping for a school fair, or just someone looking to add a splash of fun to a casual get-together, you'll find easy-to-follow ideas that even a beginner can nail. We’re talking designs that are ready to go, easily replicable from a simple template, and guaranteed to bring smiles without the stress.
1. Quick & Classic Critters: Animal Magic Made Easy
Animals are always a hit, and thankfully, many can be simplified into basic shapes and lines, perfect for simple face painting designs printable guides. These are fantastic for high-volume events where speed is key. I've found these designs are often the fastest way to get a lot of happy campers!
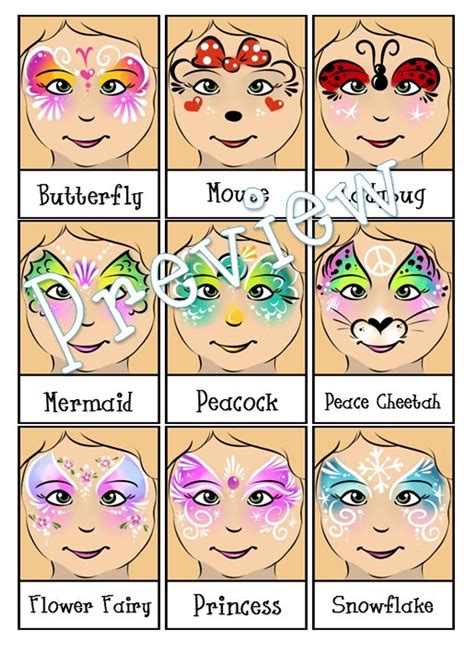
- The Fluttery Butterfly: A classic for a reason! Two large, rounded wings over the eyes and forehead, a small body on the nose, and two antennae. You can stick to one or two colors for ultimate simplicity. *I used this for a shy little girl's first time getting her face painted; the gentle shape made her feel instantly comfortable!*
- Wiggly Worm/Caterpillar: A series of connected green or rainbow circles on the cheek or forehead. Add two antennae. Super quick, super cute.
- Sleepy Kitty Cat: Whiskers on the cheeks, a small pink nose dot, and maybe two pointed ears on the forehead (drawn, not painted on the actual ears!).
- Friendly Doggy Nose: A black nose tip, a few dots around it, and some whiskers. Maybe a wagging tongue drawn below the lip. Perfect for boys and girls who love pups.
- Little Ladybug: A red circle on the cheek, add black dots and antennae. Easy to do freehand or with a simple circle stencil.
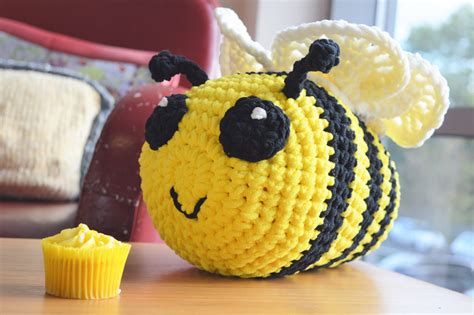
- Busy Bumblebee: Yellow and black stripes across the cheek, with tiny wings drawn near the temple. A simple dot for the head and antennae.
- Chirping Birdy: A colorful arc over one eye with a small beak on the nose. Great for quick, vibrant touches.
- Cute Mouse: A pink nose, whiskers, and two simple round ears on the forehead. Simple, effective, and adorable.
2. Fantastic & Friendly Faces: Heroes, Crowns, & Clowns
These designs leverage a child's imagination, transforming them into their favorite characters or royalty with just a few strokes. The key here is recognizable elements that can be simplified.
- Super Hero Mask (Eyes Only): A colored 'mask' shape around the eyes, perhaps with a star or lightning bolt on the temple. Minimal coverage, maximum impact. *This is my go-to when a kid wants to be a superhero but doesn't want their whole face covered.*
- Princess Crown: A simple golden crown drawn on the forehead, perhaps with a few glitter "jewels." Elegant yet easy.
- Sparkling Fairy Dust/Stars: A scattering of colorful stars and dots, often trailing from the temple down the cheek, sometimes with glitter. This is incredibly versatile.
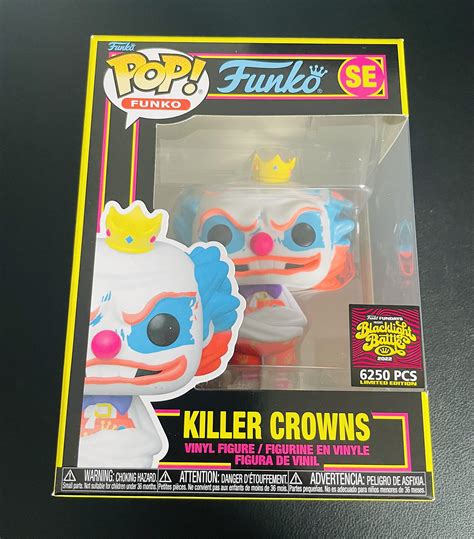
- Happy Clown Nose & Cheeks: A red circle on the nose and two red/pink circles on the cheeks. Add a wide, painted smile if they're feeling extra silly.
- Pirate Patch & Scar: A black 'patch' drawn over one eye (careful to avoid the actual eye!), and a simple red scar line on the cheek. Aargh, matey!
- Unicorn Horn & Flowers: A simple spiral horn on the forehead (white or rainbow) surrounded by a few small, simple flowers or dots. Magical!
- Robot Gears & Wires: A few geometric shapes (circles, squares, lines) on the cheek or forehead to represent gears and wires. Metallic colors work best.
- Baseball stitches: Simple red stitches drawn on one cheek, like on a baseball. Perfect for sports fans!
3. Nature's Nods & Whimsical Wonders

Inspired by the natural world and pure imagination, these designs are often abstract or involve repeating patterns, making them excellent candidates for simple, repeatable templates.
- Bright Rainbow: A simple arc of rainbow colors across the forehead or cheek. Add clouds for extra charm.
- Sunny Rays: A yellow circle with lines radiating outwards on the cheek or forehead. Instant sunshine!
- Moon & Stars: A crescent moon and a few stars on the cheek or temple. Great for quieter, dreamy designs.
- Simple Flower: A basic five-petal flower on the cheek, with a dot in the center. Easily adaptable with different colors. *I find that even just one vibrant flower can completely brighten a child's face.*
- Cloud with Raindrops: A puffy white cloud with blue teardrops trailing down. Sweet and gentle.
- Leafy Vine: A simple green vine with a few leaves trailing from the temple down the cheek. Can be combined with flowers.
- Ocean Wave: A simple blue wave pattern on the cheek, maybe with a tiny fish or bubble.
- Sparkly Icicle/Snowflake: A few white lines and dots resembling a snowflake or icicle, especially effective with glitter.
4. Spooky & Silly Strokes: Not-So-Scary Fun
Even "spooky" designs can be kept simple and fun, avoiding anything too complex or frightening, perfect for a non-intimidating approach to easy face painting designs printable for Halloween or themed parties.
- Creepy-Crawly Spider: A black circle on the cheek with eight thin legs radiating out. Add small fangs for a playful touch.
- Friendly Ghost: A simple white ghost shape on the cheek, with two black dots for eyes and an 'O' for the mouth. More cute than scary.
- Jack-o'-Lantern Smile: An orange circle with simple black triangle eyes and a jagged smile on the cheek.
- Simple Bat: A black bat silhouette on the forehead, with two pointed ears and outstretched wings.
- Monster Bolts: Two simple green bolts on the temples, like Frankenstein's monster. Great for quick transformation.
- Vampire Fangs: Two white triangles below the lip, with a small red drip. Fun for older kids who want a quick scary touch.
- Witch's Wart: A single green or black wart on the nose or cheek. Sometimes, less is more for a spooky effect!
5. Geometric & Graphic Gems: Bold & Easy Shapes
Sometimes, the most striking designs are the simplest, relying on bold shapes and colors. These lend themselves perfectly to a printable template, guiding where to place each element.
- Bold Stars: One or two large, simple stars on the cheek or forehead, perhaps outlined or filled with color. Repeatable and effective.
- Colorful Dots: A scattering of various-sized dots in bright colors on the cheeks or forehead. Abstract and fun. *This is my favorite strategy for when I’m short on time but still want to make a big impact.*
- Simple Heart: A classic heart shape on the cheek or forehead. Red is traditional, but any color works!
- Checkerboard Patch: A small square checkerboard pattern on the cheek, using two contrasting colors. Requires a steady hand but looks impressive.
- Stripes Galore: Alternating colored stripes across the forehead or down the cheek. Think sports team colors or rainbow!
- Polka Dots: A simple pattern of polka dots across the cheeks or nose, in one or multiple colors.
- Target Practice: Concentric circles on the forehead or cheek. Fun and eye-catching.
Tips for Personalizing Your Face Paint Masterpiece
Even with simple face painting designs printable as your guide, adding a personal touch makes all the difference.
- Ask for Favorites: Before you start, ask the child what their favorite color is, or if they have a specific animal/character they love. Incorporating their preference, even in a small way, makes it special.
- Add Glitter (Sparingly!): A little glitter can elevate even the simplest design. A tiny sprinkle on a butterfly wing or a princess crown goes a long way. Trust me, you don’t want to mess this up by overdoing it – a little goes a long way and avoids a glitter bomb disaster!
- Use Non-Toxic, Skin-Safe Paints: This isn't just a tip; it's a must. Always use professional-grade, cosmetic-approved face paints. Their pigments are vibrant, and they are designed to be safe on skin.
- Less is More: Especially for beginners, focus on one strong element rather than trying to fit too many details. A simple, well-executed design is far better than a complex, messy one.
- Consider the Child's Comfort: Some kids don't like paint near their eyes, others are fine with it. Be empathetic and check in with them as you go.
- My personal preference: I find using a damp, not wet, sponge for applying base colors creates a smoother, more even coat, making your subsequent line work much cleaner. It's a small detail, but it makes a huge difference in the final look!
Common Pitfalls: What to AVOID When Face Painting

Learning from mistakes is part of the fun (and sometimes, the mess!). Here are some "hard-earned" lessons:
- Don't Use Craft Paint: Seriously, put down the acrylics! Craft paints are not designed for skin and can cause irritation or allergic reactions. Stick to cosmetic-grade face paint.
- Don't Rush: While simple designs are quick, rushing will lead to smudges and uneven lines. Take a deep breath! You’ve got this.
- Don't Forget a Patch Test (If Time Allows): For very sensitive skin, doing a small test patch on the inner arm a day before can save a lot of trouble.
- Don't Over-Saturate Your Brush: Too much water or paint on your brush will lead to drips and messy lines. Aim for a creamy, ink-like consistency.
- Don't Be Afraid to Say No: If a child requests something incredibly complex that's beyond your skill level or time constraints, offer a simplified version or suggest a different simple design. It's better to deliver a great simple design than a disappointing complex one.
- Don't Be Like Me and Start on a Wet Face: Make sure the skin is clean and dry. Oily or sweaty skin will make the paint harder to apply and more likely to smudge. I once tried to paint a superhero on a child who'd just been running around like crazy, and it turned into a super-smudge instead! Live and learn, right?
Conclusion
Face painting doesn't have to be intimidating! With these simple face painting designs printable ideas and a little patience, you'll be creating smiles and lasting memories in no time. The true magic lies not in perfection, but in the joy you bring and the confidence you gain. So grab your paints, pick a design, and watch those little faces light up. Now go make their day – and yours!