
Are you on a quest for the perfect shamrock graph printable? Maybe you’re a teacher looking for a fun St. Patrick’s Day math activity, a parent helping with a school project, or just a creative soul wanting to add a touch of Irish luck to your graphing skills. Trust me, I’ve been there. I remember my first time trying to plot anything beyond a straight line on a coordinate plane; it felt like searching for a pot of gold at the end of a very wiggly rainbow! But with a little guidance, transforming a grid of numbers into a beautiful, leafy symbol of fortune is not just possible, it’s incredibly rewarding.
This isn't just about finding a template; it's about understanding how to bring that iconic three-leaf clover to life on a graph. We'll dive deep into various ways to create stunning shamrock designs, from simple and sweet to detailed and delightful, ensuring you find the perfect shamrock graph printable solution for your needs. Get ready to turn those intimidating x and y axes into a canvas for your very own lucky charm!
---
Getting Started: The Classic Shamrock Graph (Beginner-Friendly)
For those new to coordinate graphing or looking for a straightforward, instantly recognizable shamrock, this is your go-to. It focuses on large, easy-to-plot points that form the basic three-leaf shape. This approach is fantastic for introducing younger learners to the concept of plotting points without overwhelming them.
- Example 1: The Basic Lucky Leaf
- Leaf 1: (0,5), (-2,7), (-4,5), (-2,3)
- Leaf 2: (0,5), (2,7), (4,5), (2,3)
- Leaf 3: (-2,3), (0,1), (2,3), (0,5)
- *Scenario:* "I used this simple set of coordinates when introducing graphing to my 7-year-old niece. She loved seeing the shamrock emerge!"
- Example 2: Slightly Rounded Edges
- Leaf 1: (-1,6), (-3,7), (-4,5), (-3,3), (-1,4)
- Leaf 2: (1,6), (3,7), (4,5), (3,3), (1,4)
- Leaf 3: (-1,4), (0,2), (1,4), (0,6)
- Example 3: Centered on the Origin
- Leaf 1: (-3,0), (-1,2), (1,2), (3,0), (0,-2) (This creates a heart shape for each leaf, rotated)
- Example 4: A Squatter Shamrock
- Leaf 1: (-2,4), (-4,4), (-3,2), (-1,2)
- Leaf 2: (2,4), (4,4), (3,2), (1,2)
- Leaf 3: (0,0), (-1,2), (1,2)
- Example 5: Simple Oval Leaves
- Leaf 1: (0,4), (-2,5), (-4,4), (-2,3)
- Leaf 2: (0,4), (2,5), (4,4), (2,3)
- Leaf 3: (-1,2), (0,0), (1,2), (0,4)
- Example 6: Blocky Shamrock for Beginners
- (2,8), (4,8), (4,6), (2,6) - Top Left
- (6,8), (8,8), (8,6), (6,6) - Top Right
- (4,4), (6,4), (6,2), (4,2) - Bottom Center
- Example 7: Another Easy Set
- (-3,0), (-1,2), (1,2), (3,0) for the top arc of two leaves.
- (-1,0), (0,-2), (1,0) for the bottom leaf.
- Example 8: Large-Scale for Classroom Boards
- Scale up any of the above by multiplying all coordinates by 2 or 3. This makes a great graphing paper activity for a whole class.
- Example 9: Basic Heart Shapes for Leaves
- Leaf 1: Points that form a heart on the top left.
- Leaf 2: Points for a heart on the top right.
- Leaf 3: Points for a heart at the bottom.
- Example 10: Using Quadrant 1 Only
- (2,8), (4,7), (3,5) and its reflections to form a quarter of a leaf, then repeat for all three leaves in the upper quadrants.
For the Little Leprechauns: Simple & Sweet Shamrock Designs

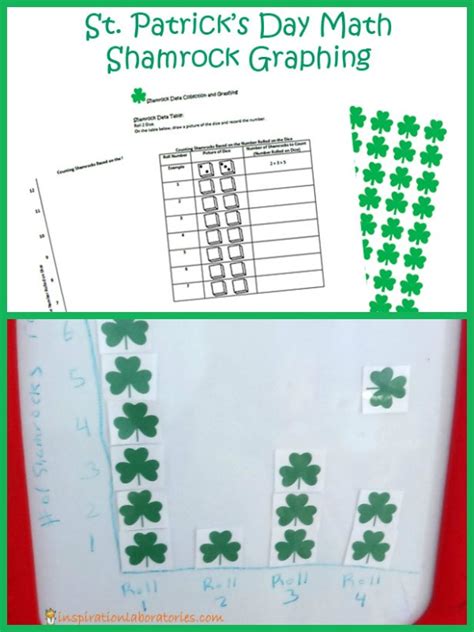
Sometimes, less is more, especially for younger kids or quick craft projects. These designs prioritize ease of drawing and a friendly aesthetic over mathematical precision, making them perfect for a St. Patrick's Day math activity printable.
- Example 1: The "Dot-to-Dot" Shamrock
- Provide a series of large dots on a coordinate plane grid for kids to connect, forming a clear shamrock shape.
- *Scenario:* "This 'dot-to-dot' method was a hit at our community St. Patrick's Day event. Even preschoolers could join in with a little help!"
- Example 2: Oversized and Chunky
- Use coordinates that are far apart, resulting in a large, bold shamrock that’s easy to color in.
- e.g., Leaf 1: (5,20), (1,15), (5,10), (9,15)
- Example 3: Simple Circles for Leaves
- Plot a central point for each leaf (e.g., (-5,5), (5,5), (0,-2)) and instruct kids to draw a circle around each point, then add a stem.
- Example 4: The "Color-by-Coordinate" Shamrock
- Provide a blank grid and a list of coordinates, each assigned a color. When filled in, they reveal the shamrock.
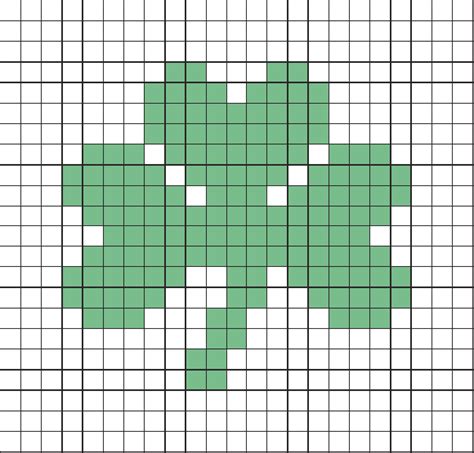
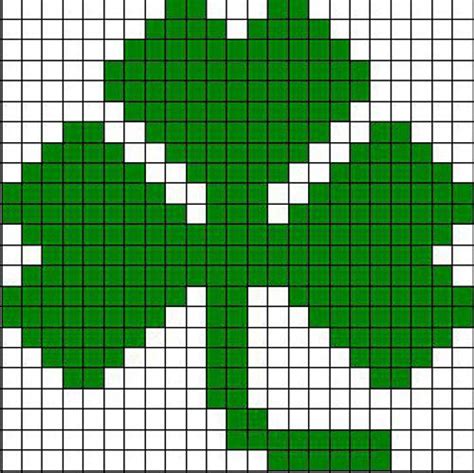
- Example 5: "Big Block" Shamrocks
- Focus on filling in larger square blocks on the graph paper rather than precise points, for a pixelated shamrock look.
- Example 6: Three Overlapping Circles
- Center points at (0,3), (-3,0), (3,0) and have them draw circles of radius 3 around each point. The overlap creates the shamrock.
- Example 7: Simplified Vertex Shamrock
- Plot only the outermost points of the shamrock's three leaves and the base of the stem.
- Example 8: The "Heart-Half" Method
- Draw the left half of a heart shape, then reflect it for the right. Do this three times for three leaves.
- Example 9: Jumbo Shamrock for Tracing
- A pre-drawn shamrock on a light grid, allowing kids to trace the lines and then graph over it.
- Example 10: Symmetry Focus
- Give points for one leaf and have kids use symmetry to find the points for the other two.
A Bit More Complex: The Detailed Clover

Ready to add more curves and finesse? These methods use more points or slightly more intricate plotting techniques to create a more organic, nuanced shamrock shape. This is where your expertise in graphing truly shines.
- Example 1: Utilizing Arcs and Curves
- Instead of straight lines between points, use a series of points that suggest a smooth curve (e.g., for a single leaf: (0,0), (1,2), (2,3), (3,2), (4,0), (2,-1)). Repeat and rotate for the other leaves.
- *Scenario:* "When I was designing a shamrock for a school's math fair, this curved approach really stood out. It looked professionally done!"
- Example 2: Multi-Point Leaf Structure
- Each leaf defined by 6-8 points for a smoother, more realistic outline.
- e.g., Leaf 1: (0,0), (1,3), (2,4), (3,3), (4,0), (3,-1), (2,-2), (1,-1).
- Example 3: Overlapping Heart-Shaped Leaves
- Plot coordinates for three overlapping heart shapes, carefully adjusting points so the overlap forms the distinct shamrock center.
- Example 4: The "Negative Space" Shamrock
- Plot points for the background around the shamrock, and the shamrock shape emerges from the un-plotted area.
- Example 5: Using Different Quadrants for Each Leaf
- Plot one leaf in Quadrant I, another in Quadrant II, and the third mostly in Quadrant III, with a stem extending into Quadrant IV.
- Example 6: Parametric Equations (Advanced Concept)
- For a truly smooth curve, one might introduce simple parametric equations like `x = r * cos(t)` and `y = r * sin(t)` adjusted for heart-like shapes, though this is for very advanced users.
- Example 7: Fractional Coordinates
- Using points like (0.5, 3.2), (1.8, 4.1) can create very precise curves, ideal for older students or advanced projects.
- Example 8: The "Triple Bubble" Method
- Graph three slightly elongated circles that meet precisely at a central point.
- Example 9: Inner and Outer Contours
- Plot an inner set of points and an outer set of points for each leaf, then connect them to give the leaves a distinct thickness.
- Example 10: Mirroring and Rotation
- Plot one leaf in detail, then use transformation rules (reflection and rotation) to find the coordinates for the other two leaves and the stem.
Adding a Twist: Graphing Shamrocks with a Stem
A shamrock isn't complete without its stem! These categories focus on how to integrate a stem seamlessly and effectively into your shamrock graph printable design, adding a touch of natural elegance.
- Example 1: The Simple Straight Stem
- After plotting the leaves, add points for a straight line extending downwards from the center: e.g., (0,0), (0,-5).
- *Scenario:* "When making a batch of shamrock cards, I found a simple straight stem was fastest and looked clean. My personal preference for quick crafts!"
- Example 2: A Gently Curved Stem
- Use a few points to create a subtle curve: e.g., (0,0), (1,-2), (0,-4), (-1,-6).
- Example 3: Tapered Stem
- Start wide at the top and narrow towards the bottom. E.g., from (1,0) to (-1,0) at the top, down to (0.5, -5) to (-0.5, -5) at the bottom.
- Example 4: Stem with a Bulbous Base
- Add a few extra points at the very bottom of the stem to give it a root-like appearance.
- Example 5: Integrating Stem into Lower Leaf
- Design the bottom leaf so its base naturally flows into the stem without a distinct break.
- Example 6: Multi-Segment Stem
- A stem made up of 3-4 distinct straight line segments, allowing for more angles.
- Example 7: Short and Stubby Stem
- Perfect for a "lucky charm" look. E.g., (0,0), (0,-2).
- Example 8: Long and Flowing Stem
- Extends significantly downwards, perhaps curling. E.g., (0,0), (2,-4), (0,-8), (-2,-10).
- Example 9: Stem with Leaf Veins (More Advanced)
- Once the main shamrock is plotted, add thinner lines inside the leaves to represent veins.
- Example 10: Stem as a Continuation of the Axis
- If your shamrock is centered at the origin, simply extend the negative y-axis downwards to form the stem.
Shamrock Graphs for St. Patrick's Day Fun
These ideas go beyond just plotting the shamrock, focusing on how to use your shamrock graph printable for festive decorations, games, and creative celebrations for St. Patrick's Day.
- Example 1: Shamrock Graph Garland
- Print multiple shamrock graphs, cut them out, and string them together for a festive garland.
- *Scenario:* "Last year, my family and I turned our graph paper shamrocks into a garland for our St. Patrick's Day party. It was a unique touch!"
- Example 2: "Find the Gold" Game
- Hide a "pot of gold" (a small circle) at a specific coordinate within or near the shamrock on the graph. Kids plot the shamrock, then find the gold.
- Example 3: Graphing Paper Coasters
- Plot a shamrock on cardstock graph paper, laminate it, and use it as a festive coaster.
- Example 4: Shamrock Graph Greeting Cards
- Fold graph paper into a card, plot a shamrock on the front, and write a festive message inside.
- Example 5: Window Decorations
- Plot a large shamrock, color it green, and tape it to a window for a cheerful display.
- Example 6: Shamrock Scavenger Hunt Clues
- Each clue leads to a coordinate on the shamrock graph, revealing part of a message or location.
- Example 7: Leprechaun Trap Design
- Use the graph paper shamrock as a blueprint for a small leprechaun trap design.
- Example 8: DIY Shamrock Stickers
- Print on sticker paper, plot the shamrock, cut out, and stick them everywhere!
- Example 9: Collaborative Classroom Mural
- Each student graphs a small shamrock on their paper, then all are combined to form a giant St. Patrick's Day mural.
- Example 10: Shamrock Graph Bingo
- Create bingo cards with coordinate pairs. Call out points, and if it's part of the shamrock, mark it off.
---
Tips for Personalizing Your Shamrock Graph
Making your shamrock graph printable truly yours adds so much to the experience. Here are some actionable tips to personalize your creation:
- Color with Intention: Don't just pick any green! Experiment with different shades – a light lime green for a fresh look, a deep emerald for classic elegance, or even add hints of gold for that "pot of gold" feel. I find a mix of two greens really makes the leaves pop!
- Add Inner Details: Once your outline is complete, draw small veins within the leaves. This adds realism and a touch of intricacy that sets your shamrock apart.
- Frame It Up: Use a ruler to draw a border around your graph. You can make it simple, or add decorative elements like tiny gold coins or leprechaun hats in the corners.
- Incorporate Text: Write a festive message like "Happy St. Patrick's Day!" or "Feeling Lucky!" along the axes or within a clear space on the graph.
- Play with Symmetry (or lack thereof!): While shamrocks are typically symmetrical, try purposefully making one leaf slightly different for a whimsical, hand-drawn feel.
- Use Different Mediums: Don't limit yourself to just pencils! Try markers, colored pencils, watercolors, or even glitter glue (my personal favorite for that extra sparkle!) to fill in your shamrock.
- Background Grids: Experiment with printing your shamrock graph printable on different colored graph paper, or even paper with a subtle texture.
Common Pitfalls: What to AVOID When Graphing Your Shamrock

We all make mistakes, and learning from them is part of the fun! Here are some common blunders to steer clear of when creating your shamrock graph:
- Miscounting Coordinates: This is the most common culprit! Double-check your x and y values before plotting. Don't be like me and accidentally graph a four-leaf clover when you only wanted three because you miscounted a point! (Unless that was your intention, of course!)
- Confusing X and Y Axes: Remember: "Walk before you climb" – X is horizontal, Y is vertical. Always plot the x-coordinate first, then the y-coordinate.
- Not Connecting the Dots Properly: Ensure you connect the points in the correct order to form the intended shape. A misplaced line can turn your beautiful shamrock into something... unidentifiable.
- Using Too Small a Grid: If your shamrock is too intricate for the size of your graph paper, it will look cramped and messy. Choose a graphing paper with appropriately spaced lines.
- Ignoring the Scale: If your graph has a specific scale (e.g., each line represents 2 units), make sure you factor that in when plotting your points.
- Forgetting the Stem: A shamrock without a stem is like a leprechaun without a hat! Make sure to include this crucial element.
- Overly Complex Designs for Beginners: While ambitious, trying to tackle a highly detailed shamrock with fractional coordinates if you're new to graphing can lead to frustration. Start simple and build your skills!
---
Conclusion: Get Plotting and Feel the Luck!
There you have it – a comprehensive guide to mastering the shamrock graph printable, whether you’re a graphing guru or just starting your journey. From simple outlines perfect for little hands to detailed designs that impress, understanding how to bring this iconic symbol of luck to life on a coordinate plane opens up a world of creative and educational possibilities.
Now, armed with these tips, tricks, and a dash of Irish charm, you're ready to create your very own masterpieces. Go on, grab some graph paper, a pencil, and let the plotting begin! May your lines be straight, your points be true, and your shamrocks bring you all the luck in the world!