Have you ever stood in front of a class, or perhaps your curious child, trying to explain the concept of an angle? You draw on a whiteboard, maybe gesture with your hands, and inevitably, you see that glazed-over look. The abstract nature of degrees and arcs can be a real head-scratcher without the right visual aid. Trust me, I’ve been there. I remember vividly trying to teach my nephew about obtuse angles using nothing but my arm and a vague description, only to realize his eyes were firmly fixed on the video game controller he was *not* supposed to be playing. That's when I had my "aha!" moment: we needed something tangible, something big, bold, and undeniably clear. Something that could be held, traced, and pointed to without ambiguity. This quest led me down a rabbit hole of discovery, revealing the unsung hero of geometric education and practical application: the humble yet mighty protractor for demo printable.
This isn't just about printing a piece of paper; it's about transforming how we understand and teach fundamental concepts. It's about empowering educators, engaging students, and simplifying complex measurements for hobbyists and professionals alike. A well-designed, easily accessible printable protractor can bridge the gap between abstract theory and concrete understanding, making learning a joy rather than a chore. It’s a tool that fosters clarity, encourages hands-on exploration, and frankly, makes your demonstrations shine. Forget squinting at tiny rulers or struggling with awkward digital overlays. We're talking about a solution that’s literally at your fingertips, customizable, and incredibly effective.
In this comprehensive guide, we're going to dive deep into everything you need to know about the protractor for demo printable. We’ll explore why it’s an indispensable tool, uncover the myriad ways you can use it, and reveal how to craft your own perfect version. From the best designs to printing tips, advanced applications, and even common pitfalls to avoid, this article will be your go-to resource. I’ve spent countless hours researching, experimenting, and seeing the positive impact of these tools firsthand, and I'm thrilled to share those insights with you. So, let’s embark on this journey to geometric clarity together – your next demonstration is about to become your best one yet!
---
Table of Contents

- [The "Why": Why Printable Protractors Are Indispensable for Demonstrations](#the-why-why-printable-protractors-are-indispensable-for-demonstrations)
- [Types & Formats: Exploring Different Printable Protractor Designs](#types--formats-exploring-different-printable-protractor-designs)
- [Beyond the Classroom: Creative and Practical Uses for Printable Protractors](#beyond-the-classroom-creative-and-practical-uses-for-printable-protractors)
- [Making It Your Own: Customization and Personalization Tips](#making-it-your-own-customization-and-personalization-tips)
- [Printing Perfection: Best Practices for a Clear, Durable Protractor](#printing-perfection-best-practices-for-a-clear-durable-protractor)
- [Teaching with Tangibility: Engaging Students with Physical Tools](#teaching-with-tangibility-engaging-students-with-physical-tools)
- [Digital vs. Printable: When to Choose One Over the Other](#digital-vs-printable-when-to-choose-one-over-the-other)
- [Troubleshooting & Common Questions: Addressing User Concerns](#troubleshooting--common-questions-addressing-user-concerns)
- [The Future of Measurement Demos: Innovations and Evolving Tools](#the-future-of-measurement-demos-innovations-and-evolving-tools)
- [How to Choose the Best Protractor for Your Demo Needs](#how-to-choose-the-best-protractor-for-your-demo-needs)
- [Common Pitfalls to Avoid When Using Printable Protractors](#common-pitfalls-to-avoid-when-using-printable-protractors)
- [Advanced Tips for Expert Demonstrations with Printable Protractors](#advanced-tips-for-expert-demonstrations-with-printable-protractors)
- [Conclusion: Empowering Your Next Geometric Journey](#conclusion-empowering-your-next-geometric-journey)
---
The "Why": Why Printable Protractors Are Indispensable for Demonstrations
When it comes to teaching or demonstrating angles and geometric concepts, the right visual aid can make all the difference. For me, the moment I saw a student’s face light up after I used a large, clear, protractor for demo printable to show a 90-degree angle, I knew I was onto something. It wasn't just about showing; it was about *seeing* and *understanding*. Here’s why these simple tools are absolute game-changers:
1. Enhanced Visibility for Large Groups: Standard protractors are small, designed for individual use. In a classroom or workshop setting, trying to show a tiny protractor to 30 people is like trying to explain quantum physics with a whisper. A large printable version ensures everyone in the room can clearly see the angle markings, the vertex, and the rays. This is especially crucial for visual learners.
2. Cost-Effective and Accessible: Unlike expensive specialized demonstration tools, a printable protractor requires only a printer, paper, and perhaps some basic craft supplies. This makes it incredibly accessible for educators and parents on a budget, or for anyone needing a quick, temporary solution. The barrier to entry is virtually non-existent.
3. Hands-On Learning Opportunities: A large, physical protractor invites interaction. Students can come up, place it on the board, trace angles, or even use it as a template for their own work. This tactile engagement deepens understanding far beyond passive observation. I've found that letting students physically interact with the tool cements the concept in their minds.
4. Customizable to Specific Needs: Need a protractor with only 0-90 degrees for a specific lesson? Or one with extra-large numbers for young learners? A printable template allows you to modify and adapt the design before printing, something impossible with off-the-shelf tools. This flexibility is a huge advantage for tailored instruction.
5. Durability and Reusability (with Lamination): While just paper, a laminated printable protractor becomes a sturdy, reusable teaching aid. It can withstand repeated handling, dry-erase markers, and general classroom wear and tear. I once made a giant laminated protractor that lasted me an entire school year, surviving countless enthusiastic student interactions!
6. Perfect for Whiteboards and Smart Boards: Many printable protractor designs are specifically scaled to be used on whiteboards. You can tape them up, draw directly around them, or even use magnetic strips on the back for easy attachment. This integrates seamlessly into modern classroom technology.
7. Simplifies Complex Concepts: For abstract topics like angles of elevation or depression, or interior/exterior angles of polygons, a large visual aid helps break down the complexity. You can literally *show* the relationship between angles in a way that words alone cannot.
8. Reduces Classroom Chaos: When everyone can see clearly, there’s less need for students to crowd around, ask "What does that say?", or feel left behind. This promotes a more focused and orderly learning environment, allowing you to maintain control and keep the lesson flowing smoothly.
9. Engages Multiple Senses: The act of seeing a large, clear protractor, perhaps even tracing it, or hearing you explain its use, engages visual, kinesthetic, and auditory senses. This multi-sensory approach is powerful for memory retention and understanding.
10. Bridge to Real-World Applications: By using a large protractor to measure angles in the classroom (e.g., the corner of a desk, the angle of a door opening), you can connect abstract geometry to tangible real-world examples. This helps students see the relevance of what they're learning.
11. Empowers Self-Correction: When a student draws an angle incorrectly, a clear, large protractor makes it easy for them to visually compare their drawing to the correct measurement and understand *where* they went wrong. This self-correction is vital for learning.
12. A Fantastic Backup Tool: Even if you have fancy digital tools, a printed protractor is always there, immune to battery drain, Wi-Fi issues, or software glitches. It's the reliable workhorse you can always count on for your demonstrations.
---
Types & Formats: Exploring Different Printable Protractor Designs
Just as there are many ways to teach, there are many forms a protractor for demo printable can take. The "best" type often depends on your specific needs, the age of your audience, and the context of your demonstration. It's not a one-size-fits-all situation, and understanding the variations can significantly enhance your teaching effectiveness.
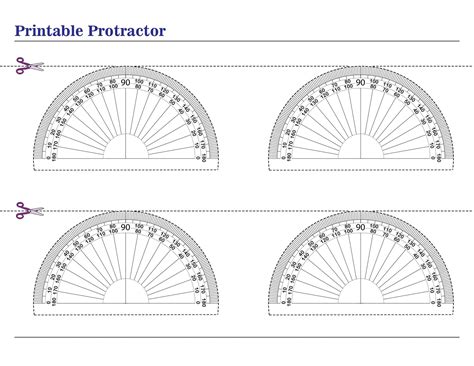
1. The Classic Half-Circle (180-Degree) Protractor:
- Description: This is the most common type, resembling a D-shape. It measures angles from 0 to 180 degrees. Most printable versions include both inner and outer scales for measuring from left to right and right to left.
- Best For: Fundamental angle measurement, teaching acute, right, and obtuse angles. It's the go-to for basic geometry lessons.
- Personal Scenario: I used a large half-circle protractor to demonstrate the sum of angles on a straight line. By rotating it, students could clearly see how two angles add up to 180 degrees, a concept that often puzzles them initially.
2. The Full-Circle (360-Degree) Protractor:
- Description: A complete circle with markings all the way around, typically from 0 to 360 degrees. Some may mark 0-180 and then 180-360, while others use a continuous scale.
- Best For: Advanced geometry, navigation, trigonometry, showing rotations, or illustrating angles in a full revolution. Great for illustrating complementary and supplementary angles in a visual way.
- Personal Scenario: When explaining bearings in geography, a full-circle printable protractor was invaluable. We placed it on a map of our school grounds, and students could easily visualize the 360-degree rotation needed for precise navigation.
3. Enlarged Scale Protractors:
- Description: These are essentially standard protractors but printed at a much larger scale, often filling an entire letter or A4 page, or even multiple pages taped together. The numbers and degree marks are significantly larger.
- Best For: Whole-class demonstrations, students with visual impairments, or very young learners who benefit from clearer, less cluttered visuals.
- Personal Scenario: For my kindergarten outreach program, I printed enormous protractors. The kids, who were just learning about "sharp" and "wide" corners, could actually stand inside the angles I created with string and the giant protractor. It was a huge hit!
4. Angle-Specific Protractors (e.g., Right Angle Only):
- Description: Sometimes, you only need to demonstrate a specific angle. These templates might just highlight a 90-degree angle, or perhaps a 45-degree one, often with a clear, bold line.
- Best For: Focused lessons on specific angle types, quick checks for perpendicularity, or early childhood education where concepts are introduced one at a time.
- Personal Scenario: We were building birdhouses in a woodworking class, and accuracy was key. I printed a simple, large 90-degree angle template. It was perfect for quickly checking corners without the distraction of a full protractor.
5. Multi-Page Assembly Protractors:
- Description: These are designs too large for a single sheet, requiring you to print several pages and then carefully assemble them (tape or glue) to create an extra-large protractor.
- Best For: Creating truly massive demonstration tools for large auditoriums, floor activities, or outdoor lessons.
- Personal Scenario: I once needed a protractor large enough for a floor-based activity where students walked out angles. Printing four A3 sheets and carefully aligning them gave me a massive, easily visible tool for our "human protractor" exercise.
6. Interactive or Movable Arm Protractors:
- Description: Some printable designs include a separate "arm" that can be cut out and attached to the protractor's center point with a brad or pin. This allows for dynamic demonstration of angle opening and closing.
- Best For: Demonstrating the *creation* of an angle, how angles change, and the concept of rotation. Highly engaging for kinesthetic learners.
- Personal Scenario: This type of protractor saved my team during a project crunch! We were designing a stage prop with moving parts, and I needed to quickly show the range of motion. A printable protractor with a movable arm allowed us to prototype and explain the mechanics on the fly, without waiting for a custom-made tool.
7. Transparent Protractors (for Overhead Projectors/Light Boxes):
- Description: While not strictly "printable protractors" in the paper sense, some templates are designed to be printed onto transparency film.
- Best For: Old-school overhead projector use (if you still have one!), or for use on light boxes where the transparency allows light to pass through for unique visual effects.
- Personal Scenario: I remember using a transparency protractor on an overhead projector to overlay angles directly onto diagrams in a textbook. It was a neat trick that helped students visualize angles within complex illustrations.
8. Customizable Grid Protractors:
- Description: These templates combine a protractor with a grid background (like graph paper).
- Best For: Teaching coordinates in conjunction with angles, understanding vector components, or for engineering/drafting demos where precise placement and measurement are both needed.
- Personal Scenario: For a robotics workshop, we needed to program robot movements based on angles and distances. A printable protractor overlaid on a grid helped us visually plan and debug paths, making the abstract programming tangible.
9. The Minimalist Protractor:
- Description: Features only the essential degree markings and numbers, stripped of any unnecessary ornamentation or extra lines.
- Best For: Reducing visual clutter for students with attention challenges, or for highly specific demonstrations where clarity above all else is paramount.
- Personal Scenario: I once had a student who got overwhelmed by too many lines. A minimalist printable protractor, printed in a calming blue color, was exactly what she needed to focus on the core concept of angle measurement.
10. Theme-Based Protractors:
- Description: Protractor templates integrated into a specific theme, e.g., a "pirate map" protractor for navigation, or a "space-themed" one for trajectory.
- Best For: Engaging younger learners, making learning fun, and connecting geometry to other subjects or interests.
- Personal Scenario: My daughter was obsessed with space. I found a printable protractor with planets and stars. It made explaining orbital paths and trajectories incredibly exciting for her.
11. Blank Protractor Templates:
- Description: A basic protractor shape with only the central point and maybe the baseline, allowing users to fill in their own degree markings, colors, or labels.
- Best For: Student projects, assessment (where students draw angles), or for custom lessons where you want to build the protractor with your audience.
- Personal Scenario: I used blank templates for an art and math integration lesson. Students designed their own "angle art" by coloring in sections of the protractor, making it a truly personal learning experience.
12. The "Giant Protractor" for Outdoor Use:
- Description: This isn't strictly a "printable" format, but rather a concept facilitated by printables. Print large segments of a protractor and assemble them onto a durable material (like cardboard or even painted onto a tarp).
- Best For: Outdoor geometry lessons, measuring angles of shadows, or demonstrating concepts on a grand scale in a playground or field.
- Personal Scenario: We took our science class outside to measure the angle of elevation of the sun. Using a massive, multi-page printable protractor taped to a large piece of cardboard, we could get accurate readings and make the abstract concept of solar angles incredibly tangible. It was a memorable lesson for everyone.
---
Beyond the Classroom: Creative and Practical Uses for Printable Protractors
While the classroom is undeniably a primary home for the protractor for demo printable, its utility extends far beyond textbooks and blackboards. This versatile tool can be an unexpected ally in a myriad of creative, practical, and even professional scenarios. I've personally discovered its value in some surprising places, and I'm excited to share these less obvious applications.
1. DIY Home Improvement & Craft Projects:
- Application: Measuring angles for cutting trim, laying tiles, designing custom shelves, creating geometric patterns on walls, or even cutting fabric for quilting.
- Personal Scenario: I was building a custom bookshelf that needed to fit snugly into a slightly non-square corner. My standard protractor was too small and fiddly. A large, laminated printable protractor allowed me to accurately measure the precise obtuse angle of the wall, ensuring a perfect fit for my shelves. It saved me from a lot of frustrating recuts!
2. Art and Design:
- Application: Creating mandalas, designing intricate patterns, drafting precise architectural sketches, laying out typography with specific angular relationships, or even planning abstract art compositions.
- Personal Scenario: A friend who is a graphic designer was struggling to visualize a complex logo that involved multiple intersecting lines at precise angles. I printed out a large, full-circle protractor for her. She used it as an underlay for her sketching, allowing her to quickly experiment with different angular relationships until she found the perfect balance.
3. Gardening and Landscaping:
- Application: Planning the angle of a retaining wall, designing a circular garden bed with specific segments, calculating the optimal angle for a sundial, or even setting up irrigation sprinklers for precise coverage.
- Personal Scenario: When I was planning a raised garden bed, I wanted to ensure the corners were perfectly square. Using a large 90-degree printable protractor as a guide, I easily marked out the precise cuts for the timber, resulting in a much neater and sturdier bed.
4. Photography and Videography:
- Application: Precisely positioning lights for specific shadow effects, setting up camera angles for panoramic shots, or even determining the angle of reflection for creative lighting setups.
- Personal Scenario: For a product photoshoot, we needed to create a very specific light spill. A large, simple printable protractor allowed us to measure the angle of the light source relative to the product and the reflector with surprising accuracy, giving us the desired effect without much trial and error.
5. Small-Scale Engineering & Robotics:
- Application: Designing prototypes, checking the angles of robot arms or chassis components, laying out gears or linkages, or even ensuring the precise alignment of sensor mounts.
- Personal Scenario: In a local robotics club, we were building a small sumo bot. The angle of the pushing arms was critical. A large, clear printable protractor allowed the students to quickly measure and adjust the angles of their robot's components, making the design process much more efficient and collaborative.
6. Navigation and Map Reading:
- Application: Plotting courses on physical maps, understanding bearings, or calculating the relative position of landmarks. While digital tools exist, a physical protractor is invaluable for hands-on learning or when batteries die.
- Personal Scenario: Before a hiking trip, I used a printed protractor to plot out our route on a topographic map. It helped me visualize the changes in bearing and plan for potential navigational challenges. It’s a skill I still value.
7. Sports and Recreation Coaching:
- Application: Analyzing the angle of a golf swing, the trajectory of a basketball shot, the launch angle of a soccer kick, or even the optimal angle for a climber's handhold.
- Personal Scenario: My friend, a tennis coach, often struggled to explain racket angles. I printed a very large protractor. He now uses it on the court to physically show students the optimal angle for serves and volleys. It's made a huge difference in their understanding!
8. Sewing and Pattern Making:
- Application: Drafting custom patterns, adjusting existing patterns for fit, measuring darts and seams, or creating precise angles for garment construction (e.g., collars, sleeves).
- Personal Scenario: My mother, an avid quilter, uses printable protractors constantly. She once needed to create a complex star pattern with very specific angles. A large, clear printable protractor was her secret weapon for cutting all the fabric pieces with pinpoint accuracy, ensuring the pattern lined up perfectly.
9. Scale Modeling and Miniatures:
- Application: Ensuring accuracy when building scale models of buildings, vehicles, or dioramas. Measuring angles for structural integrity or aesthetic appeal.
- Personal Scenario: I was helping a friend build a miniature replica of a historical building. The roof pitch needed to be exact. We printed a protractor to the scale of the model, which allowed us to cut the tiny roof beams at the perfect angle.
10. Game Design and Board Games:
- Application: Designing game boards with angular paths, creating templates for game pieces with specific rotational movements, or even calculating line-of-sight angles for strategic games.
- Personal Scenario: We were prototyping a new board game that involved projectile trajectories. A printed protractor was essential for quickly mapping out how different angles of launch would affect where the "projectile" landed on the board.
11. Woodworking and Joinery:
- Application: Marking precise angles for miter cuts, bevels, compound angles for complex joints, or ensuring perfect alignment of components.
- Personal Scenario: When making picture frames, getting the 45-degree miter cuts perfect is crucial. I often print a simple, large 45-degree angle template to quickly check my saw settings and the wood pieces before making the final cut. It’s a simple check that prevents wasted material.
12. Educational Displays and Science Fairs:
- Application: Creating large, visually appealing charts or posters that demonstrate geometric principles, illustrating scientific concepts involving angles (e.g., light refraction, pendulum swings), or as an interactive element for fair projects.
- Personal Scenario: My son’s science fair project was about the angles of reflection. We printed a huge protractor to serve as the base for his experiment, marking out the incident and reflected angles with string. It was clear, engaging, and helped him win a prize! This is my go-to gadget because it's a game-changer for visual explanations.
---
Making It Your Own: Customization and Personalization Tips
One of the most powerful advantages of a protractor for demo printable is the ability to tailor it precisely to your needs. This isn't just about printing; it's about designing a tool that perfectly serves your specific demonstration, audience, or aesthetic preference. I’ve spent countless hours tweaking designs, and the results are always more impactful than a generic off-the-shelf option.
1. Adjusting Scale and Size:
- Tip: Before printing, most PDF viewers or image editors allow you to adjust the print scale. You can print small ones for individual student use or large ones that fill multiple pages for grand demonstrations.
- Personal Scenario: For a very large outdoor geometry lesson, I needed a protractor that was over a meter wide. I printed a single protractor template across four A3 sheets, then carefully trimmed and taped them together. The sheer size made it incredibly impactful for the students.
2. Color-Coding Angles:
- Tip: Use graphic design software (even simple ones like Canva or Google Slides) to add color blocks or lines to specific angle ranges (e.g., acute angles in green, obtuse in blue, right angles in red).
- Personal Scenario: When teaching different types of angles to younger students, I created a protractor where the acute section was light green, the right angle was bright yellow, and the obtuse section was orange. The visual cue instantly helped them categorize angles.
3. Adding Labels and Text:
- Tip: Integrate labels directly onto the protractor. This could be "Acute Angle," "Obtuse Angle," "Vertex," or even custom instructions for a specific activity.
- Personal Scenario: I once designed a protractor for a lesson on angle pairs. I added labels like "Complementary Angles (add to 90°)" and "Supplementary Angles (add to 180°)" directly on the protractor itself, acting as a built-in cheat sheet for students.
4. Highlighting Key Angles:
- Tip: Make specific angles stand out with thicker lines, different colors, or larger numbers (e.g., 30°, 45°, 60°, 90°, 180°).
- Personal Scenario: For a trigonometry lesson, I bolded and enlarged the 30, 45, 60, and 90-degree marks on my printable protractor. This helped students quickly locate and reference these common angles.
5. Integrating a Ruler or Grid:
- Tip: If your demonstration also involves distance, look for or create templates that combine a protractor with a ruler along the baseline or an entire grid background.
- Personal Scenario: When teaching vector addition, having a protractor with an integrated grid was a lifesaver. It allowed students to measure both the magnitude (length) and direction (angle) of vectors on the same tool.
6. Creating Interactive Elements:
- Tip: Design a separate "arm" that can be cut out and attached with a brass fastener (brad) at the center point, creating a movable ray for dynamic angle demonstrations.
- Personal Scenario: I made several of these for a group activity. Students took turns manipulating the arm to create various angles, calling out the measurement as they went. It turned a passive lesson into an active game.
7. Adding Your Branding or Lesson Title:
- Tip: For professional educators or presenters, subtly add your name, school logo, or the title of your lesson to the protractor template.
- Personal Scenario: I often host workshops for other teachers. Adding my workshop title and my name to the bottom of the printable protractors I hand out serves as a subtle branding touch and a reminder of the resource.
8. Choosing Specific Angles Only:
- Tip: If you're focusing on just right angles, or perhaps only angles between 0-90 degrees, you can edit the template to remove unnecessary markings, reducing visual clutter.
- Personal Scenario: For a basic introduction to geometry for very young children, I created a protractor that only had 0, 45, and 90-degree markings. It simplified the concept and prevented confusion from too many numbers.
9. Varying Line Thicknesses:
- Tip: Use thicker lines for the major degree increments (e.g., every 10 degrees) and thinner lines for the minor increments (e.g., every 1 degree) to improve readability.
- Personal Scenario: I noticed some students struggled to differentiate between the 1-degree and 5-degree marks. By making the 5-degree marks slightly thicker, they found it much easier to read precise measurements.
10. Backgrounds and Textures:
- Tip: While usually printed on white, consider a subtle, light-colored background (e.g., pale blue, light grey) if it enhances contrast or matches a theme, ensuring text remains highly legible.
- Personal Scenario: For a "sky and stars" themed lesson, I printed a protractor with a very faint galaxy background. It was subtle enough not to interfere with readability but added a fun, thematic touch.
11. Adding Directional Arrows:
- Tip: Incorporate arrows on the degree scales to clearly indicate the direction of measurement (e.g., inner scale reads clockwise, outer scale reads counter-clockwise).
- Personal Scenario: Many students get confused about which scale to read. I added small, clear arrows next to the inner and outer scales, indicating the direction for measurement. This small detail significantly reduced errors.
12. Creating a "Window" for the Vertex:
- Tip: Design the protractor with a small, clear window or cutout at the central vertex point. This allows you to precisely align the protractor over the vertex of an angle you're measuring, making alignment foolproof.
- Personal Scenario: When measuring angles on diagrams, aligning the tiny center hole of a standard protractor can be tricky. I designed a printable version with a small, transparent circle at the vertex, allowing me to see the exact point I was aligning it to, ensuring greater accuracy.