Have you ever felt that primal tug, that whisper of the wild calling you to embrace a different side of yourself? Maybe you’re planning a costume party, a school play, a unique photo shoot, or simply looking for a fun, creative project to do with your kids. Whatever your reason, the allure of the wolf is undeniable – its strength, mystery, and connection to nature resonate deeply. And what better way to embody that spirit than with a stunning, personalized printable wolf mask?
Trust me, I’ve been there. I remember years ago, scrambling last minute for a unique costume for a themed event. I spent hours sifting through generic options, feeling uninspired. Then, a thought sparked: "What if I could *make* one?" The idea of a wolf mask immediately clicked. But finding the *right* template, the *best* materials, and the *perfect* technique felt like navigating a dense, moonlit forest without a guide. I ended up with a somewhat lopsided, hastily colored mask that, while functional, definitely didn't capture the majestic spirit I envisioned. If only I’d had a comprehensive resource like this then, it would have saved me not just time, but also a good deal of creative frustration!
This isn't just about printing a piece of paper and cutting it out; it's about transforming a simple template into a powerful symbol, a playful accessory, or a captivating prop. Whether you’re a complete crafting novice or a seasoned DIY enthusiast, this guide is your compass through the wilderness of wolf mask creation. We're going to dive deep into everything you need to know, from finding the perfect design and mastering the craft, to adding those expert touches that will make your wolf mask truly roar (or howl!). Get ready to unleash your creativity and bring your inner wolf to life – because the journey of crafting your own printable wolf mask is an adventure worth taking!
---
Table of Contents

- [The Call of the Wild: Why a Printable Wolf Mask?](#the-call-of-the-wild-why-a-printable-wolf-mask)
- [Unleashing Your Inner Wolf: Finding the Perfect Printable Design](#unleashing-your-inner-wolf-finding-the-perfect-printable-design)
- [From Paper to Persona: A Step-by-Step Crafting Guide for Beginners](#from-paper-to-persona-a-step-by-step-crafting-guide-for-beginners)
- [Beyond the Basics: Elevating Your Wolf Mask with Creative Customization](#beyond-the-basics-elevating-your-wolf-mask-with-creative-customization)
- [The Pack's Favorites: Wolf Mask Ideas for Every Occasion and Age](#the-packs-favorites-wolf-mask-ideas-for-every-occasion-and-age)
- [Materials & Magic: Choosing the Right Supplies for Your Mask](#materials--magic-choosing-the-right-supplies-for-your-mask)
- [The Art of the Snarl: Advanced Techniques for a Realistic Wolf Mask](#the-art-of-the-snarl-advanced-techniques-for-a-realistic-wolf-mask)
- [Digital Den to Real-World Roar: Printing and Assembling Like a Pro](#digital-den-to-real-world-roar-printing-and-assembling-like-a-pro)
- [Caring for Your Creation: Longevity and Reusability Tips](#caring-for-your-creation-longevity-and-reusability-tips)
- [How to Choose the Best Printable Wolf Mask for Your Needs](#how-to-choose-the-best-printable-wolf-mask-for-your-needs)
- [Common Pitfalls to Avoid When Crafting Your Wolf Mask](#common-pitfalls-to-avoid-when-crafting-your-wolf-mask)
- [Advanced Tips for Expert Mask Makers](#advanced-tips-for-expert-mask-makers)
- [Conclusion: Howl with Pride!](#conclusion-howl-with-pride)
---
The Call of the Wild: Why a Printable Wolf Mask?

The wolf, a creature of legend and mystery, embodies a spectrum of powerful meanings: loyalty, instinct, freedom, and strength. Donning a wolf mask isn't just about covering your face; it's about stepping into a role, embracing an archetype, or simply having a blast with a creative project. A printable wolf mask offers an accessible, affordable, and incredibly versatile way to do just that.
Here’s why these masks are such a fantastic choice for so many people and occasions:
1. Cost-Effectiveness: Let's face it, store-bought costumes can be pricey, and sometimes, you just need that one perfect accessory. A printable mask typically requires only paper, a printer, and basic craft supplies you likely already have. This makes it an incredibly budget-friendly option for individual crafters, parents, and educators.
2. Instant Gratification & Accessibility: The beauty of a printable is its immediacy. Found a design you love? Print it, and you're halfway there! No waiting for shipping, no last-minute dashes to the store. This makes a printable wolf mask ideal for spontaneous costume needs or sudden creative urges.
3. Creative Expression & Personalization: Unlike a pre-made mask, a printable template is a blank canvas. You get to choose the colors, textures, and details, allowing your personality to shine through. I remember helping my niece craft a wolf mask for a school play; she insisted on adding glitter – not traditional wolf territory, but it made *her* mask uniquely hers, and her joy was infectious.
4. Educational & Developmental Benefits: For children, crafting a printable wolf mask is more than just fun. It enhances fine motor skills (cutting, gluing), encourages following instructions, sparks imagination, and introduces them to animal themes and nature. It’s a wonderful STEAM activity!
5. Versatility for Various Occasions: From Halloween and costume parties to school projects, theatrical performances, themed birthdays, or even just imaginative play at home, a wolf mask fits a surprising array of events. It’s a classic animal motif that never goes out of style.
6. Eco-Friendly Potential: By using recycled paper or sustainable printing methods, you can make your crafting project more environmentally conscious. It's a small step, but every little bit helps, turning your craft into a mindful act.
7. Bonding Activity: Crafting a wolf mask can be a fantastic way to spend quality time with family or friends. It's a collaborative effort that fosters communication, shared laughter, and a sense of accomplishment. My best friend and I once made matching wolf masks for a themed movie night, and the shared effort made the experience so much richer.
8. Therapeutic & Mindful Crafting: The act of cutting, coloring, and assembling can be incredibly meditative and stress-reducing. Focusing on the intricate details of a printable wolf mask allows you to disconnect from daily worries and immerse yourself in a creative flow state.
9. Adaptability for All Skill Levels: Whether you're a beginner needing a simple cut-and-fold design or an experienced crafter looking for a complex, multi-layered template, the world of printable masks has something for everyone. This guide will help you navigate choices for any skill level.
10. Exploration of Identity: Masks, throughout history, have been used to explore different identities or aspects of self. A wolf mask allows you to tap into traits like courage, independence, or even a playful wildness, offering a unique avenue for self-expression.
Unleashing Your Inner Wolf: Finding the Perfect Printable Design
The digital world is a vast forest, teeming with incredible resources for your printable wolf mask adventure. The key is knowing where to hunt for the best templates that match your vision and skill level. From simple outlines to intricate 3D models, the options are as diverse as the wolf pack itself.
Here’s how to navigate the digital dens and find your ideal wolf mask template:
1. Free Online Resources (The Prowlers' Paradise):
- Craft Blogs & DIY Sites: Many crafting enthusiasts and bloggers offer free printable templates as part of their tutorials. Sites like Pinterest, Instructables, and specialized craft blogs are treasure troves. *My personal tip: Search for "free printable wolf mask template DIY" to get started.*
- Educational Websites: Websites aimed at teachers and parents often provide simple, kid-friendly wolf masks for school projects or playtime. These are usually easy to print and assemble, perfect for beginners.
- Image Search Engines: Google Images or similar platforms can lead you to various templates, but always check the source for print quality and usage rights.
2. Paid Template Marketplaces (The Alpha's Arsenal):
- Etsy: A fantastic source for unique, artist-designed printable masks. You'll find everything from realistic low-poly designs to stylized cartoon wolves. Supporting independent artists is a huge bonus here.
- Creative Market / Design Bundles: These platforms offer high-quality, often more complex designs, sometimes bundled with other animal masks or craft projects. Ideal for those looking for something truly distinctive.
- Specialized Craft Stores Online: Some online craft stores might offer their own brand of printables, often tied to specific crafting materials they sell.
3. Types of Wolf Mask Designs (Choose Your Pack):
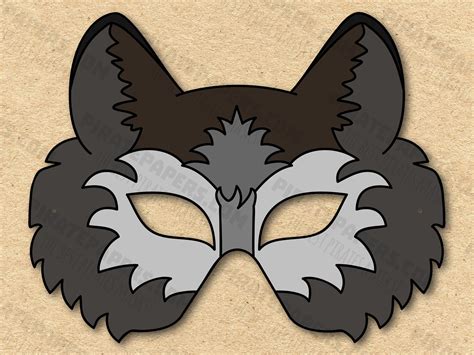
- Flat 2D Masks: The simplest form, often just a front-facing wolf face with eyeholes. Great for young children or quick projects. You color them in yourself!
- Simple 3D Masks (Low-Poly): These involve a few folds and tabs to create basic dimensionality, giving the mask a more sculpted look without being overly complicated. They often have a modern, geometric aesthetic. *I once crafted a low-poly fox mask for a friend, and the simple angles gave it surprising character.*
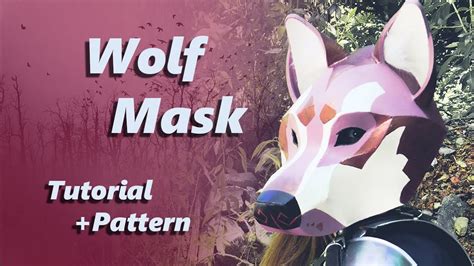
- Complex 3D Masks (Papercraft/Pepakura): These are for the more experienced crafters. They consist of many intricate pieces that, when cut, folded, and glued precisely, form a highly realistic, sculptural wolf head. These can be incredibly impressive.
- Masks with Movable Jaws: Some advanced templates even include mechanisms for a movable jaw, adding an extra layer of realism and fun. This is where your inner engineer can truly shine!
- Stylized vs. Realistic: Do you want a friendly cartoon wolf, a fierce mythical beast, or a strikingly realistic depiction? Think about the mask's purpose.
4. Key Search Terms for Your Hunt:
- "Printable wolf mask" (of course!)
- "DIY wolf mask template"
- "Papercraft wolf mask"
- "Low poly wolf mask printable"
- "Realistic wolf mask PDF"
- "Kids wolf mask printable"
- "Halloween wolf mask template"
- "Wolf head mask template"
5. Checking Quality and Rights (Respecting the Territory):
- Resolution: Ensure the image or PDF is high-resolution for a crisp print. Blurry templates lead to blurry masks!
- Instructions: Does the template come with clear, easy-to-follow instructions, especially for 3D designs? This is crucial for successful assembly.
- Usage Rights: For free templates, check if they are for personal use only. If you plan to use the mask for commercial purposes or a public event, ensure you have the appropriate license. Respecting creators' work is vital!
6. Customization Potential: Look for templates that are either black and white (for coloring) or offer areas that are easy to modify and embellish. A good template provides a solid foundation, but the true magic often happens in the customization.
7. Community Recommendations: Join online crafting forums or social media groups. Ask fellow crafters for their favorite sources or recommendations for a printable wolf mask. You’d be surprised by the hidden gems you can uncover through community wisdom.
From Paper to Persona: A Step-by-Step Crafting Guide for Beginners
So, you’ve found the perfect printable wolf mask template. Fantastic! Now it's time to bring it to life. Don't be intimidated if you're new to crafting; we'll break down the process into simple, manageable steps. Think of it as learning to track the wolf – one careful step at a time.
Here's your beginner-friendly guide to crafting your first paper wolf mask:
1. Gather Your Supplies (Equip Your Den):
- Printed Template: Your chosen printable wolf mask design.
- Cardstock or Sturdy Paper: This is crucial! Regular printer paper is too flimsy. Aim for 65lb (176 gsm) to 110lb (298 gsm) cardstock. White is usually best as a base for coloring.
- Scissors: Sharp, comfortable scissors for clean cuts. Smaller detail scissors can be helpful for intricate areas.
- Craft Knife/X-Acto Knife (Optional, with adult supervision): Excellent for precise cuts, especially eyeholes or intricate details. Use a cutting mat underneath!
- Glue: A quick-drying craft glue, glue stick, or tacky glue works well. Hot glue can be too bulky for papercraft and might warp the paper.
- Ruler & Scoring Tool (Optional, but recommended for clean folds): A dull knife, a ballpoint pen without ink, or a scoring stylus can create crisp fold lines.
- Coloring Supplies: Crayons, colored pencils, markers, or paints – whatever you prefer to personalize your wolf!
- Elastic String or Ribbon: For attaching the mask to your head.
- Hole Punch: To make holes for the elastic.
2. Print Your Template (The First Paw Print):
- Make sure your printer settings are on "actual size" or 100% scale. Do NOT scale to fit page, as this can distort the mask's proportions.
- Print on your chosen cardstock. If your template has multiple pages, ensure they are all printed.
3. Cut Out the Mask Pieces (Sharpen Your Claws):
- Carefully cut along the solid outer lines of all mask pieces. Take your time, especially around curves and intricate edges. Precision here makes a big difference in the final look.
- If there are internal cut-outs (like eyeholes or nostril slits), use a craft knife for cleaner results, or carefully fold the paper and snip with scissors for larger openings. *Warning: Always use a craft knife on a self-healing cutting mat and supervise children closely!*
4. Score and Fold (Mapping the Terrain):
- Look for dotted or dashed lines on your template – these are fold lines.
- Using a ruler and your scoring tool, gently press along these lines *before* folding. This creates a crisp, professional-looking fold and prevents the cardstock from cracking or bending unevenly.
- Fold all indicated tabs and edges. For "mountain folds," the fold goes away from you, creating a peak. For "valley folds," the fold comes towards you, creating a trough.
5. Assemble the Mask (Building Your Den):
- This is where the magic happens! Most templates will have numbers or letters on tabs and corresponding areas.
- Apply a thin layer of glue to one tab at a time.
- Carefully align the tab with its corresponding edge and press firmly. Hold for a few seconds until the glue begins to set.
- Work systematically, piece by piece, allowing sections to dry slightly before moving on. Patience is a virtue here! Don’t rush the gluing process, or your mask might fall apart.
- *I learned this the hard way with my first 3D project; trying to speed up the glue led to a very wobbly creation!*
6. Color and Decorate (Adorn Your Coat):
- Once the basic structure is assembled and dry, it's time for personalization.
- Use crayons, markers, colored pencils, or even paint to give your wolf its unique fur color, markings, and expression.
- Consider adding details like whiskers (drawn or made from thin string), a textured nose, or even a splash of glitter for a mystical touch.
7. Attach the Elastic (Securing the Pack):
- Use a hole punch to create small holes on either side of the mask, usually near the temples.
- Thread your elastic string or ribbon through one hole, knot it securely, measure it around your head (or the wearer's head) for a comfortable fit, and then thread and knot it through the other hole.
- Ensure it’s snug enough to stay on but not so tight it’s uncomfortable.
8. Fit Check and Adjust (The Final Howl):
- Try on your mask! Check eyehole alignment and comfort.
- Make any final adjustments to the elastic or minor trims if needed.
- Congratulations, you’ve just brought your printable wolf mask to life!
Beyond the Basics: Elevating Your Wolf Mask with Creative Customization
A basic printable wolf mask is a great start, but the real fun begins when you infuse it with your unique creative flair. Think of it as painting the detailed markings on a wolf's fur – each stroke adds character and depth. This section is all about taking your mask from "good" to "wow!"
Here are 12 ways to personalize and elevate your wolf mask:
1. Textural Fur Effects:
- Faux Fur Strips: Glue small strips of craft faux fur around the edges, ears, or cheeks for a realistic, soft texture.
- Layered Paper: Cut out various shades of gray, brown, and white paper in small, jagged fur-like shapes and layer them, starting from the bottom up, to create a feathery fur effect.
- Cotton/Wool: Gently pull apart cotton balls or wool roving and glue sparse amounts onto the mask to mimic soft undercoat fur.
2. Dynamic Coloring & Shading:
- Blending Techniques: Use colored pencils or pastels to blend colors seamlessly, creating depth and highlights, rather than flat block colors. Think about where light would hit and where shadows would fall.
- Watercolor Washes: For a more ethereal look, apply diluted watercolors. Test on a scrap piece of cardstock first to ensure it doesn't warp the paper too much.
- Acrylic Dry Brushing: After the base color is dry, use a stiff brush with very little paint to lightly brush over raised areas, bringing out details and adding texture.
3. Expressive Eyes:
- Colored Lenses: Glue translucent colored cellophane (e.g., yellow, amber, or blue) behind the eyeholes for an eerie, glowing effect.
- Eyelashes: Add small strips of black paper or even faux eyelashes around the eyeholes for a more dramatic, feminine, or stylized look.
- Highlighting: Use a white gel pen or a tiny dot of white paint to add a "sparkle" or catchlight in the eyes, making them seem more alive.
4. Realistic Noses and Teeth:
- Textured Nose: Use a small piece of black felt, craft foam, or even mold a tiny bit of air-dry clay for a more prominent, realistic nose.
- Detailed Teeth: Cut sharp, individual teeth from white cardstock or craft foam and glue them along the jawline for a menacing snarl. You can even paint them with a hint of yellow for realism.
5. Adding Whiskers:
- Fishing Line/Wire: Thread thin fishing line or floral wire through tiny holes poked around the muzzle for authentic-looking whiskers. Secure with a tiny dot of glue on the inside.
- Black Thread: For a softer look, use strands of black embroidery floss.
6. Ear Enhancements:
- Inner Ear Color: Paint or glue a contrasting color (e.g., pink or dark gray) inside the ears for added depth and realism.
- Stiffening: If your ears are floppy, reinforce them from behind with an extra layer of cardstock or a thin wire frame.
7. Weathering and Dirt Effects:
- Coffee Staining: Lightly dab a damp sponge with weak coffee or tea solution onto areas to give an aged, earthy, or "dirt" effect.
- Charcoal Smudges: Use a charcoal pencil or a smudge of dark pastel to create subtle shadows or dirt marks, especially around the muzzle or lower jaw.
8. Embellishments for Special Themes:
- Glow-in-the-Dark Paint: For a ghostly, nocturnal wolf, paint certain details with glow-in-the-dark paint.
- Feathers/Beads: For a shamanic or mystical wolf, add small feathers, beads, or tribal markings. *I once saw a wolf mask adorned with small, ethically sourced owl feathers, and it looked absolutely stunning for a forest spirit theme.*
- Floral Accents: For a more serene or "nature spirit" wolf, glue tiny faux flowers or leaves around the ears or forehead.
9. Strap Upgrade: Instead of basic elastic, consider using wider elastic, ribbon, or even a soft fabric strap for greater comfort and a more finished look. You can also add decorative elements to the strap itself.
10. Lamination/Sealing: For durability, especially if the mask will be handled a lot or used outdoors, apply a clear matte or glossy sealant spray (like Mod Podge spray) or laminate the individual pieces before assembly. This protects your artwork and strengthens the paper.
11. Internal Padding: For long-term wear, glue small foam pads or felt pieces inside the mask, especially around the forehead and cheeks, for added comfort and a better fit.
12. Movable Jaw Mechanism: For advanced crafters, research simple papercraft hinge mechanisms or elastic loops that allow the lower jaw to move when you open your mouth. This takes a lot of planning but yields incredible results!
The Pack's Favorites: Wolf Mask Ideas for Every Occasion and Age
The versatility of a printable wolf mask is truly remarkable. It can be a cute accessory for a toddler, a dramatic prop for a theatrical production, or a fearsome element of a Halloween costume. Let's explore some specific ideas for different scenarios and age groups.
Here are 10 unique wolf mask ideas tailored for various occasions and users:
1. The Playful Pup Mask (Ages 3-6):
- Description: A simple, rounded, friendly-faced wolf mask, often with larger eyes and a soft snout. Focus on bright, inviting colors.
- Customization: Use chunky crayons or washable markers. Add cotton balls for fluffy cheeks or small googly eyes for extra charm.
- Occasion: Imaginative play, animal-themed birthday parties, simple dress-up.
- *Hypothetical Scenario:* My nephew loved his "playful pup" mask so much, he wore it to the grocery store, convinced he was a friendly wolf cub helping me hunt for snacks!
2. The Forest Guardian Mask (Nature-Themed Events):
- Description: A more realistic, stoic wolf design, incorporating earthy tones like grays, browns, and deep greens.
- Customization: Embellish with small, dried leaves, twigs, moss, or faux berries. Use texture paint for a bark-like effect on the forehead.
- Occasion: Nature walks, eco-awareness events, woodland creature themes, storytelling sessions.
3. The Howling Halloween Wolf (Costume Parties):
- Description: A fierce, perhaps slightly exaggerated wolf face with sharp teeth, glowing eyes, and defined snarl lines. Can be classic gray or even black for a "werewolf" vibe.
- Customization: Use red or yellow cellophane for eyeholes. Add fake blood drips from the mouth, or use darker paints for deep shadows to enhance the menacing look. Consider incorporating faux fur around the face.
- Occasion: Halloween, horror-themed parties, theatrical performances.
4. The Mythical Spirit Wolf (Fantasy/Cosplay):
- Description: A stylized wolf, possibly with elongated features, intricate patterns, or even glowing elements. Think "Spirit of the Forest" or "Moon Wolf."
- Customization: Incorporate metallic paints (silver, gold, iridescent), glitter, rhinestones, or delicate feathers. Use glow-in-the-dark paint for mystical runes or symbols.
- Occasion: Cosplay conventions, LARP events, fantasy-themed photoshoots, ren faires.
- *Subjective Tip: This is my go-to style for masks because it allows for so much artistic freedom and really stands out!*
5. The School Play Prop (Educational/Drama):
- Description: A clear, recognizable wolf mask that conveys emotion and can be seen from a distance. Often a simplified, slightly larger design.
- Customization: Durable construction is key. Use strong cardstock and reinforce stress points. Keep details bold for stage visibility.
- Occasion: School plays (e.g., *Little Red Riding Hood*, *Three Little Pigs*), storytelling projects, classroom presentations.
6. The Geometric Low-Poly Wolf (Modern Aesthetic):
- Description: A mask composed of many flat, angular facets that come together to form a recognizable wolf shape. Often monochromatic or with subtle color shifts.
- Customization: Embrace the geometric nature. Use clean, crisp lines. A single bold color or a gradient from dark to light gray works beautifully.
- Occasion: Modern art exhibits, themed parties (e.g., "digital forest"), unique photo props, minimalist cosplay.
7. The "Big Bad Wolf" Mask (Storybook Character):
- Description: A more theatrical, often cartoonish mask with exaggerated features – large teeth, bushy eyebrows, and a mischievous or cunning expression.
- Customization: Use vibrant, almost unsettling colors. Add a faux tongue made from red felt. Exaggerate the snout and jawline.
- Occasion: Children's parties, story time, character events, school presentations.
8. The Winter Wolf Mask (Seasonal/Holiday):
- Description: A pristine, white or icy blue wolf, perhaps with hints of silver. Evokes snow, ice, and winter wilderness.
- Customization: Apply iridescent glitter, silver paint accents, or faux snowflakes. You could even add tiny white feathers around the face.
- Occasion: Winter festivals, holiday parties, winter-themed photoshoots, "Frozen" inspired events.
9. The "Adulting is Hard" Wolf (Humorous/Gag):
- Description: A standard wolf mask, but with a twist – maybe a tired expression, or a coffee cup drawn on, or even a tiny "Property of [Your Name]" tag.
- Customization: Subtly alter the expression with drawn-on lines or droopy eyes. Add humorous props or text.
- Occasion: Office parties (if appropriate!), casual get-togethers, gag gifts, or just to make yourself laugh.
- *Humorous Example:* I once made a wolf mask with tiny spectacles and a worried brow for a friend who was "feeling the weight of the world." It was a hit!
10. The Wolf Pack Duo/Trio (Group Costumes):
- Description: Multiple wolf masks with consistent styling but subtle individual differences (e.g., varying fur patterns, different eye colors, or slightly varied expressions).
- Customization: Plan a cohesive color scheme. Each person can choose their "wolf personality" to express through their mask.
- Occasion: Group Halloween costumes, themed friend gatherings, team-building events.
- *Hypothetical Scenario:* My team decided to dress as "lone wolves" for a corporate retreat's costume night, but we all made our own printable wolf masks with different accents, which led to a lot of laughs and camaraderie.
Materials & Magic: Choosing the Right Supplies for Your Mask

Just as a master chef selects the finest ingredients, a skilled crafter chooses the right materials to bring their vision to life. The quality of your supplies directly impacts the durability, appearance, and overall success of your printable wolf mask. Don’t underestimate the power of good paper and the right adhesive!
Here are 10 essential considerations for selecting your wolf mask crafting materials:
1. Cardstock Weight (The Backbone of Your Wolf):
- Beginner Recommendation: 65lb (176 gsm) to 80lb (216 gsm) cardstock. This is sturdy enough to hold its shape but still easy to cut and fold.
- Intermediate/Expert Recommendation: 90lb (243 gsm) to 110lb (298 gsm) cardstock. This provides maximum durability and structure, especially for complex 3D masks, but can be harder to cut cleanly.
- Why it matters: Flimsy paper (like standard printer paper) will tear easily, warp with glue, and won't hold its shape. A good weight ensures your printable wolf mask stands the test of time and handling.
2. Cardstock Finish (A Wolf's Coat):
- Matte: Best for coloring with pencils, markers, and pastels, as it absorbs color well and reduces glare.
- Slightly Glossy/Satin: Can make colors pop if you're printing a pre-colored template, but might smudge with some markers or be harder to glue.
- Textured: Some cardstocks have a subtle linen or felt texture, which can add a unique tactile quality to your mask.
3. Adhesive Choice (The Glue that Binds the Pack):
- Craft Glue (PVA Glue): Versatile, strong, and generally dries clear. Look for quick-drying formulas. Apply sparingly to avoid warping. My personal favorite is Tacky Glue for its quick grab.
- Glue Sticks: Best for flat, simple 2D masks. Less mess, but often not strong enough for intricate 3D assemblies.
- Hot Glue (Use with caution!): Dries instantly and is very strong, but can create bulky seams and might melt or warp thinner cardstock. Best