Hello, fellow beading enthusiasts! Are you ready to transform your beading visions into tangible, sparkling realities? If you’ve ever found yourself squinting at a blank page, trying to sketch out a peyote or brick stitch pattern, you know the struggle is real. The desire for precision, symmetry, and a clear roadmap for your intricate designs is a universal craving among beaders. Trust me, I’ve been there. I remember one frantic evening, trying to design a complex geometric necklace for a friend’s birthday, only to realize my freehand sketches were leading me down a path of wonky angles and mismatched beads. It was a disaster waiting to happen! If only I’d had a comprehensive guide to printable triangle beading graph paper PDF back then, it would have saved me hours of frustration and a near-meltdown.
This isn't just about finding a piece of paper; it's about unlocking your creative potential, bringing order to the beautiful chaos of tiny beads, and ensuring every stitch is a step towards perfection. Whether you're a beginner just dipping your toes into the mesmerizing world of triangular beadwork or a seasoned artisan looking for advanced tools to elevate your craft, this article is your ultimate companion. We're going to dive deep into everything you need to know about printable triangle beading graph paper PDF – from understanding its fundamental role to discovering advanced design techniques, troubleshooting common hiccups, and even connecting with a vibrant community of fellow beaders. Get ready to turn those abstract ideas into stunning masterpieces, bead by precise bead. Let's embark on this creative journey together!
---
Table of Contents

- [Understanding the Magic of Triangle Beading Graph Paper](#understanding-the-magic-of-triangle-beading-graph-paper)
- [Decoding the Types of Printable Triangle Beading Graph Paper PDFs](#decoding-the-types-of-printable-triangle-beading-graph-paper-pdfs)
- [Your First Steps: Designing with Printable Triangle Graph Paper](#your-first-steps-designing-with-printable-triangle-graph-paper)
- [Unleashing Creativity: Project Ideas & Advanced Applications](#unleashing-creativity-project-ideas--advanced-applications)
- [Beyond Paper: Digitizing Your Triangle Beading Designs](#beyond-paper-digitizing-your-triangle-beading-designs)
- [Organizing Your Masterpieces: Archiving and Sharing Designs](#organizing-your-masterpieces-archiving-and-sharing-designs)
- [Community Connection: Sharing, Learning, and Growing Together](#community-connection-sharing-learning-and-growing-together)
- [Customizing Your Canvas: Tailoring Your Graph Paper Experience](#customizing-your-canvas-tailoring-your-graph-paper-experience)
- [How to Choose the Best Printable Triangle Beading Graph Paper PDF for Your Needs](#how-to-choose-the-best-printable-triangle-beading-graph-paper-pdf-for-your-needs)
- [Common Pitfalls to Avoid When Using Triangle Beading Graph Paper](#common-pitfalls-to-avoid-when-using-triangle-beading-graph-paper)
- [Advanced Tips for Experts: Pushing the Boundaries of Beading Design](#advanced-tips-for-experts-pushing-the-boundaries-of-beading-design)
- [Conclusion: Your Beading Adventure Awaits!](#conclusion-your-beading-adventure-awaits)
---
Understanding the Magic of Triangle Beading Graph Paper

Have you ever tried to draw a perfectly symmetrical hexagon freehand? Or attempted to create a flowing geometric pattern that repeats flawlessly? It's tough, right? This is where the magic of printable triangle beading graph paper PDF comes into play. It's not just a piece of paper; it's your secret weapon for precision, consistency, and unparalleled design freedom in the world of triangular beadwork.
Here’s why it’s absolutely indispensable for any beader, from novice to master:
1. Precision Perfected: Each tiny triangle or hexagon on the paper represents a bead, ensuring your designs are perfectly symmetrical and aligned. No more guessing or uneven edges!
2. Visualizing Complexity: Intricate patterns, especially those with color changes or complex geometric motifs, become much easier to visualize before you even pick up a needle. I remember spending hours meticulously coloring in a design for a mandala-inspired pendant – the graph paper made it feel like a puzzle, rather than a chore.
3. Error Reduction: By mapping out your design beforehand, you drastically reduce the chances of making mistakes mid-beading, saving you precious time and beads. Who hasn't had to un-bead an entire section because of a miscount?
4. Experimentation Station: It's a low-risk environment to play with color palettes, design variations, and different scales. Want to see how a pattern looks in emerald green versus sapphire blue? Just color it in!
5. Blueprint for Success: Your completed graph paper design serves as a clear, unambiguous guide as you bead, much like an architect's blueprint. This is my go-to gadget because it's a game-changer for complex projects.
6. Teaching Tool: For instructors, it's an excellent way to demonstrate pattern development and teach students the fundamentals of bead placement.
7. Universal Language: A well-charted pattern on printable triangle beading graph paper PDF can be easily shared and understood by other beaders, regardless of language barriers.
8. Project Planning: Beyond the pattern itself, you can use the margins to note bead types, colors, thread choices, and finishing techniques.
9. Mental Clarity: The act of charting can be meditative, helping you to focus your creative energy and refine your ideas.
10. Historical Record: Each completed design becomes a part of your personal beading archive, a testament to your creative journey.
11. Cost-Effective: Printing your own graph paper is far more economical than buying pre-printed design pads, especially for extensive projects or frequent use.
12. Accessibility: With a quick search, you can find a printable triangle beading graph paper PDF that suits your exact needs, ready to download and print from the comfort of your home.
---
Decoding the Types of Printable Triangle Beading Graph Paper PDFs
The world of triangular beadwork isn't a one-size-fits-all affair, and neither is its graph paper. Depending on your chosen stitch and bead size, you'll need different configurations. Understanding these variations is key to picking the perfect printable triangle beading graph paper PDF for your next masterpiece.
Here are the main types you'll encounter and why they matter:
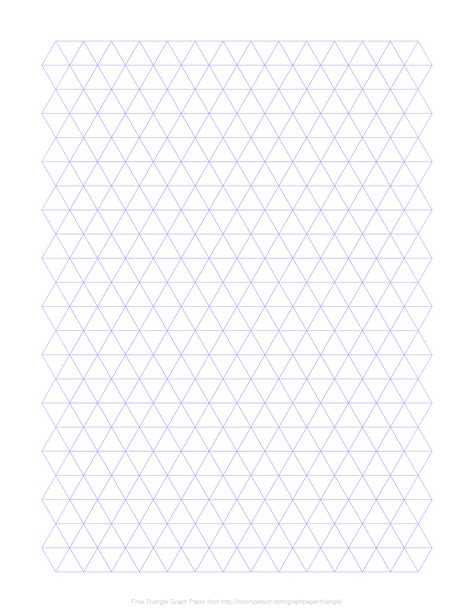
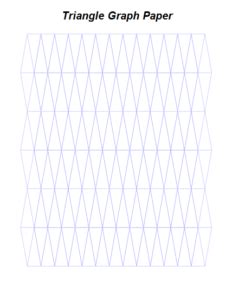
1. Equilateral Triangle Grid:
- Description: The most common type, featuring a grid of perfectly equilateral triangles.
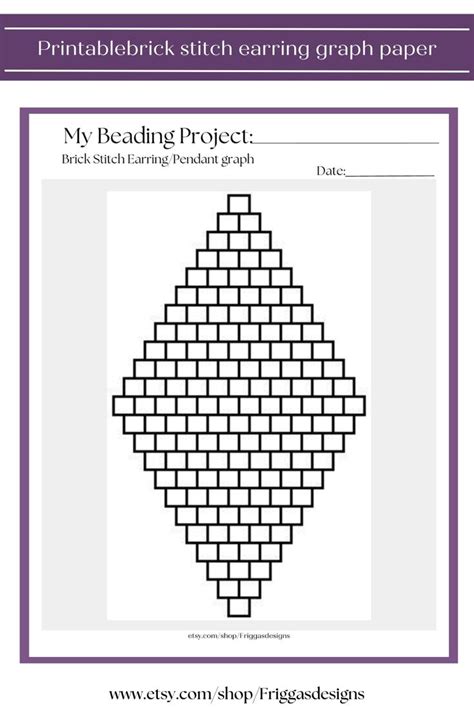
- Best For: Designing patterns for peyote stitch, brick stitch, or other flat geometric beadwork where beads align in a hexagonal pattern. Each triangle can represent a single bead.
- Personal Scenario: I once used this type to design a complex amulet bag, carefully plotting out each color change for a vibrant sunset motif. The even grid was essential for getting the gradient just right.
2. Hexagonal Grid (Honeycomb):
- Description: Instead of individual triangles, this paper features a grid of hexagons, with each hexagon often subdivided into six smaller triangles.
- Best For: Visualizing larger units of beadwork, or for patterns where a central bead is surrounded by six others. It's often used for visualizing circular peyote or brick stitch components.
- Personal Scenario: A friend of mine, struggling with a complex beaded coaster design, found that coloring in the hexagonal grid helped her understand the radial symmetry much better than a purely triangular grid.
3. Scaled Grids (e.g., 11/0, 8/0, 6/0 Beads):
- Description: These PDFs are specifically designed with grid sizes that approximate the actual physical size of common bead types (e.g., 11/0 Delicas, 8/0 seed beads).
- Best For: Getting a highly accurate visual representation of your finished piece, which is crucial for wearable items where size matters.
- Why it Matters: An 11/0 bead is much smaller than a 6/0, so a graph paper scaled for 11/0 beads will have much smaller triangles. This is my go-to gadget for ensuring my designs are proportional.
4. Blank Grids (No Markings):
- Description: Simple, clean grids of triangles without any numbers, lines, or orientation marks.
- Best For: Experienced beaders who prefer a minimalist canvas or those who want to add their own numbering systems.
5. Numbered/Directional Grids:
- Description: Some PDFs include numbered rows or directional arrows to help guide your stitching path, especially for tubular or sculptural designs.
- Best For: Beginners learning specific stitches or for complex 3D projects where stitch direction is paramount.
6. Grids with Borders/Margins:
- Description: Graph paper with designated areas for notes, project titles, bead color legends, and design inspirations.
- Best For: Comprehensive project planning and organization. It's like having a miniature project binder on every sheet.
7. Grids with Varying Line Weights:
- Description: Some PDFs might feature slightly thicker lines for every 5th or 10th row/column, making counting beads and navigating larger patterns easier.
- Best For: Large-scale projects where losing your place in a sea of tiny triangles is a real concern. This can be a lifesaver!
8. Grids for Specific Stitches (e.g., Odd-Count Peyote):
- Description: While most triangular grids work for both even and odd count, some specialized layouts might subtly aid in visualizing specific increases/decreases for odd-count peyote.
- Best For: Tackling the unique challenges of odd-count peyote where the turnarounds differ.
9. Color-Coded Grids:
- Description: Less common, but some PDFs might have pre-printed light grey or colored sections to suggest pattern blocks or help with visual separation.
- Best For: Sparking inspiration or guiding complex colorwork.
10. "Print-on-Demand" Customizers:
- Description: Online tools that allow you to generate a custom printable triangle beading graph paper PDF based on your specific needs (e.g., grid density, paper size, orientation).
- Best For: Ultimate flexibility and catering to very niche project requirements.
11. Pattern-Specific Layouts:
- Description: Some PDFs are pre-designed for specific shapes like a bracelet strip, a medallion, or a specific component, with the triangular grid already laid out within that shape.
- Best For: Jumpstarting common projects and saving time on initial layout.
12. Combined Grids:
- Description: A single PDF might offer different sections with various grid types (e.g., one section for equilateral triangles, another for hexagons) to cater to diverse design needs on one sheet.
- Best For: Versatile beaders who work on multiple types of projects simultaneously.
---
Your First Steps: Designing with Printable Triangle Graph Paper
So, you've found your perfect printable triangle beading graph paper PDF, printed it out, and you're ready to dive in. Exciting! But where do you begin? Designing on graph paper is a process that blends artistic vision with methodical planning. Here's a step-by-step guide to get you started, complete with practical tips and a few insights from my own beading adventures.
1. Gather Your Tools:
- Printed Graph Paper: Your chosen printable triangle beading graph paper PDF.
- Pencils: A good mechanical pencil with a fine lead is excellent for outlining.
- Eraser: For inevitable changes and refinements.
- Colored Pencils/Markers: Crucial for visualizing color palettes. Start with a basic set, you don't need a huge array initially.
- Bead Reference Chart (Optional): If you're mapping specific bead colors, having a physical bead chart or swatches handy is incredibly helpful.
- Inspiration Source: A sketch, a photo, a theme, or just an idea buzzing in your head.
2. Define Your Project:
- What are you making? A bracelet, earrings, a pendant, a sculptural piece? This will dictate the overall shape and size of your design.
- What stitch are you using? Peyote, brick stitch, right-angle weave? While triangle paper is primarily for peyote/brick, knowing your stitch helps you visualize bead orientation.
3. Outline Your Shape:
- Lightly sketch the general outline of your desired finished piece onto the graph paper. Are you making a square, a circle, a teardrop, or a more abstract form? Don't worry about perfection yet.
- Personal Scenario: I once decided to design a pair of earrings shaped like tiny abstracted leaves. I started by roughly sketching the leaf shape, then refined it by tracing along the grid lines until I had a smooth, beaded outline.
4. Start with Your Base/Center:
- For flat pieces, identify a starting point – often the center or one edge. For symmetrical designs, starting from the center and working outwards can be very intuitive.
- For bracelets, you might start with one end tab or a repeating motif.
5. Color in Your Design (The Fun Part!):
- This is where your vision truly comes to life. Assign a color to each triangle (representing a bead).
- Beginner Tip: Start with a simple two-color pattern to get a feel for how the colors interact on the grid.
- Expert Tip: Use light, medium, and dark shades of the same color to create depth and dimension.
- Personal Scenario: I was designing a complex geometric pattern that called for precise color transitions. After hours of coloring, I realized one section's colors clashed horribly. The graph paper allowed me to switch out those colors *before* I even threaded a needle, saving me a ton of headache!
6. Develop Your Pattern:
- Repetition: Identify repeating motifs. Can you design one section and then duplicate it across your piece?
- Symmetry: Pay attention to symmetry if that's your goal. Fold the paper to check for mirroring.
- Flow: Does the pattern flow logically? Are there clear transitions between colors and shapes?
7. Add a Color Legend:
- Create a small box on your graph paper to list the bead colors you're using. Assign a number or letter to each colored pencil, then write down the corresponding bead name/number (e.g., "1 = Miyuki Delica DB-001 Opaque White"). This is crucial for replication.
8. Notes and Instructions:
- Use the margins to jot down important details: bead size, stitch type, thread color, finishing techniques, or specific counts.
- Example: "Start with 20 beads for a 1-inch width." "Remember to add increase/decrease beads for shaping."
9. Review and Refine:
- Step back and look at your design. Does it match your vision? Are there any areas that could be improved?
- Don't be afraid to erase and redraw! That's the beauty of working on paper.
- Show your design to a fellow beader for feedback, if possible. A fresh pair of eyes can spot things you missed.
10. Save Your Design:
- Once you're happy, keep your completed graph paper design safe. It's your blueprint for success! You might even want to scan it to create a digital backup.
---
Unleashing Creativity: Project Ideas & Advanced Applications

The humble printable triangle beading graph paper PDF is far more than just a grid; it's a launchpad for boundless creativity. Once you've mastered the basics, you can push the boundaries and explore a universe of project ideas and advanced applications. Here are some inspiring ways to use your graph paper, from beginner-friendly projects to intricate masterpieces.
1. Geometric Bracelets & Cuffs:
- Idea: Design a flat strip bracelet with repeating geometric patterns like zigzags, diamonds, or chevrons.
- Application: Use a long strip of graph paper to create a continuous pattern, ensuring seamless repeats.
- Personal Scenario: I once charted a complex art deco-inspired cuff on a long piece of triangle graph paper. It looked intimidating on paper, but following the colored grid bead by bead, it transformed into a stunning wearable piece that always gets compliments.
2. Mandala Pendants & Medallions:
- Idea: Create intricate circular or hexagonal designs that can be turned into pendants, brooches, or even coasters.
- Application: Start from the center of your graph paper and work outwards, maintaining radial symmetry. A hexagonal grid can be particularly helpful here.
3. Figurative & Pictorial Designs:
- Idea: Translate images like animals, flowers, or abstract art into beaded pixel art.
- Application: Break down the image into tiny triangular "pixels" on your graph paper, carefully selecting colors to represent shading and detail.
4. Sculptural & 3D Objects:
- Idea: Design beaded boxes, spheres, or other three-dimensional forms.
- Application: This is advanced! You'll need to chart each face or section separately, thinking about how they will connect. Numbered grids can help keep track of rows and increases/decreases.
5. Earrings & Dangles:
- Idea: Smaller, quicker projects like fringe earrings, simple geometric drops, or intricate chandelier components.
- Application: Use smaller sections of your printable triangle beading graph paper PDF to design individual components, then plan how they'll connect.
6. Amulet Bags & Pouches:
- Idea: Design patterns for the front and back of small, decorative bags.
- Application: Chart the main body, then consider the flap and strap, perhaps even a fringe pattern that complements the main design.
7. Beaded Bezels for Cabochons:
- Idea: Create custom-fitted beadwork frames for gemstones or other focal pieces.
- Application: While the bezel itself might not be pure triangular stitch, the decorative elements around it often are. Use graph paper to plan these embellishments to ensure they fit the cabochon's shape.
8. Wall Hangings & Art Pieces:
- Idea: Go big! Design large-scale tapestry-like beaded art.
- Application: This requires printing multiple sheets of printable triangle beading graph paper PDF and taping them together to create a massive canvas for your design. This gadget saved my team during a project crunch, allowing us to visualize a huge mural.
9. Interlocking Motifs:
- Idea: Design multiple independent beaded components that can then be joined together to form a larger, more complex piece.
- Application: Chart each component separately on the graph paper, ensuring their connecting points align perfectly.
10. Fringe & Embellishment Patterns:
- Idea: Design intricate fringe patterns that extend from a main piece of beadwork.
- Application: Use the graph paper to map out bead counts and color sequences for each strand of fringe, ensuring symmetry and flow.
11. Text & Initials:
- Idea: Incorporate names, initials, or short words into your beadwork.
- Application: This can be tricky with triangular grids, but careful planning on the graph paper allows you to pixelate letters effectively.
12. Collaborative Projects:
- Idea: Work with other beaders on a shared design.
- Application: The graph paper serves as a universal blueprint, allowing multiple people to contribute to and understand the same design, even if working remotely.
---
Beyond Paper: Digitizing Your Triangle Beading Designs
While the tactile experience of coloring on a printable triangle beading graph paper PDF is deeply satisfying, the digital realm offers incredible power and flexibility for beading designers. Moving your designs into a digital format can unlock new levels of precision, iteration, and sharing.
Here’s how to transition your designs to the digital world and why it’s a game-changer:
1. Scanning Your Hand-Drawn Designs:
- Process: Start by scanning your completed paper design at a high resolution. This creates a digital image of your physical work.
- Benefit: Preserves your original artwork, provides a backup, and makes it easy to share.
- Personal Scenario: After spending days on an intricate design, I accidentally spilled coffee on my paper copy! Luckily, I had scanned it the day before. Crisis averted!
2. Using Basic Graphic Design Software (e.g., Paint, GIMP, Photoshop Elements):
- Process: Open your scanned image or a blank digital graph paper template. Use the "fill" tool to color in triangles, or the "pencil" tool for more detailed work.
- Benefit: Easy color changes, ability to zoom in for precision, basic editing features.
- Why it Matters: You can quickly experiment with different color schemes without re-printing or re-drawing.
3. Specialized Beading Design Software (e.g., BeadTool4, Pattern Maker for Bead Weaving):
- Process: These programs are specifically built for beadwork. They have features like bead shape selection (Delicas, rounds), automatic pattern generation, and color palette management.
- Benefit: Unparalleled precision, automatic bead count, realistic bead rendering, export to various formats.
- Expert Insight: For seasoned users, these tools are indispensable for complex designs, offering features like virtual bead trays and stitch visualization.
4. Vector Graphics Software (e.g., Adobe Illustrator, Inkscape):
- Process: Create your own triangular grids using vector shapes, then fill them with colors.
- Benefit: Scalable designs (no pixelation), highly precise control over shapes and colors, professional output.
- Consideration: Steeper learning curve, but offers ultimate control for professional pattern designers.
5. Online Graph Paper Generators:
- Process: Many websites offer free tools to generate custom digital graph paper grids that you can then open in a graphics program.
- Benefit: Quick and easy way to get a perfectly tailored grid for your digital canvas.
6. Color Palette Management:
- Digital Advantage: Software allows you to create and save custom bead color palettes, ensuring consistency across projects and making it easy to swap out entire color schemes with a few clicks.
- Personal Opinion: This is my go-to gadget for ensuring my color choices are perfect before I commit to beading.
7. Layering for Complexity:
- Digital Advantage: In advanced software, you can design different elements on separate layers (e.g., background, main motif, embellishments). This makes editing and experimenting incredibly flexible.
8. Exporting and Sharing:
- Digital Advantage: Easily export your designs as images (PNG, JPG) or PDFs for sharing with friends, selling as patterns, or printing for your own reference.
9. "Undo" and "Redo" Power:
- Digital Advantage: The ultimate safety net! Experiment freely knowing you can always revert to a previous state if a design choice doesn't work out. Don’t be like me and forget to save your work before closing the program!
10. Calculating Bead Counts Automatically:
- Digital Advantage: Many specialized bead design programs can automatically count the number of beads of each color needed for your project, making shopping and budgeting a breeze.
11. Virtual Bead Trays:
- Digital Advantage: Some advanced software offers a virtual bead tray where you can "load" your chosen bead colors and see them accurately represented in your design.
12. Previewing Different Bead Finishes:
- Digital Advantage: Certain programs can even simulate different bead finishes (matte, metallic, transparent) to give you an even more realistic preview of your finished piece.
---
Organizing Your Masterpieces: Archiving and Sharing Designs
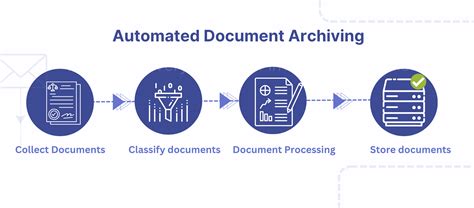
You've poured your heart and soul into designing stunning patterns on your printable triangle beading graph paper PDF. Now what? Protecting, organizing, and effectively sharing your creative output is just as important as the design process itself. Think of it as creating a legacy for your beautiful beadwork.
Here’s how to become a master archivist and generous sharer of your beading brilliance:
1. Physical Filing System:
- Method: Use binders, folders, or accordion files to store your printed graph paper designs.
- Organization: Categorize by project type (bracelets, earrings), theme (floral, geometric), or bead stitch. Use clear sheet protectors to keep designs pristine.
- Personal Scenario: I have a dedicated "Bracelets" binder and a "Pendants" binder. It makes finding old designs a breeze when I want to revisit a favorite pattern or adapt an idea.
2. Digital Backups:
- Method: Scan all your finished graph paper designs and save them as PDFs or high-resolution images on your computer, cloud storage (Google Drive, Dropbox), or an external hard drive.
- Benefit: Protection against loss, damage, or wear and tear of physical copies.
- Trust me, you don't want to miss this! Losing a meticulously designed pattern because of a spilled drink is heartbreaking!
3. Metadata & Tagging:
- Method: When saving digital files, use descriptive filenames (e.g., "Peyote_Bracelet_SunsetGradient_2023.pdf") and add tags or keywords.
- Benefit: Makes searching for specific designs incredibly efficient later on.
4. Design Journal/Logbook:
- Method: Keep a physical or digital journal where you record details for each design: date created, bead types/colors used, thread type, estimated time, challenges encountered, and any modifications made during beading.
- Benefit: A comprehensive record for future reference and a valuable learning tool.
5. Creating a Portfolio:
- Method: Curate your best designs into a digital portfolio (e.g., a dedicated folder, a Pinterest board, or an online gallery).
- Benefit: Showcases your skill, helps you track your progress, and can be used to attract commissions or teaching opportunities.
6. Sharing with Attribution:
- Method: If you share your original designs online, always include clear attribution (your name/handle) and consider adding a watermark to your images.
- Benefit: Protects your intellectual property and ensures you get credit for your creative work.
7. Selling Your Patterns:
- Method: If you plan to sell your designs, prepare a professional printable triangle beading graph paper PDF pattern. This usually involves clear instructions, a color legend, and high-quality images.
- Consideration: Be mindful of copyright and licensing if using existing patterns as inspiration.
8. Online Communities & Forums:
- Method: Share your designs (and ask for feedback!) on beading forums, Facebook groups, or platforms like Instagram and Pinterest.
- Benefit: Connects you with other beaders, provides inspiration, and helps you grow as a designer.
9. Teaching & Workshops:
- Method: Use your well-organized graph paper designs as teaching aids for workshops or online tutorials.
- Benefit: A clear pattern makes it much easier for students to follow along and learn new techniques.
10. Version Control:
- Method: When modifying a design, save it as a new version (e.g., "Bracelet_Sunset_v1.pdf," "Bracelet_Sunset_v2_withFringe.pdf").
- Benefit: Allows you to track changes and revert to earlier versions if needed.
11. Mood Boards & Inspiration Files:
- Method: Beyond finished designs, keep folders (physical or digital) of inspiring images, color palettes, and interesting shapes that you might want to translate into future beadwork.
- Benefit: A constant source of fresh ideas.
12. "Project Graveyard" (Optional):
- Method: Don't discard designs that didn't quite work out. Keep a separate folder for them.
- Benefit: Sometimes a design that failed for one project might be perfect for another, or you might find a way to salvage elements later.
---
Community Connection: Sharing, Learning, and Growing Together

Beading, while often a solitary pursuit, thrives on community. Sharing your designs, learning from others, and engaging with fellow enthusiasts can elevate your craft and provide immense joy. Your printable triangle beading graph paper PDF designs are not just personal blueprints; they are a language through which you can connect with a global network of creative souls.
Here’s how to plug into the vibrant beading community:
1. Online Forums & Groups:
- Platform: Dedicated beading forums (e.g., Bead-Patterns.com forums, various Facebook groups like "Peyote Stitch Beading" or "Seed Bead Patterns").
- Engagement: Post photos of your finished pieces, share your printable triangle beading graph paper PDF designs (if you're comfortable!), ask questions, and offer advice.
- Personal Scenario: I once shared a challenging design I was working on in a Facebook group, and within minutes, I had several experienced beaders offering tips on how to handle a tricky decrease. It was incredibly helpful!
2. Social Media Platforms:
- Platform: Instagram, Pinterest, TikTok.
- Engagement: Use relevant hashtags (e.