Hey there, fellow party enthusiast! Ever been in that last-minute scramble, trying to find the perfect party decor to truly make an event pop? Or perhaps you've longed to add that unique, personal touch that store-bought items just can't deliver? Trust me, I’ve been there. I remember one frantic birthday eve when I realized I’d completely forgotten party hats for my niece's unicorn-themed bash. Panic set in! But then, a lightbulb moment: what if I could *make* them? That night, armed with my printer and a hot glue gun, I discovered the magical world of printable party hats. They saved the day, transforming a potential decor disaster into a dazzling display of DIY charm, and ever since, I've been hooked. This guide is born from that very experience – a desire to share how you can easily, affordably, and beautifully elevate any celebration with the power of printable party hats.
Whether you're a seasoned crafter looking for fresh inspiration or a total newbie who just realized you need 20 hats by tomorrow, you’ve landed in the right place. We're not just talking about basic cones here; we're diving deep into a vibrant universe of themes, customization, and clever tricks that will make your parties unforgettable. Get ready to unleash your creativity, save some cash, and truly impress your guests. Let's make some magic!
Table of Contents

- [The Magic of Printable Party Hats: Why They're a Game-Changer](#the-magic-of-printable-party-hats-why-theyre-a-game-changer)
- [From Whimsical to Wonderful: Diverse Themes and Designs for Every Celebration](#from-whimsical-to-wonderful-diverse-themes-and-designs-for-every-celebration)
- [Mastering the Craft: A Step-by-Step Guide to Printing & Assembly](#mastering-the-craft-a-step-by-step-guide-to-printing--assembly)
- [Beyond the Basic Cone: Creative Customization & Embellishment Ideas](#beyond-the-basic-cone-creative-customization--embellishment-ideas)
- [DIY Delights for Every Occasion: Specific Party Hat Inspirations](#diy-delights-for-every-occasion-specific-party-hat-inspirations)
- [The Savvy Crafter's Toolkit: Essential Materials & Software](#the-savvy-crafters-toolkit-essential-materials--software)
- [Troubleshooting & Pro Tips: Solving Common Printable Hat Hurdles](#troubleshooting--pro-tips-solving-common-printable-hat-hurdles)
- [Eco-Friendly & Budget-Friendly: Sustainable Party Hat Solutions](#eco-friendly--budget-friendly-sustainable-party-hat-solutions)
- [Turning Passion into Profit: Selling Your Printable Hat Designs](#turning-passion-into-profit-selling-your-printable-hat-designs)
- [How to Choose the Best Printable Party Hat for Your Needs](#how-to-choose-the-best-printable-party-hat-for-your-needs)
- [Common Pitfalls to Avoid When Making Printable Party Hats](#common-pitfalls-to-avoid-when-making-printable-party-hats)
- [Advanced Tips for Expert Party Hat Creators](#advanced-tips-for-expert-party-hat-creators)
- [Conclusion: Your Party Hat Journey Begins Now!](#conclusion-your-party-hat-journey-begins-now)
---
The Magic of Printable Party Hats: Why They're a Game-Changer
Let's be honest, store-bought party hats can be... well, a bit bland. They often come in generic designs, feel flimsy, and let's not even talk about the price tag when you need a dozen or more. That's where the magic of the printable party hat swoops in like a confetti cannon! This isn't just about saving a few bucks; it's about unlocking a world of creativity, personalization, and unparalleled charm that elevates any celebration from good to absolutely glorious.
Here's why I'm such a huge advocate for diving into the DIY printable party hat world:
1. Unmatched Personalization: This is, hands down, the biggest draw. You can match your hats *exactly* to your party's theme, color scheme, and even the guest of honor's personality. Imagine a hat adorned with their favorite cartoon character, or a design that subtly hints at an inside joke. I once made mini taco hats for a Cinco de Mayo party, and everyone absolutely *raved* about the attention to detail!
2. Budget-Friendly Brilliance: Let's face it, party planning costs can spiral. Printable hats are incredibly economical. Once you have a template, you can print as many as you need for the cost of paper and ink. This is a game-changer, especially for larger gatherings.
3. Creative Outlet Galore: For those of us who love to craft, printable hats are a fantastic canvas. From choosing patterns to adding embellishments, it’s a genuinely satisfying creative process that yields tangible, festive results. It's like therapy, but with glitter!
4. Convenience at Your Fingertips: Forgot hats? No problem! Most designs can be downloaded, printed, and assembled in under an hour. This rapid turnaround is a lifesaver for last-minute party preparations. I've personally printed a whole batch of hats while the birthday cake was cooling, saving my bacon more times than I can count.
5. Eco-Conscious Choices: With the right materials, printable hats can be a more sustainable option than plastic-heavy store-bought alternatives. We'll dive into eco-friendly paper and embellishments later, but the potential for a greener party is definitely there.
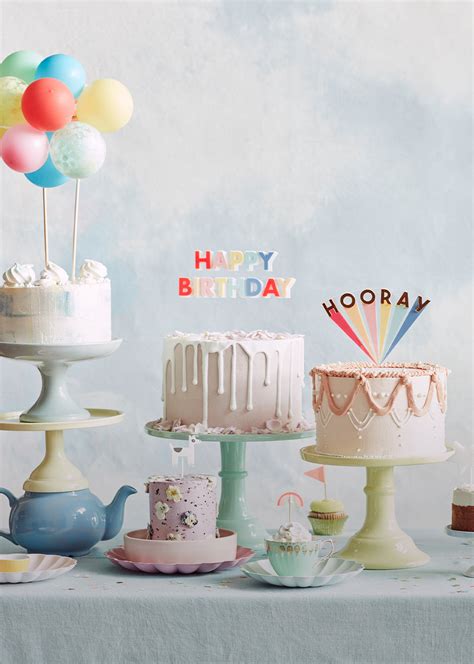
6. Unique Photo Opportunities: Seriously, custom hats make for the *best* party photos. Imagine everyone in coordinated, personalized hats – it creates a cohesive and memorable visual that screams "thoughtful planning."
7. Engaging Activity for Kids (and Adults!): Printing and decorating hats can be a fantastic pre-party activity for children, getting them excited and involved in the celebration. Even adults can enjoy a "hat decorating station" at a more casual gathering.
8. Quality Control: You choose the paper, the embellishments, and the adhesive. This means you control the durability and overall quality, ensuring your hats aren't flimsy and fall apart after five minutes.
9. Beyond Birthdays: While often associated with birthdays, printable hats are perfect for baby showers, graduations, holiday gatherings, themed dinner parties, or even just a fun Tuesday! The possibilities are endless.
10. A Sense of Accomplishment: There's genuine pride in seeing your guests wearing something you made with your own hands. It adds a layer of warmth and personal connection to the celebration that money simply can't buy.
The shift to printable party hats isn't just a trend; it's a smart, creative, and heartfelt approach to party planning. It empowers you to infuse every celebration with your unique style, ensuring that each guest feels special and every moment is picture-perfect. Trust me, once you go printable, you'll never look back!
---
From Whimsical to Wonderful: Diverse Themes and Designs for Every Celebration
The beauty of the printable party hat lies in its incredible versatility. Forget the days of being limited to generic polka dots or stripes. With printables, your imagination is the only limit! You can find or create designs that perfectly match any theme, age group, or formality level. Here's a look at the diverse range of themes and designs you can explore, ensuring your hats are always a talking point.
1. Classic & Timeless Shapes:
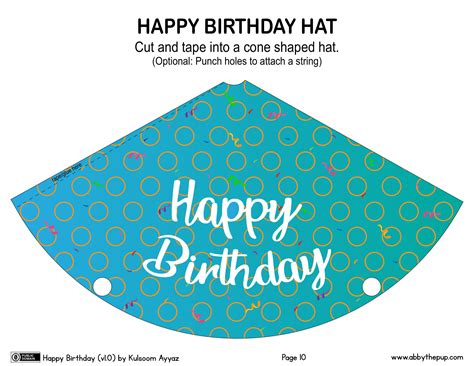
- The Traditional Cone: The quintessential party hat, easily customizable with any pattern, color, or character. It's the go-to for birthdays and general festivities.
- The Crown/Tiara: Perfect for royalty-themed parties, princesses, kings, or anyone who deserves to feel majestic. Think glitter and faux jewels!
- Mini Fascinators: For a more elegant or adult affair, small, decorative hats attached to headbands or clips offer a sophisticated touch. My personal favorite is a floral fascinator for a garden party – it's a game-changer for chic celebrations.
- Animal Ears/Headbands: Instead of a full hat, printable ears (cat, bunny, bear, unicorn horn) attached to a headband are a huge hit, especially with younger kids or for costume parties.
- Party "Hats" with a Twist: Think pirate bandanas, superhero masks that wrap around the head, or even tiny witch hats for Halloween.
2. Kid-Centric Fantasies:
- Superhero Emblems: Hats featuring the logos or colors of favorite superheroes like Spider-Man, Captain America, or Wonder Woman.
- Enchanted Forest Creatures: Unicorns, dragons, fairies, gnomes, or woodland animals like foxes and owls. Imagine a child's delight wearing a hat that looks like a friendly dragon's head!
- Dinosaur Roar: Hats shaped like dinosaur heads, or simply adorned with prehistoric patterns and T-Rex silhouettes.
- Under the Sea Adventures: Mermaids, sharks, octopuses, and coral reef patterns. I once made shark fin hats for a pool party, and they were an absolute splash!
- Space Explorers: Rockets, planets, stars, and astronauts. Black paper with glow-in-the-dark embellishments can look spectacular.
- Construction Zone: Hats designed as hard hats, or featuring diggers, dump trucks, and construction signs.
3. Adult Elegance & Whimsy:
- Sophisticated Patterns: Geometric designs, watercolor washes, marble textures, or minimalist monochrome hats for a chic adult gathering.
- Roaring Twenties Flair: Art Deco patterns, feathers, and metallic accents for Gatsby-themed parties.
- Tropical Paradise: Vibrant floral prints, palm leaves, flamingos, and pineapples for luaus or summer parties.
- Retro Vibes: Hats with patterns inspired by the '70s (groovy swirls), '80s (neon shapes), or '90s (pixel art).
- Wine Tasting/Cocktail Party: Subtle designs featuring wine glasses, corks, or cocktail shakers. Imagine a tiny top hat for a sophisticated soirée.
- Seasonal Celebrations:
- Halloween: Spiders, bats, ghosts, mini witch hats, or franken-hats.
- Christmas: Santa hats, elf hats, reindeer antlers, or festive bauble designs.
- Thanksgiving: Pilgrim hats, cornucopia patterns, or autumn leaf motifs.
- New Year's Eve: Glittery "Happy New Year" hats, clock designs, or champagne bottle shapes.
4. Personalized & Photo-Ready Designs:
- Photo Hats: Hats featuring a photo of the birthday person, the guest of honor, or even funny guest photos.
- Milestone Numbers: Large, bold numbers indicating a birthday year (e.g., "1," "30," "50") integrated into the hat design.
- Name Tags: Small banners or labels on the hats with each guest's name, doubling as a party favor. This is especially great for smaller, more intimate gatherings.
- Inside Joke Hats: For close friends or family, hats that feature a specific meme, quote, or image that only *they* will understand, creating an instant bond and plenty of laughs.
5. Interactive & Playful Designs:
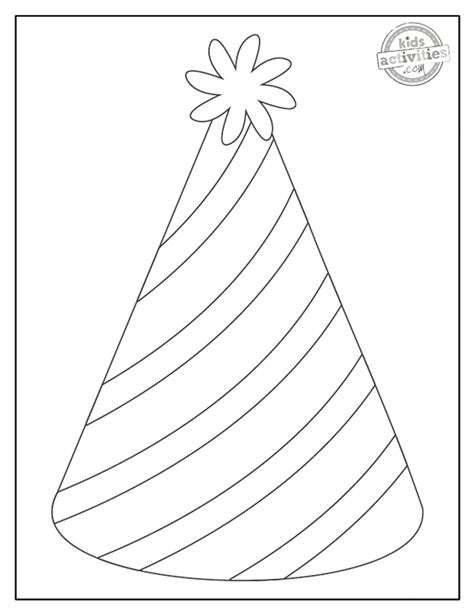
- Color-Your-Own Hats: Printable outlines that guests can color in themselves, perfect for kids' parties or a relaxed adult craft session.
- Puzzle Piece Hats: Hats that, when combined, form a larger picture or message.
- "What's Your Favorite..." Hats: Hats with spaces to write down a favorite movie, food, or hobby, encouraging conversation.
The world of printable party hats is an open invitation to let your creativity run wild. Don't be afraid to mix and match, add your own flair, and design something truly unique that captures the spirit of your celebration. The possibilities are genuinely limitless, and the joy of seeing your themed creations come to life is incredibly rewarding!
---
Mastering the Craft: A Step-by-Step Guide to Printing & Assembly
So, you've found the perfect printable party hat design, or perhaps you've even created your own! Now comes the exciting part: bringing it to life. Don't let the idea of "DIY" intimidate you. This process is surprisingly straightforward and incredibly satisfying. Think of it as a fun craft project, not a daunting task. Here’s my tried-and-true, step-by-step guide to printing and assembling your fabulous hats.
### Phase 1: The Printing Perfection
1. Choose Your Paper Wisely: This is crucial for hat durability and appearance.
- Cardstock (65-110 lb / 176-300 gsm): My personal recommendation for most hats. It holds its shape well, feels substantial, and prevents ink bleed-through. Lighter cardstock (65-80 lb) is easier to cut and fold, while heavier stock (90-110 lb) offers more rigidity, especially for larger hats.
- Glossy Photo Paper: Great for vibrant colors and a professional finish, but can be harder to fold and less forgiving with adhesive. Use sparingly or for specific design elements.
- Matte Photo Paper: A good compromise for vibrant colors without the high gloss, and generally easier to work with than full glossy.
- Specialty Papers: Think glitter cardstock, metallic paper, or even textured paper for extra flair. Just ensure your printer can handle the thickness!
- *Expert Tip:* Always do a test print on plain paper first to check sizing and color accuracy before committing to your good cardstock.
2. Printer Settings are Your Friend:
- Best Quality/Photo Quality: Always select the highest print quality setting to ensure crisp lines and vibrant colors. Standard draft mode will lead to dull, pixelated results.
- Correct Paper Type: Tell your printer what kind of paper you're using (e.g., "Cardstock," "Matte Photo Paper"). This adjusts ink saturation and feed settings for optimal results.
- Scale to Fit: Ensure your print settings are set to "Actual Size" or "100% Scale" unless you deliberately want to resize the hat. "Fit to Page" can sometimes alter dimensions.
3. Ink Check: Make sure you have enough ink! There's nothing worse than running out mid-print, especially if you're on a tight deadline. I've been there, staring at a half-printed hat, wishing I'd checked my cartridges. Don't be like me!
4. Print with Care:
- Load your chosen paper into the printer's manual feed tray if available, especially for thicker cardstock, to prevent jams.
- Allow prints to dry for a few minutes before handling extensively to prevent smudging, particularly with heavier ink coverage.
### Phase 2: The Art of Assembly
1. Gather Your Tools:
- Sharp Scissors or Craft Knife: For clean, precise cuts. A craft knife with a cutting mat is excellent for straight edges.
- Ruler: Essential if using a craft knife for straight lines.
- Adhesive:
- Hot Glue Gun (Low-Temp): My go-to for speed and strong hold. Use low-temp to avoid burning fingers and warping paper.
- Craft Glue (PVA Glue): Dries clear, strong hold, but takes longer to set. Great for a neat finish.
- Double-Sided Tape or Glue Dots: Less messy, but may not be as strong for heavy embellishments.
- Hole Punch: For creating holes for elastic or ribbon.
- Elastic String or Ribbon: For securing the hat to heads. Approximately 12-18 inches per hat, depending on head size.
- Scoring Tool (Optional but Recommended): A scoring stylus or even a dull butter knife can create clean fold lines on thicker cardstock.
2. Cutting Out Your Hats:
- Carefully cut along the outer edges of your printed hat template. If there are intricate details, take your time. Precision here makes a big difference in the final look.
- If your template includes a glue tab, cut around that as well.
3. Scoring and Folding:
- Locate the straight edge that will form the seam of the cone (usually marked as a fold line or indicated by the glue tab).
- Using a ruler and your scoring tool (or dull knife), lightly score along this line. This creates a crisp, professional fold.
- Fold the paper along the scored line.
4. Forming the Cone:
- Bring the two straight edges of the hat together, overlapping the glue tab.
- Apply your chosen adhesive to the glue tab. If using hot glue, a thin bead along the edge is sufficient. If using craft glue, apply an even layer.
- Press firmly to secure the seam, holding it in place until the adhesive sets. For hot glue, this is almost instant. For craft glue, you might need to use a paperclip or clothes pin to hold it while it dries.
5. Adding the Chin Strap:
- Using your hole punch, make a small hole on each side of the hat, near the bottom edge. Ensure these holes are symmetrical.
- Cut a length of elastic string or ribbon (around 12-18 inches, depending on the recipient).
- Thread one end of the elastic through a hole from the outside in, and tie a secure knot inside the hat to prevent it from pulling through.
- Repeat on the other side. You can adjust the length of the elastic later to fit different head sizes.
- *Pro Tip:* For younger kids, wider ribbon or softer elastic can be more comfortable. For adults, simple elastic works perfectly.
And just like that, you've got a beautifully assembled, custom printable party hat ready for its moment in the spotlight! This process might seem like a lot of steps, but once you do one, the rest fly by. The feeling of accomplishment when you see a pile of perfectly crafted hats is truly rewarding.
---
Beyond the Basic Cone: Creative Customization & Embellishment Ideas
You've mastered the art of printing and assembling your basic printable party hat. Now, let's unlock the true potential of these festive adornments by diving into the exciting world of customization and embellishment! This is where your hats transform from simple paper cones into show-stopping, personality-packed masterpieces. Think of your hat as a blank canvas, just waiting for your creative flair.
1. Glitter Galore (and How to Tame It):
- Glitter Glue: Apply designs or cover entire sections for a sparkly effect that's less messy than loose glitter.
- Loose Glitter: For maximum sparkle! Apply a layer of craft glue or spray adhesive, then sprinkle glitter. Tap off excess. To minimize mess, use a clear sealant spray once dry. My personal opinion? Glitter cardstock is the ultimate hack for sparkle without the mess; it's a game-changer!
- Glitter Cardstock: Pre-glittered paper that you can cut directly. Comes in various colors and levels of sparkle.
2. Feathers for Flair:
- Small Craft Feathers: Glue them around the base of the hat, or create a plume at the top. Match colors to your theme.
- Marabou Feathers: Soft, fluffy feathers perfect for a playful, whimsical touch, especially on baby shower or bachelorette hats.
- Ostrich Feathers: For a truly dramatic and elegant look on larger hats or fascinators, adding height and sophistication.
3. Ribbon, Tulle, and Fabric Trims:
- Ribbon Edging: Glue ribbon around the bottom rim of the hat for a clean, finished look.
- Ribbon Loops/Bows: Create small bows or loops to attach to the top or sides.
- Tulle Pom-Poms: Gather and tie tulle into a fluffy pom-pom for the top of the hat, offering a softer alternative to paper or yarn.
- Fabric Scraps: Use small fabric pieces to add texture or create specific shapes (e.g., small fabric flowers, denim patches). I once used tiny scraps of plaid fabric for a lumberjack-themed hat, and it was a huge hit!
4. Pom-Poms, Bells, and Baubles:
- Yarn Pom-Poms: Hand-make fluffy pom-poms in various colors and sizes to top your hats. They add a playful, soft touch.
- Mini Bells: Sew or glue tiny jingle bells around the rim or to the tip for a subtle, festive sound. Perfect for holiday hats!
- Small Baubles/Beads: String beads onto elastic or wire to create dangly embellishments.
5. Paper Punches and Die-Cuts:
- Shape Punches: Use craft punches to create stars, hearts, circles, or other shapes from contrasting paper to glue onto your hat.
- Die-Cut Letters/Numbers: Spell out names, ages, or messages with pre-cut or machine-cut letters.
- Layered Designs: Cut out multiple shapes in different sizes and layer them for a 3D effect.
6. Gems, Rhinestones, and Sequins:
- Self-Adhesive Gems: Easy to apply and instantly add sparkle and glam.
- Loose Rhinestones/Sequins: Apply with craft glue for intricate patterns or full coverage.
- Pearl Beads: For a classic, elegant touch, especially on wedding shower or vintage-themed hats.
7. 3D Elements & Pop-Ups:
- Springy Toppers: Attach a small cut-out shape (e.g., a star, balloon, character head) to a spring for a bobble-head effect.
- Mini Banners: Create tiny flags or letters strung on thread to drape across the hat or hang from the tip.
- Cut-Out Overlays: Print and cut out additional elements (e.g., wings for a fairy hat, flames for a dragon hat) and glue them on for a multi-dimensional look.
8. Personalized Touches:
- Handwritten Messages: Use metallic markers to write "Happy Birthday [Name]" or a special message on the hat.
- Guest Names: Add each guest's name to their hat for a unique place card and favor.
- Photos: Print small photos of the guest of honor or even each guest to attach to their hat. This creates a really memorable keepsake.
9. Paint, Markers, and Stencils:
- Acrylic Paints: Use for adding custom colors, patterns, or freehand designs.
- Paint Pens/Markers: Great for fine details, outlines, or adding metallic accents.
- Stencils: Use stencils with paint or ink pads to create repetitive patterns or specific shapes.
10. Themed Toppers:
- Mini Pinwheels: Create tiny paper pinwheels and attach them to the top of the hat.
- Balloons (Mini): Inflate very small balloons and attach them to the top.
- Foil Fringe: Cut metallic foil fringe and glue it around the base for a disco or celebratory vibe.
- Pipe Cleaners: Twist pipe cleaners into spirals, stars, or other shapes to use as antenna or toppers.
Don't be afraid to experiment and combine different techniques. A hat might have a glitter base, a ribbon trim, and a fluffy pom-pom on top! The goal is to make each printable party hat a unique expression of your party's theme and your personal creative style. I once went all out with a tropical theme, adding tiny paper umbrellas and real dried flowers to some hats – it was a bold move, but it truly made the hats unforgettable!
---
DIY Delights for Every Occasion: Specific Party Hat Inspirations
The true magic of the printable party hat lies in its adaptability. It's not just for birthdays anymore! With a little creativity, you can design and customize hats for virtually any celebration, adding a unique, personalized touch that store-bought options simply can't match. Here are some specific inspirations for different occasions, packed with ideas to get your crafting gears turning.
1. Birthday Bashes (Ages 1-100+):
- First Birthday (Smash Cake Hat): A sturdy, heavily embellished crown or cone with the number "1." Use soft fabrics, gentle glitter, and perhaps a photo of the baby. Make it extra special for the photos!
- Kids' Themed Parties:
- Princess/Prince: Glitter crowns, tiaras with faux jewels, or cones adorned with castle motifs.
- Pirate: Mini tricorn hats, skull and crossbones designs, or hats with attached eye patches. I made pirate hats for my nephew's 7th birthday, and he and his friends spent the whole party yelling "Arrr!" – it was hilarious.
- Dinosaur: Hats shaped like dino heads (T-Rex, Triceratops), or simple cones with dinosaur footprint patterns and "ROAR!" text.
- Unicorn: White or pastel cones with a glitter horn and floral embellishments.
- Space: Silver or dark blue hats with stars, planets, rockets, or astronaut helmets.
- Teen/Adult Milestones:
- Sweet Sixteen/21st/30th: Elegant mini fascinators, glittery numbers, or hats with personalized messages. Think metallic accents and sophisticated patterns.
- Over the Hill (40th, 50th, etc.): Humorous designs like "Vintage 19XX," "Still Got It," or "Officially Old" hats with playful "gravestone" or "wrinkle" motifs.
2. Baby Showers & Gender Reveals:
- "Oh Baby" Theme: Pastel-colored cones with baby animals, tiny footprints, or "It's a Boy/Girl" messages.
- Gender Reveal Hats: Half-pink, half-blue hats, or hats that say "Team Boy" vs. "Team Girl" for guests to wear before the big reveal.
- Storybook Theme: Hats adorned with characters from classic children's books (e.g., Peter Rabbit, Winnie the Pooh).
3. Holidays & Festive Seasons:
- Christmas: Santa hats, elf hats, reindeer antlers, or elegant cones with winter wonderland scenes, snowflakes, or "Merry & Bright" messages. Don't forget tiny bells!
- New Year's Eve: Glittery "Happy New Year" hats, clocks striking midnight, champagne bottles, or futuristic designs. My absolute favorite is a tall, glittery cone with a sparkly star on top for NYE – it never disappoints.
- Halloween: Mini witch hats, Frankenstein monster hats, vampire top hats, or hats with spiders, bats, and ghosts.
- Valentine's Day: Hearts, cupids, "Be Mine" messages, or hats with romantic floral patterns.
- St. Patrick's Day: Leprechaun hats, shamrocks, pots of gold, or green and gold patterns.
- Easter: Bunny ears, chick hats, or hats adorned with spring flowers and pastel eggs.
4. Graduations:
- Cap & Gown: Mini graduation caps (mortarboards) that can be personalized with the grad'