Have you ever poured your heart and soul into a handmade creation – a cozy quilt, a bespoke garment, a cuddly toy, or a batch of artisan preserves – only to have it feel... unfinished? Like a magnificent painting without a signature, or a delicious meal missing that secret ingredient? That’s exactly how I felt for years about my crafting projects. I’d spend hours meticulously sewing, knitting, or designing, and then, at the very end, something was always missing: a personal touch, a mark of authenticity, a little flag proudly declaring, "I made this!"
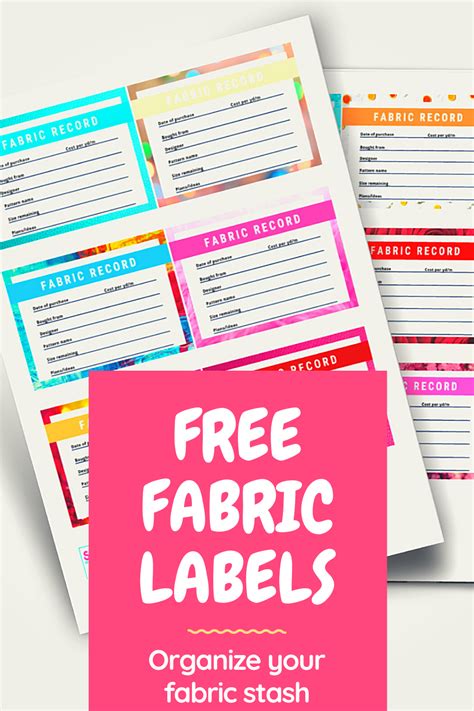
That "something" is often a label. But not just any label. We’re talking about printable fabric labels – the unsung heroes of the crafting and small business world. They're the elegant, practical, and incredibly versatile solution that transforms a beautiful handmade item into a professional, personalized, and truly unforgettable piece. I remember a particularly frustrating afternoon, trying to hand-stitch tiny letters onto a delicate baby blanket, only to have them look less "charming" and more "shaky toddler’s first crayon attempt." I knew there had to be a better way, a way to capture the essence of my craft without losing my sanity. This guide, born from countless hours of trial-and-error, research, and a genuine love for making, is the resource I wish I had back then. It would have saved me so much time, so many wonky stitches, and a significant amount of self-doubt.
Whether you’re a seasoned quilter looking to sign your masterpieces, a budding entrepreneur ready to brand your artisan goods, a parent wanting to keep track of school uniforms, or simply someone who loves adding a personal touch to gifts, you’ve landed in the right place. We're going to dive deep into the wonderful world of printable fabric labels, covering everything from the absolute basics to advanced techniques that will elevate your creations. Get ready to discover how easy, affordable, and incredibly rewarding it is to add that professional, personal flourish to everything you make. Trust me, you don’t want to miss this!
---
Table of Contents

- [The World of Printable Fabric Labels: An Introduction](#the-world-of-printable-fabric-labels-an-introduction)
- [DIY Dream: Crafting Your Own Printable Fabric Labels at Home](#diy-dream-crafting-your-own-printable-fabric-labels-at-home)
- [Beyond the Basics: Advanced Printing Techniques & Materials](#beyond-the-basics-advanced-printing-techniques--materials)
- [Branding Brilliance: Using Labels for Your Handmade Business](#branding-brilliance-using-labels-for-your-handmade-business)
- [Practical Magic: Organization & Gifting with Fabric Labels](#practical-magic-organization--gifting-with-fabric-labels)
- [Wash & Wear: Ensuring Durability and Longevity](#wash--wear-ensuring-durability-and-longevity)
- [Design Delights: Tips for Creating Stunning Label Graphics](#design-delights-tips-for-creating-stunning-label-graphics)
- [Troubleshooting & Triumphs: Common Issues and Smart Solutions](#troubleshooting--triumphs-common-issues-and-smart-solutions)
- [The Future of Fabric Labels: Innovations and Trends](#the-future-of-fabric-labels-innovations-and-trends)
- [How to Choose the Best Printable Fabric Labels for Your Needs](#how-to-choose-the-best-printable-fabric-labels-for-your-needs)
- [Common Pitfalls to Avoid When Working with Printable Fabric Labels](#common-pitfalls-to-avoid-when-working-with-printable-fabric-labels)
- [Advanced Tips for Expert Fabric Label Makers & Small Businesses](#advanced-tips-for-expert-fabric-label-makers--small-businesses)
- [Conclusion: Your Labeled Legacy Awaits](#conclusion-your-labeled-legacy-awaits)
---
The World of Printable Fabric Labels: An Introduction
Let's start at the very beginning. What *are* printable fabric labels, and why are they such a game-changer? Simply put, they are specially treated sheets of fabric (or fabric-like material) that you can feed through a standard inkjet or laser printer to create custom designs, text, or logos. Once printed, these labels can be cut out and then attached to your fabric items in various ways – typically by sewing them on, ironing them on, or sometimes even using adhesive.
The beauty of printable fabric labels lies in their versatility and accessibility. Gone are the days of needing expensive professional printing services or complex machinery to get personalized fabric tags. With a home printer and the right materials, you can create professional-looking labels right from your studio, kitchen table, or even your favorite comfy armchair. This democratizes branding and personalization, putting the power of custom design into the hands of everyone.
Here’s a deeper dive into what makes these labels so special and why they've become an indispensable tool for so many:
1. Unleashed Creativity: Imagine any design, any font, any color palette – you can bring it to life on a fabric label. This freedom allows for truly unique branding or personalization that perfectly matches your aesthetic.
2. Professional Finish: A well-designed and cleanly applied label instantly elevates the perceived value and professionalism of any handmade item. It shows attention to detail and care.
3. Cost-Effectiveness: Compared to ordering custom-woven labels in small batches, printing your own fabric labels at home is significantly more affordable, especially for crafters and small businesses just starting out.
4. Quick Turnaround: Need labels for a last-minute market? No problem! You can design, print, and apply labels in a single afternoon, eliminating waiting times associated with external suppliers.
5. Personalized Touch: For gifts, adding a "Handmade by [Your Name]" or "Especially for [Recipient's Name]" label adds a deeply personal and thoughtful dimension that store-bought items simply can't replicate.
6. Durability Options: Modern printable fabric sheets come with various treatments to ensure they are washable, colorfast, and durable, standing up to the wear and tear of everyday use.
7. Variety of Attachment Methods: Whether you prefer the classic look of a sew-in label, the convenience of an iron-on, or the simplicity of an adhesive tag, there's a printable solution for you.
8. Brand Storytelling: Your label isn't just a name; it's a tiny canvas for your brand story. Include care instructions, your website, or a small tagline that speaks volumes about your craft.
9. No Minimums: Unlike traditional label manufacturers who often require large minimum orders, you can print just one label or a hundred, exactly as needed, reducing waste and upfront costs.
10. Educational Tool: For those teaching sewing or crafting, printable fabric labels can be used to label tools, fabric swatches, or even finished projects, adding an organized and educational element.
11. Eco-Friendly Options: Some brands offer printable fabric sheets made from organic cotton or recycled materials, allowing you to align your crafting with sustainable practices.
12. Care Instructions Made Easy: Instead of fumbling with separate paper tags, you can integrate washing, drying, and ironing instructions directly onto a fabric label that stays with the item. For example, when I started selling my knitted baby booties, customers kept asking about washing instructions. Integrating a tiny, clear care label directly onto the bootie, printed with the washing symbols, was a lifesaver. It not only made my life easier but also gave my customers confidence that they were buying a quality, well-thought-out product.
DIY Dream: Crafting Your Own Printable Fabric Labels at Home
The magic truly begins when you realize you can become your own label factory, right in the comfort of your home. It’s an empowering feeling, knowing that with a few supplies and a creative spark, you can churn out professional-grade labels tailored to your exact needs. This isn't just about saving money; it's about complete creative control and instant gratification.
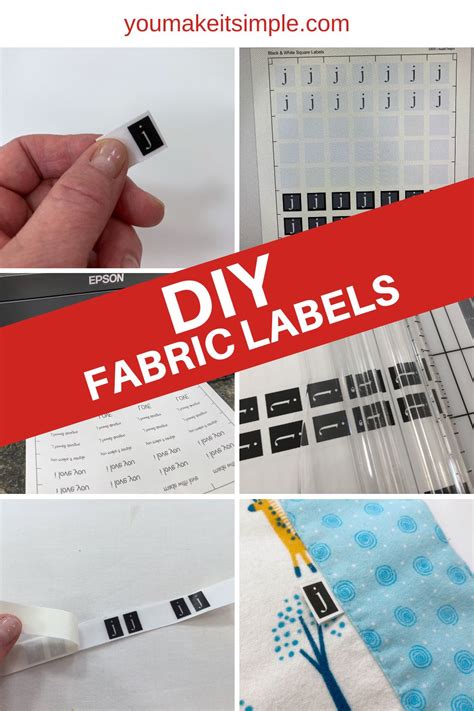
Here’s your step-by-step guide to making your own printable fabric labels:
1. Gather Your Supplies:
- Printable Fabric Sheets: These are the stars of the show. Available for inkjet or laser printers, choose based on your printer type and desired finish (cotton, satin, canvas, iron-on, sew-in).
- Inkjet or Laser Printer: A standard home printer is usually sufficient. Ensure your ink cartridges are full and clean.
- Design Software: Anything from free tools like Canva or GIMP, to more advanced options like Adobe Illustrator or Photoshop. Even Microsoft Word or Google Docs can work for simple text labels.
- Sharp Scissors or Rotary Cutter: For precise cutting. A craft knife and cutting mat are also excellent.
- Iron (for iron-on labels): Essential for heat-setting.
- Sewing Machine/Needle & Thread (for sew-in labels): To attach your beautiful creations.
- Ruler: For accurate measurements and straight cuts.
2. Design Your Label:
- Keep it Simple: Especially for your first few attempts. Start with text (your name, brand name) and perhaps a small, simple graphic.
- Dimensions Matter: Measure the desired finished size of your label. Account for seam allowances if you're sewing them in, or fold lines if you're creating loop labels.
- Resolution is Key: Use high-resolution images/logos (at least 300 DPI) to avoid pixelation.
- Color Test: If color accuracy is crucial, print a small test swatch on regular paper first to check how colors translate.
- Mirror Image (for some iron-ons): Crucially, *some* iron-on transfer sheets require you to mirror your design so it appears correctly when transferred. ALWAYS check the specific instructions for your chosen iron-on fabric. Don't be like me and print a whole batch only to realize you mirrored the image incorrectly and end up with backward text! Learn from my mistakes!
3. Print Your Labels:
- Load Correctly: Carefully load the printable fabric sheet into your printer, ensuring the printable side (usually the fabric side, not the paper backing) is facing the correct way for your printer.
- Printer Settings: Adjust your printer settings for "Photo Paper" or "Specialty Media" for best results. Choose "Best Quality" printing.
- Test Print: If possible, print one label first on a small scrap or a corner of the sheet to check alignment and color.
- Let it Dry: Allow the printed labels to dry completely before handling, especially with inkjet prints, to prevent smudging. This usually takes a few minutes but can vary.
4. Prepare Your Labels:
- Cut with Precision: Using sharp scissors or a rotary cutter, carefully cut out each label. If you plan to fold them, score a line down the middle for a crisp fold.
- Peel Backing (if applicable): For iron-on sheets, you'll often need to peel off a paper backing before applying heat.
5. Attach Your Labels:
- Iron-On:
- Preheat your iron to the recommended temperature (usually cotton setting, no steam).
- Place the fabric item on a firm, heat-resistant surface.
- Position your label precisely.
- Press firmly and evenly for the recommended time (e.g., 20-30 seconds), moving the iron slightly to ensure even heat distribution.
- Allow to cool completely before testing adhesion.
- Sew-In:
- Fold the label if desired (e.g., to create a loop tag).
- Pin the label in place on your fabric item.
- Use your sewing machine (or hand-stitch) to sew around the edges or along the fold. A small zigzag stitch or a straight stitch close to the edge works well. For a polished look, I often use a contrasting thread color that complements the label design, giving it that extra pop.
- Adhesive (less common for fabric, but some exist):
- Simply peel and stick. These are generally for temporary use or items that won't be washed frequently.
6. Cure/Set (Important for Durability):
- Many printable fabric labels, especially inkjet ones, require a "curing" or "setting" period or method to ensure washability. This might involve an additional ironing step after initial application, or simply letting them sit for 24-72 hours before the first wash. Always read the manufacturer's instructions! For instance, I once made a batch of gorgeous custom labels for a quilt, washed it immediately, and watched the colors fade. A simple read of the instructions would have told me to wait 72 hours for the ink to fully set. Lesson learned!
Beyond the Basics: Advanced Printing Techniques & Materials

Once you've mastered the fundamentals, the world of printable fabric labels opens up even further. There are specialized materials and techniques that can elevate your labels from good to absolutely stunning, offering enhanced durability, unique textures, and a truly professional finish.
1. Specialty Fabric Sheets:
- Canvas & Twill: For a more rustic, robust, and tactile feel. Excellent for bags, outdoor gear, or items needing a sturdy label.
- Satin & Silk: For luxurious, soft, and elegant labels, perfect for lingerie, delicate garments, or high-end apparel.
- Sheer Organza: Create ethereal, transparent labels where your design appears to float on the fabric. Best for light-colored fabrics or where you want a subtle effect.
- Heavyweight Cotton: Offers excellent stability and a classic, natural look, ideal for quilts, handmade toys, and home décor items.
- Weatherproof/Outdoor Fabric: Designed to withstand the elements, perfect for labeling garden tools, outdoor cushions, or pet accessories.
2. Professional Finishing Touches:
- Fray Check: A liquid sealant that prevents fabric edges from fraying. Apply a thin line to the raw edges of sew-in labels before or after cutting for a clean, long-lasting finish.
- Heat Press Application: For iron-on labels, a heat press provides consistent, even pressure and temperature, resulting in superior adhesion and durability compared to a household iron. This is a game-changer for small businesses.
- Laminating (Carefully!): While not typical for *fabric* labels, some crafters experiment with very thin, flexible fabric-safe laminates for extreme durability, especially for outdoor or high-wear items. Proceed with caution and test thoroughly.
3. Double-Sided Printing:
- Some printable fabric sheets are designed to be printed on both sides. This allows you to create labels with your logo on one side and care instructions or a personal message on the other, making for a truly comprehensive and attractive tag. It’s like getting two labels in one, perfect for loop tags.
4. Integrating QR Codes:
- For the tech-savvy crafter or entrepreneur, printing a QR code on your label can link directly to your website, online store, social media profile, or even a video tutorial for the product. It's a subtle way to connect with your customers and share more about your brand story. This is my go-to gadget for my small business because it’s a game-changer for engagement!
5. Pre-treating for Enhanced Durability:
- While most printable fabrics come pre-treated, some advanced users might experiment with fabric fixatives or clear fabric sealants (e.g., textile medium mixed with ink, or a spray fixative) *after* printing but *before* heat-setting or washing. Always test on a scrap piece first!
6. Printing in Bulk:
- Learn to set up your design software to print multiple labels efficiently on a single sheet. Maximize space, leaving just enough margin for cutting. Create a "gang sheet" of your labels to optimize paper usage and speed up production.
- Consider using a template. Many printable fabric sheet manufacturers offer downloadable templates for popular design software, ensuring perfect alignment.
7. Using Specialty Inks (with caution):
- While standard inkjet or laser inks work well, some crafters explore specialty fabric inks designed for direct-to-fabric printing. This usually requires specialized printers or processes beyond basic home printing, but it's good to know the options exist for truly bespoke creations.
8. Die-Cutting or Electronic Cutting Machines:
- For perfectly shaped labels (circles, ovals, unique shapes) and faster production, an electronic cutting machine like a Cricut or Silhouette can be a godsend. You print your design, then the machine precisely cuts around it using registration marks. This saved my team countless hours when we needed to produce uniquely shaped labels for a seasonal collection!
9. Vintage or Distressed Effects:
- Experiment with design software to add vintage filters, faded textures, or distressed overlays to your label graphics *before* printing. This can give your labels a unique, aged, or handmade aesthetic that perfectly matches certain crafts.
10. Glow-in-the-Dark or Reflective Ink (DIY/Specialty):
- While not standard, some creative minds have explored using specialty glow-in-the-dark or reflective fabric paints (applied *after* printing) or even sourcing specific reflective iron-on sheets to create highly visible labels for safety or novelty items.
11. Embroidered Accents:
- Print your basic label design, then use hand embroidery or a sewing machine to add decorative stitches, outlining, or a small motif directly onto the printed label *before* attaching it. This blends the best of both worlds: the precision of printing with the charm of handcraft.
12. Textured Printing Surfaces:
- Some printable fabric sheets mimic textures like linen or raw silk. Choosing these materials adds another layer of sensory experience to your labels, enhancing the overall quality and feel of your finished product.
Branding Brilliance: Using Labels for Your Handmade Business
For anyone selling their handmade goods, a well-designed label isn't just an accessory; it's a vital part of your brand identity. It's your silent salesperson, your quality assurance stamp, and a tiny billboard for your passion project. Investing time in your printable fabric labels can significantly impact how your business is perceived and remembered.
Here’s how to leverage printable fabric labels for branding brilliance:
1. Consistent Brand Identity:
- Ensure your label design (logo, fonts, colors) aligns perfectly with your overall brand aesthetic, website, and social media. Consistency builds recognition and trust.
- *Hypothetical Scenario:* "When I launched my line of eco-friendly baby clothes, having a consistent label with my whimsical tree logo and earthy color palette made every item instantly recognizable and reinforced my brand's commitment to nature."
2. Clear Logo & Business Name:
- Your brand name and logo should be the most prominent elements. Make them legible, even when small. This is how customers will remember and find you again.
3. Include Contact Information:
- Consider adding your website URL, Etsy shop name, or social media handle. A small, clear line of text can drive repeat business and online engagement.
- *Example:* "www.mycraftyshop.com" or "@handmadewithheart"
4. Care Instructions:
- Crucial for garments, blankets, or items that need washing. Use universal laundry symbols or clear, concise text. This shows professionalism and helps customers care for their purchase, extending its life.
5. Material Content:
- Especially important for textiles. State "100% Cotton," "Merino Wool Blend," etc. This provides transparency and meets consumer expectations.
6. "Handmade By" or "Designed By":
- This adds a personal touch and emphasizes the artisanal quality of your goods. It connects the customer to the maker.
- *Example:* "Handmade with love by Sarah" or "A [Your Brand Name] Original"
7. Origin/Location:
- If relevant to your brand story, include where your item was made. "Made in [Your City/Country]" can add a unique selling point, especially for locally sourced or ethically produced goods.
8. Batch Numbers/SKUs:
- For tracking inventory or quality control, print small batch numbers or internal SKUs on the back of your labels. This is invaluable for larger operations.
- *Hypothetical Scenario:* "When a customer inquired about a specific yarn type for a scarf they bought months ago, I was able to quickly reference the batch number on the label and pull up my records, providing excellent customer service."
9. Limited Edition/Special Collection Tags:
- Create unique label designs for special collections or limited runs. This adds exclusivity and urgency, making those items feel even more special.
- *Example:* "Autumn Harvest Collection 2024" or "Limited Edition: Only 50 Made!"
10. QR Codes for Expanded Info:
- As mentioned earlier, a QR code can link to a detailed product page, a video of your making process, or even customer reviews. It's a bridge from your physical product to your digital presence.
11. Thank You/Personal Message:
- Some small businesses print a tiny "Thank You for Supporting Handmade!" or a short, sweet message on the reverse side of a folded label. It’s a subtle but powerful way to build customer loyalty.
12. Sustainability Claims:
- If your materials are organic, recycled, or ethically sourced, your label is the perfect place to highlight this. A small "Eco-Friendly Materials" or "Made with Organic Cotton" can resonate deeply with conscious consumers. My go-to subjective opinion here is that transparency about materials is non-negotiable for building a trustworthy brand today.
Practical Magic: Organization & Gifting with Fabric Labels
Printable fabric labels aren't just for commercial branding; they are also incredibly useful for everyday life, making organization a breeze and adding heartfelt touches to gifts. Think beyond the business and discover how these versatile tags can simplify your home and enhance your personal projects.
1. Kids' Clothing & School Supplies:
- Label uniforms, lunch bags, backpacks, and sports gear with names and phone numbers. Say goodbye to lost property!
- *Example:* "Liam's Jacket - 555-1234" or "Property of Emily - Grade 2"
2. Storage & Organization:
- Label fabric bins, baskets, and soft storage containers for linens, craft supplies, toys, or seasonal décor. This makes finding things so much easier and keeps your home tidy.
- *Example:* "Winter Scarves," "Yarn Stash," "Art Supplies," "Holiday Decorations"
3. Heirloom Identification:
- For quilts, blankets, and garments meant to be passed down through generations, a label noting the maker, date, and recipient adds immense sentimental value.
- *Hypothetical Scenario:* "My grandmother once made a beautiful quilt, and I always wished it had a label with her name. Now, for every quilt I make, I include a label with my name and the year, hoping it becomes a cherished heirloom for my family."
4. Handmade Gifts - Personal Touch:
- Elevate any handmade gift – a knitted scarf, a sewn tote bag, a batch of homemade jam (with a fabric jar cover) – with a personalized label. It shows thought and care.
- *Example:* "Handmade for Aunt Carol with love," "Especially for David - Est. 2024," "Merry Christmas, From The Smiths"
5. Craft Project Management:
- Label your fabric cuts, project bags, or WIP (work in progress) pouches with project names, fabric types, or pattern details. This keeps your crafting organized and prevents confusion.
- *Example:* "Quilt Project: Starry Night," "Upholstery Fabric - Sofa," "Next Up: Baby Blanket"
6. Pet Accessories:
- Label pet beds, blankets, and even dog coats with your pet's name or your contact information for emergencies.
- *Example:* "Max's Bed," "Lost & Found: Call 555-5678"
7. Luggage & Travel Bags:
- For fabric luggage tags or internal labels on duffel bags, add contact info. This is a durable alternative to paper tags.
8. Donation Items:
- When donating handmade items to charity, a small label stating "Handmade with Love" or "Donated by [Your Name]" can add warmth and appreciation.
9. Costume & Theatrical Wardrobe:
- Label individual costume pieces with character names, actor names, or scene numbers for efficient organization during productions.
- *Hypothetical Scenario:* "During a chaotic theater production, we used printable fabric labels to tag every single costume piece with the character and scene. It saved us from countless wardrobe malfunctions and misplaced items!"
10. Recipe Labels for Fabric Gift Items:
- If you're gifting baked goods in a fabric-wrapped container or a bottle with a fabric sleeve, print a small label with the ingredients or recipe instructions.
11. Tool Identification:
- Label your fabric tool cases, sewing machine cover, or craft organizers with your name or a fun graphic.
12. Seasonal Decor & Home Linens:
- Label pillow covers, table runners, or even fabric wall hangings for easy identification when storing them away, especially for seasonal items. This is particularly helpful for me when I’m trying to find my Halloween pillow covers in a sea of storage bins!
Wash & Wear: Ensuring Durability and Longevity
What’s the point of a beautiful label if it fades, peels, or disintegrates after the first wash? Ensuring the durability and longevity of your printable fabric labels is paramount, especially for items that will see frequent use or washing. This section delves into the secrets of making your labels stand the test of time, wash after wash.
1. Choose the Right Fabric Sheet:
- Washable & Colorfast: Always select printable fabric sheets specifically labeled as "washable" and "colorfast." These are pre-treated to hold ink better.
- Printer Compatibility: Ensure the sheet is compatible with *your* printer type (inkjet or laser). Laser prints tend to be more inherently water-resistant due to the toner fusing process.
- Material Composition: Cotton sheets are generally very durable, while satin can be softer but might require more delicate handling.
2. Use Quality Ink:
- Pigment Ink (Inkjet): If using an inkjet printer, pigment-based inks are significantly more fade and water-resistant than dye-based inks. Check your printer's ink specifications.
- Original Manufacturer Ink: Stick to your printer's brand of ink cartridges. They are formulated to work best with your printer and often contain specific properties for durability.
3. Proper Curing/Setting:
- Heat Set: Most printable fabric labels (especially inkjet) require heat-setting to permanently bond the ink to the fabric fibers and make them washable. This usually involves ironing the *printed label* (before or after application, follow instructions) for a specific duration.
- Air Dry Time: Allow printed labels to air dry for at least 24-72 hours *before* the first wash. This allows the ink to fully cure and set into the fabric. Skipping this step is a common pitfall!
4. Attachment Method Matters:
- Sew-In Labels: These are generally the most durable option as they are physically sewn into the item. Even if the ink eventually fades over many years, the label itself remains attached.
- Iron-On Labels: Their durability depends heavily on proper application (sufficient heat, pressure, and time) and the quality of the adhesive. A high-quality iron-on will last through many washes, but poor application can lead to peeling.
5. Reinforce Edges (for sew-in):
- For sew-in labels, sewing around all four edges (or along the fold for loop tags) prevents fraying and ensures the label stays securely attached.
- Fray Check: Apply Fray Check liquid sealant to the raw edges of your cut labels *before* sewing them on for extra protection against fraying.
6. Washing Instructions for the Labeled Item:
- Follow Label Care: If your item has care instructions on the label, make sure to follow them! The label itself will likely withstand the washing conditions it recommends for the garment.
- Gentle Cycle/Cold Water: For handmade items with labels, a gentle cycle with cold water is often best to preserve both the item and the label. Avoid harsh detergents or bleach.
- Avoid High Heat Drying: Tumble drying on high heat can degrade both fabric and adhesives over time. Air drying or low heat is preferable.
7. Test, Test, Test!
- Before printing a whole batch, print a single test label. Apply it to a scrap piece of fabric similar to your final project. Wash and dry it a few times to see how it holds up. This is invaluable!
- *Hypothetical Scenario:* "I once made a batch of dog bandanas with cute custom labels. Luckily, I tested one first. The first wash made the colors run! I switched to a different brand of printable fabric and re-tested, saving me from having to re-make all the bandanas."
8. Protection During Washing:
- For delicate items with labels, consider placing them in a mesh laundry bag before washing. This reduces friction and stress on the label.
9. Avoid Direct Ironing on Print (after application):
- Once applied, avoid ironing directly over the printed area of iron-on labels, especially at high heat, as this can sometimes reactivate the adhesive or cause ink to smear. If you must iron, place a pressing cloth over the label.
10. Storage of Unused Sheets:
- Store unused printable fabric sheets in their original packaging, away from direct sunlight and humidity, to maintain their quality and ensure consistent printing results. This is my go-to tip for ensuring the sheets perform optimally every time.
11. Consider Laser for Extreme Durability:
- If you have access to a laser printer, the toner-based printing process generally offers superior water and smudge resistance compared to inkjet, making it a top choice for highly durable labels.
12. The "Handmade" Factor:
- While striving for professional quality, remember that handmade items often carry a certain charm from their unique imperfections. A slight softening of a label's color over many years can actually add to its character and tell a story, much like a well-loved quilt.
Design Delights: Tips for Creating Stunning Label Graphics

The visual appeal of your printable fabric labels is just as important as their durability. A stunning design captures attention, communicates your brand effectively, and adds that extra touch of