Have you ever found yourself knee-deep in a crafting project, brimming with ideas, only to realize you’re missing that one perfect embellishment or shape? That little something that would take your creation from "nice" to "wow!"? I’ve been there more times than I can count. Just last month, I was putting together a scrapbook page for my niece's birthday, and I needed a tiny, intricate cupcake shape. My physical die collection came up short. That's when I remembered the sheer magic of printable die cuts. It was a total game-changer, and honestly, it saved my crafting sanity!
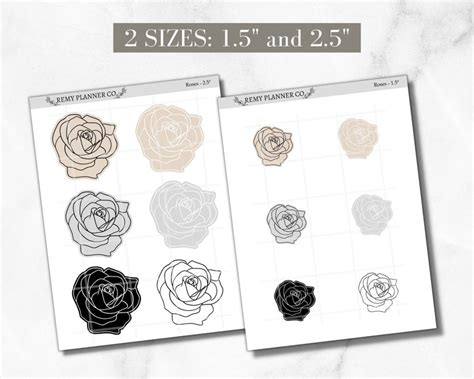
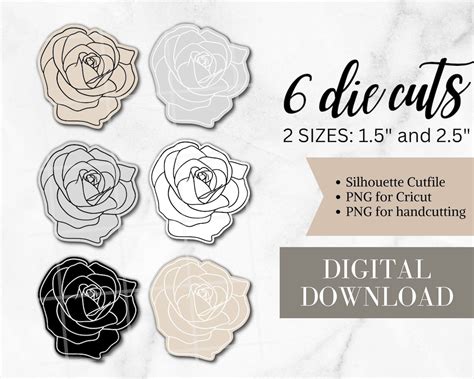
Printable die cuts are essentially digital templates and designs that you can print out at home, then cut either by hand or, more commonly, with an electronic cutting machine like a Cricut or Silhouette. They offer an endless wellspring of creativity, from intricate florals to witty sentiments, giving you instant access to virtually any shape or design imaginable. Whether you're a seasoned crafter looking for unique accents or a beginner just dipping your toes into the world of paper crafting, mastering printable die cuts is an invaluable skill that will unlock a whole new dimension of possibilities for your projects.
Embrace the World of Printable Die Cuts: Categories & Inspiration
Printable die cuts aren't just one-size-fits-all; they come in a dazzling array of styles and serve countless purposes. Let's dive into some popular categories and spark your next creative adventure.
### 1. Seasonal & Holiday Wonders
The holidays are a crafter’s dream, and printable die cuts make it easier than ever to add festive flair. From shimmering snowflakes to spooky spiders, these designs bring the spirit of the season right to your fingertips.
- Festive Foliage: Think holly leaves, mistletoe sprigs, or autumn maple leaves for cards, scrapbooks, or gift tags.
- Spooky Silhouettes: Ghosts, bats, pumpkins, and haunted house shapes are perfect for Halloween party decor or treat bags.
- Sweet Hearts & Arrows: Ideal for Valentine's Day cards, romantic scrapbooking layouts, or even wedding favors.
- Easter Eggs & Bunnies: Bright, cheerful designs for springtime crafts, basket tags, or educational games for kids.
- Firework Bursts: Celebrate New Year's Eve or patriotic holidays with dynamic, explosive shapes.
- Tiny Ornaments: Print and cut miniature Christmas baubles or stars to adorn homemade cards or small gifts.
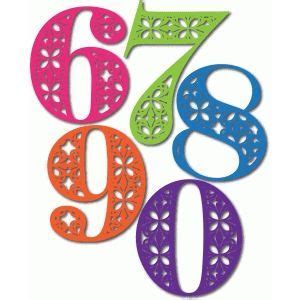
- Themed Banners: Individual letters or pennant shapes with holiday patterns to spell out "Happy Birthday" or "Merry Christmas."
- I once used intricate snowflake printable die cuts to create a stunning winter wonderland backdrop for a school play. It looked incredibly complex, but it was just smart printing and layering!
### 2. Everyday Essentials & Sentiments
Sometimes, it’s the simple things that make the biggest impact. These printable die cuts are your go-to for adding polished, heartfelt touches to everyday projects.
- Classic Labels & Tags: Perfect for organizing pantry items, labeling gifts, or adding a professional touch to homemade goods.
- Basic Geometric Shapes: Circles, squares, triangles, and stars in various sizes are fundamental for layering and creating visual interest.
- "Thank You" & "Hello" Banners: Pre-designed sentiments ready to adorn cards, gift baskets, or journal pages.
- Cute Animals & Critters: Adorable little creatures like bears, foxes, or birds that add a whimsical touch to children's projects or baby shower gifts.
- Floral Clusters: Small bouquets or individual flower and leaf designs for elegant card making or scrapbook embellishments.
- Borders & Edges: Decorative strips that can elevate the look of any paper project, from certificates to photo frames.
- Speech Bubbles: Blank or pre-filled with common phrases for interactive cards or fun journal entries.
- I always keep a stash of "hello" and "thank you" printable die cuts ready for last-minute cards. They make sending a heartfelt message so quick and easy!
### 3. Whimsical & Playful Designs
Unleash your inner child and add a dash of fun to your crafts with these delightful and imaginative printable die cuts.
- Fantasy Creatures: Unicorns, dragons, fairies, and gnomes to bring magical worlds to life in journals or party decorations.
- Food & Drink Icons: Mini cupcakes, coffee cups, ice cream cones – perfect for recipe cards, party invites, or food-themed scrapbooks.
- Travel Motifs: Suitcases, globes, airplanes, and famous landmarks for documenting adventures or creating travel-themed decor.
- Doodle Art: Quirky, hand-drawn style shapes and characters that add a unique, artistic flair.
- Cartoon Characters: If you have access to licensed designs, these can be a huge hit for kids' parties or personalized gifts.
- Outer Space Elements: Planets, stars, rockets, and astronauts for cosmic-themed projects.
- Musical Instruments: Guitars, pianos, microphones for music lovers or event invitations.
- My absolute favorite is using oversized whimsical flower printable die cuts for my vision board. They make it feel less like a chore and more like a joyful garden of dreams!
### 4. Functional & Organizer Helpers
Printable die cuts aren't just pretty; they can be incredibly practical! Use them to bring order and efficiency to your daily life, especially within planners and journals.
- Planner Icons: Small symbols for appointments, chores, workouts, or special events that help you visually organize your day.
- Divider Tabs: Customizable tabs for journals, binders, or recipe books, making it easy to flip to specific sections.
- Pocket Folders: Small, foldable die cuts that create pockets to hold ephemera, notes, or receipts in journals or scrapbooks.
- Calendar Grids: Print and cut your own mini-calendars for bullet journals or memory planners.
- Bookmark Shapes: Design your own unique bookmarks with intricate details or beloved characters.
- File Box Labels: Larger, more robust designs for categorizing storage boxes or office files.
- Recipe Card Blanks: Specialized shapes for writing out recipes, often with decorative elements.
- I relied heavily on printable die cuts for my first "Bullet Journal" setup. Creating custom tabs and little "to-do" list icons made my chaotic life feel so much more organized. It was surprisingly therapeutic!
### 5. Advanced Layering & Dimension
For those ready to take their crafting to the next level, certain printable die cuts are designed specifically for creating depth and intricate, multi-dimensional effects.
- Shadow Layers: Multiple versions of the same shape, each slightly offset or larger, to create a layered, shadowed effect.
- Pop-Up Mechanisms: Die cuts that include score lines and tabs to create a pop-up element when a card is opened.
- Intricate Mandalas: Complex, detailed designs that look stunning cut from various colored papers and layered.
- 3D Boxes & Containers: Templates for small gift boxes, favor boxes, or display cases that fold into shape.
- Shaker Card Elements: Frames and inner shapes designed to create a "window" for shaker bits in cards.
- Explosion Box Components: Die cuts for the various layers and embellishments that make up an intricate explosion box.
- Window Cut-Outs: Pre-designed frames or shapes that can be cut into a card front to reveal a design underneath.
- Creating a multi-layered floral bouquet using various shades of green and pink printable die cuts, then popping them up with foam adhesive, is my favorite way to add serious "wow" factor to a card. Trust me, you don’t want to mess this up by skimping on the foam dots!
Tips for Personalizing Your Printable Die Cut Projects
Making your crafts uniquely "you" is the ultimate goal. Here’s how to infuse your personality and thoughtfulness into every project involving printable die cuts.
- Mix & Match: Don't be afraid to combine different die cut designs from various sets. A whimsical animal with a classic label, for instance, can create a surprising and delightful contrast.
- Choose Your Paper Wisely: The type, color, and texture of paper can dramatically change the feel of your die cut. Experiment with glitter cardstock, vellum, or textured specialty papers. I find that a good quality 65lb cardstock is my everyday champion, but for more intricate cuts, I’ll sometimes go lighter.
- Incorporate Personal Touches: If it's a gift or a message for someone, use die cuts that subtly reference their hobbies, favorite colors, or inside jokes. Did they love that one specific video game? See if you can find a tiny pixelated heart or sword printable die cut to tuck in!
- Add Hand-Drawn Details: Once your die cut is on your project, consider adding small hand-drawn lines, dots, or sentiments with a fine-tip pen. This adds a unique, handcrafted feel.
- Experiment with Embellishments: Don't stop at just the die cut! Add small rhinestones, enamel dots, glitter glue, or even a tiny bow. These little additions can really make a die cut pop.
- Layer with Purpose: Think about how you want to create depth. Use foam adhesive for dimension, or simply layer flat for a more subtle effect. My personal preference is always to pop up at least one element – it just adds that professional touch that makes people ask, "How did you do that?!"
Common Pitfalls: What to AVOID When Working with Printable Die Cuts
Even seasoned crafters can make mistakes. Learn from my "oops" moments so your journey with printable die cuts is smooth sailing!
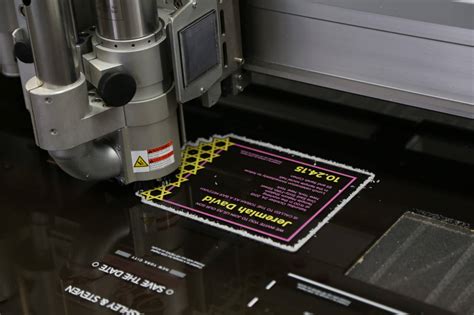
- Forgetting to Calibrate Your Printer/Cutter: This is a big one! If your printer and cutting machine aren't perfectly aligned, your cuts will be off-center. Always do a test cut. Don't be like me and rush through a batch of intricate designs, only to find they all have a wonky white border!
- Using the Wrong Paper Weight: Paper that’s too thin can tear easily during cutting, especially with intricate designs. Paper that’s too thick might not cut cleanly, leaving ragged edges. Always check your machine's settings and paper recommendations.
- Not Cleaning Your Cutting Mat: A dirty, non-sticky mat will lead to your paper shifting during the cut, resulting in ruined die cuts. Clean your mat regularly with baby wipes or rubbing alcohol to maintain its stickiness.
- Rushing the Cut: Patience is a virtue in crafting. Don't try to speed up the cutting process or remove the paper too quickly from the mat. Go slow, especially with delicate designs.
- Ignoring Your Blade: A dull blade will chew, rather than cut, your paper. If your cuts are ragged, it's probably time for a new blade. This is one of those lessons I learned the hard way – a fresh blade makes all the difference!
- Over-Cutting (Too Many Passes): Unless absolutely necessary for very thick material, multiple passes can wear out your paper and blade, potentially causing tears or rough edges. Stick to the recommended settings.
- Forgetting to Save Your Designs: If you've customized a printable die cut or created a new layout, *save it!* There's nothing worse than perfecting a design only to lose it.
Conclusion
Stepping into the world of printable die cuts is like discovering a secret crafting superpower. They offer unparalleled versatility, allowing you to bring virtually any creative vision to life with precision and ease. From holiday cheer to daily organization, the possibilities are truly endless. So, go ahead, dive in! Experiment with different designs, play with papers, and don't be afraid to personalize. Your next crafting masterpiece is just a print and a cut away. Now go make some magic – your craft stash (and your friends!) will thank you!