Oh, fellow crafters, do you ever feel that moment of pure magic when your creation starts to gaze back at you? That spark, that personality, that *soul* that emerges when you add the perfect eyes? I know I do. I remember countless times meticulously sketching tiny eyes onto a handmade doll, only to erase them again and again, frustrated that I just couldn't capture the whimsical innocence or mischievous twinkle I envisioned. It was a struggle, a real craft block, trying to give my creations that final, defining touch. Then, a few years ago, I stumbled upon the world of printable eyes for crafts, and my entire creative universe shifted. Suddenly, the possibilities exploded! No more wobbly pupils or uneven irises – just vibrant, expressive eyes ready to infuse life into every project. Trust me, if you’ve ever felt that same longing to truly bring your characters to life, you’re in for an absolute treat.
This isn't just about sticking on a pair of pre-made eyes; it's about unlocking a whole new dimension of creativity. From charming plushies to spooky Halloween decorations, intricate paper dolls to whimsical puppets, printable eyes for crafts offer unparalleled versatility, customization, and a level of detail that’s hard to achieve with traditional methods. Whether you're a seasoned artisan looking for advanced techniques or a beginner eager to add that professional polish, this comprehensive guide is your passport to transforming your crafting journey. We're going to dive deep, exploring everything from choosing the perfect style and mastering printing techniques to advanced customization and innovative applications. So, grab your favorite crafting beverage, settle in, and let's embark on this eye-opening adventure together!
Table of Contents

- [The Magic of Printable Eyes: Why They're a Game-Changer for Crafters](#the-magic-of-printable-eyes-why-theyre-a-game-changer-for-crafters)
- [Decoding the Styles: A Universe of Printable Eye Designs](#decoding-the-styles-a-universe-of-printable-eye-designs)
- [From Screen to Craft Table: Your Essential Guide to Printing Perfection](#from-screen-to-craft-table-your-essential-guide-to-printing-perfection)
- [Beyond the Basics: Advanced Customization and Digital Wizardry for Printable Eyes](#beyond-the-basics-advanced-customization-and-digital-wizardry-for-printable-eyes)
- [Bringing Them to Life: Creative Applications and Craft Projects for Every Eye Style](#bringing-them-to-life-creative-applications-and-craft-projects-for-every-eye-style)
- [Troubleshooting Your Eyeball Adventures: Common Pitfalls and Smart Solutions](#troubleshooting-your-eyeball-adventures-common-pitfalls-and-smart-solutions)
- [The Ultimate Resource Hub: Where to Find, Create, and Share Your Printable Eye Designs](#the-ultimate-resource-hub-where-to-find-create-and-share-your-printable-eye-designs)
- [The Art of Expression: Matching Eyes to Your Craft's Soul](#the-art-of-expression-matching-eyes-to-your-crafts-soul)
- [Making Them Last: Tips for Durability and Longevity of Your Printable Eyes](#making-them-last-tips-for-durability-and-longevity-of-your-printable-eyes)
- [Printable Eyes for Every Occasion: Seasonal & Thematic Crafting Ideas](#printable-eyes-for-every-occasion-seasonal--thematic-crafting-ideas)
- [How to Choose the Best Printable Eyes for Your Needs](#how-to-choose-the-best-printable-eyes-for-your-needs)
- [Common Pitfalls to Avoid When Using Printable Eyes](#common-pitfalls-to-avoid-when-using-printable-eyes)
- [Advanced Tips for Crafting with Printable Eyes](#advanced-tips-for-crafting-with-printable-eyes)
- [Conclusion: Your Crafting World, Reimagined](#conclusion-your-crafting-world-reimagined)
---
The Magic of Printable Eyes: Why They're a Game-Changer for Crafters
Let's be honest, those little plastic safety eyes, while convenient, can sometimes feel a bit... limiting. And painting eyes? That's a skill that takes years to master, often leading to uneven results or a lack of intricate detail. This is where printable eyes for crafts sweep in like a crafting superhero, ready to rescue your projects from blandness and inject them with unparalleled character. But what exactly makes them so revolutionary?
1. Unmatched Variety and Customization: This is the biggest draw. From realistic human eyes with intricate irises and reflections to whimsical cartoon eyes, spooky monster eyes, or even anime-inspired sparkly gazes – the options are literally endless. You can find eyes in every color, shape, and expression imaginable.
2. Cost-Effectiveness: Say goodbye to buying packs of safety eyes in limited sizes and colors. With a printer and some paper, you can create hundreds of eyes for a fraction of the cost, often using free templates or affordable digital downloads. This is especially fantastic when you're making multiple items, like a whole army of plushie monsters.
3. Perfect Sizing Every Time: Ever found the perfect eye, only to realize it's too big or too small for your project? Printable eyes solve this! You can resize them digitally before printing, ensuring a flawless fit for any craft, no matter how tiny or gargantuan. I once spent an entire afternoon trying to find tiny safety eyes for a miniature felt mouse; if only I'd known about resizing printables then, I would've saved so much frustration!
4. Ease of Application: Once printed and cut, these eyes can be attached with a variety of adhesives, making them suitable for fabric, paper, wood, clay, and more. No special tools required beyond scissors and glue.
5. Adding Depth and Realism (or Whimsy!): The ability to print eyes with subtle color gradients, highlights, and even tiny veins makes your creations incredibly lifelike. Conversely, you can go wild with exaggerated pupils and vibrant colors for a truly fantastical look.
6. Experimentation Without Commitment: Don't like how a certain eye style looks on your puppet? No problem! Just print another set. This freedom to experiment without wasting expensive materials is a huge advantage. It encourages creative play and helps you discover new aesthetics you might not have dared to try otherwise.
7. Accessibility for All Skill Levels: Whether you're a seasoned digital artist designing your own eyes or a beginner simply printing pre-made templates, the process is straightforward. No need for advanced painting skills or specialized crafting techniques. My friend, who's just starting out in doll making, was so thrilled when she realized she could give her first fabric doll beautiful, expressive eyes without needing to master a paintbrush.
8. Digital Backups: Once you've purchased or created a digital eye file, you have it forever! No more worrying about running out of a specific eye size or color. You can reprint them whenever you need, ensuring consistency across a series of projects.
9. Beyond Just Eyes: The techniques you learn for printing and applying these eyes can be extended to other printable craft elements – think tiny buttons, logos, facial expressions, or decorative patterns. It's a gateway skill to a wider world of digital crafting.
10. A Personal Touch: When you're able to choose, customize, and apply eyes that perfectly match the personality of your creation, it infuses the craft with a piece of your own artistic vision. It’s a silent conversation between you and your creation, bringing it to life in a way that truly feels unique.
The shift to using printable eyes for crafts has truly revolutionized how many of us approach our projects, offering a blend of artistic freedom, practicality, and endless creative possibilities. It’s a game-changer that every crafter, from beginner to expert, should explore.
---
Decoding the Styles: A Universe of Printable Eye Designs

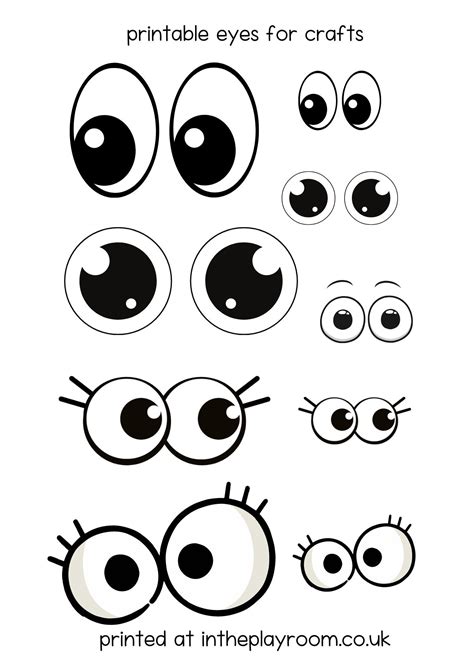
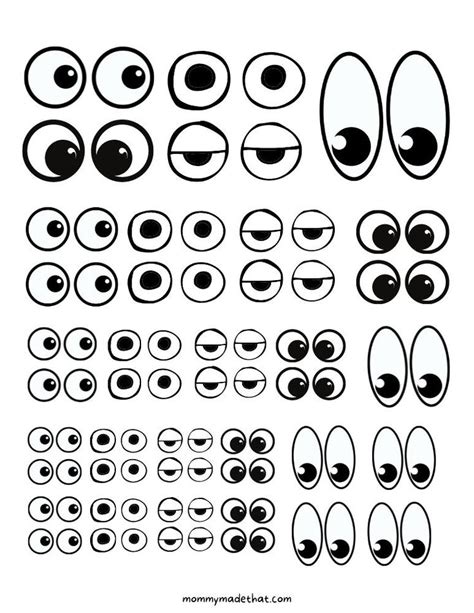
One of the most thrilling aspects of working with printable eyes for crafts is the sheer, dazzling array of styles available. It’s not just about color; it’s about shape, expression, detail, and the overall vibe you want your creation to exude. Let's explore some of the most popular and versatile categories, each capable of transforming your craft into something truly unique.
1. Realistic Human/Animal Eyes:
- Description: These eyes mimic the intricate details of actual eyes, featuring detailed irises, pupils, sclera (the white part), subtle blood vessels, and often realistic reflections.
- Best For: Dolls, realistic animal sculptures, masks, art dolls, taxidermy-style crafts, fantasy creatures that need a grounded look.
- Example 1: Imagine crafting a detailed felt fox. Instead of simple black beads, you print realistic amber fox eyes with a subtle slit pupil and tiny highlights. Suddenly, your fox isn't just felt; it's a cunning, vibrant creature.
- Example 2: For a custom art doll, I once found a printable set of human eyes with stunning emerald irises and faint red veins. When I layered them under a clear resin dome, they looked incredibly lifelike, giving the doll an almost unsettlingly real gaze. This completely elevated the doll's artistic impact.
2. Cartoon & Anime Eyes:
- Description: Characterized by exaggerated features, large pupils, vibrant colors, and often multiple layers of highlights to convey emotion (sparkle for joy, narrowed for mischief, huge for surprise).
- Best For: Plush toys, amigurumi, kawaii crafts, paper puppets, chibi figures, comic-style characters, children's crafts.
- Example 1: A fluffy monster plushie could get a pair of enormous, sparkly green anime eyes, instantly making it adorable and friendly, even with its rows of felt teeth.
- Example 2: My niece was making a paper puppet of her favorite cartoon character. We found printable eyes specifically designed in that character's style – big, expressive, and full of animated life. She was thrilled, saying, "Now it really looks like her!"
3. Monster & Creature Eyes:
- Description: These are where things get truly creative! Think reptilian slits, multiple eyes, alien black voids, glowing effects, jagged pupils, or eyes with strange textures.
- Best For: Halloween decorations, monster plushies, fantasy creatures, sci-fi props, horror-themed crafts, unique art pieces.
- Example 1: For a Halloween-themed felt bat, you could print glowing yellow eyes with jagged, bat-like pupils, making it look much more sinister and fun than plain black buttons.
- Example 2: I was once commissioned to make a series of "friendly" monster puppets for a children's show. I used printable eyes that were slightly mismatched, one with a spiral pupil and the other with a star, both in bright, unnatural colors. This gave each monster a distinct, quirky personality that the kids loved.
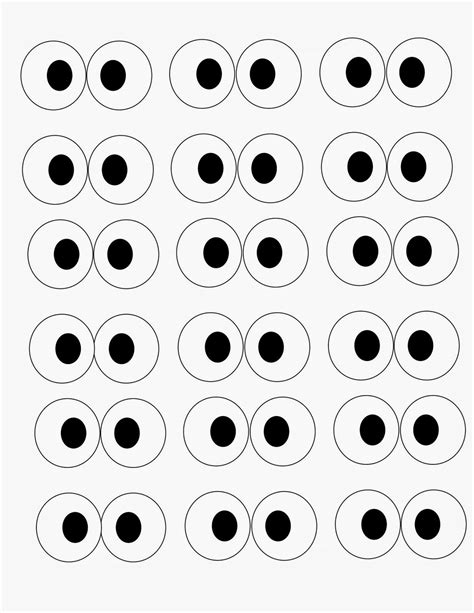
4. Googly/Wobbly Eyes (Printable Version):
- Description: While traditional googly eyes are physical, printable versions simulate their look, often with a white background and a black pupil that appears to "float" or move. Some advanced designs even incorporate a subtle shadow for a 3D effect.
- Best For: Humorous crafts, quick projects, paper bag puppets, cards, adding a playful touch where real googly eyes might be too bulky.
- Example 1: A simple paper craft monster could get a set of printable googly eyes, instantly adding a silly, playful charm without the bulk of actual plastic eyes.
- Example 2: My kids love making silly faces on paper plates. We printed out various sizes of "googly" eyes, and they had a blast cutting them out and glueing them on, making their creations look hilariously alive.
5. Vintage & Retro Eyes:
- Description: These capture the aesthetic of older dolls or illustrations, often with simpler designs, muted colors, or a distinct "glass eye" look. They might have a slightly faded or sepia tone.
- Best For: Vintage-style dolls, teddy bears, nostalgic crafts, steampunk projects, period-specific character designs.
- Example 1: For a reproduction of an antique teddy bear pattern, you could find printable eyes with a slightly cloudy, aged glass effect, perfectly matching the vintage aesthetic.
- Example 2: I made a series of little "cabinet of curiosities" creatures out of found objects. I used printable eyes that looked like old, mismatched doll eyes – some slightly cracked, others with faded irises – which gave each creature a wonderfully eerie, storied appearance.
6. Glitter & Sparkle Eyes:
- Description: These eyes are designed with embedded glitter textures, metallic sheens, or starburst highlights to create a dazzling, eye-catching effect.
- Best For: Fairy crafts, magical creatures, festive decorations, princesses, characters that need to convey enchantment or glamor.
- Example 1: Imagine a felt fairy doll with large, wide-set eyes that sparkle with tiny printed glitter. These aren't just eyes; they're tiny windows to a magical world.
- Example 2: For a unicorn plushie, I found printable eyes with a rainbow glitter effect in the iris. When I applied them, the unicorn instantly looked more enchanting and magical, making it a huge hit at the craft fair.
7. Button & Stitch Eyes (Illustrated):
- Description: These are digital illustrations of traditional craft eyes like buttons or embroidered stitches, offering the look without the bulk or the need for sewing.
- Best For: Fabric crafts where you want a flat finish, paper crafts, beginner sewing projects where real buttons might be tricky for small hands, minimalist designs.
- Example 1: A simple felt bird could have printed "button" eyes that look perfectly sewn on, giving it a charming, handmade aesthetic without any actual needlework.
- Example 2: My mom, who loves to quilt, often makes small fabric appliqué animals. She uses printable stitch eyes because they lie completely flat, don't interfere with the quilting, and still provide that lovely, hand-stitched look.
8. Expressive & Emotional Eyes:
- Description: These eyes are specifically designed to convey a particular emotion – angry, sad, surprised, joyful, sleepy, mischievous. The shape of the pupil, the presence of eyebrows (even if implied), and the highlights all contribute to the feeling.
- Best For: Puppets, character design, storytelling crafts, educational tools for emotions, interactive toys.
- Example 1: If you're making a set of emotional learning plushies for kids, you can print eyes specifically designed for "happy," "sad," "angry," and "surprised," instantly communicating the emotion.
- Example 2: I once created a series of small "worry dolls" and used printable eyes that looked perpetually calm and reassuring. It was amazing how much comfort those simple eyes brought to the project's purpose.
This incredible diversity means that no matter what you're crafting, there's a perfect pair of printable eyes for crafts waiting to give it life and personality.
---
From Screen to Craft Table: Your Essential Guide to Printing Perfection
Okay, you've found the perfect eye designs, brimming with potential. Now comes the crucial step: getting them from your screen onto your craft table. This isn't just about hitting "print"; it's about understanding the nuances that will ensure your printable eyes for crafts look crisp, vibrant, and professional.
### 1. The Right Printer Makes a Difference
- Inkjet vs. Laser:
- Inkjet: Generally preferred for crafts, especially if you want vibrant colors and photo-quality detail. Inkjets blend colors beautifully and are excellent for intricate designs. *Pro tip: Ensure your ink cartridges are full and clean for the best results.*
- Laser: Great for sharp lines and text, and laser prints are often more water-resistant. However, they might not achieve the same color vibrancy or subtle gradients as a good inkjet. If you're making simpler, cartoon-style eyes, a laser printer can work well.
- Printer Settings:
- Quality: Always select the highest print quality setting (e.g., "Photo Quality," "Best," "Fine"). This uses more ink but produces far superior results.
- Paper Type: Match the setting to your paper (e.g., "Glossy Photo Paper," "Matte Photo Paper," "Heavyweight Paper"). This tells the printer how much ink to lay down and how to dry it.
- Color Profile: If your printer allows, ensure it's set to a standard color profile like sRGB unless you have specific calibration needs.
### 2. Choosing Your Paper Wisely
The paper you print on is just as important as the design itself. Each type offers different finishes and durability.
- Matte Photo Paper:
- Pros: Excellent for rich, non-glossy colors. Absorbs ink well, reducing smudging. Great for a natural, soft look.
- Cons: Not water-resistant on its own. Can show fingerprints if handled excessively before a protective coat.
- Best For: Plushies, fabric crafts, paper dolls, any project where you want a smooth, non-reflective finish.
- Glossy Photo Paper:
- Pros: Produces vibrant, high-contrast colors with a reflective, shiny finish. Can make eyes look very realistic or glass-like, especially when combined with a resin or Mod Podge coating.
- Cons: Prone to fingerprints. Can smudge if not fully dry. The reflection might not be desirable for all projects.
- Best For: Dolls that need a "glass eye" look, projects where a glossy finish is desired, eyes that will be sealed with a clear coat.
- Cardstock (Heavyweight Matte/Glossy):
- Pros: Sturdy and durable, adds substance to the eyes. Good for projects where the eyes need to stand up a bit more.
- Cons: Can sometimes lose a bit of detail compared to dedicated photo paper. May be harder to cut with intricate details.
- Best For: Paper puppets, larger craft eyes, elements that need to maintain their shape, scrapbooking.
- Vinyl Sticker Paper (Printable Vinyl):
- Pros: Self-adhesive, making application incredibly easy. Often durable and sometimes water-resistant. Great for a clean, professional finish.
- Cons: Can be more expensive. Might require specific printer settings.
- Best For: Quick application, projects that need repositioning (some vinyls), surfaces where liquid adhesive is tricky. *I once made a series of little "love monster" cards for Valentine's Day, and using printable vinyl for the eyes saved me so much time with glue, plus they looked incredibly neat!*
- Fabric Transfer Paper:
- Pros: Allows you to iron the eyes directly onto fabric. Creates a seamless, integrated look.
- Cons: Can sometimes have a slightly plastic-y feel. Colors might not be as vibrant as photo paper.
- Best For: Fabric plushies, textile art, clothing embellishments.
### 3. Sizing Your Eyes for Perfection
This is critical! Don't just print and hope.
- Measure Your Craft: Before you even open the file, measure the area where the eyes will go. Use a ruler or flexible measuring tape.
- Digital Resizing: Most image editing software (even basic ones like Paint 3D, Preview, or online tools) allow you to resize images. If the eyes are provided on a template, you can usually scale the entire template in your print dialogue box.
- Tip for Beginners: Print a test sheet with eyes in several slightly different sizes (e.g., 90%, 100%, 110%) to see what works best before committing to a full sheet. This saves ink and paper!
- DPI (Dots Per Inch): For high-quality prints, look for eyes designed at 300 DPI or higher. Printing a low-DPI image at a large size will result in pixelation.
- Trial and Error: Don't be afraid to print a small test batch on plain paper first to check sizing. It’s better to waste a bit of cheap paper than expensive photo paper.
### 4. Cutting and Adhering Like a Pro
- Cutting Tools:
- Sharp Craft Scissors: Essential for clean edges. Invest in a good pair.
- Hobby Knife/X-Acto Knife: For intricate details or very small eyes. Use with a self-healing mat.
- Circle Punches: A game-changer for perfectly round eyes. Available in various sizes, they give a clean, professional cut every single time. *I swear by my circle punches for giving my plushies that perfectly symmetrical gaze. It makes such a difference!*
- Cutting Machines (Cricut, Silhouette): For advanced crafters, these machines can precisely cut out multiple eyes quickly and flawlessly, even with complex shapes.
- Adhesives:
- Craft Glue (PVA Glue): Versatile, dries clear, good for paper, felt, fabric.
- Fabric Glue: Specifically designed for textiles, offers a strong, flexible bond.
- Hot Glue: Quick-drying, strong, but can be bulky. Best for larger eyes or less delicate materials.
- Double-Sided Tape: Clean, no-mess option, especially for paper crafts.
- Mod Podge: Acts as an adhesive, sealer, and finish. Can give a nice protective coat.
- Clear Drying Gel Medium/Resin: For a really professional, domed, glass-like effect (more on this in advanced tips).
By paying attention to these details, you'll ensure your printable eyes for crafts are not just functional but truly shine, bringing a polished, professional look to all your handmade creations.
---
Beyond the Basics: Advanced Customization and Digital Wizardry for Printable Eyes
Once you've mastered the fundamentals of printing and applying printable eyes for crafts, you'll likely yearn for more control, more personalization, and truly unique results. This is where digital design tools come into play, transforming you from a mere printer to an eye-crafting sorcerer! Even if you're a beginner, don't be intimidated; many of these techniques can be learned with free or affordable software.
### 1. Harnessing Digital Art Software
- Adobe Photoshop/Illustrator (Paid, Professional):
- Expertise: The industry standard. Offers unparalleled control over color, layers, brushes, and effects. You can draw eyes from scratch, manipulate photos of real eyes, or customize existing templates with infinite precision.
- Capabilities: Create intricate irises, add realistic reflections, fine-tune color gradients, design unique pupils, and apply texturing. You can make eyes that look wet, glossy, matte, or even sparkly.
- Learning Curve: Steep, but countless tutorials are available.
- Procreate (iPad, Paid, Excellent for Digital Painting):
- Expertise: Intuitive and powerful for drawing. If you have an iPad and Apple Pencil, Procreate is a fantastic tool for sketching and painting unique eye designs.
- Capabilities: Great for hand-drawn, artistic, or whimsical eye styles. Easy to experiment with colors and brush strokes.
- Learning Curve: Moderate, very user-friendly.
- GIMP / Krita (Free, Open Source):
- Expertise: Powerful alternatives to Photoshop. GIMP is a robust image editor, and Krita excels at digital painting.
- Capabilities: Offer many of the same features as paid software for editing existing eye images or creating new ones.
- Learning Curve: Moderate to steep, similar to Photoshop.
- Canva / PicMonkey (Freemium, Web-Based, User-Friendly):
- Expertise: Excellent for quick edits and basic customization. Less about drawing from scratch, more about modifying templates.
- Capabilities: Change colors, add basic shapes (for highlights or pupils), layer elements, add text, resize.
- Learning Curve: Very gentle, ideal for beginners. *When I first started customizing eyes, I used Canva to simply change the iris color on a pre-made template, and it felt like magic!*
### 2. Customizing Existing Eye Templates
Even if you're not drawing from scratch, you can elevate downloaded templates:
- Color Swaps: Easily change the iris color to match a specific character or outfit.
- Adding Highlights/Reflections: A simple white dot or a subtle gradient can add immense depth and make eyes "pop." Use a soft-edged brush for a natural look.
- Pupil Manipulation: Change pupil shape (round, slit, star, heart), size, or even add a glow effect.
- Texture Overlays: Apply subtle textures like fabric weave, glitter, or subtle cracks to give the eyes character.
- Expression Adjustments: Slightly narrow or widen the eyes, add a tear duct, or even a tiny eyebrow line (if appropriate) to change the emotion.
- "Wet Look" Effect: Add a very subtle, light-blue or white crescent shape at the bottom of the iris to simulate moisture, then a tiny white dot for shine.
### 3. Creating Your Own Unique Eye Designs
For the truly adventurous, designing eyes from the ground up offers ultimate creative freedom.
- Start with Basic Shapes: Begin with a white circle for the sclera, then a colored circle for the iris, and a black circle for the pupil.
- Layering for Depth: Use multiple layers for different elements: base iris color, darker outer ring, lighter inner ring, reflections, shadows, and tiny details.
- Brushwork for Detail: Experiment with different brushes to create veins, subtle color variations, or unique patterns within the iris.
- Lighting and Shadows: Consider where the light source is coming from to accurately place highlights and shadows, giving the eye a 3D effect.
- Vector vs. Raster:
- Vector (Illustrator, Inkscape): Creates images using mathematical paths. Great for sharp lines and scalability without pixelation. Ideal for cartoon eyes or designs that need to be resized frequently.
- Raster (Photoshop, GIMP, Procreate): Creates images using pixels. Excellent for detailed textures, gradients, and realistic effects. Be mindful of resolution when resizing.
### 4. Integrating with Other Digital Tools
- 3D Modeling Software (Blender, ZBrush): For advanced users, you can design 3D models of eyes, render them with realistic lighting, and then flatten them into 2D images for printing. This is a powerful way to achieve hyper-realistic effects.
- AI Art Generators (Midjourney, DALL-E): You can use AI to generate unique eye concepts or styles, then refine them in image editing software. *I've used Midjourney to generate fantastical creature eyes with glowing pupils and intricate patterns, then cleaned them up in Photoshop for my monster plushies – it's a huge time-saver for brainstorming!*
- Digital Scrapbooking Software: Many digital scrapbooking programs have tools for layering and manipulating images that can be adapted for eye design.
By diving into these advanced techniques, you’ll discover that printable eyes for crafts are not just templates but a canvas for your digital artistry, allowing you to create truly bespoke and captivating expressions for all your projects.
---
Bringing Them to Life: Creative Applications and Craft Projects for Every Eye Style
The beauty of printable eyes for crafts lies not just in their variety but in their incredible versatility. They can elevate almost any project, adding personality and realism (or whimsy!) in ways that other eye