Have you ever felt that nagging frustration of a brilliant idea slipping away because you didn't have a quick, accessible place to jot it down? Or perhaps you're tired of sticky notes cluttering your desk, only to be lost or discarded, taking your important thoughts with them? Maybe you're a parent trying to wrangle a chaotic family schedule, a student drowning in assignments, or a professional yearning for a more flexible way to brainstorm and plan. If any of this resonates, trust me, you're not alone. I’ve been there – staring at a blank wall, wishing I had a magic board that could transform with my every need, without breaking the bank or taking up permanent space.
That’s exactly where the unsung hero of organization and creativity enters the scene: the printable dry erase board. It’s not just a fancy piece of paper; it’s a revelation, a customizable powerhouse that brings the best of traditional whiteboards into your home, office, or classroom with unparalleled flexibility and affordability. Imagine being able to design your *perfect* planner, your *ideal* brainstorming tool, or your *dream* chore chart, print it out, and use it over and over again. This isn't just about saving paper; it's about reclaiming your mental space, fostering creativity, and injecting a dose of delightful practicality into your daily life.
I still remember my "aha!" moment: I was trying to manage a complex project with multiple moving parts, and my digital tools felt too rigid, while paper notes became a mountain of chaos. I needed something visual, tactile, and easily editable. That's when I stumbled upon the concept of printable dry erase boards. It felt like discovering a secret hack that instantly decluttered my mind and my workspace. What started as a simple printed calendar laminated at home quickly evolved into a custom Kanban board, then a family menu planner, and now, a whole universe of possibilities. This guide is born from that journey – from frustration to fascination, and from experimentation to expertise. I’m here to share everything I’ve learned, so you can skip the trial and error and dive straight into the magic. You’re about to unlock a world of personalized organization, and trust me, you don’t want to miss this!
---
Table of Contents

- [Unveiling the Magic: What Exactly Are Printable Dry Erase Boards?](#unveiling-the-magic-what-exactly-are-printable-dry-erase-boards)
- [The Irresistible Benefits: Why You Need a Customizable Canvas in Your Life](#the-irresistible-benefits-why-you-need-a-customizable-canvas-in-your-life)
- [Your Blueprint for Brilliance: Exploring Popular Printable Dry Erase Templates](#your-blueprint-for-brilliance-exploring-popular-printable-dry-erase-templates)
- [DIY Dry Erase Dream: A Step-by-Step Guide to Crafting Your Own](#diy-dry-erase-dream-a-step-by-step-guide-to-crafting-your-own)
- [Beyond the Basics: Advanced Customization & Creative Applications](#beyond-the-basics-advanced-customization--creative-applications)
- [The Right Tools for the Job: Choosing Your Materials Wisely](#the-right-tools-for-the-job-choosing-your-materials-wisely)
- [Productivity Power-Ups: Hacking Your Day with Printable Dry Erase Boards](#productivity-power-ups-hacking-your-day-with-printable-dry-erase-boards)
- [Fun & Games: Unleashing Creativity Beyond Organization](#fun--games-unleashing-creativity-beyond-organization)
- [Longevity & Luster: Care, Maintenance, and Troubleshooting](#longevity--luster-care-maintenance-and-troubleshooting)
- [The Future is Bright (and Erasable!): Innovations & Emerging Trends](#the-future-is-bright-and-erasable-innovations--emerging-trends)
- [How to Choose the Best Printable Dry Erase Board for Your Needs](#how-to-choose-the-best-printable-dry-erase-board-for-your-needs)
- [Common Pitfalls to Avoid with Printable Dry Erase Boards](#common-pitfalls-to-avoid-with-printable-dry-erase-boards)
- [Advanced Tips for Mastering Your Printable Dry Erase Boards](#advanced-tips-for-mastering-your-printable-dry-erase-boards)
- [Conclusion: Your Erasable Journey Awaits!](#conclusion-your-erasable-journey-awaits)
---
Unveiling the Magic: What Exactly Are Printable Dry Erase Boards?
At its heart, a printable dry erase board is a clever hack that transforms any printed document into a reusable, writable surface. It’s essentially a piece of paper (or cardstock, or even photo paper) that has been treated or covered with a material that allows you to write on it with dry erase markers and then easily wipe the ink away. Think of it as a personal, portable, and infinitely customizable whiteboard that you can create yourself, tailored to your exact specifications.
The beauty lies in its simplicity and versatility. Unlike a rigid, store-bought whiteboard, a printable dry erase board isn't fixed in its design. You print the *template* you need – a calendar, a to-do list, a game board, a learning worksheet – and then you make it dry-erasable. This means you’re not stuck with generic layouts; you create precisely what serves *your* purpose.
### The Core Concept: Print, Protect, Erase, Repeat!
1. Print: You start by designing or downloading a template. This could be a simple grid, a complex planner, a detailed map, or anything your heart desires. The key is that it's *printed* on paper.
2. Protect: This is where the magic happens. You cover your printed template with a transparent, smooth, non-porous surface. The most common methods involve lamination (using a laminating machine or self-adhesive sheets) or placing it inside a clear sheet protector. This protective layer is what makes it dry-erasable.
3. Erase: Once protected, you can write on this surface with dry erase markers. The ink sits on top of the smooth layer and doesn't soak into the paper.
4. Repeat: When you're done, simply wipe the ink away with a cloth or eraser, and your template is ready for its next mission!
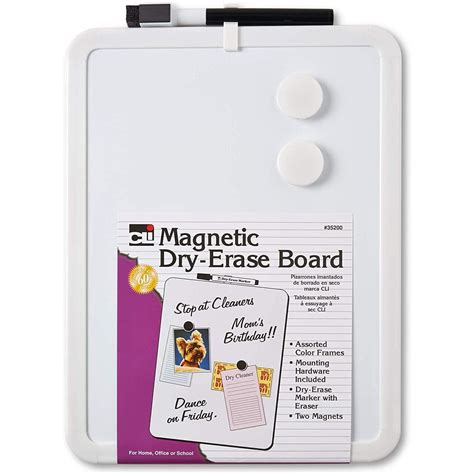
### Why They're a Game-Changer Compared to Traditional Whiteboards
Traditional whiteboards are fantastic, don't get me wrong. I have a huge one in my office that’s indispensable for big-picture planning. But they have their limitations:
- Fixed Design: Most whiteboards are just blank canvases. While great for freeform thought, they lack pre-printed structures like calendars or task lists. If you want lines, you have to draw them every time.
- Size & Portability: They're often large, heavy, and not easily moved. A small desk whiteboard is portable but still limited to its factory design.
- Cost: Quality whiteboards can be an investment.
- Aesthetics: You're often stuck with a plain white surface.
A printable dry erase board, on the other hand, offers:
- Infinite Customization: Want a weekly planner for your meals? A chore chart with your kids' names and specific tasks? A project management Kanban board? Design it, print it, make it dry-erasable.
- Affordability: You're primarily paying for paper, ink, and a laminating solution, which is significantly cheaper than a large physical whiteboard.
- Flexibility & Portability: Create boards of any size – from a small pocket-sized reminder to a large wall-mounted planner. They can be easily swapped out, stored, or transported.
- Dynamic Content: If your needs change, you simply print a new template. No need to buy a whole new board!
- Aesthetic Appeal: You can incorporate colors, fonts, images, and branding into your templates, making them as visually appealing as they are functional.
When I first realized the power of being able to *design* my own organizational tools, it felt like unlocking a secret level in a game. No more trying to force my workflow into a generic template; now, the template adapted to *me*. This is the core magic of the printable dry erase board, and it's a magic I'm thrilled for you to experience.
---
The Irresistible Benefits: Why You Need a Customizable Canvas in Your Life
Okay, so we know what a printable dry erase board is, but why should *you* care? Beyond the immediate "cool factor," these customizable canvases offer a plethora of practical, emotional, and even environmental benefits that make them an essential tool for just about anyone. Let’s dive deep into why this seemingly simple innovation is truly a game-changer.
### 1. Unmatched Customization and Personalization
This is, by far, the biggest draw. Generic isn't for everyone, and let's face it, most store-bought planners or whiteboards come with layouts that don't quite fit our unique needs.
- Tailored to Your Workflow: Whether you prefer a highly structured daily schedule, a free-form brainstorming space, or a visual project tracker, you can design it precisely.
- Aesthetic Harmony: Match your printable dry erase board to your home decor, office branding, or personal style. Use your favorite colors, fonts, and even add personal photos or inspirational quotes. My personal preference? I love incorporating calming pastel colors into my daily planner to make my morning routine feel less like a chore and more like a gentle start to the day.
- Specific Niche Solutions: Need a board for tracking plant watering schedules? A list of local emergency contacts for a babysitter? A complex scientific formula for a study group? You can create hyper-specific tools that simply don't exist on the market. I once helped a friend design a board specifically for tracking her foster kittens' feeding and medication times – a truly life-saving tool for her!
### 2. Incredible Cost-Effectiveness
Traditional whiteboards, especially large, high-quality ones, can be expensive. Specialty planners and notebooks add up over time.
- One-Time Investment, Endless Returns: Your main costs are paper, ink, and a laminating solution (which you can reuse for countless projects). Once you have these, the templates are often free or very low cost to design or download.
- No More Recurring Purchases: Say goodbye to buying new planners every year or new notebooks every month. Print, erase, repeat. It’s like having an infinite supply of fresh pages.
- Reduced Waste: While not entirely waste-free (you still use paper and laminate), the reusability significantly reduces the amount of paper you'd typically go through with disposable notes and planners.
### 3. Boosting Productivity and Organization
Visual tools are incredibly powerful for cognitive processing. Having your plans, goals, and tasks laid out in front of you can drastically improve efficiency.
- Clarity at a Glance: Instantly see your priorities, deadlines, and progress without flipping through pages or clicking through screens.
- Reduced Mental Load: Offload information from your brain onto a tangible surface, freeing up mental energy for deeper thinking.
- Enhanced Focus: A dedicated board for a specific task helps you stay on track and minimize distractions. For example, a project manager I know started using a custom printable Kanban board for his team, and it literally saved them during a project crunch, helping them visualize bottlenecks and reallocate resources in real-time.
### 4. Fostering Creativity and Learning
Beyond rigid planning, these boards are fantastic for imaginative play and educational purposes.
- Kids' Learning Hub: Create reusable worksheets for tracing letters, practicing math, or drawing. It's an eco-friendly alternative to endless printouts.
- Brainstorming Powerhouse: Quickly jot down ideas, draw diagrams, and connect concepts without the commitment of permanent ink. Erase and refine as your ideas evolve.
- Artistic Outlet: Design your own coloring pages or drawing prompts that can be used again and again. My daughter loves her custom "daily drawing challenge" board!
### 5. Eco-Friendly and Sustainable Choice
In an age where we're all trying to be more mindful of our environmental impact, printable dry erase boards offer a tangible step towards sustainability.
- Significant Paper Reduction: The core principle is reusability. Instead of using a new sheet of paper for every to-do list or daily schedule, you use one sheet hundreds of times.
- Long-Term Durability: With proper lamination, your custom boards can last for years, reducing the need for constant replacements.
- Conscious Consumption: It encourages a "make and reuse" mindset rather than a "buy and discard" one, which aligns with sustainable living principles.
### 6. Tactile Engagement in a Digital World
While digital tools are ubiquitous, there's something uniquely satisfying about writing by hand.
- Improved Memory Retention: Studies suggest that writing things down by hand can improve memory and comprehension compared to typing.
- Sensory Experience: The feel of the marker on the smooth surface, the visual satisfaction of wiping it clean – it engages multiple senses, making the planning process more enjoyable and effective.
- Digital Detox: A physical board offers a welcome break from screens, reducing eye strain and digital fatigue.
The benefits truly extend beyond mere utility. They touch upon efficiency, creativity, personal well-being, and even our planet. Embracing printable dry erase boards isn't just about getting organized; it's about empowering yourself with tools that adapt to *your* life, fostering a more productive, creative, and sustainable existence. Trust me, once you start, you'll wonder how you ever lived without them!
---
Your Blueprint for Brilliance: Exploring Popular Printable Dry Erase Templates
The real magic of printable dry erase boards lies in the infinite possibilities of their templates. This is where your creativity meets practicality, transforming a blank surface into a highly specific, functional tool. Whether you're a student, a parent, a professional, or just someone looking to bring more order to your day, there's a printable dry erase template out there for you – or, even better, one you can design yourself! Let’s explore some of the most popular and impactful categories.
### 1. The Essential Planners: Master Your Time and Tasks
These are probably the most common and arguably the most powerful uses for printable dry erase boards. They bring structure to chaos.
- Daily Planners: Break down your day hour-by-hour, list top priorities, schedule appointments, and track water intake. *Scenario: A freelancer uses a daily printable board to time-block client work, personal errands, and creative projects, ensuring nothing falls through the cracks and they maintain work-life balance.*
- Weekly Planners: Get a bird's-eye view of your week. Perfect for scheduling family activities, work deadlines, study sessions, or fitness routines.
- Monthly Calendars: Ideal for long-term planning, marking important dates, birthdays, holidays, and big project milestones.
- To-Do Lists (The Unending Kind!): Keep a running list of tasks, crossing them off (or erasing them!) as you go. You can have categories like "Work," "Home," "Errands," or "Future."
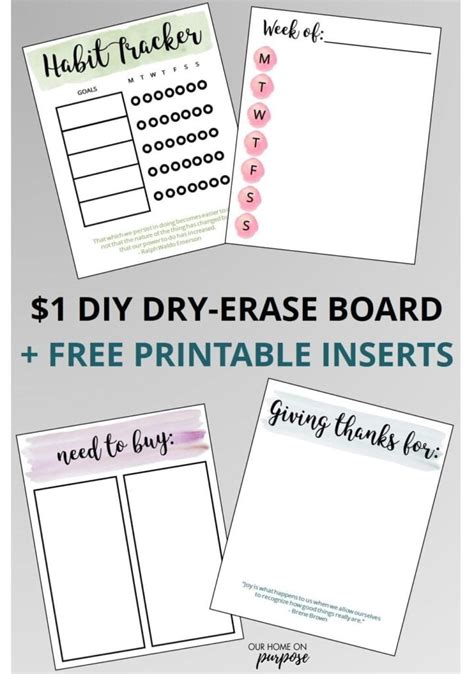
- Goal Trackers: Visualize your progress on personal or professional goals. Track habits (e.g., "meditate daily," "read 30 mins"), savings goals, or project phases.
- Habit Trackers: A simple grid to mark off daily habits like exercise, hydration, or learning a new skill. The visual progress is incredibly motivating!
### 2. Home & Family Harmony: Keeping Your Household Running Smoothly
Family life can be a whirlwind. Printable dry erase boards are excellent for creating shared understanding and responsibility.
- Family Chore Charts: Assign tasks, track completion, and keep everyone accountable. You can even add a reward system! *Scenario: A busy parent creates a colorful chore chart for their kids, making daily tidying a fun, visual game instead of a constant battle. The kids love seeing their progress and earning stars.*
- Meal Planners & Grocery Lists: Plan your weekly meals, reducing stress and food waste. As you plan, instantly generate a grocery list that you can take to the store (or snap a photo of!).
- Kids' Activity Schedules: Keep track of school events, sports practices, playdates, and appointments for everyone to see.
- Household Project Boards: Planning a renovation? A garden project? Break it down into manageable steps and assign tasks.
- Babysitter/Pet Sitter Instructions: A lifesaver! Print out all essential info: emergency contacts, routines, allergies, and special instructions. The sitter can easily add notes.
### 3. Academic & Professional Edge: Boosting Learning and Productivity
From students to seasoned professionals, these templates streamline learning and project management.
- Study Planners: Map out study sessions, assignment deadlines, and exam dates for different subjects.
- Vocabulary/Formula Boards: Write down new words, equations, or concepts for quick memorization and practice. Erase and rewrite until they stick!
- Project Management Boards (Kanban, Scrum): Visualize workflow, move tasks through "To Do," "In Progress," and "Done" columns. In a recent team meeting, we used a large printed Kanban board for a new feature launch. It was fantastic for identifying blockers and keeping everyone aligned – way more collaborative than a digital tool for real-time discussion.
- Meeting Agendas & Notes: Keep your meetings on track. Write down agenda items, key discussion points, and action items. Easily wipe and reuse for the next meeting.
- Brainstorming Grids/Mind Maps: Unleash creativity. Quickly sketch ideas, connect concepts, and explore possibilities without the pressure of permanence.
### 4. Creative & Fun Pursuits: Play, Imagine, and Grow
Not everything has to be about productivity. These boards are fantastic for pure enjoyment and creative expression.
- Kids' Drawing/Doodle Boards: Provide an endless canvas for artistic expression. Print a fun border or a drawing prompt.
- Game Score Trackers: For board games, card games, or even video game challenges. No more searching for scraps of paper!
- Reading Trackers/Challenges: List books you want to read, authors to explore, or track your progress through a reading challenge.
- Vision Boards: A powerful tool for manifesting goals. Print inspiring images or words, and arrange them to visualize your dreams.
- Interactive Learning Games: Create a blank tic-tac-toe grid, a hangman puzzle, or a "fill-in-the-blank" word game for instant, reusable fun.
### 5. Specialized & Niche Applications: When You Need Something Unique
The true power is in creating solutions for highly specific problems.
- Fitness Trackers: Log workouts, track reps, sets, and personal bests.
- Budgeting Worksheets: Monitor income, expenses, and savings goals.
- Language Learning Practice: Write out conjugations, new phrases, or practice calligraphy.
- Emergency Contact Boards: Keep vital numbers and information clearly visible for caregivers or family members.
- "In Case of Emergency" Medical Info: Perfect for those with specific health needs, clearly listing medications, allergies, and doctor's contacts.
The beauty of printable dry erase boards is that if you can imagine it, you can probably make it. Don't be afraid to experiment! Start with a popular template, and then think about how you can tweak it to perfectly fit *your* life and *your* needs. The world is your erasable oyster!
---
DIY Dry Erase Dream: A Step-by-Step Guide to Crafting Your Own
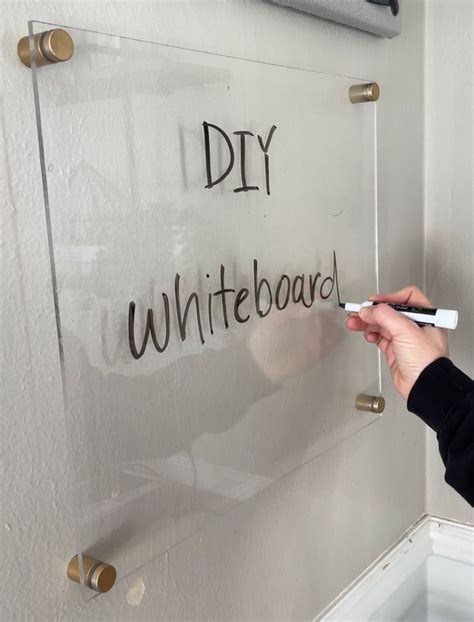
Feeling inspired to create your own customized dry erase board? Excellent! The DIY process is surprisingly straightforward, incredibly rewarding, and far more affordable than buying pre-made solutions. You don't need to be a crafting guru to master this; just a few simple tools and a little patience will get you there. Here's a comprehensive, beginner-friendly guide to making your own printable dry erase board.
### Step 1: Design or Download Your Template
This is where your vision comes to life!
- Design Your Own (Recommended for Customization):
- Software: You have many options!
- Canva (Free/Paid): User-friendly, drag-and-drop interface, tons of templates for calendars, planners, charts. Great for beginners.
- Microsoft Word/PowerPoint/Google Docs/Slides (Free with account): Excellent for basic grids, text-heavy planners, and simple layouts. You can insert tables, shapes, and text boxes.
- Adobe Illustrator/InDesign (Paid): For advanced users who want professional-grade design, intricate graphics, and precise layouts.
- Content: Think about what you need. A daily schedule? A chore chart? A brainstorming grid? Include sections for dates, tasks, notes, or even small decorative elements.
- Size: Design your template to fit the paper size you'll be printing on (e.g., US Letter, A4, Tabloid).
- Colors & Fonts: Choose colors that are pleasing to the eye and fonts that are easy to read. Remember, the dry erase marker will be on top, so don't make the background too busy.
- Download Pre-Made Templates:
- Online Resources: Many websites offer free printable templates for calendars, to-do lists, chore charts, etc. (e.g., Pinterest, Etsy (paid), various blog sites). Search for "free printable daily planner" or "printable weekly menu template."
- Etsy/Creative Market: You can also purchase beautifully designed, professional templates for a small fee if you're looking for something specific and don't want to design it yourself.
### Step 2: Print Your Masterpiece
The quality of your print will impact the final look of your dry erase board.
- Printer: Any inkjet or laser printer will work. Ensure your ink levels are good for a crisp print.
- Paper Choice:
- Standard Printer Paper (20-24 lb): Good for casual, quick-and-dirty boards. It's affordable and readily available.
- Cardstock (65-110 lb): My personal preference for most projects. It's thicker, more durable, and less prone to wrinkling during lamination. It gives your board a more substantial, professional feel.
- Photo Paper (Glossy or Matte): Can produce vibrant colors and a very smooth finish, but it's more expensive. Make sure it’s compatible with your printer.
- Print Settings:
- Always select "Best" or "High Quality" print settings for the clearest image.
- Choose "Actual Size" or "100%" to avoid scaling issues, unless you intentionally want to fit multiple small templates on one page.
### Step 3: Transform It into a Dry Erasable Surface (The Lamination Magic!)
This is the crucial step. You have several options for making your printed template reusable.
#### Option A: Using a Laminating Machine (Highly Recommended)
This is my go-to method for durability and a professional finish.
1. Get a Laminator: Small home laminators are surprisingly affordable (often under $30-$50) and a fantastic investment if you plan to make multiple boards.
2. Laminating Pouches: These come in various sizes (e.g., letter, legal, business card) and thicknesses (e.g., 3 mil, 5 mil, 7 mil, 10 mil).
- 3 mil: Good for basic protection, flexible.
- 5 mil: My recommendation for most printable dry erase boards. It's durable, stiff enough to feel substantial, but still somewhat flexible.
- 7-10 mil: Very stiff and durable, great for heavy-use items or signs, but can be harder to cut and more expensive.
3. Process:
- Preheat: Turn on your laminator and let it preheat according to the manufacturer's instructions (usually 5-10 minutes).
- Insert: Carefully place your printed template inside the laminating pouch, centering it and ensuring it's straight. Make sure the sealed edge of the pouch goes into the machine first.
- Feed: Gently feed the pouch into the laminator. It will slowly pull the pouch through, sealing the plastic layers together with heat.
- Cool & Trim: Once it comes out, let it cool completely on a flat surface. Trim any excess laminate around the edges with scissors or a paper trimmer, leaving a small sealed border (about 1/8 inch) to prevent peeling.
#### Option B: Self-Adhesive Laminating Sheets
No machine needed! Great for occasional use or larger items that won't fit a standard laminator.
1. Sheets: Buy self-adhesive laminating sheets. These usually come in packs and have a peel-and-stick backing.
2. Process:
- Clean Surface: Work on a clean, flat surface.
- Position: Peel back one corner of the self-adhesive sheet's backing. Carefully align it with one edge of your printed template.
- Smooth: Slowly peel away the rest of the backing while simultaneously smoothing the sheet down over your print with a credit card, ruler, or squeegee. Work from the center outwards to avoid air bubbles. This is the trickiest part – go slow!
- Repeat (if double-sided): If you want both sides laminated, flip the print and repeat the process on the other side with another sheet.
- Trim: Trim the edges, leaving a small border.
#### Option C: Clear Sheet Protectors/Document Sleeves
The absolute simplest and cheapest method, but also the least durable.
1. Sleeves: Buy standard clear plastic sheet protectors (the kind you use for binders).
2. Process:
- Simply slide your printed template inside the sheet protector.
- Secure (Optional): You can tape the open edges of the sheet protector closed for a bit more stability, but it's not strictly necessary.
- Limitations: This method is prone to shifting, and the plastic isn't as rigid or robust as laminated sheets. It's best for very temporary or low-use applications. The marker might also smudge more easily on some sheet protector plastics.
#### Option D: Clear Contact Paper/Vinyl
Similar to self-adhesive sheets but often comes in rolls.
1. Contact Paper: Purchase clear, self-adhesive contact paper.
2. Process:
- Cut a piece of contact paper slightly larger than your printed template.
- Carefully peel the backing from one edge and align it.
- Slowly smooth it over your print, working out air bubbles with a squeegee or cloth.
- Trim excess.
- Pro Tip: This can be a bit challenging to apply without bubbles, especially on larger prints. Enlist a friend to help hold one end if you're working with bigger pieces.
### Step 4: Mount or Display Your Board (Optional)
Once your printable dry erase board is laminated, how will you use it?
- Clipboard: Simply attach it to a clipboard for a portable solution.
- Magnets: Stick magnetic tape or small magnets to the back of your laminated board, and put it on your fridge, filing cabinet, or any magnetic surface. This is my go-to for kitchen planners!
- Tape/Adhesive Strips: Use painter's tape, removable adhesive strips (like Command strips), or even poster putty to attach it to a wall, cabinet, or mirror.
- Frame: Place it in a picture frame (without the glass) to give it a more finished look. The back of the frame provides rigidity.
- Binder: If you used sheet protectors, simply pop it into a binder.
### My Personal Anecdote: The Lamination Mishap!
I remember one of my first attempts at laminating a detailed weekly planner. I was so excited, I rushed the preheating step. The laminator wasn't quite hot enough, and when the pouch came out, it wasn't fully sealed. Air bubbles were everywhere, and the edges started to peel almost immediately. It was a wrinkled mess, and I had to start over! The lesson? Patience is key, especially with laminators. Always let it fully preheat, and if your laminator has a speed setting, a slower pass often yields better results for thicker pouches. Don't be like me and try to rush the process – a little patience upfront saves a lot of frustration later!
Crafting your own printable dry erase boards is a super satisfying process. It empowers you to create custom solutions for your unique challenges, and the feeling of wiping away a completed task on a board you made yourself is truly unparalleled!
---
Beyond the Basics: Advanced Customization & Creative Applications

Once you've mastered the art of creating basic printable dry erase boards, you'll inevitably start thinking, "What else can I do with this?" This is where the real fun begins! For seasoned users and those looking to elevate their dry erase game