Have you ever clutched a scalding hot coffee cup, juggling it between your palms, wishing there was a better way? Or perhaps you’re a small business owner, dreaming of a subtle, yet impactful, way to brand your delicious brews? Maybe you’re just a creative soul looking for a fun, personalized craft project that’s both practical and heartwarming. Trust me, I’ve been there. I remember my first attempt at a DIY coffee sleeve – a flimsy piece of cardstock, hastily taped, that offered more aesthetic charm than actual heat protection. It was a disaster, but it sparked a realization: there’s a whole world of potential in something as simple as a coffee cup sleeve, especially when it's *printable*.
This isn't just about protecting your hands; it's about making a statement, infusing personality into your daily ritual, or adding a professional touch to your brand. Printable coffee cup sleeves are a creative playground, offering endless possibilities for personalization, branding, and thoughtful gifting. They bridge the gap between functionality and flair, transforming an ordinary cup into a canvas for your imagination. This comprehensive guide will take you on a deep dive into everything you need to know, from choosing the right materials to designing jaw-dropping graphics, and even turning your passion into a small business venture. Whether you’re a complete beginner eager to try your hand at a new craft or a seasoned pro looking for advanced tips, you’re in the right place. Get ready to transform your coffee experience, one beautifully designed printable sleeve at a time!
Table of Contents

- [The Magic of Printable Sleeves: Why They're More Than Just Paper](#the-magic-of-printable-sleeves-why-theyre-more-than-just-paper)
- [Designing Your Dream Sleeve: Tools, Tips, and Creativity Unleashed](#designing-your-dream-sleeve-tools-tips-and-creativity-unleashed)
- [Materials Matter: Choosing the Right Paper & Printer for Perfect Sleeves](#materials-matter-choosing-the-right-paper--printer-for-perfect-sleeves)
- [From Concept to Coffee Cup: A Step-by-Step Printing & Assembly Guide](#from-concept-to-coffee-cup-a-step-by-step-printing--assembly-guide)
- [Printable Sleeves for Every Occasion: Ideas for Celebrations & Events](#printable-sleeves-for-every-occasion-ideas-for-celebrations--events)
- [Branding & Business: Elevating Your Coffee Shop with Custom Sleeves](#branding--business-elevating-your-coffee-shop-with-custom-sleeves)
- [Eco-Friendly & Sustainable Sleeves: Printing with a Conscience](#eco-friendly--sustainable-sleeves-printing-with-a-conscience)
- [Troubleshooting & Pro Tips: Avoiding Common Printable Sleeve Blunders](#troubleshooting--pro-tips-avoiding-common-printable-sleeve-blunders)
- [Beyond the Coffee Cup: Creative Uses for Printable Sleeves](#beyond-the-coffee-cup-creative-uses-for-printable-sleeves)
- [The Future of Sleeves: Innovations & Trends to Watch](#the-future-of-sleeves-innovations--trends-to-watch)
- [How to Choose the Best Printable Coffee Cup Sleeves for Your Needs](#how-to-choose-the-best-printable-coffee-cup-sleeves-for-your-needs)
- [Common Pitfalls to Avoid When Working with Printable Coffee Cup Sleeves](#common-pitfalls-to-avoid-when-working-with-printable-coffee-cup-sleeves)
- [Advanced Tips for Experts: Maximizing Your Printable Sleeve Potential](#advanced-tips-for-experts-maximizing-your-printable-sleeve-potential)
- [Conclusion](#conclusion)
---
The Magic of Printable Sleeves: Why They're More Than Just Paper

When we talk about printable coffee cup sleeves, we’re not just talking about a piece of paper that keeps your fingers from burning. Oh no, it’s so much more! These versatile little bands of creativity are a fusion of practicality, personal expression, and powerful branding. They are a statement, a mood, a mini-billboard, and a thoughtful gesture all rolled into one. Let's delve into the myriad reasons why printable sleeves are truly magical.
1. Personal Expression on the Go: Imagine sipping your morning latte from a cup adorned with a sleeve featuring your favorite quote, a quirky doodle you made, or a photo of your pet. It’s like wearing your personality on your sleeve – literally! For me, a particularly stressful morning was made infinitely better by a custom sleeve my daughter had drawn with a goofy monster and the words "You got this, Mama!" It was a small gesture, but it instantly changed my whole perspective.
2. Unleash Your Inner Designer: Whether you’re a graphic design pro or someone who just enjoys doodling, printable sleeves offer an accessible canvas. You don't need fancy equipment; a basic printer and some design software (even free ones!) are enough to get started.
3. Cost-Effective Customization: Compared to ordering custom-printed sleeves in bulk from a commercial printer, making your own printable coffee cup sleeves at home is incredibly budget-friendly. This is especially true for small batches or unique, one-off designs.
4. Instant Gratification: Need a dozen personalized sleeves for a party tomorrow? No problem! With printable templates, you can design, print, and assemble them in a matter of hours, not weeks. I once completely forgot about the personalized sleeves for a last-minute baby shower. Panic set in until I remembered I could just print them myself. Crisis averted!
5. Branding Powerhouse for Small Businesses: For independent coffee shops, bakeries, or even pop-up stands, custom printable coffee cup sleeves are an affordable way to establish brand identity and leave a lasting impression. It’s a subtle yet effective marketing tool that elevates your product.
6. Thoughtful Gifting: Imagine gifting a friend a bag of their favorite coffee beans, complete with custom sleeves featuring inside jokes or photos. It’s a personalized touch that shows you went the extra mile.
7. Event Enhancement: From weddings and birthdays to corporate events and trade shows, custom sleeves add a professional and cohesive touch, reinforcing themes or brand messages. They turn a simple coffee station into an interactive branding opportunity.
8. Eco-Friendly Potential: With the right material choices (which we'll explore later!), printable sleeves can be a surprisingly sustainable option, reducing waste from pre-printed, non-recyclable alternatives.
9. Protection with Panache: Beyond the aesthetics, the primary function of a coffee cup sleeve is, of course, to protect your hands from hot beverages. Printable sleeves allow you to combine this essential function with unparalleled style.
10. Educational & Fun Craft for Kids: It’s a fantastic way to engage children in a creative activity. They can draw, color, and design their own sleeves, learning about basic measurements and assembly in the process. My niece absolutely loves decorating sleeves for her imaginary tea parties.
11. Seasonal & Holiday Flair: Easily switch out your designs for different seasons, holidays, or special promotions. Think spooky Halloween sleeves, festive Christmas designs, or vibrant spring themes.
12. Community Building: For online communities or fan groups, creating custom printable coffee cup sleeves can be a fun way to share inside jokes, memes, or affirmations, fostering a sense of belonging among members.
Designing Your Dream Sleeve: Tools, Tips, and Creativity Unleashed

The blank canvas of a printable coffee cup sleeve awaits your artistic touch! This is where your vision comes to life. Whether you're a seasoned graphic designer or someone who's never touched design software, there are tools and techniques for everyone. The key is to start with a clear idea and then find the right medium to express it.
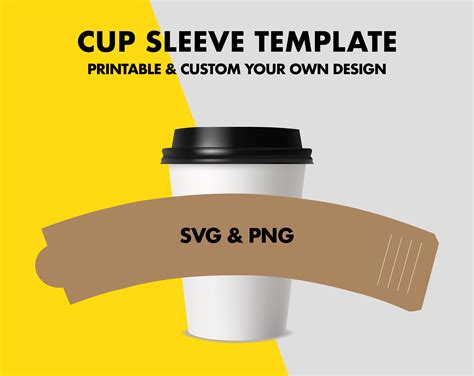
1. Start with a Template: Don't reinvent the wheel! Many websites offer free or paid printable coffee cup sleeve templates in various formats (PDF, JPG, SVG). These templates provide the correct dimensions and cut lines, saving you a lot of guesswork. My first attempt was freehand, and let me tell you, getting the curve just right was a nightmare. A template is your best friend here.
2. Design Software for Every Skill Level:
- Beginner-Friendly (Canva, PicMonkey): These online tools offer drag-and-drop interfaces, pre-made elements, fonts, and easy photo uploads. Perfect for quick, visually appealing designs.
- Intermediate (Adobe Express, Affinity Designer): More robust features for those who want more control without the steep learning curve of professional software.
- Professional (Adobe Illustrator, Photoshop, InDesign): For ultimate control, vector graphics, and high-resolution output. Ideal if you're designing for clients or complex branding.
3. Embrace Thematic Consistency: If you're designing for an event or a brand, ensure your sleeve design aligns with the overall theme, color palette, and existing branding. A cohesive look always leaves a stronger impression.
4. Focus on Readability: If your sleeve includes text (e.g., a logo, a message, a QR code), make sure the font is legible, the size is appropriate, and there's enough contrast with the background. Remember, people will likely be reading this on the go.
5. Consider the Cup Size: Not all coffee cups are created equal. Standard sleeves fit 12oz-20oz cups, but some larger or smaller cups might require custom sizing. Always measure your target cup before finalizing your design.
6. Leverage Free Design Elements: Websites like Unsplash, Pixabay, Pexels (for photos), and Freepik, Vecteezy (for vectors/icons) offer a vast library of free resources you can incorporate into your designs. Just check the licensing!
7. Play with Patterns and Textures: Beyond flat colors, consider incorporating subtle patterns, gradients, or even faux textures (like wood grain or fabric) to add depth and visual interest to your printable coffee cup sleeves.
8. Add a Call to Action (for businesses): If you're using sleeves for branding, consider adding a subtle call to action. This could be your website, social media handle, a QR code for a loyalty program, or even a simple "Share your #MyCoffeeMoment."
9. Mock It Up Before Printing: Before printing a whole batch, use a digital mock-up tool or even just cut out a plain paper sleeve and wrap it around your cup. This helps you visualize the final product and catch any design flaws or sizing issues early. This tip saved me from wasting so much paper on misaligned designs!
10. Hand-Drawn Charm: Don't underestimate the power of a hand-drawn design! You can draw directly onto a scanned template, or create your artwork on paper, then scan or photograph it and import it into your design software for cleanup and sizing. This adds a unique, artisanal touch.
11. Keep it Simple, Stupid (KISS Principle): Sometimes, less is more. A clean, minimalist design with a strong logo or a single powerful message can be far more impactful than a cluttered one.
12. Print Test Pages: Always, always, *always* print a test page on regular paper first to check colors, sizing, and alignment before committing to your final, more expensive cardstock. This is a non-negotiable step for anyone serious about quality printable coffee cup sleeves.
Materials Matter: Choosing the Right Paper & Printer for Perfect Sleeves
The best design in the world won't matter if your printable coffee cup sleeves feel flimsy, fade easily, or simply don't hold up to the heat and condensation. The right materials are crucial for both aesthetics and functionality. This section will guide you through selecting the perfect paper and ensuring your printer is up to the task.
1. Paper Weight (Cardstock is King!):
- Minimum: Aim for at least 65 lb (176 gsm) cardstock. Anything lighter will be too flimsy and offer minimal heat protection.
- Ideal: 80 lb (216 gsm) to 110 lb (298 gsm) cardstock provides excellent rigidity and insulation. This is my personal sweet spot for durability and ease of handling.
- Pro Tip: Thicker paper means more heat protection, but it can also be harder for some home printers to handle. Check your printer's specifications for its maximum paper weight.
2. Paper Finish:
- Matte: Non-reflective, great for designs with a rustic or artistic feel, and generally easier to write on. Colors appear softer.
- Glossy/Semi-Gloss: Offers vibrant color reproduction and a professional sheen. Be aware that glossy surfaces can smear if not allowed to dry properly, especially with inkjet printers.
- Coated vs. Uncoated: Coated papers generally produce sharper images and more vibrant colors, as the ink sits on the surface rather than soaking in. Uncoated papers have a more natural, absorbent feel.
3. Recycled Content Paper: For an eco-friendly approach, look for cardstock made from post-consumer recycled content. This is a fantastic way to make your printable coffee cup sleeves sustainable.
4. Kraft Paper/Brown Cardstock: Provides a natural, earthy, and rustic look. It's popular for organic brands or charming, handmade aesthetics. Just remember that colors will appear different on a brown background than on white.
5. Water-Resistant Paper (Specialty Option): If condensation is a major concern (e.g., for iced coffee, though sleeves are primarily for hot drinks), some specialty papers offer water resistance. These are less common for home printers but worth exploring for commercial applications.
6. Printer Type Matters:
- Inkjet Printers: Excellent for vibrant colors and detailed photo printing. They handle a wide range of paper types, but ink can smudge if not completely dry, especially on glossy stock. They're generally more affordable for home use.
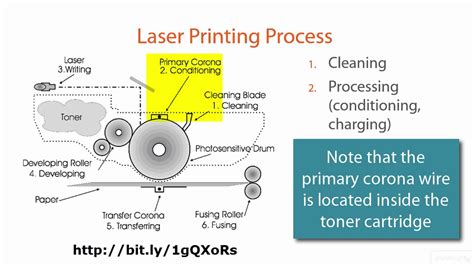
- Laser Printers: Ideal for crisp text, sharp lines, and fast printing. The toner is fused to the paper, making it smudge-proof immediately. They handle thicker cardstock well but can be more expensive upfront. For bulk production of printable coffee cup sleeves, a laser printer is often the more efficient choice.
7. Printer Settings for Quality:
- "Best" or "High Quality" Setting: Always select the highest print quality setting to ensure crisp lines and vibrant colors.
- Paper Type Selection: Tell your printer what kind of paper you're using (e.g., "Cardstock," "Matte Photo Paper," "Glossy Paper"). This adjusts ink saturation and print speed for optimal results.
- Borderless Printing (if applicable): If your design goes to the very edge of the sleeve, ensure your printer supports borderless printing. Otherwise, you'll have a small white margin.
8. Ink Considerations:
- Dye-based inks (Inkjet): Produce vibrant colors but can be susceptible to fading over time and water damage.
- Pigment-based inks (Inkjet): More archival, fade-resistant, and water-resistant, making them a better choice for longevity.
- Toner (Laser): Extremely durable and water-resistant.
9. Calibration and Maintenance: Regularly clean your printer heads (inkjet) or toner rollers (laser) and calibrate your printer for accurate color reproduction. A well-maintained printer makes a huge difference in print quality.
10. Test, Test, Test: Before printing a large batch of your printable coffee cup sleeves, always print one or two on your chosen paper to check the color accuracy, quality, and how the paper handles the ink/toner. This step is critical to avoid wasted materials.
From Concept to Coffee Cup: A Step-by-Step Printing & Assembly Guide
You've designed your masterpiece and chosen your materials. Now it's time for the exciting part: bringing your printable coffee cup sleeves to life! This step-by-step guide will walk you through the printing, cutting, and assembly process, ensuring your sleeves are not just beautiful, but also functional and perfectly fitted.
### Step 1: Finalize Your Design & Prepare for Printing
1. Double-Check Dimensions: Ensure your design fits snugly within the chosen template. A standard sleeve generally measures about 10.5 to 11 inches long and 2.5 to 3 inches high, but these can vary slightly based on cup size.
2. Add Bleed (if necessary): If your design has elements that go to the very edge of the sleeve, extend them slightly beyond the cut line (this is called "bleed"). This prevents white edges if your cutting isn't perfectly precise.
3. Save in the Right Format: For printing, PDF is often preferred as it maintains quality and dimensions. High-resolution JPG or PNG can also work.
4. Calibrate Your Monitor (Optional but Recommended): For true color accuracy, ensure your monitor is calibrated. What you see on screen might not be exactly what your printer produces otherwise.
5. Test Print on Plain Paper: Print a single sleeve on regular printer paper first. This is crucial for checking:
- Sizing: Wrap it around your target coffee cup. Does it fit? Is there enough overlap for gluing?
- Alignment: Are your design elements where they should be? Are the cut lines visible and accurate?
- Color: While plain paper won't perfectly represent your final cardstock, it gives you a good idea of color balance.
### Step 2: Printing Your Sleeves
1. Load Your Cardstock Correctly: Refer to your printer's manual for the correct way to load thicker paper. Some printers have a specific "manual feed" slot for cardstock to prevent jams.
2. Adjust Printer Settings:
- Select "High Quality" or "Best" print setting.
- Choose the correct "Paper Type" (e.g., "Cardstock," "Heavyweight Paper," "Glossy Photo Paper" if applicable).
- Ensure "Actual Size" or "100%" scale is selected, not "Fit to Page," to prevent resizing errors.
- If your design has bleed, select "Borderless Printing" if your printer supports it.
3. Print a Few Sheets: Start with a small batch to ensure everything is perfect before printing your entire supply.
4. Allow Ink to Dry: Especially with inkjet printers and glossy paper, allow ample drying time (10-30 minutes, or even longer) before touching or stacking the printed sheets to prevent smudging. I once rushed this, and ended up with smudged sleeves that looked like they'd been through a mud wrestling match!
### Step 3: Cutting Your Sleeves
This is where precision pays off!
1. Scissor Method (for beginners/small batches):
- Carefully cut along the outer lines of your template. Take your time, using sharp scissors for clean edges.
- *Hypothetical Scenario:* My young daughter loves to help, and while her enthusiasm is boundless, her scissor skills are... developing. For truly crisp lines, I wait until she's moved on to her next art project, then I do the final, precise cutting myself!
2. Paper Trimmer/Guillotine (for efficiency/clean lines):
- This is highly recommended for straight edges. Align your printed sheet with the cutting guide and slice.
3. Craft Knife & Cutting Mat (for ultimate precision/intricate designs):
- For the most professional finish, especially if your template has non-straight edges or cut-outs, use a sharp craft knife (like an X-Acto knife) and a self-healing cutting mat. Use a metal ruler as a guide for straight cuts.
- *Personal Insight:* I find this method incredibly therapeutic, almost like meditation. The precision and the clean cut are just so satisfying.
4. Electronic Cutting Machine (Cricut, Silhouette Cameo - for large batches/complex cuts):
- If you have one, these machines are a game-changer! Upload your template, and the machine will precisely cut out your sleeves, including any intricate details. This is the fastest and most accurate method for bulk production of printable coffee cup sleeves.
### Step 4: Assembling Your Sleeves
1. Pre-Fold (Optional but helpful): Gently pre-fold the sleeve along the score lines (if your template has them) or where the overlap will occur. This makes assembly easier.
2. Adhesive Choice:
- Hot Glue Gun: Fast-drying and strong. Use a thin bead along the overlapping edge to avoid bulkiness. Be quick, as it dries fast!
- Strong Craft Glue (e.g., Tacky Glue): Provides a strong bond but requires clamping or holding for a minute or two to set.
- Double-Sided Tape: Clean, no drying time, but ensure it's strong enough to hold. Apply along the entire overlapping edge.
- Glue Stick (least recommended for durability): Might work for very temporary or light-duty sleeves, but not ideal for long-term use or heat exposure.
3. Apply Adhesive & Form the Sleeve: Apply your chosen adhesive to one of the narrow ends of the sleeve's overlap tab. Bring the other end around, carefully align, and press firmly to secure the bond, forming a cylinder.
4. Check Fit: Once assembled, slide a sleeve onto a coffee cup to ensure a snug, but not too tight, fit. It should slide on and off easily but stay put when in use.
5. Stack & Store: Once fully dry, stack your beautifully crafted printable coffee cup sleeves, ready for their debut!
Printable Sleeves for Every Occasion: Ideas for Celebrations & Events

The beauty of printable coffee cup sleeves lies in their versatility. They're not just for your morning brew; they're fantastic, customizable accents for virtually any event or celebration. Think beyond the everyday and let your imagination run wild with these occasion-specific ideas.
1. Weddings & Bridal Showers:
- "Love is Brewing" Theme: Design sleeves with the couple's names, wedding date, and a "Love is Brewing" phrase.
- Monogrammed Elegance: Simple, elegant sleeves featuring the couple's monogram or a delicate floral pattern matching the wedding decor.
- Bridal Party Roles: "Bridesmaid Fuel," "Groomsman Jolt," "Maid of Honor Must-Have" for pre-wedding festivities.
- *Personal Scenario:* For my best friend's bridal shower, we created sleeves with baby photos of the bride and groom. It was a hilarious and heartwarming touch that everyone loved, sparking lots of "remember when..." conversations.
2. Baby Showers & Gender Reveals:
- "Oh Boy!" / "Oh Girl!" / "Baby is Brewing": Classic phrases with cute baby-themed graphics (storks, bottles, booties).
- Prediction Sleeves: Design sleeves with checkboxes for "Boy" or "Girl" and let guests mark their prediction.
- Nursery Theme Integration: Match the sleeve design to the nursery theme for a cohesive feel.
3. Birthdays & Anniversaries:
- Milestone Ages: "Cheers to 30 Years!", "Fabulous at 50!" with celebratory designs.
- Photo Collage: A fun way to showcase photos from different stages of the person's life.
- "Happy [Name] Day!": Simple and personal, perhaps with their favorite colors or hobbies incorporated.
4. Holidays (Christmas, Halloween, Valentine's, Easter):
- Christmas: "Merry & Bright," "Santa's Little Helper," snowmen, reindeer, or cozy cabin scenes.
- Halloween: Spooky ghosts, cute pumpkins, "Witch's Brew," or "Trick or Treat Yourself."
- Valentine's Day: "Love You a Latte," hearts, cupids, or personalized "Be My Valentine" messages.
- Easter: Bunnies, eggs, "Hoppy Easter," or pastel-colored designs. These are my go-to for adding instant festive cheer to our family gatherings.
5. Graduations:
- "Class of [Year]": With the school colors and mascot.
- "Hats Off to the Grad!": Featuring graduation caps and diplomas.
- "Future is Brewing": A clever play on words for the graduate's next chapter.
6. Corporate Events & Conferences:
- Company Branding: Feature your company logo, tagline, and event hashtag.
- Keynote Speaker Quotes: Print inspiring quotes from speakers or industry leaders.
- Networking Prompts: A subtle "Connect with me!" or "Ask me about [topic]" to encourage interaction.
- *Hypothetical Scenario:* At a recent tech conference, a startup had custom sleeves with a QR code linking to their demo. It was a brilliant, subtle way to drive engagement without being overly salesy.
7. Fundraisers & Charity Events:
- Cause Awareness: Feature the charity's logo, a relevant statistic, or a call to action (e.g., "Donate Now!").
- Thank You Message: A simple "Thank You for Your Support" with the event details.
8. Sporting Events & Tailgates:
- Team Colors & Mascot: Show your team spirit!
- Game Day Slogans: "Go Team Go!", "Game On!", or specific chants.
9. Book Clubs & Movie Nights:
- Book Cover Art: For a book club meeting, print sleeves featuring the cover of the current read.
- Movie Quotes: For a movie night, iconic quotes or character silhouettes.
10. Themed Parties:
- Decades Party: 80s neon, 70s disco, 50s diner themes.
- Tropical Luau: Hibiscus flowers, palm trees, "Aloha!"
- Fantasy/Sci-Fi: Dragons, spaceships, themed quotes.
11. Teacher Appreciation:
- "Best Teacher Ever" / "Thank You for Helping Me Grow": Personalized with apple or book designs.
12. Just Because / "Thinking of You":
- "Sending You Warm Hugs," "You Got This," "A Little Pick-Me-Up": Simple, empathetic messages for a friend having a tough day. These are often the most impactful.
Branding & Business: Elevating Your Coffee Shop with Custom Sleeves
For any coffee shop, café, or mobile coffee cart, brand identity is everything. While delicious coffee is paramount, the experience extends far beyond the cup. Printable coffee cup sleeves offer an incredibly powerful, yet often overlooked, opportunity to reinforce your brand, engage customers, and elevate the overall perception of your business. This isn't just about pretty paper; it's about strategic marketing.
1. Consistent Brand Identity: Your sleeve is an extension of your logo, color scheme, and overall aesthetic. Ensure the design aligns perfectly with your existing branding, creating a cohesive and professional look that customers recognize instantly.
2. Affordable Customization: For small businesses or those just starting out, investing in large-scale custom-printed sleeves can be cost-prohibitive. Printable sleeves allow you to achieve a custom look at a fraction of the cost, especially for smaller batches or special promotions.
3. Dynamic Marketing Tool: Unlike static marketing materials, sleeves are literally in your customers' hands. This makes them a highly visible and interactive marketing channel. Use them to:
- Announce New Products: "Try our new Pumpkin Spice Latte!"
- Promote Special Offers: "20% off pastries with this sleeve!"
- Highlight Seasonal Menus: "Winter Warmers Collection."
4. Social Media Engagement:
- Instagram-Worthy Designs: Create sleeves that are visually appealing and encourage customers to snap photos and share them on social media.
- Hashtag Integration: Print your unique brand hashtag (e.g., #MyCoffeeSpot) directly onto the sleeve, encouraging user-generated content and brand visibility. This is my go-to strategy for new clients looking to boost online presence.
- QR Codes: Link directly to your social media profiles, loyalty program sign-up, or online menu.
5. Storytelling & Values: Use the sleeve to subtly communicate your brand's story, values, or mission. Are you locally sourced? Eco-friendly? Family-owned? A short, impactful message can resonate with customers.
- *Hypothetical Scenario:* I worked with a small, artisanal roastery that printed sleeves with "Roasted with Love in [Local Town]" and a small graphic of their roaster. It immediately conveyed their commitment to quality and local roots.
6. Loyalty Programs:
- Punch Card Integration: Design a sleeve that doubles as a mini loyalty punch card. "Buy 9, Get 1 Free!"
- QR Code for Digital Loyalty: Link to your digital loyalty app or sign-up page.
7. Event & Catering Customization: When catering an event or setting up a pop-up, custom printable coffee cup sleeves instantly elevate your offering, making your brand look polished and professional, even in a temporary setting.
8. Customer Feedback & Engagement:
- "Rate Your Experience!": A small note encouraging customers to leave a review.
- Interactive Elements: A simple riddle or fun fact related to coffee or your brand.
9. Holiday & Seasonal Promotions: Easily swap out your standard branding for festive or seasonal designs without committing to large, expensive print runs. This keeps your brand fresh and relevant.
10. Partnership Opportunities: If you collaborate with another local business, create a joint-branded sleeve that promotes both entities. It's a win-win for cross-promotion.
11. Employee Morale & Internal Branding: Create special sleeves for internal events or staff appreciation days. "Best Barista Ever!" or "Team Fuel" can be a fun touch.
12. Cost-Benefit Analysis: While the initial setup for DIY printable coffee cup sleeves takes time, the long-term savings and marketing benefits often far outweigh the investment, especially when compared to outsourced printing. This is particularly true for businesses that require frequent design changes or small batch runs.
Eco-Friendly & Sustainable Sleeves: Printing with a Conscience
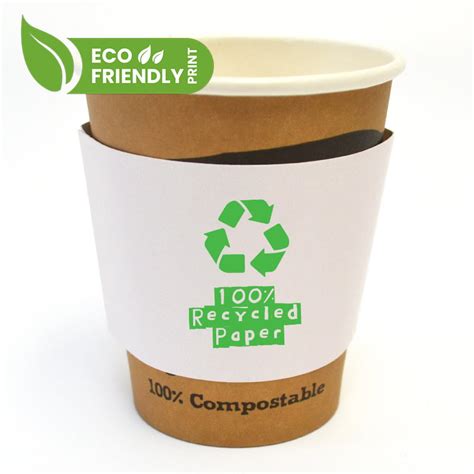
In today's world, sustainability isn't just a buzzword; it's a responsibility. As businesses and individuals, we're increasingly aware of our environmental footprint. When it comes to printable coffee cup sleeves, you have a fantastic opportunity to make conscious choices that benefit the planet without sacrificing style or functionality. Let's explore how to go green with your sleeves.
1. Choose Recycled Content Paper:
- Post-Consumer Waste (PCW): Look for cardstock made from 100% PCW. This means the paper is made from materials that have been recycled after consumer use (e.g., old newspapers, office paper). It's the gold standard for reducing landfill waste.
- Pre-Consumer Waste: Paper made from industrial scraps. While still good, PCW is generally preferred.
- *Personal Insight:* I always prioritize recycled paper for my craft projects. It feels good knowing I'm giving materials a second life. The slightly textured feel of some recycled cardstock also adds a unique, organic touch to the sleeves.
2. FSC Certified Paper: Look for paper certified by the Forest