Oh, the joy (and sometimes, the delightful chaos!) of planning a child's birthday party. If you’re here, chances are you’re deep in the thrilling world of Paw Patrol, ready to bring the heroic pups to life for your little one's special day. And right at the heart of that celebration? The cake! It’s the centerpiece, the moment everyone gathers around, singing and cheering, and nothing makes a birthday cake truly pop like the perfect topper.
But let’s be real, finding the *exact* Paw Patrol cake topper you envision can be a quest in itself. Store-bought options might not quite hit the mark, or perhaps your budget is stretched thinner than a piece of chewing gum after a toddler's playtime. That's where the magic of "Paw Patrol cake topper printables" swoops in like Ryder on his ATV! They offer an incredible, budget-friendly, and highly customizable solution to transform a simple cake into a pup-tastic masterpiece. Trust me, I’ve been there – staring at a plain cake an hour before the party, wishing I had a quick fix. If only I’d known about the power of printables back then, it would have saved me a frantic dash to three different stores! This guide isn't just about printing; it's about empowering you to create a personalized, show-stopping cake that will light up your child's eyes and make you feel like the ultimate party hero.
We're going to dive deep into everything you need to know, from finding the perfect designs to printing them like a pro, and even turning them into adorable party decor beyond the cake. Whether you're a seasoned DIY enthusiast or a parent just trying to make a little one’s birthday dreams come true, you’re in the right place. Let's get these paws on the page!
---
Table of Contents

- [The Essential Paw Patrol Crew: Character Spotlight Toppers](#the-essential-paw-patrol-crew-character-spotlight-toppers)
- [Beyond the Pup-tastic Crew: Themed & Action-Packed Variations](#beyond-the-pup-tastic-crew-themed--action-packed-variations)
- [DIY Magic: Step-by-Step Printing & Assembly for Beginners](#diy-magic-step-by-step-printing--assembly-for-beginners)
- [Material Matters: Choosing the Right Paper & Tools for Durability](#material-matters-choosing-the-right-paper--tools-for-durability)
- [Personalizing Your Pups: Customization Ideas for a Unique Touch](#personalizing-your-pups-customization-ideas-for-a-unique-touch)
- [Troubleshooting & Tips for Print Perfection: Avoiding Common Hiccups](#troubleshooting--tips-for-print-perfection-avoiding-common-hiccups)
- [Beyond the Cake: Creative Uses for Paw Patrol Printables](#beyond-the-cake-creative-uses-for-paw-patrol-printables)
- [Finding Your Freebies: Reputable Sources & Copyright Considerations](#finding-your-freebies-reputable-sources--copyright-considerations)
- [Budget-Friendly Brilliance: Making Every Penny Count with Printables](#budget-friendly-brilliance-making-every-penny-count-with-printables)
- [The Grand Finale: Styling Your Cake & Party Table with Flair](#the-grand-finale-styling-your-cake--party-table-with-flair)
- [How to Choose the Best Paw Patrol Cake Topper Printable for Your Needs](#how-to-choose-the-best-paw-patrol-cake-topper-printable-for-your-needs)
- [Common Pitfalls to Avoid When Using Paw Patrol Printables](#common-pitfalls-to-avoid-when-using-paw-patrol-printables)
- [Advanced Tips for Expert Paw Patrol Party Planners](#advanced-tips-for-expert-paw-patrol-party-planners)
- [Conclusion](#conclusion)
---
The Essential Paw Patrol Crew: Character Spotlight Toppers
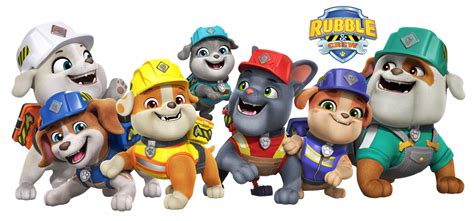
When it comes to Paw Patrol, the stars of the show are, of course, the pups themselves! A classic Paw Patrol cake topper printable often features the core team, ready for action. These character-focused toppers are fantastic for showcasing your child's favorite pup or assembling the entire heroic squad.
Here are some popular and impactful character-spotlight printable ideas:
1. Chase, the Police Pup: A strong, confident Chase topper, perhaps saluting or in a dynamic pose. Ideal for kids who love leadership and justice.
2. Marshall, the Fire Pup: A playful Marshall, maybe mid-sneeze or ready with his ladder. Perfect for those who adore humor and bravery.
3. Skye, the Aviator Pup: A graceful Skye, soaring through the sky or striking a heroic pose. A hit with fans of adventure and high-flying fun.
4. Rubble, the Construction Pup: A sturdy Rubble, flexing his muscles or holding a construction tool. Great for little builders and digger enthusiasts.
5. Zuma, the Water Rescue Pup: A cool Zuma, ready to dive in or surfing a wave. Fantastic for kids who love water and aquatic adventures.
6. Rocky, the Recycle Pup: A clever Rocky, surrounded by his tools or a recycling symbol. Inspires eco-consciousness and ingenuity.
7. Everest, the Snow Rescue Pup: A spirited Everest, ready for snowy missions. A favorite for winter birthdays or fans of the snowy mountains.
8. Tracker, the Jungle Pup: An adventurous Tracker, with his trusty machete or surrounded by jungle foliage. Ideal for little explorers.
9. Ryder, the Leader: A prominent Ryder topper, perhaps with his Pup Pad, overseeing the entire team. He brings authority and a sense of command to the cake.
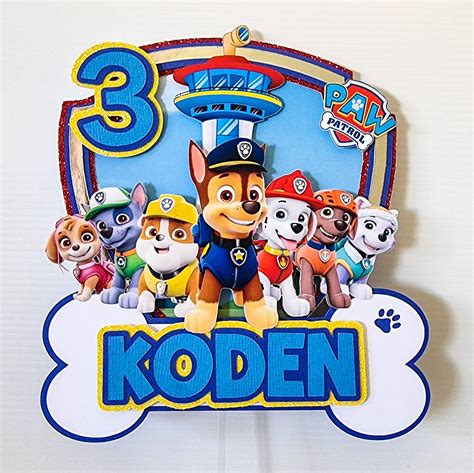
10. Group Shot Collage: A topper featuring all the main pups together in a dynamic, action-packed pose. This is my go-to choice because it truly brings the entire team spirit to the cake, and my son absolutely loves pointing out each one!
11. Individual Pup Silhouettes: For a more minimalist or modern look, simple silhouette printables of each pup. These can be cut out and arranged artistically.
12. Pup Badges/Logos: Printables of the individual pup badges (e.g., Chase's police badge, Marshall's fire badge). These are great for smaller cupcakes or as accents around a larger central topper. I remember once trying to hand-draw these for a party, and trust me, printing them is a million times easier and looks far more professional!
Beyond the Pup-tastic Crew: Themed & Action-Packed Variations
While the individual pups are fantastic, a Paw Patrol cake topper printable can also encompass broader themes, action scenes, or even focus on specific missions. These types of printables add an extra layer of storytelling and excitement to your cake, making it truly unique.
Here are some creative, themed, and action-packed printable ideas:
1. Adventure Bay Skyline: A printable depicting the iconic Adventure Bay skyline, perhaps with the lookout tower prominently featured. The pups can then be placed in front of it.
2. "No Job is Too Big, No Pup is Too Small!": A printable banner or speech bubble with this classic Paw Patrol motto. It adds a motivational and recognizable element.
3. Specific Mission Scene: Imagine a topper showing the pups on a specific rescue mission – Marshall putting out a fire, or Chase directing traffic. These create a dynamic narrative.
4. Paw Patrol Logo Topper: A bold, recognizable Paw Patrol logo, perfect for a clean, impactful statement. You can often find these with a "Happy Birthday" text integrated.
5. Age-Specific Paw Patrol: A printable that incorporates the birthday child's age directly into the Paw Patrol theme, perhaps with pups surrounding the number.
6. "Happy Birthday [Child's Name]" Banner: A printable banner with each letter on a separate mini-flag, featuring Paw Patrol characters or paw prints. This is a lovely personal touch.
7. Vehicle Spotlight: Toppers featuring the pups' iconic vehicles – Chase's police cruiser, Marshall's fire truck, Skye's helicopter. Great for vehicle-loving kids!
8. Pup Houses/Kennels: Printables of the pups' individual houses, which can be arranged around the cake base or on different tiers.
9. Paw Print Trails: A series of printable paw prints that can be arranged to look like a trail leading up to the cake or around its base. It adds a playful, interactive feel. I once used these to lead from the front door to the party room, and the kids absolutely loved following them!
10. Weather-Themed Paw Patrol: For example, pups in snow gear for a winter birthday, or beach gear for a summer party, adding a seasonal twist.
11. Villain Appearance (Mayor Humdinger!): A playful printable featuring one of the show's antagonists, perhaps caught in a silly predicament, with the pups ready to save the day. This adds a touch of comedic drama.
12. Character Catchphrases: Small speech bubbles with iconic pup catchphrases like "Rubble on the double!" or "I'm fired up!" These can be scattered around the main topper for extra detail. I used "Let's dig it!" for my nephew's Rubble-themed cake, and it got a good laugh from the adults!
DIY Magic: Step-by-Step Printing & Assembly for Beginners
You've found the perfect Paw Patrol cake topper printable! Now comes the exciting part: bringing it to life. Don't be intimidated; this process is straightforward and incredibly rewarding. Even if you're new to DIY, I promise you can do this.
Here’s a step-by-step guide to printing and assembling your Paw Patrol cake toppers:
1. Download Your Printable:
- Once you find your desired Paw Patrol cake topper printable, click the download link. Most printables come as PDF files, which are easy to open and print.
- *Pro Tip:* Save the file to an easily accessible folder on your computer (e.g., "Paw Patrol Party Printables") so you can find it later.
2. Open and Prepare for Printing:
- Open the PDF file using a PDF reader (like Adobe Acrobat Reader, which is free).
- Before printing, check the print settings. Ensure "Actual Size" or "100%" scale is selected to avoid distortion. Avoid "Fit to Page" unless you specifically want the image resized.
- Look for options like "Print Quality" and select "Best" or "High" for vibrant colors and sharp details.
3. Choose Your Paper:
- This is a crucial step for a professional finish. We'll dive deeper into paper types in the next section, but generally, use cardstock (65lb to 110lb) for sturdy toppers.
- Load your chosen paper into your printer's paper tray.
4. Print Your Toppers:
- Click "Print." While it's printing, resist the urge to peek too closely. Let your printer do its magic!
- Once printed, allow the ink to dry completely before touching the prints. This prevents smudges, especially if you're using glossy paper.
5. Gather Your Cutting Tools:
- For intricate designs: A craft knife (X-Acto knife) and a self-healing cutting mat are your best friends.
- For simpler shapes: Sharp scissors work perfectly.
- For circles or specific shapes: A craft punch (circle punch, star punch, etc.) can save a lot of time and create perfect edges.
6. Careful Cutting:
- Scissors: Cut slowly and steadily along the lines. For curves, move the paper, not just the scissors.
- Craft Knife: Place your printable on the cutting mat. Use a ruler for straight lines. Apply even pressure and make multiple light passes rather than one heavy one to avoid tearing. This technique saved me from many wonky edges when I was first learning to cut detailed shapes!
- *Patience is key here.* Rushing will lead to jagged edges.
7. Prepare for Assembly:
- Gather your chosen sticks: wooden skewers, lollipop sticks, paper straws, or even toothpicks for smaller toppers.
- You'll also need adhesive: hot glue gun (low temp is safer), strong double-sided tape, or craft glue.
8. Attach the Sticks:
- Flip your cut-out topper face down.
- Apply a small amount of hot glue or a strip of double-sided tape to the back of the topper where you want the stick to be.
- Press the stick firmly onto the adhesive. For larger toppers, you might want to use two sticks for better stability.
- *Pro Tip:* For a cleaner look and extra durability, cut out a second identical shape from plain cardstock (or print a mirrored image if available) and glue it to the back, sandwiching the stick between the two layers. This hides the stick and makes the topper double-sided.
9. Let it Set:
- Allow the glue or tape to dry and set completely before handling or inserting into the cake. This usually takes just a few minutes for hot glue, longer for liquid craft glue.
10. Insert into Cake:
- Carefully push the stick(s) into your cake. Arrange them aesthetically, considering height and spacing.
- Step back and admire your handiwork! You've just created a custom Paw Patrol cake topper printable masterpiece!
Material Matters: Choosing the Right Paper & Tools for Durability
The secret to a professional-looking Paw Patrol cake topper printable isn't just a great design; it's also about the materials you use. The right paper and tools can make all the difference in durability, vibrancy, and ease of crafting.
Here's a breakdown of what you'll need and why:
1. Cardstock (The Foundation):
- Weight: This is crucial. Regular printer paper (20-24lb) is too flimsy and will flop. Opt for 65lb (176 gsm) to 110lb (298 gsm) cardstock. The heavier the cardstock, the sturdier your topper will be. For smaller, more delicate toppers, 65-80lb is fine. For larger, standing toppers, go for 90-110lb.
- Finish:
- Matte Cardstock: Provides a non-reflective surface, giving a classic, professional look. Colors will be rich but not shiny. Great for a more understated feel.
- Glossy Cardstock: Offers a vibrant, photo-like finish. Colors will pop, and it can give your toppers a more "finished" appearance, mimicking store-bought items. Be careful with smudging before it dries completely.
- Photo Paper: For ultimate vibrancy and crispness, especially if your printable has intricate details or photo-realistic elements. Choose a thicker photo paper (e.g., 80lb or higher).
- *Personal Preference:* I personally prefer matte heavy cardstock (around 90-100lb). It’s sturdy enough to stand up straight, doesn’t show fingerprints as easily as glossy, and the colors look fantastic without any distracting glare.
2. Printer Quality:
- An inkjet printer is usually sufficient for vibrant colors. Ensure your ink cartridges are full and your printer heads are clean for the best results.
- Check your printer settings to select the appropriate paper type (e.g., "Cardstock," "Photo Paper") and "Best" or "High" print quality.
3. Cutting Tools (Precision is Key):
- Sharp Scissors: Essential for basic shapes and outlines. Invest in a good pair of craft scissors that are sharp all the way to the tip for intricate cuts.
- Craft Knife (X-Acto Knife): Absolutely invaluable for intricate details, sharp corners, and internal cuts (like cutting out the inside of a number or letter).
- Self-Healing Cutting Mat: Protects your work surface when using a craft knife and provides a stable, non-slip base for cutting.
- Metal Ruler: For perfectly straight cuts with a craft knife. Avoid plastic rulers as the knife can easily cut into them.
- Craft Punches: If your design includes circles, stars, or other common shapes, craft punches (various sizes available) create perfectly clean edges with minimal effort.
4. Adhesives (Sticking Power):
- Hot Glue Gun (Low-Temp): Quick-drying and strong. Low-temp is safer to use, especially around children, and reduces the risk of burning thin paper. This is my absolute go-to for attaching sticks!
- Strong Double-Sided Tape: A mess-free alternative to glue. Look for permanent, extra-strength varieties. Great for sandwiching two layers of cardstock together.
- Craft Glue (e.g., Tacky Glue): Dries clear and strong, but takes longer to set. Good for larger surfaces or if you need a little repositioning time.
- Glue Dots: Small, clear dots of strong adhesive. Perfect for attaching smaller elements or for quick, clean bonds.
5. Sticks/Supports:
- Wooden Skewers: Common, sturdy, and come in various lengths. You can trim them to size.
- Lollipop Sticks: Shorter and thinner, good for smaller or lighter toppers.
- Paper Straws: A colorful and eco-friendly option. Can be used as a stick or slipped over a skewer for a decorative touch.
- Toothpicks: For very small accents or cupcake toppers.
By investing a little thought into your materials, your Paw Patrol cake topper printable will not only look amazing but also stand proudly atop your cake, enduring the excitement of the party!
Personalizing Your Pups: Customization Ideas for a Unique Touch
A Paw Patrol cake topper printable is already special, but imagine taking it a step further! Personalization transforms a generic design into a heartfelt, one-of-a-kind creation that speaks directly to your child's celebration. This is where your creativity truly shines.
Here are some fantastic ways to personalize your Paw Patrol printables:
1. Add the Birthday Child's Name:
- Integrated Design: Look for printables that have a blank space or a banner where you can digitally add the child's name using photo editing software (even basic ones like Paint 3D, Canva, or online editors).
- Layered Letters: Print individual letter cut-outs in a Paw Patrol font or color scheme, then layer them onto the main topper.
- *Hypothetical Scenario:* My daughter is obsessed with Skye, so for her birthday, I found a Skye topper and added her name "Olivia" in a cute pink font right next to Skye. Her face lit up when she saw it!
2. Incorporate the Age:
- Large Number Topper: Print a bold number corresponding to the child's age, and then attach smaller Paw Patrol character cut-outs around it.
- Number Overlay: Digitally overlay the age number onto an existing Paw Patrol scene printable.
- Pups Holding Numbers: Print small pup cut-outs and have them "hold" a number (e.g., Marshall holding a "3").
3. Match Party Colors/Theme:
- While Paw Patrol has its signature colors, you can often find printables with slight color variations or adapt them. If your party theme is "Paw Patrol Beach Party," look for pups in swim gear or add beach elements around the topper.
- Add Glitter/Embellishments: After printing, use craft glitter, stick-on gems, or small rhinestones to add sparkle to specific areas (e.g., Skye's goggles, pup badges).
4. Include a Personal Message/Catchphrase:
- Instead of just "Happy Birthday," how about "Happy 5th Birthday, Our Little Hero!" or "To Our Sweet Pup [Child's Name]!"
- Add a favorite pup's catchphrase, like "Chase is on the case!" or "Let's dig it!"
5. Family Pet Integration (with caution!):
- If your child has a beloved pet, and it's stylistically compatible, you *might* be able to find or create a simple cartoon drawing of their pet to add alongside the Paw Patrol pups. *Be mindful of copyright and quality here.*
6. Create a 3D Effect:
- Print multiple copies of a character. Cut out different layers (e.g., the full character, then just its head, then just its paw). Use foam dots (3D adhesive dots) between the layers to give depth. This makes the Paw Patrol cake topper printable truly pop!
- *Hypothetical Scenario:* For my son’s birthday, he wanted a specific scene with Ryder and all the pups. I printed Ryder separately and mounted him on foam dots in front of the assembled pups, creating a cool layered effect that made it look like he was leading them right off the cake!
7. Add a Background Scene:
- Print a simple background (e.g., a blue sky with clouds, a green hill, or a subtle Adventure Bay outline) and then layer your individual pup cut-outs on top of it.
8. Incorporate Photos (Subtly):
- For a truly unique touch, you could subtly integrate a small, cartoonized photo of your child into a Paw Patrol scene, perhaps peeking out from behind the lookout tower or standing with Ryder. Ensure the photo is small and doesn't overwhelm the design.
9. Change Outfits/Accessories (Digitally):
- If you're comfortable with basic photo editing, you might be able to find images of pups in different outfits (e.g., Halloween, Christmas) and incorporate them if relevant to your party theme.
10. Interactive Elements:
- While more advanced, you could create a topper where a small piece moves (e.g., a simple lever that makes a pup's arm wave) if you're feeling ambitious with paper engineering.
11. Signature Elements:
- Include small cut-outs of elements specific to the child’s favorite pup: Marshall’s fire hydrant, Skye’s goggles, Rubble’s bulldozer scoop. These tiny details make it highly personal.
12. Themed Banner Add-ons:
- Beyond the main topper, create smaller, themed banners that spell out a message and feature personalized elements like the child's name or a special date.
Personalization takes your Paw Patrol cake topper printable from great to absolutely unforgettable, showing your child just how much thought and love went into their special day.
Troubleshooting & Tips for Print Perfection: Avoiding Common Hiccups
Even with the best intentions, DIY projects can sometimes hit a snag. When working with a Paw Patrol cake topper printable, a few common issues can arise. But don't worry, with a little foresight and these troubleshooting tips, you'll be printing perfectly in no time. Don't be like me and forget to check your ink levels right before printing – it’s a party planning nightmare!
Here are common pitfalls and how to avoid them:
1. Issue: Blurry or Pixelated Prints:
- Cause: Low-resolution image file. You downloaded a small image that looks fine on a screen but is pixelated when enlarged for printing.
- Solution: Always look for high-resolution (300 DPI - dots per inch is ideal for printing) printables. Check the file size; larger files generally indicate higher resolution. If a printable looks blurry on your screen when zoomed in, it will print even worse.
2. Issue: Colors Don't Match the Screen:
- Cause: Differences in screen calibration, printer profiles, or paper type. What you see on your monitor isn't exactly what your printer outputs.
- Solution:
- Do a test print on a regular piece of paper first.
- Check your printer settings for color management options.
- Ensure your chosen paper type is selected in the printer settings (e.g., "Glossy Photo Paper" vs. "Plain Paper").
- If colors are wildly off, your printer might need calibration or new ink cartridges.
3. Issue: Printer Jams or Paper Feeds Incorrectly:
- Cause: Using cardstock that's too thick for your printer, or the paper isn't loaded correctly.
- Solution:
- Consult your printer's manual for its maximum paper weight capacity.
- Fan the stack of cardstock before loading to prevent sheets from sticking together.
- Load paper carefully, ensuring it's flush with the guides in the paper tray.
4. Issue: Smudged Ink:
- Cause: Handling the print too soon after printing, or using incompatible ink/paper (e.g., water-based ink on glossy paper that isn't fast-drying).
- Solution:
- Allow prints to dry completely for at least 10-15 minutes (or longer for glossy paper) before touching or cutting.
- If using an inkjet printer, consider "instant-dry" photo paper for glossy finishes.
5. Issue: Cuts are Jagged or Uneven:
- Cause: Dull scissors/craft knife, rushing, or improper technique.
- Solution:
- Always use sharp scissors or a fresh blade in your craft knife.
- Take your time! Slow and steady wins the race for clean cuts.
- When cutting curves, rotate the paper, not the scissors. When using a craft knife, make multiple light passes rather than one heavy one.
6. Issue: Topper is Flimsy and Won't Stand Up:
- Cause: Using paper that's too light (regular printer paper) or not enough support.
- Solution:
- Always use cardstock (65lb or heavier).
- For larger toppers, use two sticks for better stability.
- Consider gluing two layers of cardstock together (sandwiching the stick in between) for extra rigidity.
7. Issue: Printable Doesn't Fit on Page / Is Wrong Size:
- Cause: Incorrect print settings (e.g., "Fit to Page" instead of "Actual Size") or the file is designed for a different paper size.
- Solution:
- In your print dialogue box, ensure "Actual Size" or "100% Scale" is selected.
- Confirm the printable is designed for your paper size (e.g., US Letter, A4). If not, you may need to adjust scaling manually, but this can sometimes distort the image.
8. Issue: Running Out of Ink Mid-Print:
- Cause: Not checking ink levels before starting a large print job.
- Solution: ALWAYS check your ink levels before printing, especially if it's a critical print for a party! Keep spare cartridges on hand. This is the one that always gets me in a panic!
By being aware of these common issues and implementing these simple solutions, your Paw Patrol cake topper printable crafting experience will be smooth sailing, ensuring a perfect result for your little one's big day!
Beyond the Cake: Creative Uses for Paw Patrol Printables
While "Paw Patrol cake topper printable" is our main focus, these versatile designs aren't just for cakes! With a little imagination, you can extend the pup-tastic fun throughout your entire party decor, creating a cohesive and immersive experience. This is one of my favorite aspects of printables – getting so much bang for your buck and effort!
Here are 12 creative ways to use your Paw Patrol printables beyond the cake:
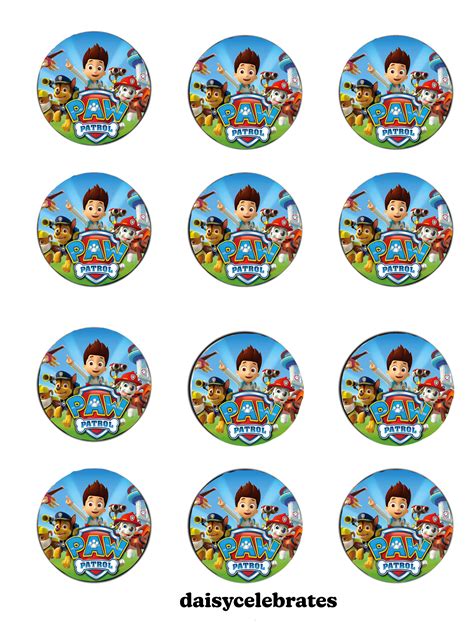
1. Cupcake Toppers: Scale down your favorite character printables and attach them to toothpicks or small lollipop sticks. They make adorable, matching cupcake toppers.
2. Food Labels/Tent Cards: Print small rectangular labels featuring paw prints or mini pup faces. Fold them in half to create tent cards for your party food (e.g., "Rubble's Rocky Road," "Skye's Sky-High Sandwiches").
3. Party Favor Tags: Print small tags with "Thank You for Coming!" and a Paw Patrol character. Punch a hole and tie them to party favor bags. This personalizes even simple favors.
4. Drink Bottle Wraps: Create custom labels for water bottles or juice boxes. Print a long