Have you ever found yourself mesmerized by the intricate patterns on a butterfly's wing, or the delicate structure of a beetle’s carapace, and thought, "I wish I could capture that beauty?" Trust me, you're not alone! For years, I found myself admiring the tiny wonders of the insect world, but felt completely intimidated by the idea of drawing them. My early attempts often looked more like blurry blobs than beautiful bugs. But then I discovered the power of a good guide, and suddenly, the world of entomological art opened up. This article, featuring an insects art guide printable, is designed to take that intimidation away and empower you to create stunning, accurate, and truly captivating insect artwork, whether you're a complete beginner or looking to refine your existing skills.
This isn't just about tracing lines; it’s about understanding the fascinating creatures you’re bringing to life on paper. We’ll dive into how to effectively use your printable guide, explore various artistic techniques, and even share some insights I picked up the hard way, ensuring your creative journey is as smooth and enjoyable as possible. Get ready to transform your fascination with the insect kingdom into beautiful, tangible art!
---
Your Ultimate Guide to Amazing Insect Art (Plus a Free Printable!)

1. Your First Flight: Getting Started with Insect Art
Stepping into the world of drawing insects can feel a bit like trying to catch a speedy dragonfly – exciting, but where do you even begin? This section is for everyone who's ever thought, "I can't even draw a stick figure, let alone a beetle!" It's about setting the stage for success, even if your only art supply right now is a dull pencil.
- Embrace the Journey: Don't aim for perfection on your first try. My very first butterfly looked like it had flown through a wind tunnel! The goal is to enjoy the process and learn with each stroke.
- Gather Your Basic Tools: You don't need a fancy art studio. Start with simple pencils (HB, 2B, 4B are a good range), an eraser, and paper. If you’re using the insects art guide printable, having a ruler might also be handy for structural lines.
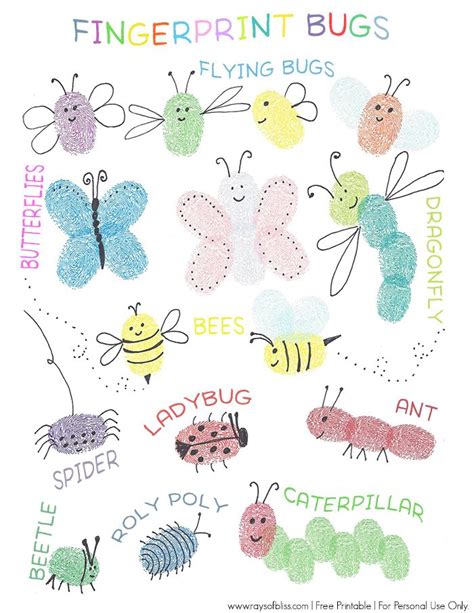
- Start Simple: Pick an insect with a clear, basic shape first – maybe a ladybug or a bee. Avoid complex wings or legs until you feel more confident.
- Observe Closely: Before you even pick up a pencil, *really look* at an insect (from a photo or, carefully, in real life!). Notice its segments, the way its legs attach, the symmetry of its wings. This foundational observation is key.
- Practice Basic Shapes: Most insects can be broken down into simple circles, ovals, and rectangles. Practice drawing these shapes accurately before combining them.
- Use Light Sketching: Draw very lightly at first. These initial lines are just guides, not final strokes. You'll refine them as you go.
- Don't Fear the Erase Button: Your eraser is your best friend! Mistakes are part of learning. I've probably erased more than I've drawn on some pieces, and that's okay.
- Take Breaks: If you feel frustrated, step away for a bit. Fresh eyes often spot solutions you missed. I find this approach works best for small, intricate details that can easily lead to "art block."
2. Unlocking the Guide: How to Maximize Your Printable

Your insects art guide printable is a powerful tool, but like any good tool, knowing how to use it effectively makes all the difference. This isn't just a coloring book; it's a foundation for your artistic growth.
- Print on Quality Paper: If possible, print your guide on slightly thicker paper (e.g., cardstock or drawing paper) if you plan to color directly on it. This prevents bleed-through and holds up better to erasing.
- Understand the Layers: Many guides break down insects into anatomical sections or step-by-step processes. Pay attention to these layers. They're designed to simplify complex structures.
- Trace, Then Freehand: Start by tracing elements from the printable to get a feel for the shapes and proportions. Once you're comfortable, try to draw the same insect freehand next to your tracing. This builds muscle memory and confidence.
- Focus on Proportions: The printable guide helps with accurate proportions. Use a grid method or light measurements to transfer the insect's dimensions to your own paper. I once struggled to make a grasshopper look right until I meticulously measured each segment against the guide!
- Experiment with Different Insects: Don't just stick to one bug. The guide likely features various insects. Each offers unique challenges and learning opportunities.
- Use It as a Reference Library: Even if you're not tracing, keep the printable handy as a reference. Need to know how a specific leg bends, or the venation on a dragonfly's wing? Your guide has the answers.
- Highlight Key Areas: Feel free to mark up your printed guide! Circle areas you find challenging, add notes about color, or highlight details you want to remember.
3. From Sketch to Masterpiece: Essential Techniques & Mediums
Once you've got the basics down and are comfortable with your insects art guide printable, it's time to explore the exciting world of artistic techniques and mediums. This is where your bug drawings truly come to life!
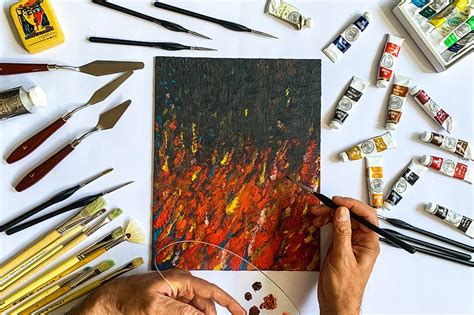
- Pencil Shading for Dimension: Don't just outline! Use varying pencil pressures to create shadows and highlights, giving your insects a 3D feel. Think about where the light source is hitting the insect.
- *Scenario:* When I was trying to make a beetle look metallic, subtle changes in shading, especially around its carapace, made all the difference.
- Ink for Definition & Detail: Once your pencil sketch is finalized, go over it with fine-liner pens (0.05mm, 0.1mm, 0.3mm are good sizes). This adds crispness and allows for intricate details like antennae hairs or wing veins.
- Watercolor Washes for Luminous Color: For delicate insects like butterflies, watercolors can create beautiful, translucent effects. Build up layers slowly for depth.
- Colored Pencils for Control: If you prefer more control, colored pencils allow for precise layering and blending, perfect for capturing the iridescent qualities of many insects.
- Mixed Media Magic: Don't be afraid to combine mediums! Start with a pencil sketch, add ink outlines, then introduce watercolor for broad color, and finish with colored pencils for fine details.
- Texture Techniques: Experiment with stippling (dots) for bumpy textures, cross-hatching for hairy bodies, or dry brushing for rough surfaces.
- Backgrounds & Environments: Think about adding a simple background like a leaf, a branch, or a blurred natural setting to make your insect pop and tell a story.
- *My experience:* I once used a quick wash of green around a ladybug to imply it was on a leaf, and it completely changed the feel of the drawing.
4. Nature's Muse: Finding Inspiration for Your Insect Creations
While your insects art guide printable provides excellent structured learning, true artistry often comes from connecting with your subject beyond the lines on a page. Nature itself is the ultimate inspiration!
- Photography as Reference: Take your own photos of insects in your garden or local park. This gives you unique angles and poses not found in generic guides. Plus, it's a great excuse to get outside!
- Visit a Natural History Museum: Museums often have incredible insect exhibits, allowing you to see specimens up close, notice their textures, and marvel at their diversity.
- Entomology Books & Documentaries: Dive deeper into the biology and behavior of insects. Understanding how they move and live will inform your art and make it more lifelike.
- Observe Your Surroundings: Even a tiny ant trail on your kitchen counter can spark an idea. Look for the beauty in the small things around you.
- Experiment with Abstraction: Once you're comfortable with realistic representation, try abstracting insect forms. Focus on their patterns, colors, or structural elements in a more interpretive way.
- Art by Other Artists: Look at how other artists depict insects. Not to copy, but to see different styles, techniques, and ways of interpreting the subject.
- Dream & Imagine: Sometimes the best ideas come from your own imagination. What would a fantastical insect look like? Combine elements from different species.
5. Beyond the Buzzz: Advanced Tips for Experienced Artists

For those of you who've already drawn a few hundred six-legged friends, your insects art guide printable can still be a springboard for pushing your skills further. Veterans can use this guide as a reference to maximize realism and explore new dimensions.
- Mastering Foreshortening: Insects, especially flying ones, often involve complex angles. Practice foreshortening to make legs, wings, and antennae look like they’re coming towards or receding from the viewer.
- Anatomical Accuracy: Go beyond basic shapes. Learn the names of different insect parts (femur, tibia, tarsus, venation patterns on wings) and strive for biological accuracy. This adds a layer of expertise to your work.
- Iridescence & Transparency: Capturing the shimmering, color-shifting quality of many insect wings and exoskeletons is a true challenge. Experiment with layering transparent mediums (watercolors, thin acrylics) and subtle color shifts.
- *My favorite strategy:* I often layer a light wash of iridescent paint over a base color to achieve this effect; it saved me countless times when trying to render a jewel beetle!
- Environmental Context: Instead of just drawing the insect, create a mini-ecosystem around it. Show it interacting with a flower, perched on a specific plant, or camouflaged within its habitat.
- Narrative Through Art: Can your insect tell a story? Is it hunting? Mating? Emerging from a chrysalis? Infuse your art with a narrative element.
- Digital Insect Art: Explore digital drawing programs. They offer undo functions, layers, and brushes that can simulate traditional mediums, opening up new possibilities for detail and experimentation.
- Scientific Illustration Techniques: Delve into the precise, detailed world of scientific illustration. This focuses on extreme accuracy and clarity, often using ink and stippling.
6. Showcasing Your Swarm: Displaying Your Insect Art
You've put in the time and effort to create beautiful insect art using your insects art guide printable and your newfound skills. Now, it's time to share it with the world (or just your living room!).
- Framing & Matting: A simple frame and a complementary mat can elevate even a small drawing. Choose colors that enhance your artwork without overpowering it.
- Creating a Series: Consider drawing a collection of insects in a similar style or medium. A series often looks more impactful than a single piece.
- Digital Portfolio: Create an online portfolio (e.g., on Instagram, Behance, or a personal website) to showcase your work. This is great for sharing with friends, family, and other art enthusiasts.
- Greeting Cards & Gifts: Your insect art can be printed onto greeting cards, bookmarks, or small prints, making thoughtful, personalized gifts.
- Art Fairs & Local Exhibits: If you're feeling confident, look for local art fairs or community exhibits where you can display and even sell your work.
- Photography Your Artwork: Get good at taking photos of your art. Good lighting and a steady hand can make a big difference in how your work appears online or in print.
- Critique Groups: Share your work with fellow artists for constructive feedback. It’s a great way to learn and grow.
Tips for Personalizing Your Insect Art
Making your insect art truly *yours* goes beyond just drawing well. It's about injecting your personality and unique perspective into every piece.
- Choose Insects That Resonate: Do you have a favorite childhood memory involving a ladybug? Or perhaps you're fascinated by the engineering of a particular beetle? Drawing insects that you have a personal connection to will make the process more engaging.
- Incorporate Your Style: Are you drawn to realism, abstraction, whimsical illustration, or scientific rendering? Let your personal style shine through. Don't feel pressured to mimic exactly what you see in the insects art guide printable; use it as a spring-board for your own interpretation.
- Add Unique Details: Maybe a tiny dewdrop on a spider's web, a whimsical flower that doesn't quite exist, or an unexpected color pop. These small touches make your art memorable. I find that this approach works best for adding character to otherwise generic insect poses.
- Experiment with Backgrounds: The setting you choose can dramatically change the feel of your piece. Consider a stylized background, a plain color to make the insect pop, or even a detailed botanical setting.
- Personal Anecdote/Story: If your art is for someone else, or if you're writing about it, include a brief story about why you chose that particular insect or what inspired you.
Common Pitfalls: What to AVOID When Creating Insect Art
We all make mistakes, and learning from them is crucial. Here are some common traps to avoid when you're busy creating your entomological masterpieces. Don’t be like me and make these mistakes – I've learned them the hard way!
- Don't Rush the Sketch Phase: Trying to go straight for detail without a solid underlying sketch is a recipe for wonky proportions and frustration. Slow down and build your foundation. This is why the insects art guide printable is so valuable for beginners – it provides that structure.
- Avoiding Reference Photos: While imagination is great, realistic insect art *requires* looking at actual insects or high-quality photos. Don't rely solely on what you think a bug looks like; it often leads to inaccuracies.
- Ignoring Anatomy (Initially): While artistic license is fine later, in the learning phase, try to understand the basic anatomy. Knowing where the head, thorax, and abdomen connect, and how many legs an insect *actually* has (six!), will improve your realism.
- Overworking It: Sometimes, less is more. Constantly adding layers of color or endlessly trying to "fix" a small area can muddy your colors or make your art look overworked. Know when to step away. I've ruined many a watercolor trying to add "just one more layer!"
- Using a Dull Pencil (Seriously!): A sharp pencil allows for clean lines and precise details. A dull one leads to fuzzy, imprecise drawings. Keep that sharpener handy!
- Fear of Failure: Every "bad" drawing is a learning opportunity. Don't let the fear of not being perfect stop you from creating. Embrace the journey of improvement.
- Not Protecting Your Work: Once you've finished, consider spraying your pencil or charcoal drawings with a fixative to prevent smudging. Store finished pieces carefully to avoid damage.
---
And there you have it! From breaking down the intricate beauty of a beetle to giving wings to a vibrant butterfly on your paper, this guide, along with your trusty insects art guide printable, is your ticket to a world of artistic discovery. Remember, every artist started somewhere, and the most important tool you possess is your passion and willingness to learn. Now go make some truly bug-tiful art! Happy drawing!