Oh, the humble bulletin board! It’s more than just a place to pin notices; it’s a canvas, a communication hub, a vibrant centerpiece in classrooms, offices, community centers, and even our homes. But let’s be honest, creating a truly eye-catching, impactful bulletin board can feel like a daunting task. The biggest hurdle? Those perfect, uniform, attention-grabbing letters. Hand-cutting them is a monumental time sink, and buying pre-made sets can quickly drain your budget. Trust me, I’ve been there. I remember one frantic Sunday night, scissors in hand, trying to cut out 50 tiny letters for a school project that was due Monday morning. My fingers ached, my patience wore thin, and the end result looked... well, let's just say "rustic" was a generous description.
That’s where the magic of free printable bulletin board letters PDF comes in. Imagine a world where you can instantly access a treasure trove of fonts, styles, and sizes, ready to transform your ideas into stunning visual displays, all without spending a dime or sacrificing your precious time. This isn't just about saving money; it's about unlocking a new level of creative freedom and efficiency. Whether you're a seasoned educator crafting an engaging classroom theme, a parent building a whimsical learning space at home, a community leader organizing an event, or a small business owner aiming for a professional look, this guide is your ultimate companion.
We're going to dive deep into the world of free printable bulletin board letters. We’ll explore where to find them, how to choose the perfect set for any occasion, advanced tips for customization, and practical advice for making your bulletin board truly shine. By the end of this comprehensive guide, you’ll be equipped with all the knowledge and inspiration you need to transform any blank space into a captivating message board that truly speaks volumes. Let’s embark on this creative journey together!
---
Table of Contents

- [The Alphabetical All-Stars: Classic & Versatile Fonts](#the-alphabetical-all-stars-classic--versatile-fonts)
- [Theme Dream Teams: Letters for Every Occasion & Season](#theme-dream-teams-letters-for-every-occasion--season)
- [Beyond the Basics: Decorative & Artistic Letter Styles](#beyond-the-basics-decorative--artistic-letter-styles)
- [Size Matters: Large-Scale & Mini Letter Solutions](#size-matters-large-scale--mini-letter-solutions)
- [Creative Customization: Making Them Uniquely Yours](#creative-customization-making-them-uniquely-yours)
- [The Printing & Prepping Playbook: From PDF to Perfection](#the-printing--prepping-playbook-from-pdf-to-perfection)
- [Display Dynamics: Arranging & Attaching Your Letters with Flair](#display-dynamics-arranging--attaching-your-letters-with-flair)
- [Troubleshooting & Tips: Common Hurdles & Smart Hacks](#troubleshooting--tips-common-hurdles--smart-hacks)
- [The Eco-Friendly Approach: Sustainable Bulletin Board Practices](#the-eco-friendly-approach-sustainable-bulletin-board-practices)
- [Inspiration Gallery: Real-World Examples & Ideas](#inspiration-gallery-real-world-examples--ideas)
- [How to Choose the Best Free Printable Bulletin Board Letters for Your Needs](#how-to-choose-the-best-free-printable-bulletin-board-letters-for-your-needs)
- [Common Pitfalls to Avoid When Using Printable Letters](#common-pitfalls-to-avoid-when-using-printable-letters)
- [Advanced Tips for Bulletin Board Maestros](#advanced-tips-for-bulletin-board-maestros)
- [Conclusion](#conclusion)
---
The Alphabetical All-Stars: Classic & Versatile Fonts
When you're searching for free printable bulletin board letters PDF, sometimes you just need the reliable, go-to options. These are the workhorses of the bulletin board world – timeless, readable, and incredibly versatile. They form the foundation for countless displays, allowing your message to shine without distraction. Think clear, crisp lines and easy readability from a distance.
1. Simple Sans-Serif (e.g., Arial, Helvetica-esque): These fonts are the epitome of clean design. Their lack of decorative "feet" (serifs) makes them incredibly legible, even from across a large room. Perfect for informational boards where clarity is key.
- *Personal Scenario:* I once used a basic sans-serif for a PTA meeting agenda board. The clear, uncluttered letters ensured every parent could quickly grasp the main topics, even those rushing in late. No one had to squint!
2. Classic Serif (e.g., Times New Roman-esque): With their elegant serifs, these fonts convey a sense of tradition and formality. They're excellent for more academic or official announcements, adding a touch of classic sophistication.
3. Bold and Blocky: Think big, chunky letters that demand attention. Ideal for headlines, titles, or any message you want to pop. They fill space well and are fantastic for impactful statements.
- *My Go-To:* For event announcements, I always gravitate towards a bold, blocky font. It screams "important!" and ensures no one misses the date or time.
4. Handwriting-Style (Neat & Legible): These fonts mimic neat handwriting, adding a personal, approachable touch without sacrificing readability. Great for "Welcome" signs or messages meant to feel warm and inviting.
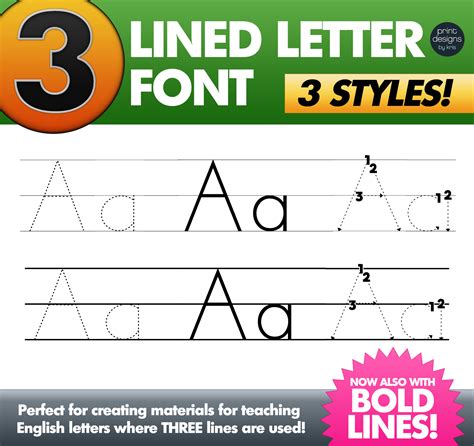
5. Outline Fonts: These letters are just the outline, allowing you to print them and then fill them in with markers, crayons, or even glitter! They offer a fantastic creative opportunity for interactive boards or student involvement.
6. Bubble Letters: Playful and friendly, bubble letters are a perennial favorite for younger audiences. They're soft, rounded, and perfect for elementary school classrooms, daycares, or children's event announcements.
7. Stenciled Fonts: Mimicking traditional stencil designs, these fonts have breaks in the letterforms. They add an industrial or DIY aesthetic and are great for themed boards like "Construction Zone" or "Art Project."
8. Thin & Elegant: For a more refined or minimalist look, thin sans-serif fonts offer understated sophistication. They're perfect for displays where you want an airy, modern feel, perhaps for a library or a subtle office announcement.
9. Standard Uppercase Only: Many free PDF sets offer uppercase letters exclusively. This simplifies design choices and ensures consistency, especially for titles or headings.
10. Mixed Case Availability: The best sets provide both uppercase and lowercase options, giving you greater flexibility for proper grammar and more natural-looking sentences.
11. Punctuation & Numbers Included: A truly versatile set will include common punctuation marks (commas, periods, exclamation points, question marks) and numbers, saving you the hassle of finding separate sets for these crucial elements.
12. Monospaced Fonts: While less common for bulletin boards, monospaced fonts (where every character takes up the same amount of horizontal space, like on a typewriter) can offer a retro or techy vibe. They're a niche but interesting choice for specific themes.
Theme Dream Teams: Letters for Every Occasion & Season
One of the most exciting aspects of free printable bulletin board letters PDF is the sheer variety of themed options available. These aren't just letters; they're design elements that instantly set the mood and reinforce your message, transforming a simple board into a storytelling canvas.
1. Seasonal Sensations (Fall, Winter, Spring, Summer):
- Fall: Think rustic wood grain, changing leaves, pumpkin patches, or cozy sweater textures. Perfect for "Welcome Fall," "Harvest Festival," or "Autumn Adventures."
- Winter: Snowflakes, icy blues, warm flannels, or even a cozy knit pattern. Ideal for "Winter Wonderland," "Holiday Cheer," or "Snow Day Fun."
- Spring: Pastel florals, blooming branches, raindrops, or vibrant green leaves. Use for "Spring into Action," "Garden Party," or "New Beginnings."
- Summer: Bright suns, beach balls, ocean waves, or picnic blanket patterns. Great for "Summer Reading," "Beach Bash," or "Vacation Vibes."
2. Holiday Hues (Christmas, Halloween, Valentine's Day, etc.):
- Christmas: Candy canes, Santa hats, twinkling lights, or festive plaid.
- Halloween: Spiders, bats, spooky eyes, or jack-o'-lantern grins.
- Valentine's Day: Hearts, cupids, lace, or romantic script.
- *Personal Scenario:* Last Halloween, I found a PDF set with dripping slime-effect letters. They were an absolute hit for our "Spooky Story Contest" board at the community center, making it feel instantly festive and fun!
3. Educational Endeavors (Science, Math, Reading, History):
- Science: Beakers, atoms, DNA strands, or futuristic tech patterns.
- Math: Graph paper, numbers, geometric shapes, or calculator buttons.
- Reading: Open books, library card catalogs, quill pens, or storybook motifs.
- History: Parchment, old maps, quill pens, or historical figures' silhouettes.
4. Fantasy & Adventure: Dragons, castles, magical wands, outer space, or pirate maps. Perfect for "Adventure Awaits" or "Explore New Worlds."
5. Nature & Outdoors: Trees, mountains, animals, camping gear, or starry nights. Great for "Go Green" or "Explore Nature."
6. Sports & Games: Scoreboards, jerseys, specific sports equipment (footballs, basketballs), or game controller elements. Ideal for "Team Spirit" or "Game On!"
7. Under the Sea: Waves, fish scales, mermaids, seashells, or coral reef patterns. Brings an aquatic vibe to "Dive Into Learning" or "Ocean Explorers."
8. Food & Celebrations: Cupcakes, confetti, balloons, ice cream, or party hats. Excellent for "Happy Birthday" or "Let's Celebrate!"
9. Careers & Community Helpers: Tools, uniforms, medical symbols, or civic buildings. Inspires future dreams with "What Do You Want to Be?" or "Community Heroes."
- *My Own Experience:* For a "Career Day" board, I used letters designed like various tools (hammers, wrenches, paintbrushes). It made the whole display instantly relatable and engaging for the kids.
10. Travel & World Cultures: Maps, passports, famous landmarks, or flags. Perfect for "Around the World" or "Global Connections."
11. Art & Creativity: Paint splatters, crayon textures, musical notes, or abstract patterns. Encourages artistic expression with "Unleash Your Inner Artist."
12. Farm & Rustic: Barn wood, hay bales, animal prints, or gingham patterns. Creates a cozy, down-to-earth atmosphere for "Farm Fun" or "Harvest Time."
Beyond the Basics: Decorative & Artistic Letter Styles
Once you've mastered the classic and themed free printable bulletin board letters PDF, it's time to explore the truly artistic and decorative options. These styles are designed to be eye-catching, adding an extra layer of visual interest and personality to your bulletin board. They often become art pieces in themselves.
1. Distressed/Vintage Look: Letters with a worn, faded, or slightly torn texture. They evoke a sense of history, nostalgia, or rustic charm, perfect for "throwback" themes or antique-inspired displays.
2. Ombre/Gradient Colors: Letters that smoothly transition from one color to another, or from a dark shade to a lighter one. This creates a visually appealing depth and modern aesthetic, especially striking against a contrasting background.
3. Glitter/Sparkle Effect: While you can't print actual glitter, many PDFs offer a graphic representation of glitter or shimmer. This adds an instant touch of glamor and excitement, fantastic for celebratory or whimsical boards.
- *Subjective Tip:* I absolutely adore glitter-effect letters for anything celebratory. They just make the whole message feel more special and festive, even if it's just printed!
4. Chalkboard Style: Letters designed to look like they're written in chalk on a blackboard. This gives a cozy, academic, or coffee shop vibe, perfect for quotes, daily messages, or a "Today's Lessons" board.
5. Water-Color Wash: Soft, blended colors that mimic the look of watercolor paint. These letters are often translucent or have a dreamy quality, ideal for calming, artistic, or inspirational displays.
6. 3D/Shadow Effect: Letters that appear to pop off the page due to cleverly designed shadows or dimensional effects. This adds a dynamic, engaging quality, making your titles truly stand out.
7. Pop Art Inspired: Bold colors, strong outlines, and often a comic book-like feel. These letters are energetic and attention-grabbing, perfect for creative projects, youth events, or anything needing a burst of energy.
8. Scribble/Doodle Fonts: Letters that look like they were hastily but charmingly drawn. They add a playful, informal, and highly creative touch, great for a "Brainstorming" board or a space where ideas are encouraged to flow freely.
- *Personal Anecdote:* My daughter, who loves to doodle, helped me pick out a scribble-style font for her "Reading Nook" sign. It instantly made the space feel more personal and inviting for her.
9. Layered/Stacked Designs: Some advanced PDFs offer letters with multiple layers or elements that can be cut out and stacked to create a textured, multi-dimensional look. This requires a bit more effort but the payoff is huge.
10. Geometric Patterns: Letters filled with stripes, polka dots, chevron, or other geometric designs. These add a modern, stylish touch and can be coordinated with room decor or specific graphic themes.
11. Furry/Textured Look: Letters designed to look like they're made of fur, fabric, or even tree bark. These are fantastic for themed boards (e.g., animal themes, nature themes) where you want to add a tactile visual element.
12. Abstract Art Fill: Letters filled with non-representational patterns, brushstrokes, or color splashes. These are for when you want your letters to be a piece of art in themselves, adding a contemporary and unique flair to your display.
Size Matters: Large-Scale & Mini Letter Solutions

Finding the right size of free printable bulletin board letters PDF is crucial for readability and visual impact. A title meant to be read from a distance needs to be large and bold, while a detailed explanation might require smaller, more subtle lettering. Thankfully, the PDF format offers incredible flexibility in scaling.
1. Full-Page Letters: Often, each letter in a PDF set will occupy an entire 8.5x11 inch page. These are perfect for grand titles, single-word displays, or when your bulletin board is viewed from afar (e.g., across a hallway or large classroom).
- *Personal Scenario:* For our school's "Book Fair" announcement, I printed giant, full-page letters. You could see the sign clearly from the main entrance, pulling everyone in!
2. Half-Page Letters: Many PDFs offer two letters per page, making them half the size of full-page letters. This is a great mid-range option for subheadings or slightly smaller bulletin boards. It also saves paper!
3. Four-to-a-Page Letters: When you need a more economical or compact option, four letters per page provides a good balance of size and paper efficiency. Ideal for quotes, longer phrases, or medium-sized displays.
4. Miniature Letters (Six or More Per Page): For detailed information, labels, captions, or smaller, intricate displays, miniature letters are invaluable. They work well for labeling sections of a board or creating a "word wall."
- *My Tip:* When I'm creating individual student name tags for a "Star Students" board, I always look for PDF sets that offer multiple letters per page. It's so much more efficient.
5. Scalable PDFs: The beauty of a PDF is its scalability. You can often adjust the print percentage in your printer settings (e.g., print at 75% or 150%) to achieve custom sizes, even if the file isn't explicitly designed for it. This gives you ultimate control.
6. "Print to Fit" Option: Most printer dialogue boxes have a "Print to Fit" or "Scale to Fit Media" option. This will automatically resize the letters to fit your chosen paper size, which can be helpful if you're printing on non-standard paper.
7. Large Format Printing Considerations: For truly enormous letters (e.g., for a gym banner), you might need to use a print shop that offers large-format printing. Some PDFs are designed with vector graphics, meaning they can be scaled up infinitely without pixelation.
8. Smallest Practical Size: Be mindful that if letters are too small, they become difficult to cut and read. Generally, letters smaller than 1 inch high are best reserved for very close-up viewing or specific craft purposes.
9. Consistency in Sizing: When downloading multiple sets or individual letters, ensure they are designed to be consistent in size within a phrase or word. Mixing wildly different scales can make your board look disjointed unless it's an intentional design choice.
10. Font Weight & Size Impact: A bold, thick font will appear larger and more impactful than a thin, delicate font of the same point size. Consider the font's visual weight when choosing your letter size.
11. Mixed-Size Display: Don't be afraid to mix and match sizes! A large, bold title with smaller, supporting text below it is a classic and effective design strategy for leading the viewer's eye.
12. Testing Before Printing All: If you're unsure about the optimal size, print just one or two letters as a test. Hold them up against your bulletin board to get a real-world sense of their scale before committing to printing the entire alphabet. This saves paper and frustration.
Creative Customization: Making Them Uniquely Yours

The beauty of free printable bulletin board letters PDF isn't just in the variety they offer, but in the blank canvas they provide for your own creative flair. These letters are just the starting point; with a few simple techniques, you can transform them into truly unique, personalized elements that perfectly match your vision.
1. Coloring & Shading: If you print outline letters, or even solid ones, you can color them in with markers, crayons, colored pencils, or paint. Add gradients, stripes, polka dots, or even realistic shading for a 3D effect.
- *Personal Scenario:* For a "Growth Mindset" bulletin board, I printed simple outline letters and had each student color a letter with their favorite colors and patterns. It made the board a collaborative art piece and deeply personal.
2. Adding Textures & Patterns: Glue fabric scraps, glitter, sequins, small buttons, sand, cotton balls (for clouds!), or even dried leaves onto your letters. This adds a tactile, multi-dimensional element.
3. Laminating for Durability: Once printed and cut, laminate your letters! This protects them from wear and tear, makes them wipeable, and allows for reuse year after year. It's a game-changer for classroom decor.
4. Backing with Cardstock: After cutting, glue your printed letters onto slightly larger pieces of colored cardstock. This creates a border, makes the letters pop, and adds rigidity. Experiment with contrasting or complementary colors.
5. Layering with Different Materials: Instead of just cardstock, try backing letters with craft foam, felt, cork, or even thin plywood (if you're crafty with a scroll saw!). This creates incredible depth and texture.
6. Adding Embellishments: Punch holes and string ribbon through the top, attach small pom-poms, sticky googly eyes, or miniature themed cutouts (e.g., tiny stars on a space-themed letter).
7. Creating a Drop Shadow: After cutting out your letter, trace around it onto a darker piece of paper, slightly offset. Cut out the shadow shape and glue the letter on top for an easy, professional-looking drop shadow.
8. Edge Distressing: For a vintage or rustic look, gently sand the edges of your cut letters, or use an ink pad to smudge the edges with a darker color.
9. Glitter Glue Outlines: Outline your letters with glitter glue for a subtle sparkle that catches the light without the mess of loose glitter.
10. Hole Punch Designs: Use decorative hole punches (stars, hearts, circles) around the edges of your letters for a delicate, lacy effect.
- *My Favorite Trick:* I love using a tiny star punch around the edges of letters for a "Magical Reading Corner" board. It's a small detail that makes a big impact.
11. Stenciling on Top: Once the letters are cut, use a small stencil (e.g., stars, dots) and paint or ink to add a repeating pattern directly onto the letters.
12. Mixing & Matching Fonts/Styles: Don't feel obligated to stick to one font for an entire phrase. Combine a bold title font with a more elegant subtitle font, or mix different patterns within the same word for an eclectic, artistic look. For example, "HAPPY" in bold stripes and "BIRTHDAY" in elegant dots.
The Printing & Prepping Playbook: From PDF to Perfection

So you’ve found the perfect free printable bulletin board letters PDF. Now what? The process from digital file to tangible letter involves a few crucial steps. Getting these right ensures your letters look crisp, professional, and are durable enough to last. This is where attention to detail really pays off.
1. Choose the Right Paper:
- Cardstock (65lb-110lb): This is your best friend. It's sturdy, prevents bleed-through, and holds up well to cutting and handling. Essential for letters you want to reuse.
- Photo Paper (Matte or Glossy): For vibrant colors and a premium feel, photo paper (especially matte) can make your designs pop.
- Regular Printer Paper (20lb-28lb): Okay for one-time use or if you're laminating immediately, but it's flimsy and prone to tearing.
2. Printer Settings are Key:
- "Actual Size" or "100% Scale": Ensure your printer isn't automatically scaling the PDF down or up. This is critical for maintaining the intended letter size.
- "Best Quality" or "Photo Quality": For crisp lines and vibrant colors, select the highest print quality setting your printer offers.
- Color Mode: Print in color even if the letters are black and white, as this often uses a richer black ink.
3. Ink Check: Make sure you have enough ink! Nothing is more frustrating than a half-printed letter or faded colors. Do a test print if you're unsure.
4. Precise Cutting:
- Scissors: Good quality, sharp scissors are essential. Take your time, rotate the paper, not the scissors, for smooth curves.
- Craft Knife/X-Acto Knife: For intricate designs, straight lines, or inner cut-outs, a craft knife on a self-healing mat is invaluable. Always cut away from your body.
- Paper Trimmer/Guillotine: For perfectly straight edges, especially on block letters, a paper trimmer is a time-saver and ensures uniformity.
- *Personal Anecdote:* I once tried to rush cutting out a detailed cursive font with dull scissors. It looked like a kindergartener’s art project. Sharp tools and patience are non-negotiable!
5. Laminating for Longevity:
- Laminator: A personal laminator is a fantastic investment if you regularly make bulletin boards. It seals the letters in plastic, making them waterproof and tear-resistant.
- Self-Adhesive Laminating Sheets: A good alternative if you don't have a laminator. Ensure you press out all air bubbles.
- Laminate *After* Cutting: For individual letters, it's generally easier to cut them out first, then laminate each one, leaving a small border around the edge for a good seal.
6. Edge Finishing: After laminating, re-trim the edges, leaving a small clear border around the letter. This border is crucial for preventing the lamination from peeling.
7. Organizing Your Letters: Once cut and prepped, sort your letters into alphabetical order or by theme. Ziploc bags, small plastic containers, or accordion folders work wonders for storage.
- *My System:* I keep a master binder with clear sleeves, each holding a different alphabet set. It makes finding specific free printable bulletin board letters PDF a breeze for future projects.
8. Test Print Before Batch Printing: Always print one sheet first to check colors, size, and clarity before printing the entire set. This prevents wasted paper and ink.
9. Consider Black and White vs. Color: If you're going to color the letters yourself, printing in black and white can save on expensive color ink.
10. Download Multiple Formats: Some sites offer not just PDF but also JPG or PNG. PDF is generally best for printing as it maintains vector quality, but sometimes other formats offer more flexibility for digital manipulation before printing.
11. Print Settings for Specific Designs: If a letter has a lot of fine detail, select a higher DPI (dots per inch) setting if your printer allows, to ensure crispness.
12. Allow Ink to Dry: Especially with heavy ink coverage or glossy paper, allow your printed sheets to dry for a few minutes before cutting or handling to prevent smudges.
Display Dynamics: Arranging & Attaching Your Letters with Flair
You've painstakingly chosen, printed, and prepped your free printable bulletin board letters PDF. Now comes the fun part: bringing your vision to life on the board! How you arrange and attach your letters can make all the difference between a cluttered mess and a polished, professional display.
1. Plan Your Layout First:
- Sketch it Out: Before touching the board, sketch your message and design on paper. This helps visualize spacing and placement.
- Lay it Out on the Floor: If your board is large, arrange the letters on the floor or a large table first to ensure proper spacing and alignment before committing to the board.
2. Achieving Straight Lines:
- Use a Ruler/Yardstick: Lightly draw a pencil line across your board where the bottom of your letters will sit. Erase it later.
- Laser Level: For ultimate precision, a small laser level projects a perfectly straight line to guide your placement.
3. Spacing is Key (Kerning and Leading):
- Kerning (Letter Spacing): Don't just put equal space between letters. Adjust the space between *each pair* of letters so it visually looks even. For example, "VA" needs less space than "VI" to look balanced.
- Leading (Line Spacing): If you have multiple lines of text, ensure consistent vertical spacing between lines for readability.
4. Attachment Methods:
- Stapler (Classic & Reliable): Quick and easy for most letters. Use a staple remover to prevent damage when taking them down.
- Thumb Tacks/Push Pins: Great for repositioning. Use clear ones for a less noticeable look.
- Hot Glue (For Permanent Displays): Use sparingly! Best for heavier letters or long-term displays where you don't plan to change the letters often.
- Double-Sided Tape/Foam Dots: For a clean look with no visible fasteners. Foam dots add a slight 3D pop.
- Removable Adhesive Putty (e.g., Blu-Tack): Excellent for temporary displays or if you want to reuse letters without staple holes.
- *My Go-To:* For classroom use, I swear by removable adhesive putty. It lets me adjust letters easily without damaging the board or the letters, and they come off cleanly.
5. Adding Dimension:
- Foam Dots/Pops: Place adhesive foam dots behind some letters to make them stand out. Vary the thickness for different levels of depth.
- Curling/Bending: For lighter paper letters, gently curl or bend them before attaching for a whimsical, flowing effect.
6. Visual Hierarchy: Use larger, bolder letters for your main message/title, and smaller letters for supporting details. This guides the viewer's eye.
7. Color Contrast: Ensure your letter color contrasts well with your background. Dark letters on a light background, or vice-versa, offer the best readability.
8. Themed Backgrounds: Don't forget the background! Use fabric, butcher paper, or even painted backdrops to enhance your letter theme. For example, a starry night background for space letters.
9. Borders & Embellishments: Add a decorative border around your entire bulletin board. Incorporate relevant cutouts, images, or student work around the letters to further illustrate your message.
- *Subjective Tip:* A strong border around your board is like framing a masterpiece. It pulls everything together and makes your free printable bulletin board letters PDF look even more intentional.
10. Lighting Considerations: Think about where your board is located. Will glare make it hard to read? Adjust letter placement or consider matte finishes if lighting is an issue.
11. Accessibility: Ensure your font choice and size are readable for all audiences, including those with visual impairments. High contrast and clear fonts are always a good choice.
12. Walk-By Test: Once your letters are up, step back and view the board from different distances and angles. Does it look balanced? Is it easy to read? Make adjustments as needed.
Troubleshooting & Tips: Common Hurdles & Smart Hacks
Even with the amazing resource of free printable bulletin board letters PDF, you might encounter a few bumps along the road. But don't despair! Most challenges have simple solutions, and a few clever hacks can save you time, ink, and frustration. Let's tackle them together.
1. Problem: Letters are pixelated/blurry when printed.
- Solution: This often means the original PDF or image file was low resolution. Always try to download PDFs designed for printing. Check your printer settings to ensure "Best Quality" or "Photo Quality" is selected. Sometimes, scaling up a small image too much will cause pixelation – try to find a larger source file if possible.
2. Problem: Ink runs out halfway through printing.
- Solution: Ah, the classic! Always check your ink levels before starting a large print job. If it happens, you might be able to replace the cartridge and resume printing. Some printers will let you print in black only if a color cartridge is empty, or vice-versa, which could save the day.
3. **Problem: Letters