Ever scrolled through an online marketplace, admiring unique jewelry, and thought, "I wish I could make that myself, exactly how I imagine it"? Or perhaps you're tired of seeing the same mass-produced designs everywhere. Trust me, I've been there! A few years ago, I stumbled into the world of 3D printing looking for a way to make custom gifts, and before I knew it, I was deep into designing my own 3D printable earrings. The sheer joy of turning a digital idea into a wearable piece of art that truly reflects my style? Unbeatable.
Whether you're a complete beginner curious about dipping your toes into digital fabrication or a seasoned maker looking to refine your craft, this guide is for you. We'll explore everything from the initial spark of an idea to the satisfying click of securing your custom-made earrings. Get ready to unleash your creativity and transform your jewelry box!
---
Why 3D Print Your Own Earrings? The Irresistible Appeal
So, why dive into the world of 3D printable earrings when you could just buy them? The reasons are as varied and vibrant as the designs themselves. This isn't just about saving a few bucks (though that's certainly a perk!); it's about empowerment, endless customization, and a truly unique creative outlet.
- Unleash Unrivaled Customization: Forget settling for what's available. With 3D printing, your imagination is the only limit. Want earrings shaped like tiny dragons? Done. A personalized charm with your initials? Easy. This level of bespoke design is almost impossible to find otherwise.
- Cost-Effectiveness & Sustainability: Once you have a printer, the material costs for earrings are incredibly low. You can print multiple pairs for pennies, making it a fantastic way to experiment without breaking the bank. Plus, printing on demand can reduce waste compared to traditional manufacturing.
- The Joy of Creation: There’s a profound satisfaction in wearing something you've brought to life from a digital file. It’s a conversation starter, a personal statement, and a testament to your growing skills in additive manufacturing.
- Perfect for Gifts & Small Businesses: Looking for a unique, heartfelt gift? A custom pair of 3D printed earrings is incredibly thoughtful. Many enthusiasts also turn this hobby into a thriving small business, selling their unique designs online or at local markets.
- Experiment with Novel Materials: Beyond standard PLA or ABS, the world of filaments offers wood composites, metallic finishes, translucent options, and even flexible materials, opening up a universe of textures and looks for your jewelry.
Getting Started: Your First Pair of 3D Printed Earrings
Feeling the itch to create? Excellent! Taking the first step into 3D printable earrings can feel daunting, but it's simpler than you think. This section is for the beginners, the curious, and anyone who's ever wondered, "How do I even start?"
- Choose Your Weapon (The 3D Printer): For earrings, a FDM (Fused Deposition Modeling) printer is usually the most accessible and affordable entry point. Look for reliable, user-friendly models like the Creality Ender 3 V2 or Prusa Mini+. Resin printers (SLA/DLP) offer incredible detail, but they come with a higher cost and more complex post-processing.
- Software Savvy: Where Designs Come Alive: You'll need 3D modeling software.
- Beginner-Friendly: TinkerCAD is a fantastic free, browser-based option to get started with basic shapes and text. I used it to design my first goofy pair of star-shaped earrings – trust me, you can't mess it up too badly!
- Intermediate/Advanced: Fusion 360 (free for hobbyists), Blender (free, powerful but steep learning curve), or SketchUp.
- Finding Your First Design (STL Files): Don't want to design from scratch yet? No problem! Websites like Thingiverse, MyMiniFactory, and Cults3D are treasure troves of free and paid 3D printable earring STL files. Search for "earrings," "jewelry," or specific shapes.
- Filament Fundamentals (Materials): PLA (Polylactic Acid) is your best friend for beginners. It's easy to print, biodegradable, and comes in a rainbow of colors. PETG is another good option, offering more durability and temperature resistance.
- Slicer Software Essentials: This program (e.g., Cura, PrusaSlicer) turns your 3D model into instructions your printer understands. It's where you set print quality, infill, supports, and layer height. Don't be afraid to play with settings; I learned the hard way that a wrong layer height can turn a delicate earring into a blob!
- The All-Important Jewelry Findings: Your printed piece needs to become an earring! You'll need earring hooks, jump rings, and small pliers for assembly. These are readily available online or at craft stores.
- Post-Processing Perks: Depending on your chosen material and desired finish, you might sand, paint, or polish your printed earrings. With PLA, a bit of light sanding and a clear coat can make a huge difference.
Design Masterclass: Elevating Your Earring Creations

Ready to move beyond basic shapes and truly make your 3D printable earrings stand out? This is where your inner artist shines. Designing unique pieces is incredibly rewarding, and a few smart approaches can transform your work.
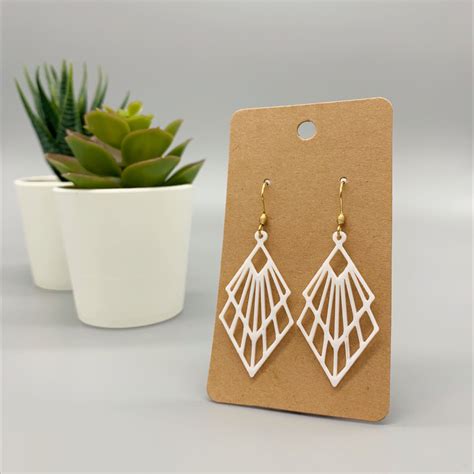
- Embrace Geometric Elegance: Simple geometric shapes like triangles, hexagons, and circles can be incredibly striking, especially when combined or layered. Experiment with cut-outs and negative space for a modern minimalist look.
- Texture Triumphs: Don't just think about shape; consider texture! Incorporate patterns like scales, woven effects, or intricate filigree into your designs. Some slicers even allow for 'fuzzy skin' or unique surface patterns.
- Think in Layers (for FDM Printing): Leverage the layer-by-layer nature of FDM printing. Design multi-layered pieces that show off contrasting colors or create depth. You can pause prints to swap filament colors for stunning multi-color effects without a multi-material printer.
- Functionality First: Attachment Points: Always remember where your jewelry findings will attach. Design a small loop, a hole, or a thin bar into your model that's sturdy enough for a jump ring but not too bulky. I once printed a beautiful design only to realize I had nowhere to attach the hook – total facepalm moment!
- Consider the Wearer's Comfort: Earrings shouldn't be too heavy or too sharp. Design with lightweight filaments and smooth edges in mind. Nobody wants earlobe fatigue!
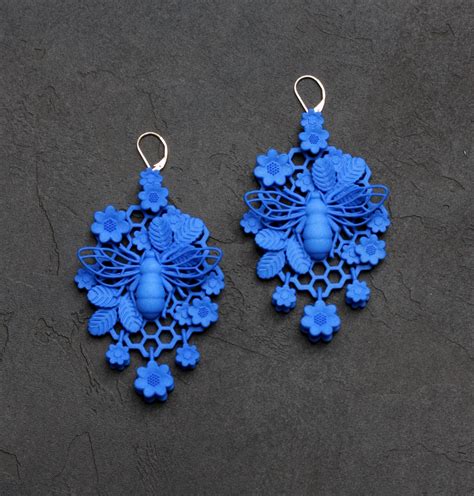
- From Nature to Niche: Draw inspiration from anywhere! Floral patterns, celestial bodies, abstract art, even intricate mechanical gears can become stunning earrings. Think about themes that resonate with you or your target audience.
- Iterate and Innovate: Don't be afraid to design, print, test, and then redesign. My personal favorite strategy for refining designs is printing smaller, quicker "test" versions to check scale and attachment points before committing to a full-size, higher-quality print. This saved me countless hours and a lot of filament.
Materials & Finishes: Beyond the Basics for Your Earring Journey
While PLA is a great starting point, the world of 3D printing filaments offers incredible variety, allowing you to achieve different looks, feels, and properties for your 3D printable earrings.
- PLA+ (Enhanced PLA): Offers slightly better strength and often a richer color payoff than standard PLA, while maintaining its ease of use. A great step up!
- PETG (Polyethylene Terephthalate Glycol): More durable and flexible than PLA, with better temperature resistance. It can be a bit trickier to print (stringing is common), but the results are worth it for more robust designs.
- Flexible Filaments (TPU/TPE): Want squishy, bendable earrings? TPU is your answer. Perfect for intricate designs that need a bit of give or for playful, unique textures. Printing flexible filaments can be challenging, requiring careful printer calibration.
- Specialty PLA Blends:
- Wood-Filled PLA: Contains actual wood fibers, allowing you to create earrings that look and even smell like wood. They can often be sanded and stained!
- Metal-Filled PLA: These filaments have metallic powders, giving a subtle sheen and a heavier, more premium feel. Post-processing (sanding, polishing) can really bring out the metallic luster.
- Silk/Shiny PLA: Formulated to have a beautiful, glossy finish straight off the print bed, often removing the need for painting. This is my go-to for elegant, ready-to-wear pieces.
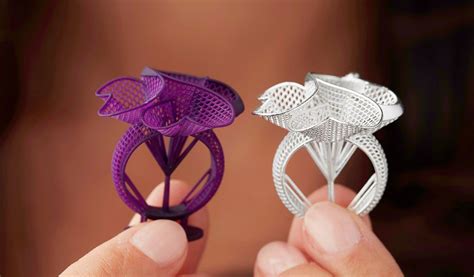
- Resin (SLA/DLP Printing): For truly intricate, highly detailed, and smooth earrings, resin printers excel. They can capture tiny details that FDM printers simply can't, offering a professional, polished look. Be aware of the post-curing and cleaning processes involved with resin.
- Finishing Touches that Transform:
- Sanding & Polishing: Smooth out layer lines for a professional finish. Start with lower grit sandpaper and move to higher grits.
- Painting: Acrylic paints work wonderfully on most filaments. Seal with a clear coat for durability.
- Clear Coats/Varnishes: Protect your earrings, add shine, or provide a uniform finish.
- Epoxy Resin Coating: For an ultra-glossy, durable, and professional look, a thin coat of clear epoxy resin can make your 3D printed earrings truly shine.
Troubleshooting & Tips from the Trenches: What I Learned the Hard Way

Nobody gets perfect prints every time, especially when dealing with delicate 3D printable earrings. Here are some common hurdles and my hard-earned advice for overcoming them. Don't be like me and make these mistakes multiple times before learning!
- Warping Woes: This happens when the print lifts off the bed.
- Fix: Ensure your print bed is clean and level. Use an adhesive like glue stick or hairspray. For larger prints, a brim or raft in your slicer can help. Enclosures also work wonders for temperature-sensitive filaments.
- Stringing & Blobs: Little wisps of filament or blobs appearing on your print.
- Fix: Adjust your retraction settings (how much filament the printer pulls back when moving). Also, check your printing temperature; sometimes it's too high.
- Poor Layer Adhesion: Layers don't stick together, making your earring brittle.
- Fix: Increase your printing temperature slightly, slow down your print speed, or check your cooling settings (sometimes too much fan can prevent layers from bonding).
- Nozzle Clogs: Filament stops extruding mid-print.
- Fix: This often comes from dust on the filament or old, brittle filament. Try a "cold pull" to clear debris, or replace your nozzle if it's damaged.
- Getting the Scale Right: Printed a design only to find it's either too big or too tiny for an earring?
- Fix: Always do a small test print or measure your existing earrings to get a feel for comfortable sizes. Remember, your slicer allows you to scale models easily.
- Delicate Details Breaking: Fine points or thin sections snapping off.
- Fix: Design with slightly thicker walls for delicate parts if possible. Print slower with more infill for strength. Consider a resin printer if ultra-fine detail is crucial.
- Patience, Grasshopper: 3D printing is a journey, not a sprint. There will be failed prints. Embrace them as learning opportunities. The perfect 3D printable earrings are worth the effort!
From Hobby to Hustle: Selling Your 3D Printed Earrings
Love your creations so much you want to share them with the world (and maybe make a few bucks)? Turning your passion for 3D printable earrings into a side hustle or even a full-time venture is absolutely achievable.
- Curate Your Collection: Focus on a niche or a specific aesthetic. Do you love abstract designs, cute animals, or minimalist shapes? Having a consistent style helps you build a brand.
- Quality is King: Ensure every pair you sell is meticulously finished. Sanding, painting, and proper assembly of jewelry findings are crucial. A quality product builds trust and repeat customers.
- Photography is Paramount: Good photos make your earrings shine. Use natural light, a clean background, and show the earrings being worn to give customers a sense of scale and style.
- Platform Power:
- Etsy: Ideal for unique, handmade items and has a built-in audience for jewelry.
- Shopify: If you want more control over your brand and website.
- Local Craft Fairs: Great for direct customer interaction and immediate feedback.
- Pricing Strategy: Calculate your material costs, time spent (designing, printing, finishing), and platform fees. Research what similar 3D printable earrings are selling for. Don't undersell your unique artistry!
- Packaging Matters: Simple, elegant packaging elevates the perceived value of your earrings and protects them during shipping.
- Tell Your Story: People connect with authenticity. Share your passion for 3D printing, your design process, and what inspires your creations. This builds a loyal customer base.
Tips for Personalizing Your 3D Printed Earrings
The magic of 3D printable earrings lies in their potential for personalization. Here’s how to make them uniquely yours, or tailor them perfectly for someone else.
- Incorporate Personal Symbols: Think of initials, birth month flowers, zodiac signs, or even a small icon representing a shared hobby or inside joke. These details make the earrings deeply meaningful.
- Color Me Happy: The filament color choice is your first layer of personalization. But don't stop there! Hand-paint details, use multiple filament colors in one print, or experiment with gradients.
- Texture & Finish Customization: Go beyond the print lines. Sand, polish, or apply a clear resin coat for different tactile and visual experiences. You can even embed glitter or tiny objects within clear resin prints.
- Themed Collections: Design sets of earrings around a specific theme – a holiday, a season, a favorite movie, or even a particular fashion style. I find this approach works best for creating a cohesive collection that truly speaks to a specific aesthetic.
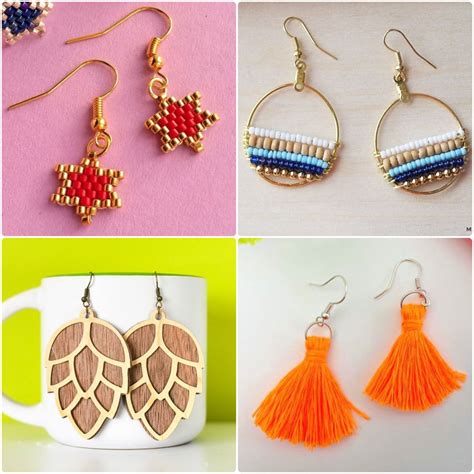
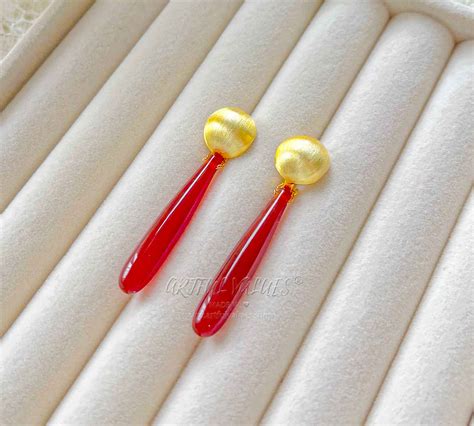
- Mix & Match Materials: Combine your 3D printed elements with traditional jewelry components like beads, tassels, or small charms. This adds texture and complexity.
- Size Matters: Scale your designs up or down. A statement earring for a bold look, or tiny studs for subtle elegance.
- Engrave or Emboss Messages: Many 3D modeling software programs allow you to add text. Imagine a hidden message or a significant date embossed on the back of an earring!
Common Pitfalls: What to AVOID When 3D Printing Earrings
While 3D printing is incredibly rewarding, there are a few traps to steer clear of, especially when creating delicate 3D printable earrings. Learn from my misadventures!
- Ignoring Scale in Design: Don't design a massive pendant and then just scale it down to earring size without considering structural integrity. Thin parts can become too fragile, and details might disappear. Always design *for* the intended size.
- Forgetting Attachment Points: As mentioned before, a beautiful print is useless as an earring if you have nowhere to securely attach the hook. Plan your loops and holes early in the design process.
- Overlooking Print Orientation: Printing an earring flat on the bed might look easy, but sometimes printing it vertically (with supports) can result in stronger layers or a smoother front face. Experiment with orientations in your slicer.
- Skimping on Post-Processing: A raw 3D print often has visible layer lines or blemishes. Don't be lazy here! A little sanding, a quick prime, and a lick of paint or clear coat can elevate your earrings from "hobby project" to "boutique quality."
- Ignoring Material Properties: Don't print a design that requires flexibility with a brittle PLA filament, or a super-detailed piece on an FDM printer if a resin printer is truly needed for that level of detail. Match the material to the design.
- Rushing Assembly: Attaching findings can be fiddly. Use the right tools (small pliers) and take your time. A poorly secured jump ring means a lost earring – and nobody wants that! Don’t be like me and accidentally launch a tiny jump ring across the room multiple times trying to rush it.
- Not Calibrating Your Printer: A poorly calibrated printer (unleveled bed, incorrect temperatures, uncalibrated E-steps) will lead to endless frustration. Take the time to dial in your settings before attempting delicate prints.
---
The world of 3D printable earrings is vast, exciting, and full of endless creative possibilities. From the initial spark of an idea to the satisfying click of a finished piece, you're not just making jewelry; you're crafting personal statements, unique gifts, and perhaps even a new income stream. So, grab your design software, load up that filament, and start bringing your wearable art to life. Now go make some magic—and make your ears fabulous!