Have you ever dreamt of blending the precision of digital art with the unique, organic beauty of watercolor? Perhaps you’ve got a stunning digital illustration, a cherished photo you want to personalize, or even an intricate pattern that just begs for a touch of classic pigment. The bridge between these two worlds is closer than you think, and it's called printable watercolor paper. Forget the myth that watercolor is only for those who start with a blank canvas and a traditional brush; this innovative medium opens up a universe of creative possibilities, letting you print, then paint.
But here’s the thing: diving into "printable watercolor paper" isn't as simple as hitting 'print' and grabbing your brushes. I once tried to print a delicate botanical illustration on regular copy paper, thinking I could just 'add watercolor' later. Spoiler alert: it buckled, smeared, and looked like a sad, soggy mess. That experience taught me the hard way that the right paper and a little know-how make all the difference. This guide is designed to save you from similar creative heartbreaks, ensuring your journey from screen to saturated masterpiece is smooth, satisfying, and spectacularly successful.
The "Why" Factor: Unlocking the Magic of Printable Watercolor Paper
So, why would you choose printable watercolor paper over traditional methods? It’s all about combining the best of both worlds, offering unparalleled flexibility and efficiency for artists of all levels.
- Seamless Digital-to-Analog Transition: Easily transfer your digital sketches, line art, patterns, or even grayscale photos directly onto a surface ready for watercolor. This means no more tedious tracing!
- Consistency and Replication: Need to make multiple copies of a design? Print them! This is a game-changer for batch production, personalized greeting cards, or even art prints you plan to hand-embellish.
- Perfecting Your Line Work: If your drawing skills aren't as strong as your painting, printing provides a perfect foundation. You can focus solely on color, shading, and blending without worrying about wonky lines.
- Experimentation Station: It's incredibly forgiving. Print a design multiple times and try different color palettes or techniques without fear of "ruining" your original drawing.
- Cost-Effective Prototyping: Before committing to a large, expensive sheet of traditional watercolor paper, test your ideas on printable versions.
Paper Playbook: Choosing the Right Printable Watercolor Paper for Your Art
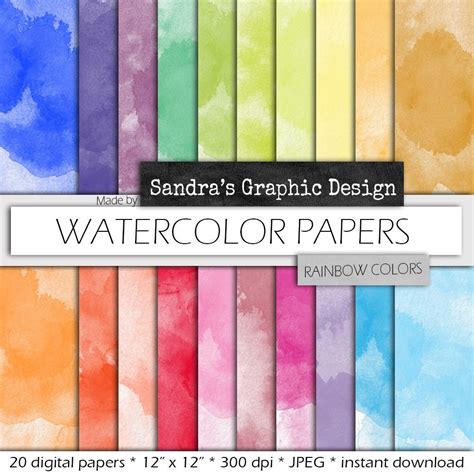
Not all "watercolor paper" is created equal, especially when it comes to going through a printer. Picking the right type of printable watercolor paper is crucial for preventing frustrating jams and achieving beautiful results.
- Weight (GSM): This is paramount. Look for paper in the range of 140lb (300gsm) to 90lb (185gsm). Thicker paper handles more water without buckling, but ensure your printer can handle its thickness. Anything too thin will warp easily.
- Texture (Cold Press vs. Hot Press):
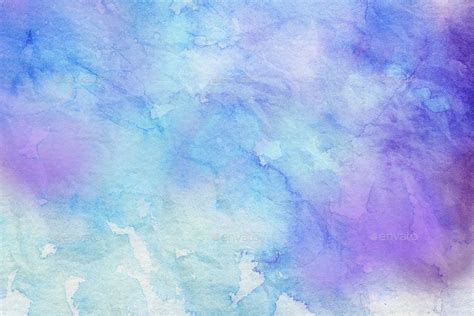
- Cold Press: Has a noticeable texture ("tooth"), which is excellent for traditional watercolor effects, allowing pigments to settle into valleys and creating granulation. It can sometimes show printer lines more if not careful.
- Hot Press: Much smoother, ideal for detailed illustrations, crisp lines, and vibrant, even washes. Prints look sharper on hot press, making it a favorite for combining digital and traditional.
- Absorbency: Good printable watercolor paper needs to absorb water properly but not bleed excessively. Look for paper specifically designed for inkjet printing that is also coated for watercolor, ensuring colors sit beautifully on the surface.
- Archival Quality: If your art is meant to last, choose acid-free, archival-quality paper to prevent yellowing or degradation over time.
- Specific Printer Compatibility: Some papers are optimized for inkjet, others for laser. Most home users will have inkjet, so ensure the paper specifies "inkjet compatible."
Printer Prep: Making Friends with Your Machine for Perfect Prints
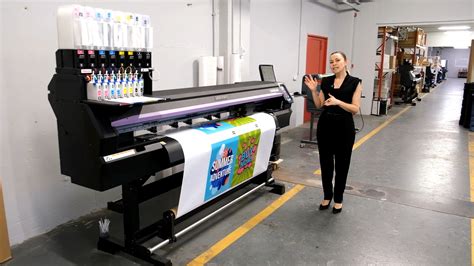
Your printer isn't just a paper-feeding robot; it's a crucial partner in bringing your printable watercolor paper creations to life. Setting it up correctly prevents headaches and wasted supplies.
- Check Your Printer's Specs: Before buying any paper, find out your printer’s maximum paper thickness (GSM/lb) it can handle. This prevents jams and ensures smooth feeding. Most home inkjet printers can handle up to 300gsm, but always double-check.
- Use the Rear Tray/Manual Feed Slot: If your printer has one, use it! This provides a straighter path for thicker paper, reducing the chances of jamming or damaging the paper as it bends through the printer's rollers.
- Printer Settings are Your Secret Weapon: This is where many go wrong!
- Paper Type: Select "Matte Photo Paper," "Fine Art Paper," or "Card Stock." Avoid "Plain Paper" settings, which will use too little ink and look faded.
- Print Quality: Always choose "Best" or "High Quality." This ensures maximum ink saturation and resolution for your design, making it a stronger base for your watercolor. Trust me, I once spent an hour trying to figure out why my prints were streaky, only to realize I hadn't changed my printer settings from 'draft mode' to 'best photo quality' – a classic beginner blunder I wish I’d known earlier!
- Borderless Printing: If your design extends to the edge, enable borderless printing in your settings.
- Ink Type Matters (Briefly): For watercolor work, pigment-based inks are generally preferred as they are more water-resistant than dye-based inks, reducing the chance of your printed lines smudging when wet.
Printing Perfection: Your Step-by-Step Guide to Crisp Impressions
Now that you've got the right printable watercolor paper and a prepped printer, let's get that masterpiece onto the page.
1. Clean Your Printer: A quick head cleaning can prevent streaks or clogs.
2. Load Paper Correctly: Ensure the printable side is facing the right way (check your printer manual). If using a rear tray, load one sheet at a time to prevent misfeeds.
3. Calibrate Colors (Optional but Recommended): If color accuracy is crucial (e.g., printing photos), a simple color calibration using your printer's utility can help.
4. Do a Test Print: Use a scrap piece of the same paper type (or a similar thickness) to print a small section of your design. Check for smudging, color accuracy, and overall quality before committing to your final sheet.
5. Let it Dry: After printing, let the ink dry completely before applying any watercolor. This is CRITICAL. Depending on your printer, ink, and paper, this could take anywhere from a few minutes to an hour. Patience here will save you from smudged lines.
Bringing it to Life: Watercolor Techniques on Your Printed Masterpiece
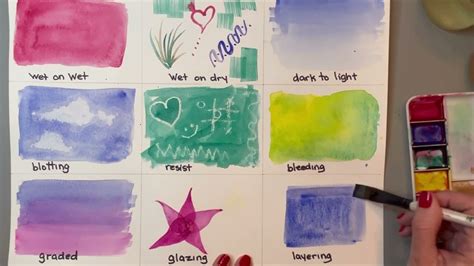
This is where the magic truly happens! Your printed design on printable watercolor paper is now your canvas, ready for your artistic touch.
- Layering Washes: Start with light, transparent washes over your printed lines. Build up color gradually. The printed base will help guide your hand.
- Negative Painting: Use the printed lines as a guide to paint *around* shapes, letting the paper (or a pre-printed color) show through for striking effects.
- Adding Details and Texture: Once your base colors are dry, use more opaque watercolor or even other mediums like colored pencils or fine-liner pens to add intricate details, textures, or highlights.
- Salt or Alcohol Effects: Experiment with dropping salt onto wet washes for unique textures, or alcohol for blooming effects, just as you would on traditional watercolor paper.
- Glazing: Apply thin, transparent layers of color over previously dried washes to deepen hues and create rich, luminous effects without disturbing the underlying print.
- Lifting: With practice, you can use a damp brush or tissue to lift color from areas, creating highlights or correcting mistakes.
Beyond the Brush: Creative Uses and Advanced Tips
Printable watercolor paper isn't just for classic paintings; its versatility unlocks a range of exciting creative projects.
- Mixed Media Marvels: Combine your printed base with gouache, acrylics, markers, or even collage elements for unique mixed media pieces.
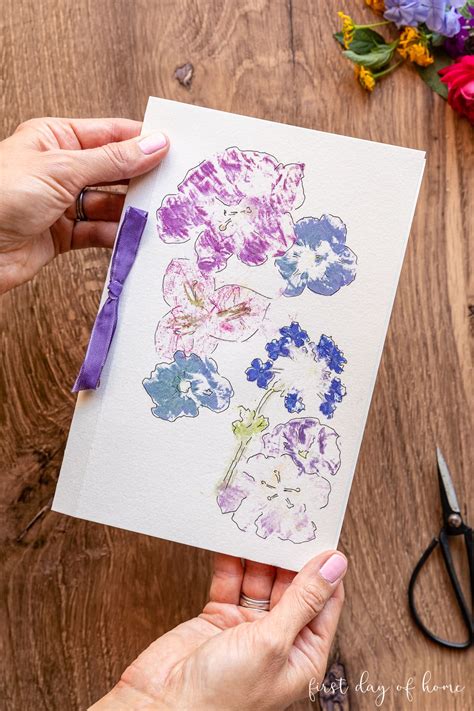
- Custom Stationery: Design and print your own watercolor-style greeting cards, invitations, or thank-you notes, adding hand-painted flourishes for a personal touch.
- Art Journaling: Print prompts, images, or backgrounds directly into your art journal, then paint over them to create unique, multi-layered pages.
- Printable Gifts: Create custom wall art, bookmarks, or small gifts by printing a design and hand-painting it. These make truly unique presents.
- Digital Art Embellishment: Print a digital painting on printable watercolor paper, then enhance it with traditional watercolor to add texture, depth, and a hand-painted feel that's often missing from purely digital work. This is my favorite strategy because it saved me countless times from flat-looking digital prints!
Troubleshooting & Triumphs: Common Hurdles and How to Overcome Them

Even with the best intentions, you might run into a snag or two. Here’s how to navigate common issues with printable watercolor paper:
- Problem: Ink Smudging When Wet:
- Solution: Ensure ink is *completely* dry before applying watercolor. Use pigment-based inks if possible. Some papers are more resistant to smudging; experiment with different brands.
- Problem: Paper Warping/Buckling:
- Solution: Use heavier paper (300gsm/140lb is ideal). Stretch the paper before use (if you're feeling ambitious and have the tools, though less common for printable). Use less water in your washes, or let layers dry completely before adding more.
- Problem: Printer Jams:
- Solution: Check your printer's maximum paper thickness. Use the manual feed slot if available. Load one sheet at a time. Fan the paper before loading to separate sheets.
- Problem: Faded or Streaky Prints:
- Solution: Set print quality to "Best" or "High Quality." Select the correct paper type in printer settings (e.g., "Matte Photo Paper"). Clean printer heads.
- Problem: Watercolor Not Absorbing Well (Beading):
- Solution: Some inkjet coatings can be too slick for watercolor. Ensure you're using paper specifically formulated for *printable watercolor* (not just photo paper).
- Problem: Colors Look Different Printed vs. Screen:
- Solution: Color calibrate your monitor and printer. Understand that screen colors are RGB (light), and print colors are CMYK (pigment), so exact matches are rare. A good printer profile can minimize discrepancies.
Tips for Personalizing Your Artwork with Printable Watercolor Paper
Making your art uniquely yours is the heart of creativity. Here’s how to inject your personality into your printable watercolor paper creations:
- Add Your Own Hand-Drawn Elements: Even if you print a base, consider drawing small details, highlights, or a personalized signature by hand *after* the watercolor is dry. This fuses the digital with the deeply personal.
- Vary Your Watercolor Style: Don't feel confined to precise fills. Experiment with loose washes, abstract splatters, or even dry brushing over your printed lines to create unique textures.
- Incorporate Text or Calligraphy: Print a quote or a special message, then embellish it with watercolor flourishes. You can even print a faint text outline and trace it with a brush pen.
- Think Beyond the Image: Perhaps print a subtle texture or a light pattern, then paint an entirely new subject *on top* of it, letting the printed background peek through. I find that adding a small, hand-drawn detail on top of a printed element really makes the piece feel uniquely mine, especially when gifting it.
- Experiment with Color Palettes: Print the same line art multiple times and challenge yourself to use completely different color schemes on each, seeing how they change the mood and feel.
Common Pitfalls: What to AVOID When Using Printable Watercolor Paper

Even experienced artists can fall into these traps. Learn from my mistakes!
- Don't Rush the Drying Process: This is the golden rule! Applying watercolor to wet ink is a recipe for smudges and blurry lines. Patience, young padawan! Don’t be like me and forget to let your prints dry *completely* before adding watercolor – I learned the hard way that impatience leads to smudges and tears!
- Avoid Excessive Water: While it's watercolor, printable watercolor paper can still buckle if overloaded. Build up layers with thinner washes rather than drenching the paper.
- Don't Use Regular Paper: Seriously, just don't. It's not designed for water and will pill, tear, and generally disappoint you.
- Don't Ignore Printer Settings: Thinking your printer will "just know" is a mistake. Always adjust quality and paper type settings for optimal results.
- Avoid Cheap Inks: While tempting, off-brand or very cheap inks might not be as water-resistant or as vibrant, potentially ruining your efforts. Stick with reputable brands or your printer manufacturer's inks.
- Don't Forget to Test: Never print your final design on your last sheet of expensive paper without a small test first. Learnings from a test print save paper, ink, and sanity.
---
There you have it! Printable watercolor paper is an incredible tool that truly bridges the gap between digital convenience and traditional artistry. It empowers you to explore new creative avenues, perfect your techniques, and bring your visions to life with a unique blend of precision and organic beauty. Now go forth, experiment, create, and make some beautiful art – one printed, painted masterpiece at a time!