Let's be honest, shipping heavy packages can feel like a mini-quest. You've packed it perfectly, secured it tight, and now comes the moment of truth: making sure it gets handled with the care it deserves. I've been there, staring at a hefty box, wondering if the "FRAGILE" sticker was enough, only to learn the hard way that a clear "HEAVY" label can prevent a world of pain – for your package *and* the person lifting it. That's where a good printable heavy package sticker comes in. It’s not just a label; it’s a silent shout-out to your carrier, saying, "Hey, this one needs a little extra muscle and attention!"
Forget worrying about strained backs or damaged goods. This guide will walk you through everything you need to know about creating and using the perfect heavy package labels, ensuring your valuable cargo arrives safely and your shipping process is as smooth as silk. We'll dive deep into best practices, smart design, and even how to make your own at home, saving you time and money.
Why Marking Heavy Packages is Crucial: Safety & Compliance First

Shipping a heavy item without proper indication is like sending someone on a blind date without a description – surprises are rarely good when it comes to lifting. A clear printable heavy package sticker is essential for several reasons, primarily safety and compliance. It protects handlers from injury and your package from damage. Trust me, you don’t want to mess this up!
- Protecting Handlers from Injury: This is paramount. An unmarked heavy package is an accident waiting to happen. The sticker warns handlers to use proper lifting techniques or get assistance, preventing back strains, drops, and other injuries. I once shipped a vintage typewriter, and if I hadn't clearly marked it heavy, I'm convinced it would have been dropped or handled improperly.
- Ensuring Proper Equipment Usage: For very heavy items, carriers might need specialized equipment like dollies or forklifts. Your label signals this need upfront.
- Compliance with Carrier Regulations: Most major carriers (USPS, FedEx, UPS, DHL) have specific requirements for packages exceeding certain weight thresholds (often 50-70 lbs or 23-32 kg). A missing or inadequate heavy label can lead to delays, surcharges, or even refusal of shipment.
- Preventing Damage to Your Package: When handlers know a package is heavy, they’re generally more careful and less likely to toss or drop it, significantly reducing the risk of damage to your valuable contents.
- Improving Logistics Flow: Clearly marked packages move more efficiently through sorting centers, reducing the likelihood of misdirection or delays caused by unexpected weight.
Designing the Perfect "Heavy" Label: Readability & Impact

A heavy package sticker isn't just a formality; it's a critical piece of communication. Its design and placement directly impact how your package is handled. Think of it as your package’s first impression – it needs to be clear, concise, and impossible to miss.
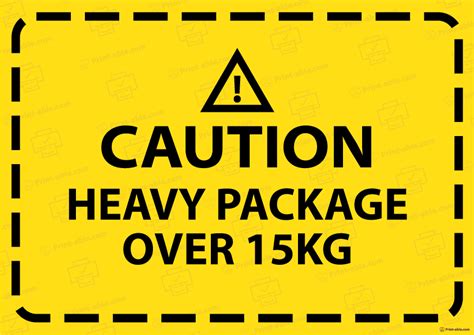
- Bold, Clear Messaging: The words "HEAVY," "HEAVY PACKAGE," or "OVER XX LBS/KGS" should be the most prominent feature. Use a large, sans-serif font that's easy to read from a distance.
- High Contrast Colors: Black text on a bright background (yellow, orange, or white) is ideal for maximum visibility. Avoid light colors or complex patterns that can obscure the message.
- Appropriate Size: The sticker should be large enough to be easily seen on any side of the package, proportional to the box itself. For a standard box, a 4x6 inch label is often a good starting point.
- Universal Symbols (Optional but Recommended): While not always a heavy symbol, using a "lift with caution" icon (a person lifting a box with a bent knee) or "center of gravity" arrow can add clarity, especially for international shipments.
- Including Weight (Recommended): Clearly stating the exact or approximate weight (e.g., "HEAVY: OVER 70 LBS" or "25 KG") provides critical information to handlers, allowing them to prepare adequately. I find this approach works best for items that are just over the threshold, as it gives handlers a precise expectation.
DIY vs. Pro: Printing Your Own Heavy Package Stickers at Home
The beauty of a printable heavy package sticker is that you don't always need to buy them pre-made. Creating your own can be cost-effective and allow for customization. If you're new to this, here's why this is important: DIY gives you control!
- Choosing the Right Material:
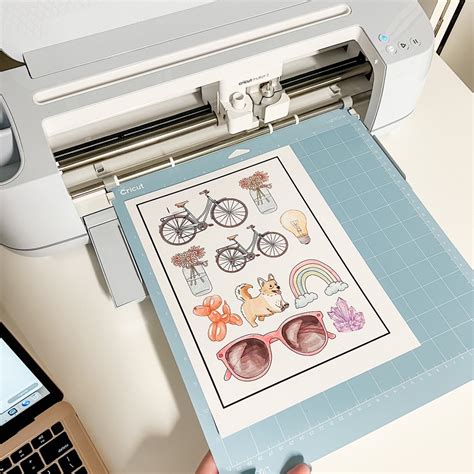
- Self-Adhesive Label Paper: This is often the easiest option. Look for full-sheet labels (8.5x11 inches) that you can cut to size after printing.
- Standard Paper + Clear Packing Tape: A budget-friendly alternative. Print your design on regular paper, cut it out, and then fully cover it with clear packing tape to protect it from moisture and tearing. This is what I did for years before investing in label paper, and it works surprisingly well!
- Printer Requirements: Most standard inkjet or laser printers can handle label paper. Ensure your printer settings are adjusted for "label" or "heavy paper" to prevent smudging.
- Design Software: Simple word processors (like Microsoft Word or Google Docs), graphic design tools (like Canva, which has great templates), or even basic image editors can be used to create your design. Search for "free printable heavy package sticker template" online for quick starts.
- Cutting Method: A good pair of scissors or a paper cutter will ensure clean, straight edges for a professional look.
- Testing is Key: Print a test sheet on regular paper first to check the size, clarity, and overall appearance before committing to label paper.
Beyond the Sticker: Best Practices for Heavy Package Shipping
While the printable heavy package sticker is vital, it's just one part of a comprehensive heavy package strategy. Veterans know that good packaging and understanding carrier rules are equally important.
- Use a Sturdy Box: Opt for double-walled or triple-walled corrugated boxes for heavy items. Regular moving boxes often aren't strong enough.
- Proper Internal Cushioning: Heavy items can shift during transit, causing damage to both the item and the box. Use dense packing materials like foam inserts, custom-cut foam, or tightly packed crumpled paper to prevent movement.
- Strategic Label Placement: Apply the heavy label to at least two, preferably four, sides of the package. Place it prominently on flat surfaces, away from seams or barcodes, where it won't be easily obscured.
- Double-Check Weight Limits: Confirm the maximum weight allowed by your chosen carrier for your service level. Exceeding this can lead to significant surcharges or refusal.
- Consider Freight Options: For exceptionally heavy or oversized items, standard parcel services might not be appropriate. Explore LTL (Less Than Truckload) freight options for safer and often more cost-effective solutions.
Common Mistakes to Avoid When Marking Heavy Packages

Even with the best intentions, it's easy to make mistakes when shipping heavy items. Don’t be like me and learn these the hard way! Avoiding these pitfalls will save you headaches, time, and potentially money.
- Using Too Small a Label: A tiny sticker on a giant box is easily missed. Ensure your printable heavy package sticker is proportionate and highly visible.
- Placing Labels on Seams or Edges: Labels placed across box seams or around corners can tear or get scuffed off during transit, rendering them useless. Always place them on flat, clear surfaces.
- Ignoring Carrier-Specific Rules: Each carrier has nuances. Some require special handling fees, others have specific label designs they prefer. Always check their guidelines.
- Underestimating the Weight: "Eyeballing" the weight is a recipe for surcharges. Always use a reliable scale to get an accurate measurement. If you’re not sure, always round up slightly.
- Not Reinforcing the Box: A heavy package needs a box that can withstand the stress. Don't rely solely on the sticker; ensure the box itself is robust enough. I once used a single-wall box for a set of dumbbells, thinking the label would suffice. Spoiler: It did not. The box burst, and I had to repackage!
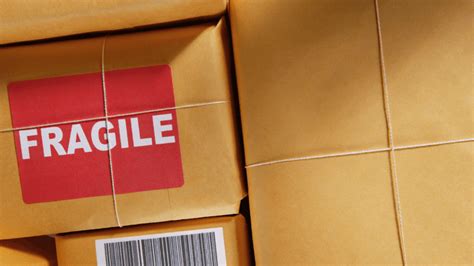
- Over-Reliance on "Fragile" Alone: While "Fragile" is important, it doesn't convey weight. A package can be both heavy AND fragile, and both need to be communicated clearly.
Saving Money & Time: Smart Strategies for Heavy Shipments

Shipping heavy items can get expensive, but with a bit of savvy, you can manage costs and streamline your process. It’s all about working smarter, not harder.
- Compare Carrier Rates: Don't just stick with one carrier. Use online comparison tools to find the best rates for your specific package dimensions and weight.
- Negotiate Discounts for Volume: If you ship heavy items regularly, contact carriers directly to inquire about bulk discounts or business accounts.
- Utilize Carrier-Provided Supplies (if applicable): Some carriers offer special heavy-duty boxes or freight containers for certain services. Check if these options align with your needs.
- Pre-Print Labels: Having a stack of printable heavy package stickers ready to go saves time, especially if you ship frequently. You can batch print them.
- Automate Your Shipping Process: If you're a business, integrating shipping software can help automate label creation, compare rates, and track shipments efficiently.
Special Considerations: Fragile & Oversized Heavy Packages
Sometimes, a heavy package isn't just heavy; it's also fragile, or oddly shaped. These require even more attention to detail.
- Fragile + Heavy: Use both "HEAVY" and "FRAGILE" labels prominently. Consider "THIS SIDE UP" arrows if orientation matters. Internal packaging becomes even more critical – use custom foam or double-boxing.
- Oversized Heavy Items: Standard parcel services have maximum dimension limits in addition to weight limits. For large, heavy items, you'll likely need to use freight services. Always measure and weigh precisely.
- Irregularly Shaped Heavy Items: If an item isn't in a standard box, ensure all labels are securely attached and visible from multiple angles. Consider crating for ultimate protection. I used this strategy to ship a custom-built computer rig, which was both heavy and delicate, and it arrived without a scratch.
Tips for Optimizing Your Heavy Package Strategy

Making your heavy package labeling and shipping process truly efficient comes down to attention to detail and a personalized approach.
- Create a Standard Template: Design one or two excellent printable heavy package sticker templates you can reuse. This ensures consistency and saves time.
- Strategic Placement: Beyond just putting it on *a* side, think about where the carrier is most likely to grab or look. Often, the top and two opposite sides are best.
- Integrate into Your Workflow: Make printing and applying heavy labels a standard step in your packaging process, just like attaching the main shipping label.
- Educate Your Team: If you have staff, ensure everyone knows the importance of proper heavy package labeling and handling. My subjective opinion is that a quick, visual checklist works wonders here.
- Feedback Loop: If you ever receive feedback (or experience a problem) related to a heavy shipment, analyze what went wrong and adjust your labeling or packaging strategy accordingly.
Conclusion
Shipping heavy packages doesn't have to be a source of stress. By understanding the critical role of a well-designed and properly placed printable heavy package sticker, combined with smart packing and shipping practices, you can ensure your items reach their destination safely and efficiently. Remember, it's about clear communication and prioritizing safety for everyone involved. Now go forth, conquer those heavy shipments, and ship smarter, not harder!