Easter morning holds a special kind of magic, doesn't it? That breathless anticipation as children wake up, wondering if the Easter Bunny truly paid a visit. As parents, guardians, and grand-friends, we live for those moments—the gasps of delight, the wide-eyed wonder, the sheer joy that lights up a child's face. And what better way to amplify that enchantment than with a whimsical trail of Easter Bunny footprints leading right to their basket of goodies?
I remember my own childhood Easters, filled with the thrill of the hunt, but it wasn't until I became a parent myself that I truly understood the power of *creating* that magic. I vividly recall one year, scrambling at 3 AM, trying to cut out crude paw prints from construction paper, wishing there was an easier, more professional way to bring the bunny's visit to life. That frantic, ink-stained morning sparked my quest to find the perfect solution, and trust me, printable Easter bunny footprints are an absolute game-changer. They transform a simple egg hunt into an immersive, enchanting narrative that children will talk about for years.
This comprehensive guide is born from countless Easters, a deep dive into creative ideas, and a desire to help you craft an unforgettable experience with minimal fuss. We’ll explore everything from classic footprint placement to dazzling creative variations, eco-friendly options, and even how to involve your little ones in the magic-making. Whether you're a first-time bunny tracker or a seasoned Easter wizard looking for fresh inspiration, prepare to unleash a wave of wonder that will make this Easter the most magical one yet. Let's hop to it and make some memories!
---
Table of Contents

- [The Magical Trail Starts Here: Classic Printable Bunny Footprints](#the-magical-trail-starts-here-classic-printable-bunny-footprints)
- [Beyond the Paw Print: Creative Variations & Customization Ideas](#beyond-the-paw-print-creative-variations--customization-ideas)
- [The Great Bunny Escape: Footprints Leading to Adventure (Beyond the Floor)](#the-great-bunny-escape-footprints-leading-to-adventure-beyond-the-floor)
- [Hopping Down the Bunny Trail: Integrating Footprints with Your Easter Egg Hunt](#hopping-down-the-bunny-trail-integrating-footprints-with-your-easter-egg-hunt)
- [Crafting Your Own Bunny Dust: DIY Footprint Fun & Embellishments](#crafting-your-own-bunny-dust-diy-footprint-fun--embellishments)
- [Troubleshooting Your Bunny's Journey: Tips for Flawless Footprint Placement & Removal](#troubleshooting-your-bunnys-journey-tips-for-flawless-footprint-placement--removal)
- [Sustainable Hoppers: Eco-Friendly & Reusable Bunny Footprint Solutions](#sustainable-hoppers-eco-friendly--reusable-bunny-footprint-solutions)
- [The Bunny's Little Helpers: Engaging Kids in the Footprint Fun](#the-bunnys-little-helpers-engaging-kids-in-the-footprint-fun)
- [From Tiny Toes to Big Leaps: Tailoring Footprints for All Ages](#from-tiny-toes-to-big-leaps-tailoring-footprints-for-all-ages)
- [The Annual Bunny Visit: Making Footprints a Cherished Family Tradition](#the-annual-bunny-visit-making-footprints-a-cherished-family-tradition)
- [How to Choose the Best Printable Easter Bunny Footprints for Your Needs](#how-to-choose-the-best-printable-easter-bunny-footprints-for-your-needs)
- [Common Pitfalls to Avoid When Creating Your Bunny Trail](#common-pitfalls-to-avoid-when-creating-your-bunny-trail)
- [Advanced Tips for Expert Bunny Trackers & Master Magicians](#advanced-tips-for-expert-bunny-trackers--master-magicians)
- [Conclusion](#conclusion)
---
The Magical Trail Starts Here: Classic Printable Bunny Footprints
There’s something undeniably enchanting about waking up on Easter morning to discover undeniable evidence that the Easter Bunny has *been there*. The classic approach to printable Easter bunny footprints is often the most effective because of its simplicity and immediate impact. These are the straightforward, iconic paw prints that instantly convey a sense of a hurried, magical visitor.
1. The Grand Entrance: Place the first few footprints right at the point of entry—perhaps near the front door (as if the bunny just hopped in), by the fireplace, or even peeking out from under a child's bedroom door. This sets the immediate scene.
2. Leading to the Loot: The most common and beloved use is to create a trail directly from the child's bed or a central point to their Easter basket. This builds anticipation with every hop.
3. Simple & Sweet: Opt for clean, simple paw print designs. These are easiest to cut out (if needed) and maintain that classic, unmistakable bunny silhouette. I find that sometimes, less is more when it comes to the immediate "aha!" moment.
4. Footprint Frequency: Don't overcrowd the floor, but don't space them too far apart either. A gentle, natural hopping distance works best, allowing kids to follow the trail easily without feeling overwhelmed or losing the path.
5. Directional Clues: Ensure all the footprints are pointing in the correct direction, leading *towards* the surprise. An upside-down footprint might confuse tiny trackers!
6. Subtle Sparkle: For an extra touch of magic without overdoing it, consider printing on slightly glossy paper or adding a sprinkle of iridescent glitter *after* they are laid down. It catches the light just right, making it seem like a bit of bunny magic dust was left behind.
7. The "Just Missed Him!" Effect: Have the trail lead to the Easter basket, then continue a few more steps towards a window or door, as if the bunny just made his swift exit. This enhances the belief that he was *just* there.
8. Varying Sizes for Authenticity: While classic designs are great, consider slightly varying the size of a few prints. Even the Easter Bunny might have a slightly clumsy hop now and then, or perhaps a different family member (a baby bunny?) joined the visit!
9. Preparation is Key: Print out plenty of copies. You'll likely need more than you think, especially if you have a longer trail or multiple children. Having spares on hand means no last-minute panic if one gets misplaced or damaged.
10. Secure Placement (Temporarily): For high-traffic areas or on slippery floors, a tiny loop of painter's tape on the back of each print can prevent them from shifting. This is crucial if you have excited little ones who might accidentally kick them aside in their rush.
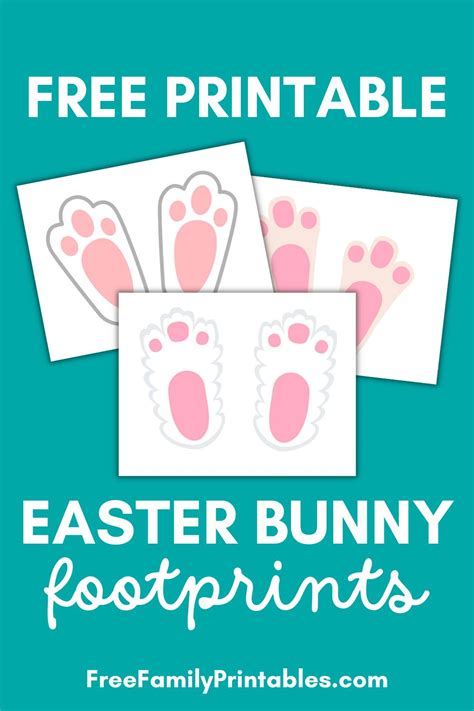
11. My Personal Go-To: For a truly classic look, I always lean towards designs that mimic a natural paw print, with distinct toe pads and a larger heel pad. It just feels more authentic and less like a stencil. Trust me, the kids notice these little details!
12. The "Surprise, Mama!" Moment: One Easter, my youngest daughter, who was about four at the time, saw the footprints leading to her basket and, with wide eyes, whispered, "Mama, the bunny *really* came!" That pure, unadulterated belief is exactly why we go through the effort. It’s a moment I replay every year.
---
Beyond the Paw Print: Creative Variations & Customization Ideas
While the classic printable Easter bunny footprints are a timeless hit, there’s a whole world of creativity waiting to be explored. Customizing your bunny trail can elevate the experience, making it uniquely yours and even more memorable. Think beyond the basic shape and delve into textures, colors, and even messages!
1. Textured Footprints: Instead of plain white paper, print your footprints on cardstock with a subtle texture, like linen or vellum. This adds a tactile dimension that makes them feel more substantial and less like a simple printout.
2. Glitter Galore: Print footprints on standard paper, then cut them out. Before placing them, apply a thin layer of craft glue and sprinkle them with iridescent or pastel-colored glitter. Let dry completely. This creates a shimmering, magical effect that truly looks like "bunny dust."
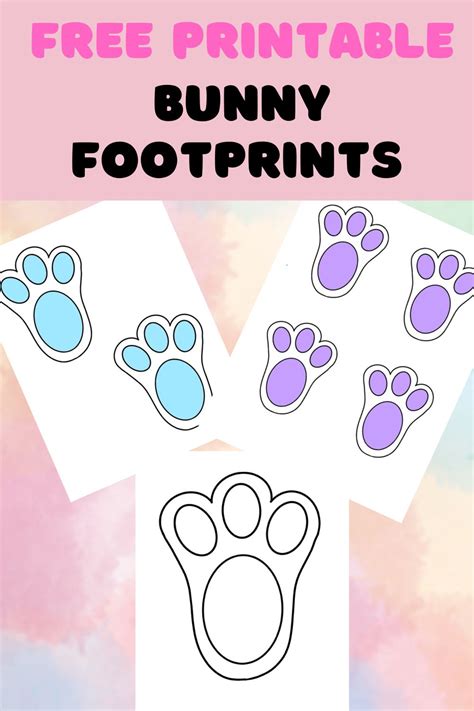
3. Pastel Palette: Don't stick to white! Print your bunny footprints on paper in soft pastel shades—light pink, sky blue, mint green, or butter yellow. You can even alternate colors to create a whimsical rainbow trail.
4. Shadow Effect Prints: Print two sets of footprints. Cut out one set cleanly. For the second set, cut slightly *outside* the lines, then layer the first set on top, slightly offset. This creates a subtle shadow effect, adding depth and a touch of artistic flair.
5. Patterned Prints: Find printable bunny footprint templates that incorporate subtle patterns within the paw print itself—think polka dots, tiny stars, or even a subtle floral design. This adds character without being overly distracting.
6. "Bunny Fur" Prints: Print footprints on fuzzy craft paper or even white felt (if your printer can handle it, or use them as templates). This adds a soft, furry texture that children will love to touch and immediately associate with a real bunny.
7. Scented Surprises: After printing and cutting, lightly spritz the footprints with a very faint, sweet scent—like vanilla or cotton candy room spray. Just a *hint* of fragrance makes the experience multi-sensory and even more immersive. *A note of caution: ensure no allergies for children, and use very sparingly!*
8. Glow-in-the-Dark Magic: For an early morning reveal in dim light, consider printing footprints on glow-in-the-dark paper. Or, use glow-in-the-dark paint pens to trace the outline of regular footprints. Imagine the excitement of following a luminous trail!
9. Personalized Messages: Incorporate tiny, handwritten (or printed) notes on some of the footprints along the trail. "Almost there!" "Hop, hop, hop!" "A special treat awaits!" These add an interactive, storytelling element.
10. The "Giant Bunny" Footprints: For a truly dramatic effect, print some of your printable Easter bunny footprints in a significantly larger size. Place them strategically as if a *very* large, special bunny made a visit, adding an element of grand scale to the magic.
11. My Secret Weapon: Embossing Powder. For a truly elevated look, I’ve experimented with clear embossing powder over printed footprints. You print the footprint, sprinkle the powder, heat it, and it gives a raised, shiny, almost wet-look texture that feels incredibly special. It’s a bit more effort, but the "wow" factor is huge.
12. The Time I Used Edible Prints: For my niece's first Easter, I found edible printer paper and food-safe ink. I printed small, simple bunny footprints and laid them on a white tablecloth. She was too young to follow a trail, but seeing the "bunny" had left edible evidence was a huge hit with the adults and older kids! (Disclaimer: ensure edible prints are on a clean, food-safe surface and are intended for consumption).
---
The Great Bunny Escape: Footprints Leading to Adventure (Beyond the Floor)
Who says printable Easter bunny footprints have to stay on the floor? To truly ignite imagination and create a sense of whimsical adventure, let the bunny's trail ascend, descend, and lead to unexpected places. This adds layers of intrigue and turns the discovery into an interactive quest.
1. Up the Stairs, Down the Stairs: If you have stairs, use them! Have footprints hopping up a few steps, then down into a new room. This extends the journey and builds suspense.
2. Furniture Hoppers: Place footprints on the edge of a coffee table, peeking out from behind a sofa cushion, or even on top of a bookshelf (if safe to reach). It suggests the bunny was a bit mischievous and explored every nook and cranny.
3. Window Sill Wanderer: A few footprints on a window sill, perhaps with a small, unraveled ribbon or a tiny, half-eaten carrot piece (real or prop) nearby, can create the illusion that the bunny paused for a moment, gazed outside, and then continued its journey.
4. Basket Clues: Have footprints leading directly into and out of the Easter basket itself. This signifies the bunny not only left the goodies but was rummaging around inside, perhaps checking his work!
5. Refrigerator Raid: Place a few footprints on the refrigerator door, maybe even leading to a small, empty carrot bag inside. This playful touch hints at the bunny’s favorite snack. *One year, my kids found bunny prints leading to a nearly empty bag of baby carrots in the fridge, and they were convinced the bunny had a pre-dawn snack. It was hilarious.*
6. Toy Box Treasure: Guide the footprints to a favorite toy box. Inside, perhaps nestled among the toys, could be a small egg or a clue to the next location. This combines their love for toys with the Easter magic.
7. Pillow Perch: A single footprint on a child's pillow, or peeking from under it, is a delightful surprise. It suggests the bunny might have checked in on them while they slept.
8. Bathroom Break: For a truly silly touch, place footprints leading to the bathroom mirror or countertop, maybe with a tiny, "bunny-sized" toothbrush (a clean doll's toothbrush, perhaps?) left behind. This adds a humorous, relatable touch.
9. Through the Laundry: If you're feeling extra playful, a few footprints emerging from the laundry basket or a pile of clean clothes can suggest the bunny got a little tangled. This always gets a giggle.
10. The "Almost Caught Him!" Doorway: Have footprints leading *under* a closed door, suggesting the bunny just slipped through. This works wonderfully if a child's main gift or basket is behind that door, building anticipation for the reveal.
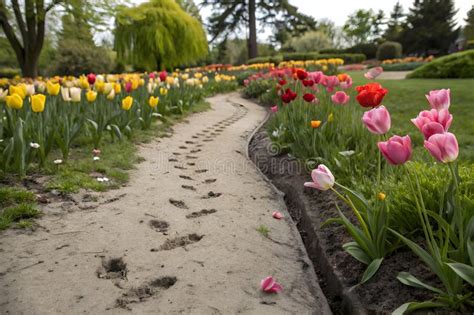
11. Outdoor Adventure (Weather Permitting): If the weather is dry and mild, extend the trail just outside the back door, leading to a garden patch, a swing set, or even a small hidden egg in the grass. This adds an element of outdoor exploration. Remember to use durable, weather-resistant prints if doing this!
12. The Bookworm Bunny: Place a few footprints on a favorite storybook, especially one about bunnies or spring. This suggests the bunny paused for a quick read before continuing its rounds.
---
Hopping Down the Bunny Trail: Integrating Footprints with Your Easter Egg Hunt
The Easter egg hunt is a cornerstone of the holiday, and printable Easter bunny footprints are the perfect tool to transform it from a simple search into a guided, storytelling adventure. They can add structure, excitement, and a narrative arc to the entire experience, making each discovered egg feel like a triumph.
1. The Starting Line: Begin the footprint trail at the child's waking spot (bedside, living room). The first few prints lead directly to the starting point of the egg hunt, perhaps a designated "start here" sign or the first visible egg.
2. Clues to Hard-to-Find Eggs: Use the footprints as breadcrumbs to guide children towards trickier hiding spots. A trail of prints leading under a bush, behind a curtain, or beneath a specific chair instantly provides a hint.
3. Path Markers: For larger or outdoor hunts, use the footprints to delineate the hunting area or to guide children along a specific path. This helps manage the flow and ensures everyone has a fair chance to find eggs.
4. "Bunny Hop" Stations: Place a few footprints at various "stations" along the hunt. At each station, there could be a small clue (a riddle, a picture) leading to the next set of footprints, or a small non-candy prize.
5. Color-Coded Trails: If you have multiple children, create different colored printable Easter bunny footprints for each child. For example, blue prints for Sarah, pink for David. Each child follows their own colored trail, leading them to their designated eggs or baskets.
6. The Grand Finale: Design the footprint trail to culminate at the location of the main Easter basket or a particularly special "golden egg." This builds excitement as they realize they're nearing the ultimate prize.
7. Footprints and Riddles: Combine footprints with written clues. A footprint might lead to a spot where a small riddle is hidden. The answer to the riddle then points to the next set of footprints, creating a fun scavenger hunt.
8. The "Bunny's Favorite Spot": Have a trail of footprints lead to a specific area where a collection of "bunny favorites" are hidden—perhaps carrots (real or toy), lettuce leaves, or bunny-themed toys alongside the eggs.
9. Interactive Directionals: Use footprints to indicate turns. A cluster of footprints pointing left at a crossroads clearly signals the bunny's direction. A single footprint pointing straight up might mean "look high!"
10. The "Almost Empty Basket" Trail: As the hunt nears its end, have a few footprints leading away from a nearly empty Easter basket, suggesting the bunny was packing up his leftovers before hopping off.
11. My Kids' Favorite: The "Mystery Door." One year, I had printable Easter bunny footprints leading to a door that was usually off-limits. Inside, I’d set up a mini "bunny wonderland" with all their baskets and a few extra surprises. The footprints made the reveal feel incredibly exclusive and magical.
12. The "Oops, I Dropped One!" Clue: Occasionally, place a single egg *next* to a footprint, as if the bunny accidentally dropped it in its haste. This is a subtle, fun hint for younger children.
---
Crafting Your Own Bunny Dust: DIY Footprint Fun & Embellishments
While printable Easter bunny footprints are fantastic for convenience, adding a DIY touch can make the experience even more personal and engaging. This section is all about getting hands-on, whether you're embellishing existing printables or creating unique footprints from scratch.
1. Glitter Outline: Print your footprints, cut them out, then use a thin line of craft glue to trace the outline of each paw print. Sprinkle generously with fine glitter (white, iridescent, or pastel) and tap off the excess. This gives a beautiful, shimmering edge.
2. Cotton Ball Pads: For a soft, plush look, cut out your printed footprints. Then, glue small, flattened cotton balls onto the "toe pads" and a larger one onto the "heel pad." This adds a delightful 3D, furry texture.
3. Stenciled Magic: If you have a Cricut or Silhouette machine, you can cut printable Easter bunny footprints as stencils from cardstock. Then, use a dusting of flour, cornstarch, or even cocoa powder (for a "muddy" bunny!) to stencil the prints directly onto the floor. *Warning: test a small area first to ensure no staining and easy cleanup.*
4. Painted Prints: Print multiple footprints on cardstock. Let children paint them with watercolors or tempera paints, choosing their favorite colors. This makes the footprints truly unique and involves the kids in the creative process *before* Easter morning.
5. Puffy Paint Power: Use puffy paint (fabric paint that puffs up when dry) to trace the outlines or fill in the pads of your printed footprints. This creates a raised, tactile effect that looks whimsical and fun.
6. Confetti Coated: After cutting out prints, apply a thin layer of glue and press small, pastel-colored paper confetti onto the footprints. This gives a festive, celebratory look.
7. Sparkle Mod Podge: For a durable, glossy finish, apply a layer of Mod Podge (gloss or glitter finish) over your printed and cut footprints. This protects them and adds a lovely sheen, making them feel more substantial.
8. Leafy Bunny Trails: For an outdoor or nature-themed hunt, print footprints on green paper. Cut them out, then use a marker to draw subtle leaf veins. You can even glue tiny, dried leaves onto them for an earthy touch.
9. DIY Stamping: Create your own bunny foot stamp! Cut the shape of a bunny paw from a potato, a sponge, or even an eraser. Dip it in paint (child-safe, washable!) and stamp directly onto paper or a non-porous surface. This is a fun activity *with* kids.
10. "Bunny Bait" Trail: Combine your printable Easter bunny footprints with tiny sprinkles of "bunny bait." This could be a mix of oat flakes, shredded coconut, or edible glitter. Place a few sprinkles around each footprint to make it look like the bunny was snacking along the way.
11. My Glitter Incident: One year, I was so excited about glitter footprints that I used way too much glue. The prints ended up clumpy and stiff. *Lesson learned:* less is often more with glitter glue! A light, even coat is perfect.
12. The "Paw Print Party" Craft: I once hosted a pre-Easter craft session where kids decorated their own printable bunny footprints with markers, stickers, and glitter. We then used "their" footprints to guide them to their baskets. The ownership of the prints made the magic even stronger!
---
Troubleshooting Your Bunny's Journey: Tips for Flawless Footprint Placement & Removal
Even the most magical plans can encounter a few bumps in the road. Ensuring your printable Easter bunny footprints look perfect, stay in place, and are easy to clean up is crucial for a stress-free Easter morning. Here’s how to avoid common pitfalls and achieve a seamless bunny trail.
1. Print Quality Check: Before printing dozens, do a test print. Check for ink levels, print clarity, and color accuracy. Faded, streaky prints won't have the same magical effect.
2. Adequate Quantity: Always print more printable Easter bunny footprints than you think you'll need. It's better to have spares for accidental rips, misplaced prints, or extending the trail unexpectedly, rather than running out at 2 AM.
3. Strategic Placement:
- Visibility: Ensure footprints are visible but not *too* obvious. They should lead the eye, not be an obstacle.
- Flow: Think about the natural path a child would take. Don't make the bunny's journey illogical or too convoluted.
- Obstacle Avoidance: Don't place prints where they'll be immediately stepped on, kicked, or hidden by furniture.
4. Securing the Prints:
- Painter's Tape: The absolute best for temporary adhesion. A small loop on the back of each print secures it to hard floors or carpets without leaving residue. It's easy to remove.
- Double-Sided Tape (Caution): Use very sparingly and only on surfaces you know won't be damaged, like sealed hardwood or durable tile. Avoid on delicate carpets or painted surfaces.
- No Tape Needed: On low-pile carpet, sometimes the friction is enough to hold lighter paper prints in place. Test a few first!
5. Surface Considerations:
- Hard Floors: Use painter's tape or non-slip backing.
- Carpets: Lighter paper might stay, but tape is safer. Avoid heavy cardstock on plush carpet as it might curl.
- Outdoor: Use laminated prints or sturdy, weather-resistant materials if placing outside. Secure with small rocks or clips if windy.
6. Cleanup Strategy:
- Easy Removal: Ensure your chosen adhesive comes off easily without leaving sticky residue or damaging floors. Painter's tape is king here.
- Glitter Containment: If using glitter, a small handheld vacuum or lint roller is your best friend for cleanup. Do it *before* the kids wake up to maintain the magic!
- Dusting Away: If you used flour/cornstarch for stenciling, have a vacuum ready.
7. The "Early Bird" Scenario: If you have very early risers, consider placing the prints just before they wake up, or setting a barrier (like a closed door) until you're ready for the reveal. My youngest once woke up at 5 AM and found the footprints before I was even fully awake!
8. Pet Patrol: If you have curious pets, ensure the prints are secured or placed out of their immediate reach, especially if you've added any edible elements or scents. A dog might find those "bunny dust" oats irresistible!
9. Durability: If you plan for the trail to last longer than a few minutes (e.g., for a whole morning of discovery), consider printing on thicker cardstock or even laminating your printable Easter bunny footprints for added resilience.
10. Test Run (Optional): If you're using a particularly intricate trail or a new placement method, do a quick "dry run" the night before. Walk the path yourself to ensure it makes sense and there are no unexpected tripping hazards.
11. My Tape Mishap: One year, I used masking tape because I ran out of painter's tape. It worked for adhesion, but it left a sticky residue on my hardwood floor that took ages to scrub off. *Never again!* Always stick to painter's tape or similar gentle adhesives.
12. The "Invisible" Footprint: I once hid a footprint under a rug edge, thinking it was clever. My child completely missed it, and it broke the flow of the trail. The magic dimmed for a moment. Ensure all footprints are easily discernible to maintain the enchantment.
---
Sustainable Hoppers: Eco-Friendly & Reusable Bunny Footprint Solutions
In our efforts to create magic, it's wonderful to also be mindful of our planet. Printable Easter bunny footprints don't have to be a one-and-done disposable item. With a little creativity, you can craft a delightful trail that's both magical and environmentally conscious.
1. Print on Recycled Paper: The simplest eco-friendly switch is to print your bunny footprints on recycled paper. Many printable templates look just as good on a slightly textured, unbleached paper.
2. "Seed Paper" Prints: Purchase or make seed paper (paper embedded with wildflower seeds). Print your footprints, use them for Easter, and then plant them in the garden! This turns cleanup into a beautiful blooming activity.
3. Laminate for Reuse: Print your favorite printable Easter bunny footprints on cardstock, cut them out, and then laminate them. Store them carefully, and you'll have a durable, reusable set for years to come. This is my personal favorite for sustainability and convenience.
4. DIY Cardboard Stencils: Create a sturdy, reusable stencil. Trace and cut out a bunny paw print from a piece of recycled cardboard (from an old delivery box, for instance). Then, use a dusting of flour or cornstarch to create temporary, compostable footprints.
5. Fabric Footprints: Instead of paper, cut bunny paw shapes from old fabric scraps (like worn-out t-shirts, towels, or flannel sheets). These are soft, reusable, and can be easily washed and stored.
6. Natural Material Prints: Use natural elements to create footprints. Collect large leaves (if available and safe), or use natural sponges cut into paw shapes. Dip them in a water-based, non-toxic paint and press onto a designated pathway or paper.
7. Digital Footprint Scavenger Hunt: Instead of physical prints, create a digital "footprint" hunt. Use QR codes hidden in various spots. Each QR code, when scanned, reveals a picture of a bunny footprint and a clue to the next location. This is zero waste!
8. Chalk Footprints (Outdoor): For an outdoor hunt on pavement or a patio, use washable sidewalk chalk to draw bunny footprints. They’ll wash away with the next rain, leaving no trace.
9. Sturdy Wood or Felt Cutouts: Invest in a set of wooden or felt bunny paw cutouts. These can be painted, embellished, and used year after year. They become a charming part of your family's Easter tradition.
10. Minimalist Approach: Instead of a long trail, use just a few key printable Easter bunny footprints—perhaps leading to the main basket—and rely more on other clues or the general magic of the morning. Less waste, still impactful.
11. My "Oops, I Forgot About Rain" Moment: One year, I diligently made beautiful chalk footprints outside. We had an unexpected spring shower overnight. The kids woke up to a faint, smudged memory of prints. *Lesson: Always check the weather forecast for outdoor plans!*
12. The "Fabric Footprint Fun": I once used old denim scraps to create footprints. The kids loved the texture, and it felt really satisfying to repurpose something old into new magic. Plus, they held up beautifully to little feet stomping all over them!
---
The Bunny's Little Helpers: Engaging Kids in the Footprint Fun
While the grand reveal of printable Easter bunny footprints is often a solo parent mission, involving children in *some* aspects of the preparation can amplify their excitement and ownership of the magic. It's about building anticipation and letting them be part of the "secret."
1. "Bunny Research" Project: Before Easter, engage kids in "researching" bunny paw prints. Look at pictures of real bunny tracks. This helps them recognize the prints on Easter morning and adds to the authenticity.
2. Footprint Decoration Station: If you’re using plain printable Easter bunny footprints, let the kids decorate them *before* Easter. Provide crayons, markers, stickers, or even glitter glue (with supervision!). Explain that these are "special training prints" for the bunny.
3. "Bunny Dust" Creation: Have kids help mix "bunny dust"—a simple blend of iridescent glitter and perhaps a tiny bit of shredded paper or cotton bits. They can sprinkle it gently over the prints *after* the bunny has visited (or you can do it stealthily).
4. Footprint Placement Planning (Pretend): On a regular day, pretend to plan a bunny trail with them using toy bunnies. Ask them where