Do you ever find yourself staring at a blank poster board, a craft project, or even a child's bedroom wall, wishing you had an easy way to make words pop with fun and personality? You're not alone! The magic of printable bubble letters of the alphabet lies in their ability to transform mundane text into vibrant, engaging visual statements. I remember once needing to whip up a last-minute birthday banner for my niece, and these letters were an absolute lifesaver – the perfect blend of cute and clear, saving me from a frantic, messy freehand attempt.
Whether you're a parent jazzing up a school project, a teacher creating engaging classroom displays, a crafter adding flair to your creations, or just someone who loves a bit of DIY, understanding how to effectively use and access these fantastic letter sets can open up a world of creative possibilities. Forget hours of trying to draw perfect, symmetrical letters by hand; we're diving into how these easy-to-use printables can make your projects shine, effortlessly.
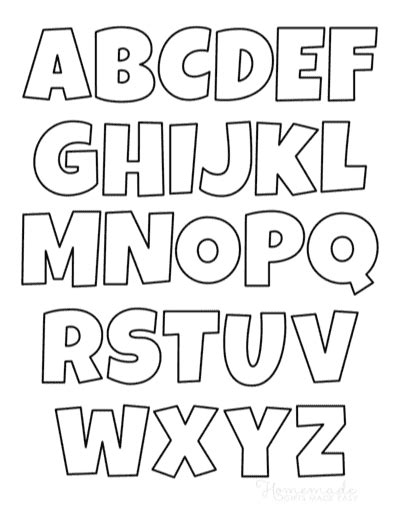
Classic & Clean Bubble Letters: Timeless Appeal for Any Project
Sometimes, simplicity is key. The classic bubble letter offers a universally appealing, rounded, and easy-to-read style that works for almost any purpose. They’re the bread and butter of the bubble letter world, offering versatility without sacrificing fun.
- Birthday Banners & Party Signs: "HAPPY BIRTHDAY!" or "WELCOME TO THE PARTY!" printed in clean, crisp bubble letters, then colored in by hand.
- School Project Titles: "OUR SOLAR SYSTEM" or "ANCIENT EGYPT" on a science fair board, making the title friendly and approachable.
- Bedroom Wall Art: A child's name, like "SOPHIA'S ROOM," in a simple, oversized bubble font, perhaps outlined and filled with their favorite colors.
- Classroom Learning Aids: Large, printable alphabet sets for teaching letter recognition or spelling words like "READ" and "PLAY."
- Event Invitations: A prominent "YOU'RE INVITED!" on a handmade card, easy to cut out and layer.
- Garage Sale Signs: "BIG SALE!" in large, legible bubble letters that can be seen from the street.
- Recipe Box Labels: Organizing your kitchen with "DESSERTS" or "DINNERS" on your recipe card dividers.
- DIY Photo Booth Props: Simple speech bubbles saying "CHEESE!" or "BESTIES" for instant fun. I used this for a family reunion, and everyone loved holding up their names!
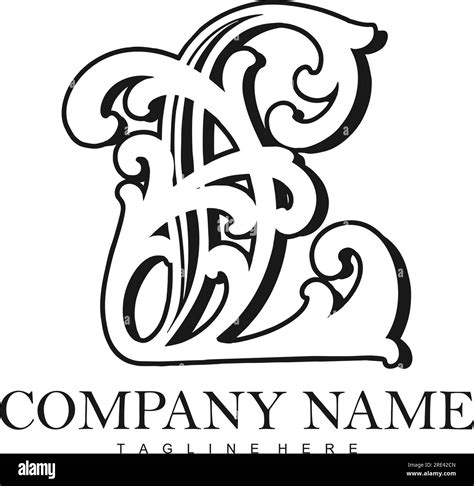
Playful & Whimsical Designs: Adding a Touch of Fun
For projects that demand a little extra personality and charm, whimsical bubble letters are your go-to. These often feature slightly exaggerated curves, playful adornments, or a more free-form, bouncy look that’s perfect for light-hearted themes.
- Nursery Decor: "DREAM BIG LITTLE ONE" above a crib, with letters that have soft, cloud-like edges.
- Playroom Organization Labels: Bins labeled "TOYS," "BLOCKS," or "ART SUPPLIES" using bouncy, uneven bubble letters to match the playful vibe.
- Puppet Show Posters: "PUPPET PARADE!" with letters that seem to dance and wiggle.
- Children's Bookmarks: Personalizing a bookmark with "READ ME!" or "MY BOOK" in a friendly, rounded font.
- Holiday Gift Tags (Non-Christmas): "TO: BEST FRIEND" or "FROM: SANTA'S HELPER" for Easter or Halloween gifts, using slightly squiggly or uneven bubble letters.
- Scrapbook Page Titles: "SUMMER VACATION" or "FUN DAY OUT" above a collage of photos, with letters that have a handwritten, casual feel.
- "Good Luck" Signs for School Plays: "BREAK A LEG!" for the actors, with letters that look like they’re skipping.
- Personalized Stationery: Printing a child’s initial in a whimsical bubble letter for their own letterhead. I once made a "ZOE'S ART" sign for my niece's art corner using letters that had little swirls – she absolutely adored it!
Bold & Blocky Statements: Making an Impact
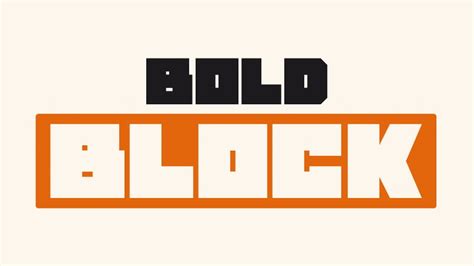
When you need your message to stand out with undeniable presence, bold and blocky bubble letters are the answer. These letters are often thicker, squarer, and command attention, making them ideal for headlines or declarations.
- Sports Team Banners: "GO TEAM!" or "CHAMPIONS" in big, sturdy bubble letters, perfect for the sidelines.
- Protest Signs or Rally Placards: "SAVE OUR PLANET" or "VOTE!" in powerful, impactful block bubble letters.
- Business Sale Promotions: "SALE!" or "OPEN NOW" for a small shop's window display.
- Concert or Event Posters: "LIVE MUSIC TONIGHT" or "ART SHOW" to grab attention from a distance.
- Teen Bedroom Door Signs: "DO NOT DISTURB" or "GAMING ZONE" in a cool, chunky font.
- School Fundraiser Posters: "BAKE SALE!" or "CAR WASH" designed to be highly visible and persuasive.
- Safety Signs (Informal): "WATCH YOUR STEP" for a DIY project area, clearly visible.
- Vision Boards: Using strong, clear bubble letters for words like "SUCCESS" or "GROWTH" to inspire. My personal go-to for making a point in a presentation (even informal ones) is a bold, all-caps bubble letter title – it just screams confidence!
Themed & Holiday-Ready Bubbles: Seasonal Sparkle
Why stick to plain when you can infuse your letters with seasonal spirit? Themed bubble letters often incorporate elements related to holidays, seasons, or specific events, making them perfect for festive decorations.
- Halloween Decorations: "BOO!" or "TRICK OR TREAT" with letters that look slightly spooky, perhaps with little cobwebs or jagged edges.
- Christmas Banners: "MERRY CHRISTMAS" or "HO HO HO" with letters that resemble snow, candy canes, or ornaments.
- Valentine's Day Cards: "BE MINE" or "LOVE YOU" with heart-shaped curves or tiny heart accents.
- Thanksgiving Place Cards: Each guest's name, or words like "GRATEFUL," using bubble letters that look like autumn leaves or pumpkins.
- Summer Pool Party Signs: "SPLASH!" or "POOL PARTY" with letters that look like they're made of water or have tiny waves.
- New Year's Eve Decor: "HAPPY NEW YEAR!" with letters that sparkle or resemble fireworks.
- Baby Shower Decorations: "IT'S A BOY!" or "WELCOME BABY" with letters that include tiny rattles or footprints.
- Graduation Banners: "CONGRATS GRAD!" with letters that resemble caps and diplomas. I once created "SPOOKY FUN" for a Halloween party, and the letters with little bat wings were a huge hit!
DIY & Customizable Options: Your Artistic Touch
Beyond just printing and coloring, the beauty of bubble letters is how easily they can be customized. These options allow you to take the basic printable and add your unique artistic flair, making each project truly one-of-a-kind.
- Outlined Letters for Filling: Print just the outline of bubble letters, then fill them with patterns, glitter, fabric scraps, or even dried beans for a tactile project.
- Stencils for Painting/Tracing: Use printed bubble letters as stencils to paint words on fabric, wood, or walls. Trust me, you don't want to mess up a wall mural, so a good stencil is key!
- "Cut and Paste" Collages: Print letters in various sizes and fonts, then cut them out and arrange them into unique, mixed-media word art.
- Adding 3D Elements: After printing and cutting, glue cotton balls, pom-poms, or small beads onto the letters for a raised effect.
- Glow-in-the-Dark Messages: Print letters, then trace or fill them with glow-in-the-dark paint for a fun nighttime surprise in a kid's room.
- Felt Board Letters: Print, cut, and laminate letters, then glue felt to the back for interactive felt board stories or lessons.
- Embroidery Patterns: Print bubble letters onto dissolvable stabilizer, then stitch over them onto fabric for personalized garments or hoops.
- Custom Coloring Pages: Print a phrase like "YOU ARE AMAZING" in outline bubble letters and use it as a custom coloring sheet for a friend.
Educational & Learning Focus: Making Learning Fun
Bubble letters aren't just for decorations; they're fantastic educational tools, especially for younger learners. Their clear, rounded forms are easy for children to recognize, trace, and even color, making learning the alphabet an engaging experience.
- Letter Recognition Flashcards: Large, distinct bubble letters for each letter of the alphabet to help preschoolers identify their ABCs.
- Spelling Practice Boards: Print words like "CAT" or "DOG" in bubble letters for kids to trace, color, or fill in with playdough.
- Name Practice Sheets: A child's name in large bubble letters for them to trace over and over.
- Sight Word Practice: Common sight words ("the," "and," "is") printed in bubble letters for early readers to master.
- Alphabet Sequencing Puzzles: Print individual bubble letters, cut them out, and have children put them in alphabetical order.
- "My First Dictionary" Pages: Each letter of the alphabet at the top of a page, with space for children to draw or write words starting with that letter.
- Phonics Fun: Print letter combinations like "SH" or "CH" in bubble letters to teach digraphs.
- Interactive Alphabet Books: Create simple books where each page features a new bubble letter for children to decorate. I found that allowing my students to trace and color their own bubble letters for their names really boosted their letter recognition!
Tips for Personalizing Your Bubble Letter Projects
Making your bubble letter creations truly shine is all about adding that personal touch. Here’s how you can elevate your designs:
- Consider Your Audience: Are these for a child, a teen, an adult? Their age and interests should influence your font choice and decoration style.
- Play with Color: Don't just stick to a single color! Use gradients, patterns, or multiple colors within a single letter. Markers, crayons, paint, or even digital fills can make a huge difference.
- Add Texture: Think beyond flat paper. Glue on glitter, small beads, fabric scraps, yarn, or even natural elements like dried leaves for a tactile experience.
- Layering is Key: Print letters on different colored papers, then cut and layer them to create a 3D effect. You can also mount letters on foam board for extra dimension.
- Incorporate Relevant Imagery: If your project is about space, add little stars or planets around your bubble letters. For a birthday, tiny balloons or confetti.
- Hand-Drawn Details: Even if you print the letters, adding small hand-drawn embellishments like dots, stripes, shadows, or outlines can give them a unique, custom feel. I find adding a subtle shadow around the letters really makes them pop off the page!
- Vary Letter Sizes: Don't be afraid to mix and match letter sizes within a single word or phrase for visual interest.
Common Pitfalls: What to AVOID When Using Printable Bubble Letters
While printable bubble letters are fantastic, there are a few common mistakes that can dampen your creative output. Learn from my own craft blunders!
- Ignoring Printer Settings: Not adjusting your printer for "best quality" or "actual size" can lead to blurry, pixelated, or incorrectly scaled letters. Always double-check!
- Using Too Many Fonts: While variety is good, sticking to one or two complementary bubble letter styles per project prevents a chaotic, unreadable mess. Don't be like me and create a sign that screams "party gone wrong!"
- Poor Paper Choice: Using flimsy paper for a project that needs durability (like a banner) will lead to tears and floppiness. Invest in cardstock or heavier paper when needed.
- Over-Complicating Designs: Sometimes, less is more. Don't add so many embellishments that the letters become hard to read. Clarity should always be a priority.
- Forgetting to Test: Before printing a whole alphabet, do a test print of one letter to ensure the size, quality, and style are exactly what you want. It saves paper and frustration!
- Not Considering Your Space: Make sure your chosen letter size fits the area where your message will be displayed. A giant banner won't work on a small door.
- Rushing the Cutting: Taking your time with scissors or a craft knife will result in much cleaner, professional-looking edges. Sloppy cuts can really detract from your hard work.
Go Forth and Create!
There you have it – your comprehensive guide to unlocking the creative power of printable bubble letters of the alphabet! From bold statements to whimsical decorations, these versatile tools are perfect for adding that special touch to any project, big or small. They truly bridge the gap between easy accessibility and boundless creative expression.
So, whether you're crafting a heartfelt message, sprucing up a classroom, or just having a fun afternoon with the kids, remember that the perfect bubble letter set is just a click away. Now go make some magic, one bubbly letter at a time!