
Oh, the magic of the holiday season! There’s something truly unparalleled about the twinkling lights, the scent of gingerbread, and the warmth of cherished traditions. And for many of us, especially those with little ones (or those who are simply young at heart), *The Polar Express* holds a special, shimmering place in our hearts. It’s more than just a story; it's a journey into the heart of belief, a reminder that the most extraordinary adventures often begin with a single, simple ticket.
I remember the first time I truly “got” the power of that golden ticket. My youngest, then just five, was utterly captivated by the movie. We’d watched it countless times, and each viewing ended with a wistful sigh and a question: "Mommy, will the Polar Express come for *me*?" My heart ached to make that magic real, even if just for an evening. That's when I stumbled upon the idea of polar express printable tickets. It wasn't just about a piece of paper; it was about unlocking a world of wonder, transforming our living room into a bustling train station, and seeing that pure, unadulterated joy in her eyes. Trust me, the effort is worth every single sparkle of wonder you'll create.
This wasn't an easy quest, though. I spent hours sifting through countless templates, wrestling with printer settings, and trying to figure out how to make these tickets feel truly *authentic*. I learned the hard way about paper weights, the perils of a dull cutting blade, and the sheer delight of a perfectly presented ticket. This guide is the culmination of those late-night searches, those trial-and-error moments, and the sheer joy of seeing a simple printable transform into a cherished memory.
Whether you're planning a full-blown Polar Express party, a cozy family movie night, or just want to surprise a loved one with a sprinkle of holiday magic, this comprehensive guide is your conductor. We’ll delve into everything from finding the perfect template to crafting an unforgettable reveal, ensuring your polar express printable tickets are not just printed paper, but passports to enchantment. Get ready to embark on a journey that’s all about creating lasting memories, one golden ticket at a time.
---
Table of Contents

- [The Magic Begins: Why Printable Polar Express Tickets?](#the-magic-begins-why-printable-polar-express-tickets)
- [Your Golden Ticket to Authenticity: Where to Find Them](#your-golden-ticket-to-authenticity-where-to-find-them)
- [Beyond the Download: Customizing Your Polar Express Tickets](#beyond-the-download-customizing-your-polar-express-tickets)
- [Printing Perfection: Tips for Professional-Looking Tickets at Home](#printing-perfection-tips-for-professional-looking-tickets-at-home)
- [The Grand Reveal: Creative Ways to Present Your Tickets](#the-grand-reveal-creative-ways-to-present-your-tickets)
- [Full Steam Ahead: Integrating Tickets into Your Polar Express Experience](#full-steam-ahead-integrating-tickets-into-your-polar-express-experience)
- [Troubleshooting & FAQs: Smooth Journeys for Your Printable Tickets](#troubleshooting--faqs-smooth-journeys-for-your-printable-tickets)
- [The Eco-Conscious Conductor: Sustainable Ticket Options](#the-eco-conscious-conductor-sustainable-ticket-options)
- [Beyond the Holidays: Year-Round Magic with Your Tickets](#beyond-the-holidays-year-round-magic-with-your-tickets)
- [The Ultimate Ticket Holder: DIY & Store-Bought Solutions](#the-ultimate-ticket-holder-diy--store-bought-solutions)
- [How to Choose the Best Polar Express Printable Tickets for Your Needs](#how-to-choose-the-best-polar-express-printable-tickets-for-your-needs)
- [Common Pitfalls to Avoid When Creating Your Tickets](#common-pitfalls-to-avoid-when-creating-your-tickets)
- [Advanced Tips for Experts: Elevating Your Polar Express Experience](#advanced-tips-for-experts-elevating-your-polar-express-experience)
- [Conclusion: All Aboard for Unforgettable Memories!](#conclusion-all-aboard-for-unforgettable-memories)
---
The Magic Begins: Why Printable Polar Express Tickets?
There’s an undeniable allure to the idea of a train whisking you away to the North Pole on Christmas Eve. It taps into the deepest corners of childhood wonder and the enduring spirit of Christmas. But why bother with polar express printable tickets when you can just watch the movie? Ah, my friend, because a tangible ticket transforms a screen into an experience, a story into a reality, and a dream into a moment you can hold in your hand.
1. Igniting Imagination: A physical ticket acts as a powerful prop, instantly transporting children (and adults!) into the world of the Polar Express. It’s the first step in believing the impossible.
2. Building Anticipation: Handing over a ticket days or even weeks before a planned "Polar Express" event (a movie night, a real train ride, or a themed party) builds incredible excitement and anticipation. It makes the event feel truly special.
3. Creating Tangible Memories: Unlike a fleeting moment, a printed ticket can be kept as a souvenir, a tangible reminder of a magical holiday experience. Many families laminate them or add them to a scrapbook.
4. Enhancing Themed Events: For a Polar Express party, these tickets are essential invitations and entry passes. They set the tone immediately and immerse guests in the theme from the moment they arrive.
5. Cost-Effective Magic: Creating your own printable tickets is often far more affordable than buying pre-made ones, especially if you need several. This allows you to allocate your budget to other magical touches, like hot chocolate and bells.
6. Personalization Power: Printable templates offer the flexibility to add names, dates, special messages, or even custom seat numbers, making each ticket unique and deeply personal.
7. Surprise & Delight: Imagine waking up on Christmas Eve morning to find a golden ticket slipped under your pillow. It’s a simple gesture that creates an unforgettable surprise and sparks pure delight.
8. Fostering Family Traditions: Incorporating printable tickets into your annual holiday routine can become a beloved family tradition, looked forward to year after year.
9. Educational & Creative Play: For younger children, designing or even just cutting out the tickets can be a fun, hands-on activity, developing fine motor skills and creativity.
10. Accessibility for All: Whether you have a fancy printer or just a basic one, the beauty of printables is that they are accessible to almost anyone with an internet connection and a printer.
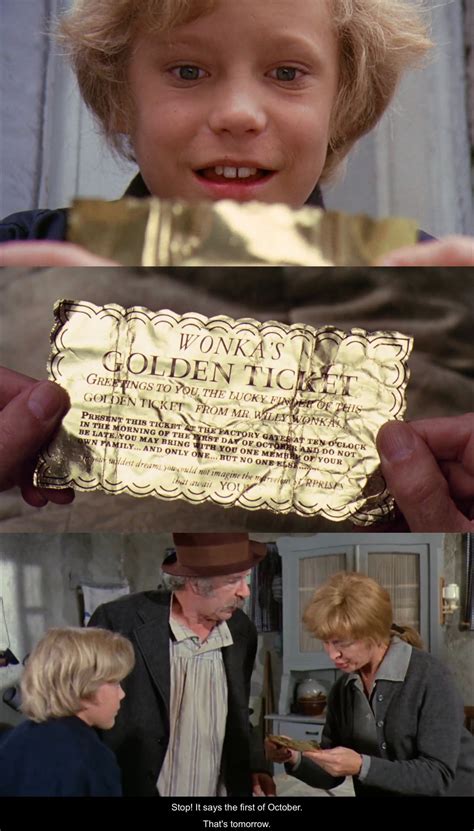
11. A Nod to Authenticity: The movie's tickets are iconic. Having printable versions that closely resemble them adds a layer of authenticity to your experience, making it feel truly "official."
12. My Own "A-Ha!" Moment: I remember one year, after painstakingly cutting out a set of tickets, my daughter held hers up and whispered, "It's real." That moment, that belief, was everything. It wasn't just a prop; it was the key to her imagination.
Your Golden Ticket to Authenticity: Where to Find Them
The quest for the perfect polar express printable tickets begins with finding the right template. Luckily, the internet is a treasure trove of options, from free downloads to intricately designed premium versions. Your choice will depend on your budget, your desired level of authenticity, and how much customization you plan to do.
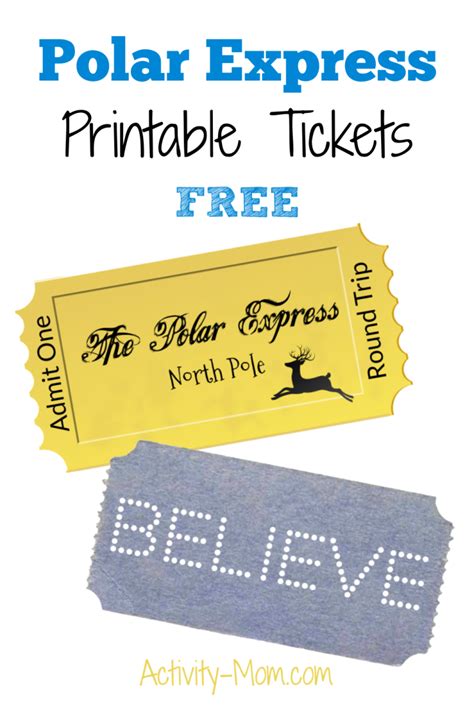
1. Free Printable Websites: Many generous creators and parenting blogs offer free downloadable PDF templates.
- Pros: Cost-effective, quick to download.
- Cons: Often less customizable, may have watermarks, designs might be simpler.
- Tip: Search for "free polar express ticket template printable" on Pinterest or Google.
2. Etsy & Creative Market: These platforms are goldmines for unique, high-quality, and often customizable digital downloads.
- Pros: Professional designs, often editable (e.g., in Canva or Adobe Reader), supports independent artists.
- Cons: Small cost per download, requires basic understanding of editing software for customization.
- Hypothetical Scenario: My friend Sarah needed 20 tickets for her son's birthday party. She found an editable template on Etsy, bought it for a few dollars, and was able to quickly input all the guests' names, saving her hours of manual writing.
3. Canva & Design Tools: If you're feeling creative, you can design your own tickets from scratch using online tools like Canva (they even have pre-made ticket templates you can adapt).
- Pros: Full creative control, truly unique results.
- Cons: Requires design skill and time, may not perfectly replicate the movie's iconic ticket unless you're very skilled.
4. Pinterest: Beyond being a source for freebies, Pinterest is excellent for visual inspiration. You can find ideas for designs, presentation, and even step-by-step DIY guides.
- Pros: Visually driven, great for sparking ideas.
- Cons: Can be overwhelming with too many options, links might lead to dead ends.
5. Official Merchandise Sites (Limited): While rarer for printables, some official or licensed fan sites might offer downloadable content, though usually not free.
- Pros: Guaranteed authenticity.
- Cons: Limited availability, potentially higher cost.
6. DIY from Scratch (Advanced): For the truly ambitious, you can design your own ticket using graphic design software like Adobe Illustrator or Photoshop, mimicking the movie's aesthetic.
- Pros: Absolute customization, perfect replication if skilled.
- Cons: Steep learning curve, time-consuming.
7. Library Resources: Some public libraries offer access to design software or even databases of free templates. Worth checking if you're on a tight budget.
8. Blogs & Parenting Forums: Many niche blogs focused on holiday activities or party planning will often share their own custom-designed templates or link to reputable sources.
9. Checking Reviews & Licensing: When downloading from third-party sites, always check reviews and ensure the source is reputable. For paid templates, ensure you understand the terms of use (e.g., for personal use only).
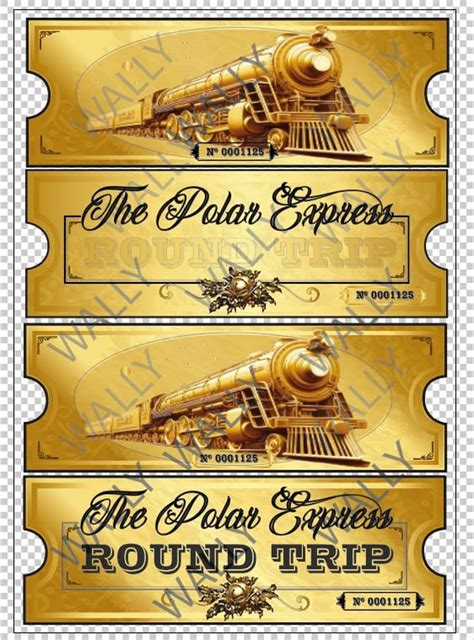
10. Consider the "Golden Ticket" Aspect: The iconic ticket is golden. When searching, prioritize templates that either have a gold-like color scheme or can be printed on gold cardstock for that extra touch of magic.
11. My Go-To Source: Personally, my go-to for polar express printable tickets has become Etsy. The variety of designs, the ease of customization for specific names and dates, and the immediate download capabilities make it worth the small investment for a truly magical result.
12. Avoiding "Pixelated Peril": Always check the resolution of any downloadable image before printing. A low-resolution image will look blurry and unprofessional, no matter how good your printer is. Look for high-resolution PDFs or JPGs.
Beyond the Download: Customizing Your Polar Express Tickets
Once you have your template for polar express printable tickets, the real fun begins: making them uniquely yours. Customization is where the magic truly comes alive, transforming a generic design into a personal invitation to an unforgettable journey.
1. Personalized Passenger Names: This is arguably the most important customization. Add each recipient's name to their ticket. "Conductor says you're on the list, [Child's Name]!"
- Hypothetical Scenario: My nephew, Leo, was convinced Santa knew everything. When he saw his name printed on his Polar Express ticket, his eyes widened. "He *knows* I'm going!" It cemented the magic for him.
2. Date of Departure: Include the specific date of your "Polar Express experience" – whether it's Christmas Eve, a movie night, or a party date. This adds authenticity and helps build anticipation.
3. Departure Time: A specific time makes it feel official. "All aboard at 7:00 PM sharp!"
4. Destination (North Pole, Of Course!): While "North Pole" is standard, you can add a fun sub-destination like "Santa's Workshop" or "Reindeer Stables" for an extra touch.
5. Unique Seat/Car Numbers: Assigning a specific car and seat number (e.g., Car 5, Seat 12) makes each ticket unique and can be fun for a party where you assign "seats" on the couch or at a table.
6. Special Messages/Instructions:
- "Dress in your pajamas!"
- "Hot chocolate will be served!"
- "Believe!" (A classic and powerful message).
- "Remember the first gift of Christmas."
7. Adding a "Believe" Stamp/Seal: Many templates include a space for a "Believe" stamp. If not, you can design one or simply add it using a text box in your editing software.
8. Incorporating QR Codes (Advanced): For a tech-savvy twist, you could add a QR code that links to a special message, a holiday playlist, or even a countdown timer to your event.
9. Font Selection: Pay attention to the font. Choose a classic, slightly ornate, or old-fashioned font that evokes the early 20th-century train aesthetic. Avoid overly modern or childish fonts.
10. Color Adjustments (If Editable): While "golden" is key, some templates allow you to slightly adjust the shades of gold, brown, and black to match your aesthetic or printer capabilities.
11. Adding a "Ticket Punch" Mark: Some templates have a space for a "ticket punch." You can digitally add a "punched" hole graphic or, even better, physically punch a unique shape (star, bell) after printing for ultimate authenticity.
12. The "Missing" Letter: For a truly authentic touch, especially for a single, special ticket, you could intentionally leave out a letter from the name (as in the movie) and then subtly "fix" it with a gold marker for the "true believer." This is an advanced, subtle touch for experts!
Printing Perfection: Tips for Professional-Looking Tickets at Home
Having a beautiful design for your polar express printable tickets is only half the battle. The printing process can make or break the final product. Achieving a professional, authentic look at home is entirely possible with a few key considerations.
1. Paper Choice is Paramount: This is probably the most critical factor.
- Cardstock (65lb - 110lb): This is your best friend. It gives the tickets a sturdy, substantial feel, unlike flimsy printer paper. Go for a heavier weight for a more luxurious, authentic feel.
- Color: Cream, off-white, or a very light gold cardstock works best. Avoid bright white, as it can look too stark.
- Finish: Matte or a slight satin finish is ideal. Avoid glossy photo paper, as it can look inauthentic and be difficult to write on later.
- My Subjective Tip: For that ultimate "golden ticket" feel, I prefer a slightly shimmering or metallic gold cardstock, usually around 80lb. It just catches the light perfectly and adds an extra layer of magic that plain cardstock can't replicate.
2. Printer Settings Matter: Don't just hit "print."
- Best Quality/Photo Quality: Set your printer to the highest quality setting. This will use more ink but yield crisp, vibrant results.
- Paper Type Setting: Select "cardstock" or "heavy paper" in your printer settings. This tells the printer to use more ink and adjust rollers for thicker paper, preventing smudging or jamming.
- Scaling: Ensure the tickets are printing at "Actual Size" or "100% scale" to maintain their intended dimensions. Avoid "Fit to Page," which can distort proportions.
3. Ink Quality: Use good quality ink. If your colors look dull or faded, it might be time for new cartridges. For black and gold tickets, rich black ink is crucial.
4. Test Print: Always, always, always do a test print on a regular piece of paper first. Check for alignment, color accuracy, and any issues before using your precious cardstock.
5. Cutting with Precision:
- Paper Trimmer/Guillotine: For straight, clean lines, a paper trimmer is invaluable. It’s far superior to scissors for a professional finish.
- Craft Knife & Cutting Mat: For intricate cuts or if you don't have a trimmer, a sharp craft knife (like an X-Acto) and a self-healing cutting mat will give you excellent precision.
- Ruler: Use a metal ruler as a guide for your craft knife to ensure straight edges.
- Hypothetical Scenario: One year, in a rush, I tried to cut 10 tickets with dull scissors. The edges were jagged, and the tickets looked homemade in the worst way. Lesson learned: invest in a good paper trimmer!
6. Drying Time: Allow ink to fully dry before handling, especially if using a heavier paper or high-quality print settings. This prevents smudging.
7. Laminating (Optional): For extra durability and to preserve the tickets as keepsakes, consider laminating them after printing and cutting. This also gives them a slight sheen.
8. Punching the Ticket: For an authentic touch, use a small hole punch or a shaped punch (star, bell, crescent moon) to create the "punched" mark like the conductor does in the movie.
9. Edge Inking (Advanced): For truly expert-level authenticity, you can use a gold ink pad and lightly run it along the edges of your cut tickets to give them a subtle gilded look.
10. Troubleshooting Streaks: If you see streaks, try cleaning your printer's print heads. Most printers have a utility for this in their software settings.
11. Using a Template Guide: Many printable templates will include faint cutting lines. Make sure your printer settings are configured to print these lines without making them too prominent on the final ticket.
12. The Power of a "Golden" Touch: If your printer struggles with metallic effects, simply printing on a high-quality, pre-colored gold cardstock will often achieve a far better "golden ticket" look than trying to print a gold color onto white paper.
The Grand Reveal: Creative Ways to Present Your Tickets

The moment of presenting your polar express printable tickets is where the magic truly unfolds. It’s not just about handing over a piece of paper; it’s about creating an experience that builds anticipation and wonder. This is your chance to be the conductor of joy!
1. Under the Pillow: The classic, most beloved method. On Christmas Eve, quietly slip the ticket under your child's pillow. They'll wake up to a magical surprise, just like in the movie.
- Hypothetical Scenario: My son, who usually sleeps like a log, woke up early on Christmas Eve. He found his ticket, held it to his chest, and whispered, "He came!" It was pure, unadulterated wonder.
2. Special Delivery Envelope: Place the ticket inside a fancy, perhaps red or gold, envelope. You can hand-deliver it, or even have a "special messenger" (another family member or a friend) deliver it.
3. Tied to a Bell: Attach the ticket with a beautiful ribbon to a small, silver sleigh bell (the "first gift of Christmas"). This adds an auditory element to the reveal.
4. Inside a Pajama Box: If new Christmas pajamas are a tradition, place the ticket inside the folded pajamas. They’ll discover it when they put on their festive sleepwear.
5. With a Mug of Hot Chocolate: On the day of your Polar Express movie night or party, present the ticket alongside a steaming mug of hot chocolate, complete with marshmallows and whipped cream.
6. "Lost" and Found: Strategically "lose" the ticket somewhere prominent but unexpected – perhaps tucked into a favorite book, under a breakfast plate, or peeking out from a stocking.
7. Train Track Pathway: For a party, create a pathway of toy train tracks leading from the front door to where the tickets are waiting, perhaps on a "ticket counter" or a "train station" setup.
8. Part of a Scavenger Hunt: Turn the reveal into a fun mini-adventure. Leave clues around the house, with the final clue leading to the hidden ticket.
9. A Surprise from the Mailbox: If you have a toy mailbox or a real one, send the ticket through the mail. Receiving a special letter makes it feel official.
10. Tucked into a Polar Express Book: If you own the book, place the ticket inside on a specific page, perhaps where the conductor first appears.
11. On the Christmas Tree: Hang the ticket as a special ornament on the Christmas tree. It can be the first "gift" they get to open.
12. The Conductor's Announcement: For a grander reveal, have an adult dress up as the conductor and formally present the tickets with a "All aboard, passengers!" announcement, perhaps with a train whistle sound effect. This is my absolute favorite way to make the polar express printable tickets feel truly magical for a group!
Full Steam Ahead: Integrating Tickets into Your Polar Express Experience
Polar express printable tickets are more than just a prop; they’re the gateway to a fully immersive experience. Integrating them seamlessly into your holiday celebrations can elevate a simple movie night or party into an unforgettable journey to the North Pole.
1. The "Boarding" Process: When guests arrive for your party or movie night, have a designated "Conductor" (an adult) collect or punch their tickets at the "boarding gate" (your front door or living room entrance).
2. Pajama Party Requirement: Make it a rule that everyone must wear their pajamas to board the Polar Express, just like in the movie. The ticket can state, "Pajamas required for boarding!"
3. Hot Chocolate Station: Set up a hot chocolate bar with all the fixings (marshmallows, whipped cream, sprinkles, candy canes). This is a quintessential part of the Polar Express experience, and the ticket grants access!
4. Bell Ceremony: After the "journey" (watching the movie or playing games), have a special moment where everyone receives a small sleigh bell, just like the first gift of Christmas. You can even attach the tickets to the bells.
5. "Train Car" Seating: Arrange your living room seating to resemble train cars. You can use blankets, pillows, and even line up chairs. Guests "find their seat" based on their ticket number.
6. "Window Views": Decorate windows with snowy scenes, or even use a projector to display moving train scenery or snowy landscapes during your "journey."
7. Conductor's Role Play: Encourage an adult to fully embrace the role of the conductor – calling out "All aboard!", punching tickets, and serving hot chocolate. A conductor hat and vest add to the fun.
8. Sing-Alongs: Play the movie's soundtrack or other festive Christmas songs. Encourage everyone to sing along to "Hot Chocolate" and "When Christmas Comes to Town."
9. "North Pole" Arrival: Designate a special area as the "North Pole" – perhaps a beautifully decorated Christmas tree, a Santa Claus figure, or a gift-giving station. The tickets are the pass to this magical destination.
10. Ticket Validation for Activities: For a longer party, use the tickets as "currency" or "passes" to access different activity stations, like a "cookie decorating car" or a "storytelling car."
11. Souvenir Photos: Set up a photo booth area with Polar Express props (conductor hat, bell, tickets) where guests can take memorable photos with their polar express printable tickets.
12. Post-Journey Reflection: After the event, encourage discussion about what everyone believed in, what they saw at the North Pole, and the magic of Christmas. The tickets serve as a tangible reminder of their adventure. My most memorable experience was when my niece, still clutching her punched ticket, declared that she "really saw Santa" and started describing his reindeer. The tickets had truly unlocked her belief.
Troubleshooting & FAQs: Smooth Journeys for Your Printable Tickets

Even the most magical journeys can have a few bumps in the track. When it comes to polar express printable tickets, encountering a printing snag or a design hiccup is common. Here's a comprehensive guide to troubleshooting and answering your most frequently asked questions, ensuring your journey is as smooth as freshly fallen snow.
1. "My Colors Look Off/Dull!"
- Cause: Low ink, incorrect printer settings, or a low-resolution image.
- Fix: Check ink levels. Ensure your printer is set to "Best" or "Photo" quality and the correct paper type (cardstock/heavy paper). Verify the image resolution; if it's pixelated on screen, it will be when printed.
2. "The Tickets Are Blurry/Pixelated!"
- Cause: You're working with a low-resolution image or trying to enlarge a small image too much.
- Fix: Always download high-resolution PDFs or JPGs. If you’re designing yourself, ensure your canvas size is large enough (e.g., 300 DPI at the desired print size).
3. "My Printer Keeps Jamming with Cardstock!"
- Cause: Paper is too thick for your printer, or the paper type setting is incorrect.
- Fix: Check your printer's specifications for its maximum paper weight. Ensure you've selected "cardstock" or "heavy paper" in the print settings, which adjusts the rollers. Try feeding one sheet at a time.
4. "The Text I Added is Misaligned/Cropped!"
- Cause: Incorrect scaling ("Fit to Page" instead of "Actual Size") or issues with your PDF editor.
- Fix: Always print at "Actual Size" or "100% scale." If using a PDF editor, ensure text boxes are fully within the printable area and saved correctly before printing.
5. "Where Do I Find the 'Golden' Paper?"
- Answer: Look for "metallic gold cardstock" or "shimmer cardstock" at craft stores (like Michael's, Hobby Lobby) or office supply stores (Staples, Office Depot). Online retailers like Amazon also have many options.
6. "How Do I Punch the Ticket Authentically?"
- Answer: The conductor in the movie punches a heart shape. You can find small heart-shaped paper punches at craft stores. Alternatively, a simple small circle punch or even a star punch works perfectly for an authentic feel.
7. "Can I Laminate These?"
- Answer: Absolutely! Laminating makes the tickets more durable and preserves them as keepsakes. Laminate *after* printing and cutting. You can even punch *after* laminating for a really sturdy ticket.
8. "My Printer Doesn't Print Gold Well. What Now?"
- Answer: Don't print a "gold" color. Instead, print your black text and design elements onto actual gold-colored cardstock. This is often more effective and looks much richer.
9. "How Many Tickets Should I Print?"
- Answer: Print one for each child/guest, plus a few extras for mistakes, practice cuts, or as unpunched keepsakes. It's always better to have too many than too few.
10. "What if I Don't Have a Paper Trimmer?"
- Answer: Use a very sharp pair of scissors and take your time. For straight lines, draw a faint pencil line with a ruler and cut precisely along it. A craft knife with a ruler and cutting mat is also an excellent alternative.
11. "Can I Reuse the Templates Next Year?"
- Answer: Yes, if you've purchased an editable digital file, you can simply change the date and names for next year's adventure! This is a huge benefit of investing in a good quality template.
12. A Light-Hearted Warning: Don’t be like me and try to print a dozen tickets five minutes before the "boarding time" on Christmas Eve. Give yourself ample time for printing, cutting, and any unexpected printer tantrums. A little planning goes a long way in preserving your holiday cheer!
The Eco-Conscious Conductor: Sustainable Ticket Options
In our journey to create magic with polar express printable tickets, it's wonderful to also consider our impact on the planet. As stewards of the Earth, we can make choices that align with the spirit of the season while minimizing waste. Being an eco-conscious conductor means making smart, sustainable choices.
1. Recycled Paper/Cardstock: Opt for paper made from recycled content. Many stationery stores and online suppliers offer recycled cardstock that still maintains a beautiful look and feel.
- Why it helps: Reduces demand for virgin timber and conserves resources.
2. Digital Tickets: For older children or adults, consider sending digital polar express printable tickets via email or a messaging app. They can display it on their phone, mimicking a modern e-ticket.
- Pros: Zero paper waste, instant delivery.
- Cons: Less tangible for the "magic" factor, might not appeal to younger children.
- Hypothetical Scenario: My cousin, a big environmental advocate, sends digital Polar Express "invitations" for her annual holiday gathering. Guests love the convenience, and she ensures a tree is planted for every 10 "tickets" sent.
3. Print Only What You Need: Avoid printing dozens of extra tickets "just in case." Print the exact number required, plus perhaps one or two spares for mistakes.
4. Compostable/Biodegradable Materials: Explore specialty papers that are designed to be compostable after use. While often pricier, they offer a truly zero-waste option.
5. Soy-Based Inks: If purchasing pre-printed tickets or having them professionally printed, inquire about the use of soy-based or vegetable-based inks, which are more environmentally friendly than petroleum-based inks.
6. Repurpose Leftover Paper: Don't throw away paper scraps from cutting your tickets. Use them for small notes, gift tags, or as confetti for another celebration.
7. Recycle Unused/Misprinted Tickets: Ensure any misprinted or unused paper tickets are disposed of properly in your recycling bin.
8. Durable Keepsakes: If you plan for the tickets to be keepsakes, consider laminating them. While lamination adds plastic, it means the ticket will last for years, reducing the