
There’s something truly special about creating, isn't there? Whether it’s for a last-minute costume, a fun classroom activity, or just a whimsical afternoon at home, finding that perfect crafting element can turn a simple idea into pure magic. I remember once trying to freehand draw bunny ears for my niece's school play, and let me tell you, they ended up looking more like lopsided fox ears! That's when I discovered the sheer magic and convenience of a well-designed bunny ears printable.
You’re here because you want to add a touch of floppy-eared charm to your next project or celebration, and you want it to be easy, effective, and utterly delightful. You might be a parent planning an Easter surprise, a teacher looking for a fun craft, or just someone who loves a bit of DIY whimsy. Whatever your reason, you've landed in the right spot! This guide is packed with ideas and tips to help you find, customize, and perfect your printable bunny ears, ensuring your creative endeavors are nothing short of adorable.
Classic & Cute Bunny Ears Printables
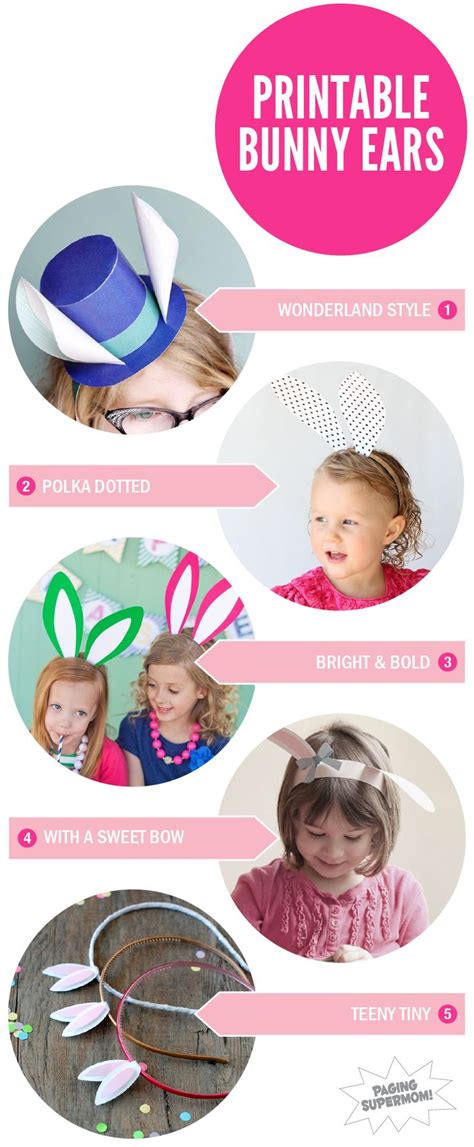
Sometimes, you just need that timeless, universally loved look. These bunny ears printable designs are perfect for when you want simple elegance and undeniable cuteness. They’re the go-to for traditional celebrations or just a sweet dress-up day.
- The Simple Silhouette: A straightforward, clean-lined ear template that’s easy to cut and perfect for all ages. I used these for my nephew’s very first Easter egg hunt, and they were a huge hit – so quick to assemble!
- Floppy & Sweet: Ears designed with a gentle curve, giving them that classic adorable "flop" when attached to a headband.
- Pastel Perfection: Printables specifically designed with soft, pre-colored pastel patterns, ready to go for spring themes.
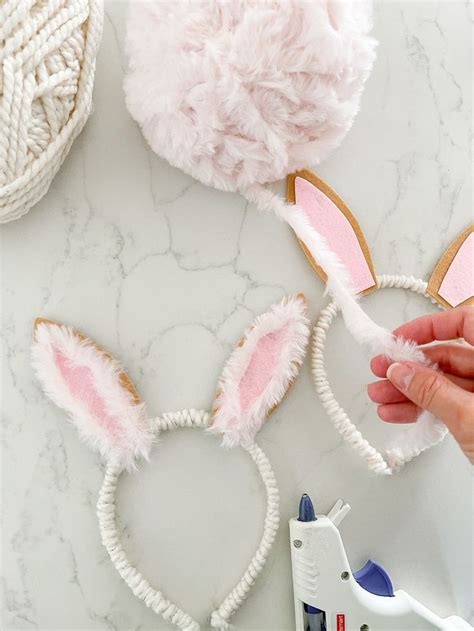
- Fuzzy Centers: Templates that include an outline for a contrasting inner ear, perfect for gluing on cotton balls or felt for a textured look.
- Miniature Magic: Smaller versions ideal for doll accessories, finger puppets, or tiny party favors. My absolute favorite type are the ones with subtle patterns – they just add that extra touch of charm without being too busy.
- "Color Me!" Outlines: Simple black-and-white outlines, perfect for letting kids color in their own unique designs.
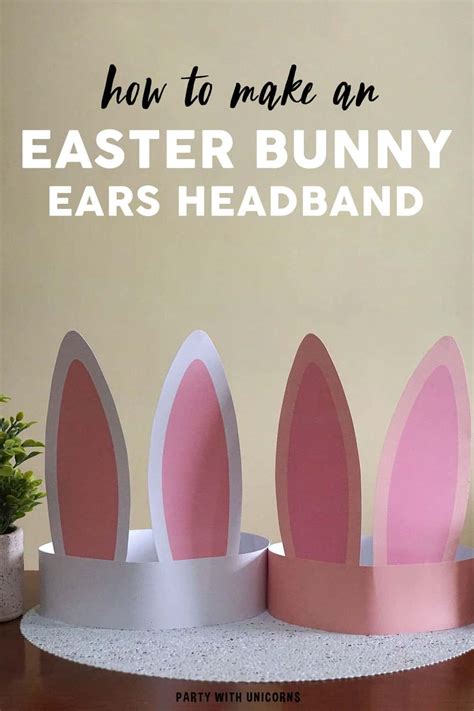
- The "Headband Ready" Pair: Ears specifically shaped and sized to attach seamlessly to a standard plastic or paper headband.
Whimsical & Wild Bunny Ears Designs
Ready to hop outside the box? These bunny ears printable ideas are for those who want a bit more flair, imagination, or a unique twist on the classic. Think beyond Easter and into everyday imaginative play!
- Fantasy Forest Ears: Taller, more pointed ears with subtle leaf or vine patterns, perfect for a woodland creature theme. I actually designed something similar for a local library's "Storytime in the Woods" event, and the kids felt like magical forest guardians!
- Sparkle & Shine: Ears featuring pre-designed glitter patterns (or spaces for you to add your own!) for that extra bit of shimmer.
- Pattern Play: Ears adorned with polka dots, stripes, chevrons, or even whimsical abstract patterns.
- Character Ears: Ears with subtle nods to famous bunny characters (think long, slightly mischievous shapes!).
- Flower Power Ears: Templates with small flower cut-outs or designs around the base of the ears, ready for embellishment.
- Ombre Wonders: Ears designed with a gradient color effect, from light to dark, for a modern artistic touch.
- "Crazy Hair Day" Ears: Ears with a slot at the top, designed for inserting pipe cleaners or yarn for a truly wild and wacky look.
Themed & Seasonal Bunny Ears for Every Occasion
While "bunny ears printable" often screams Easter, these versatile little crafts can be adapted for so many other fun moments throughout the year!
- Spring Fling Ears: Adorned with butterflies, bees, or raindrops – perfect for celebrating the end of winter.
- Garden Party Hoppers: Ears with delicate floral motifs or even tiny vegetable prints, great for outdoor gatherings.
- Birthday Bunny Bash: Fun, celebratory ears with birthday hat outlines or confetti patterns. I used a confetti-themed design for my daughter's animal-themed birthday, and it added such a joyful touch!
- Halloween Hoppers (Spooky-Cute!): Ears with subtle spiderwebs, tiny ghosts, or bat wings integrated into the design – perfect for a not-too-scary costume.
- Winter Wonderland Bunnies: Ears with snowflake patterns or even a subtle "fur" texture for a chilly bunny look.
- "Get Well Soon" Bunnies: Gentle, comforting ears with soft colors, perfect for brightening someone's day.
- School Play Prop Ears: More durable or specific designs for school productions, perhaps even with character names.
DIY & Customizable Bunny Ears Templates
For the true craft enthusiasts, these bunny ears printable options offer the ultimate blank canvas for personalization and creative expression.
- The Blank Slate: Simple, unadorned ear outlines, ready for you to color, paint, or decorate in any way imaginable.
- Fold-and-Glue Fun: Templates with clear fold lines and glue tabs for a more dimensional look, adding depth to your ears.
- Accessory-Ready: Ears designed with designated spots for attaching bows, ribbons, tiny hats, or other adornments. I find this approach works best for small teams or groups where everyone wants to add their own unique flair.
- Sizing Guides Included: Printables that come with different size options (small, medium, large) or scaling tips for a perfect fit.
- Texture Play: Templates that suggest different materials to glue on, like felt, faux fur, or even fabric scraps, to create a multi-sensory experience.
- Build-Your-Own Kit: Printables that include not just the ears, but also templates for noses, whiskers, or even tiny bunny tails.
- Interchangeable Centers: Ears with removable inner sections, allowing you to swap out different patterns or colors with ease.
Quick & Easy Bunny Ears for Last-Minute Fun
Sometimes, time is of the essence! These bunny ears printable options are designed for speed and simplicity, ensuring you can whip up some cute ears in a flash.
- Print-and-Go: Pre-colored and pre-decorated ears that simply need to be cut out and attached. Ideal for busy parents or unexpected playdates.
- Minimal Cut Lines: Designs with fewer intricate cuts, making them quicker to prepare, especially for little hands.
- Single-Sheet Wonders: Ears designed to fit perfectly on one standard letter-sized sheet of paper, minimizing waste. I’ve used these when we needed quick costume additions for a video call – literally minutes from printer to head!
- "Tape-It-On" Ready: Ears with wider bases for easy taping or stapling directly to a paper strip or simple headband.
- Thick Outline: Designs with bold, dark outlines that are easy to follow with scissors, even for beginners.
- Basic Shape Emphasis: Focusing purely on the classic bunny ear shape without any added embellishments, for maximum simplicity.
- "No Headband Needed" Loops: Ears with integrated loops at the bottom, allowing them to be slipped onto existing glasses arms or even hair clips.
Tips for Personalizing Your Bunny Ears
Making your bunny ears printable truly *yours* is where the magic happens! Here's how to elevate your crafting game:
- Think Beyond Paper: While paper is great, consider printing on cardstock for durability, or even sticker paper for easy application to other materials.
- Color Creativity: Don't just stick to white! Use markers, crayons, paint, or even fabric dyes to bring your ears to life. Add polka dots, stripes, or even a tie-dye effect!
- Textural Fun: Glue on cotton balls for fluffy inner ears, felt for a soft touch, or glitter for a dazzling effect. A tiny pom-pom at the base of the ear can be super cute!
- Add Accessories: Think small bows, tiny flowers (real or artificial), sequins, rhinestones, or even miniature bells. Personalize them with a child's name or a special date.
- Headband Choices: Beyond a simple paper strip, consider attaching your ears to a plastic headband (for durability), a piece of elastic, or even bobby pins for a more subtle look.
Common Pitfalls: What to AVOID When Using Bunny Ears Printables

Even simple crafts can have their tricky moments. Learn from my "oops" moments so your bunny ears printable project goes smoothly!
- Printing on Flimsy Paper: Using regular printer paper can result in floppy, easily torn ears. Always opt for cardstock (65lb/176gsm or heavier) for sturdy, long-lasting ears. Don’t be like me and print them on tissue paper – they’ll wilt faster than a bunny in a heatwave! Jangan sampai zonk hasilnya, ya! (Don't let the result be a fail!)
- Ignoring Sizing: Before printing a whole batch, do a test print on plain paper. Make sure the ears are the right size for the head they're intended for. Too big, and they'll flop awkwardly; too small, and they’ll look comical (unless that's the goal!).
- Skipping the Test Cut: If your ears have intricate designs, do a quick test cut on scrap paper first. This helps you identify tricky spots and choose the right scissors.
- Forgetting Reinforcement: If you're attaching ears to a headband, reinforce the base of the ears with an extra layer of cardstock or tape. This prevents them from tearing where they connect.
- Over-Glittering (Yes, it's a thing!): While glitter is fun, too much can make the ears heavy, messy, and prone to flaking everywhere. Use glitter glue or a clear sealant to minimize fallout.
Time to Get Hopping!

There you have it – a comprehensive guide to unleashing the full potential of a bunny ears printable! From classic charm to whimsical creations, and with plenty of tips to personalize and perfect your craft, you're now equipped to create something truly special. The joy of a simple DIY project, especially one as universally adored as bunny ears, is truly infectious. So grab your scissors, fire up that printer, and get ready to create some ear-resistible magic. Now go make someone's day – or your own!